Installing extra RAM (random access memory) in your Mac can be a quick, easy way to give it a speed boost. It’s just one of a few components that affect the speed of your Mac, but it’s worth upgrading it if you can.
But that’s a pretty big ‘if’. With older Macs, changing out the RAM was simple. You just popped open a covering or, with some older Apple laptops, lifted up the keyboard. That gave you access to the memory slots.
Things have changed a lot over the years. It’s become more and more difficult to do Mac RAM upgrades. With the latest M1 Macs, all MacBook Airs and some newer Intel MacBooks, it’s practically impossible, because the memory is soldered to the motherboard. Although some brave people have managed to change soldered RAM, it’s not recommended, and it’s certainly beyond the scope of this article.
So for this guide, we’ll be sticking to Macs that can have RAM upgrades without soldering. In most cases, all you’ll need is a screwdriver and a bit of patience.
Before we start
Instead of adding more RAM to your Mac, how about using what you’ve got more efficiently? You can do that easily with MacKeeper’s Memory Cleaner feature.
- Open MacKeeper, and select Memory Cleaner from the sidebar
- Click Open
- Now click Clean memory
If you only occasionally need more RAM, this can save you time and money, compared to buying more memory. And it’s just one of MacKeeper’s many great features. To try them all, download MacKeeper, and give it a go. You can try each feature out for free, so you can see for yourself what it can do.
Does your Mac need more RAM?
If your Mac is running well as it is, then you probably don’t need to add any more RAM. For most everyday tasks, 8GB of memory is plenty. In fact, you can get along quite well with even less than that, if you’re just browsing the web and watching videos.
But if you're doing anything more intensive, like music production or video editing, then the more RAM your Mac has the better. You don’t necessarily need to install the maximum amount of RAM possible, but 16GB or 32GB are good starting points for more intensive tasks.
If you’re unsure if you need to upgrade your Macintosh RAM, it’s worth checking to see how much you’re currently using.
Here’s how to check if your Mac needs more RAM:
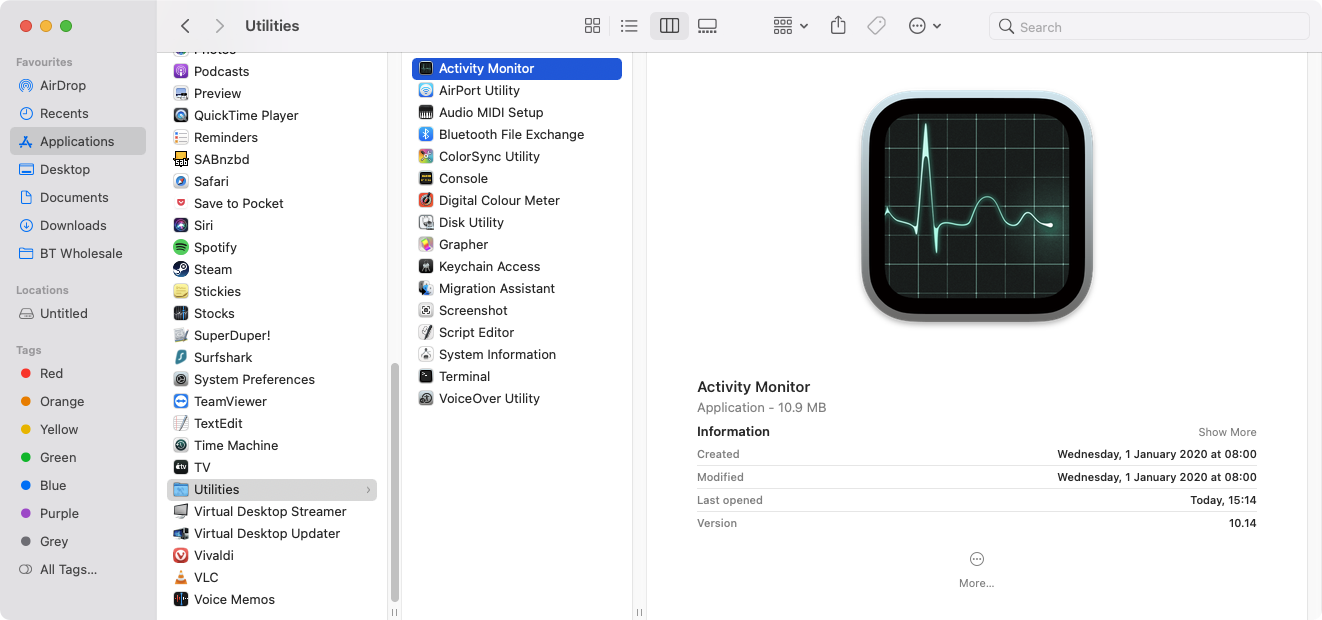
1. Open Activity Monitor from Applications > Utilities

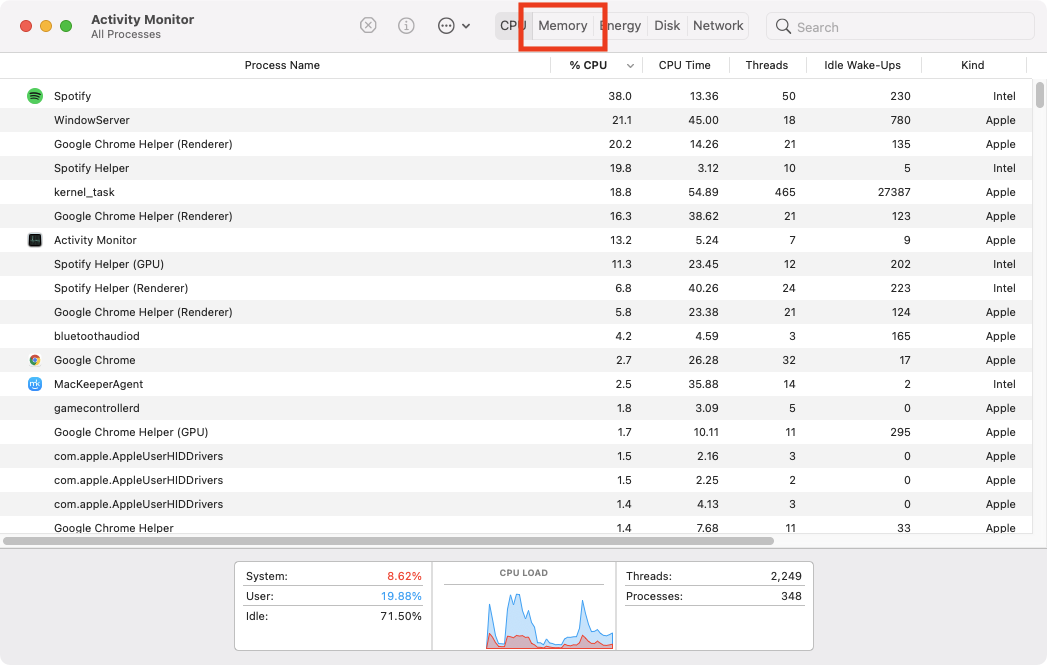
2. Click the Memory tab

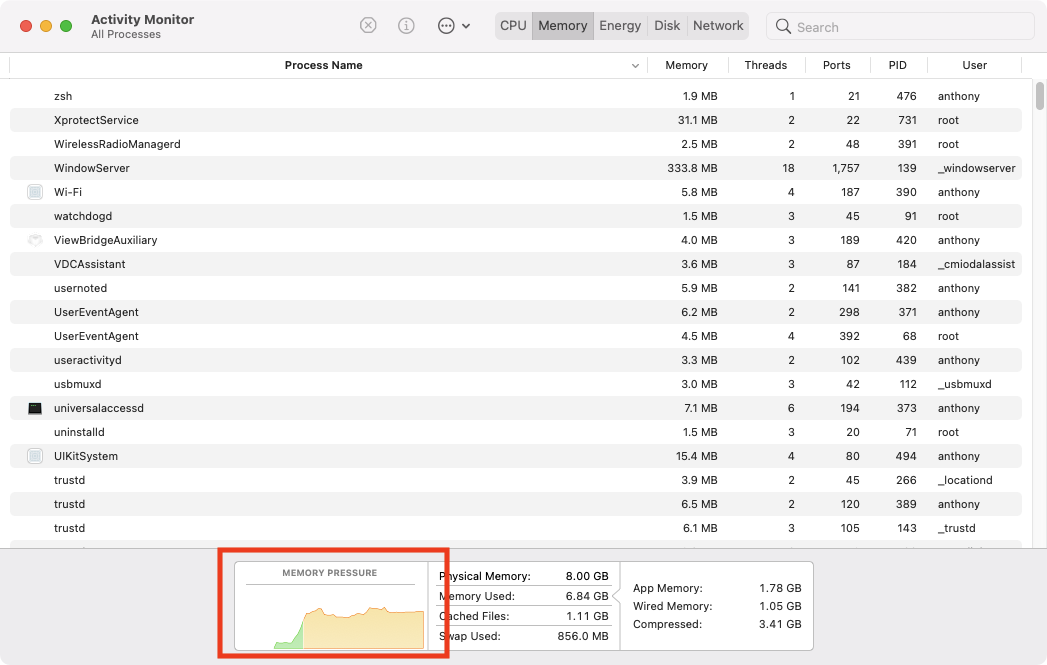
3. Check the Memory Pressure graph.

If you see green memory pressure, you have enough RAM in your Mac. Yellow memory pressure means you might need more RAM soon. And red memory pressure means you need to upgrade your Mac’s memory.
Buying RAM for your Mac
Apple doesn’t sell RAM directly, so you either have to buy third-party RAM or buy it second-hand from a site like eBay.
If you’re going to get more RAM for your Mac, you’ll need to make sure you buy the right memory modules. The wrong ones simply won’t fit or work with your Mac. Thankfully, many RAM sellers have online tools that will help you get the right memory modules for your Mac.
At OWC, for example, you can select the model and year of your Mac, and the site will recommend RAM upgrades that will work. You’ll find a similar experience at Crucial’s website.
It’s also worth checking out EveryMac.com, a site that lists every model of Mac ever made, with full hardware specifications. This will help you identify the specification of the RAM you need, which will be useful if you’re buying second-hand memory.
MacBook Pro RAM upgrade
The last MacBooks Pros that had upgradeable RAM came out in 2012. These were 15-inch and 13-inch models, but the process was basically the same.
How to upgrade MacBook Pro memory:
- Shut down your MacBook Pro
- Disconnect all cables and adapters, including the power supply
- Turn your MacBook Pro over, and remove all the screws holding the case on. Put them somewhere safe
- It’s a good idea to discharge any static electricity you might be carrying, by touching a metal part of your MacBook Pro
- Locate the memory slot, and pull the levers on the sides of your RAM sticks outward. This should cause the sticks to pop up
- Hold the RAM by its sides and gently pull it out
- Do the same with the other RAM module
- Put your new RAM in, pressing it down so it clicks into place
- Do the same with the other stick of RAM
- Put the bottom of your MacBook Pro back, and screw into place
How to Install Memory in a 13-inch MacBook Pro (watch on YouTube)
iMac RAM upgrade
Apart from the latest iMac, which has an M1 chip and soldered RAM, replacing iMac memory is easy.
Here’s how to add RAM to an iMac:
- Shut down your iMac
- Remove all cables, including the power supply
- Lay a cloth or towel on a flat service, like a desk or table. Place your iMac facedown on it, to protect the screen from scratches
- Above the power port, you’ll see a small, grey button. Press it to open your iMac’s RAM compartment
- The RAM cover will pop up. Take it off, and put it somewhere safe
- Push the two memory levers out to the sides to release the RAM cage
- Pull the cage towards you, so you can access the RAM modules
- Gently pull out the memory sticks you want to remove
- Add your new RAM to your iMac, making sure it clicks into place
- Return the RAM cage, and the compartment cover
How to: 27-inch 5K iMac (2019) (watch on YouTube)
Mac mini RAM upgrade
The last Mac mini to include user-upgradeable RAM was the 2012 model. It’s also possible with the 2018 Mac mini, but it’s a long, quite difficult process, so we won’t cover it here.
How to upgrade a Mac mini’s RAM:
- Shut down your Mac mini
- Unplug all cables, including the power supply
- Lay your Mac mini upside down
- Rotate the bottom cover anti-clockwise to unlock it
- Remove the cover
- Locate the RAM slots, and gently push the holding clips out to the side
- When the RAM stick pops up, hold it by the sides and carefully pull it out
- Do the same with the other module
- Add your new RAM to your Mac mini, making sure it clicks into place
- Return the cover, and lock it into place
How to Install RAM in a 2011-2012 Mac mini (watch on YouTube)
Mac Pro RAM upgrade
The Mac Pro is Apple’s professional machine, and it’s built to be upgradeable. That means adding memory to any Mac Pro is easy. For now, we’ll look at how to add RAM to the newest Mac Pro, which came out in 2019.
It’s important to note that Mac Pros can use two types of RAM: R-DIMMs and LR-DIMMs, but you can’t mix and match them. You can install up to 12 memory modules in a variety of different configurations, but Apple recommends six- or 12-DIMM configurations.
Here’s how to change your Mac Pro RAM:
- Shut down your Mac Pro
- If you’ve been using it, wait for between five and ten minutes so it can cool down
- Unplug all cables, except the power supply
- Discharge any static electricity you might be carrying, by touching the Mac Pro’s metal case
- Now unplug the power cable
- Lift up the latch on top of your Mac Pro and rotate it to the left, to unlock the case
- Lift your Mac Pro’s casing straight up to remove it
- Locate the RAM compartments, and slide the covers to the left to remove them
- Find the RAM you want to replace, and push down on the ejector clips on the ends of each stick
- The memory module will pop up, so you can remove it. Repeat this with the all RAM you’re removing
- Add your new RAM, making sure it clicks into place
- Return your Mac Pro’s casing
2019 Mac Pro RAM Upgrade Guide (watch on YouTube)
Final thoughts
Since Apple has started making memory non-upgradeable, your only practical option for getting more RAM in your Mac is to choose it when you buy your Mac. In the case of the new M1 Macs, you can have either 8GB or 16GB of memory.
If you find your Mac running slowly and its RAM can’t be upgraded, then it’s worth trying to clear out unnecessary apps and caches to optimise it and speed it up. Eventually, though, you’ll have to buy a new Mac. But for older models and Mac Pros that can be upgraded, just follow the instructions we’ve laid out here, and give your Mac a speed boost.
Read more:


