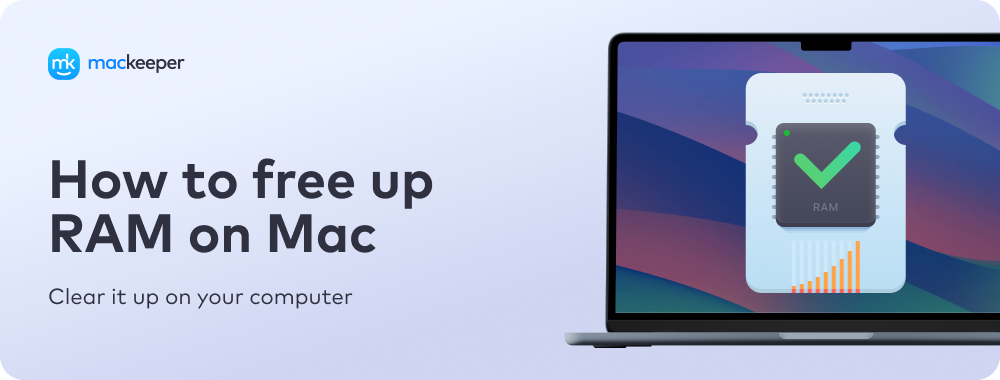
It takes a long time to manually free up RAM on your Mac, which is why you should strongly consider using a third-party app that can do most of the difficult work for you. MacKeeper’s Memory Cleaner tool is an efficient way to fix many RAM-related problems, since it only takes a few clicks.
When you don’t have enough RAM, you can experience all sorts of problems with your Mac not working properly. For example, your Mac might perform slowly or continuously freeze. But worry not, as we can help you get rid of RAM on Mac and decrease your computer’s performance-related problems.
Keep reading to learn our experts’ tips on how to lower RAM usage on Mac, along with the top signs you need to hurry up to free up some storage space.
What is RAM?
RAM is short for Random Access Memory, and it refers to a relatively small amount of memory space in a computer that is reserved for temporary files. This memory allows a computer to transfer files to and from your system drive while carrying out tasks and processes. It’s essential for your computer to work properly.
RAM is usually measured in GB, and MacBook computers come with at least 16GB of RAM these days. Most can be configured with 24GB or 32GB if you don’t mind paying for a RAM update, and there are also 64GB and 128GB options for MacBook Pro. The Mac mini maxes out at 64GB, and Mac Studio can be configured with up to 512GB.
Don’t confuse RAM with internal storage on your Mac, which is also measured in GB. Internal storage is where you keep all your documents and files, on a separate drive within your computer. You can’t choose to store any files in your RAM. Why, we hear you ask? Because your computer needs to flexibly move files in and out of that memory all the time to work properly.
Think of RAM as your computer’s workspace. It transfers files from long-term storage into the workspace whenever it needs to work on them. The more RAM you have, the bigger the workspace, and the more tasks your computer can handle at once.
What is using RAM on Mac?
You can use RAM on a Mac in several ways, and your device mainly uses it to ensure that programs run as they should.
Here are some of the ways that a Mac will use RAM:
Opening apps on your device
Processing different actions you take, such as watching a video
Writing and editing documents
Loading pages on the web
Accessing multiple files simultaneously
Running games
Using design software
Editing photos and videos.
For each of these, your RAM will need to use more space. However, the performance will often depend on other factors—such as how many files you already have on your computer.
How much RAM do you need?
Some apps require a lot of RAM to work efficiently, such as 3D design software, video processing apps, and graphics-heavy video games. You’ll also need more RAM to edit photos on your device. But for the most part, 16GB of RAM in a Mac is plenty of memory for the average user carrying out typical computing tasks. It’s only when you really start pushing your Mac with intensive workloads that you’ll need to think about a RAM upgrade when buying a new machine.
5 signs you need to free up more RAM on your Mac
If your Mac tries to do too much at once, it can run out of RAM, causing performance problems. This usually happens when you’ve got lots of demanding apps open at the same time, and they’re all working hard to complete different tasks. You’ll almost certainly have experienced this problem if you’ve tried playing games on your device while also attempting to browse on your desktop in Safari or Google Chrome.
If you don’t have enough RAM on your Mac, you’re likely to see the following problems:
Everything on your Mac is slowed down—from opening apps to playing videos.
Typing still works, but there’s a delay before anything appears on the screen.
Apps freeze and become unresponsive to anything you do.
Your entire Mac freezes, and the cursor turns into a colorful spinning pinwheel (also known as the rainbow wheel of death).
Many of these issues, like when your Mac is running slow, can come up for other reasons as well, not just because you’ve run out of RAM. Nevertheless, they’re a good indicator that you should check your RAM usage and try to optimize Mac performance.
Checking the RAM usage on your Mac is easy. You’ve got the built-in utility called Activity Monitor at your service, and here’s how it works:
Press Command + Space to open Spotlight and type Activity Monitor to find it. If your Mac is unresponsive, try restarting it first by going to Apple > Shut Down. If that doesn’t work, hold down the Power button instead. You may lose any unsaved progress in your open apps if you do this, so make sure you’ve saved everything in advance.
After opening Activity Monitor, go to the Memory tab at the top of the window. This shows a list of all the active apps and processes on your Mac, along with how much memory each of them is using. At the bottom of the window, you should see a Memory Pressure chart along with a breakdown of how your memory is being used.
Step 1. Open Activity Monitor via SpotlightStep 2. Move to the Memory tab
You might notice that the breakdown amounts show that almost all of your memory is being used by Memory Used, Cached Files, or Swap Files. This is totally normal. Unused RAM is a wasted resource, so your Mac always tries to use as much as it can, and this shouldn’t be causing any problems.
Having lower amounts of used RAM won’t necessarily improve your Mac’s performance at all.
Instead, the most important thing to look at is the Memory Pressure chart, which shows up in green, yellow, or red based on whether your Mac needs more RAM or not. This chart also shows spikes in time when more RAM is in demand by the system.
As you might expect, if the Memory Pressure chart is all green, you’ve got nothing to worry about as far as RAM is concerned. When it shows yellow, it means your Mac might benefit from more RAM, and when it shows red, it means your Mac definitely needs more RAM.
A note from our experts:
If you need to clear RAM on your Mac, use MacKeeper's Memory Cleaner. The tool will automatically free up your Mac’s memory your computer will run more effectively. The program removes cached files, memory that was previously required for using apps, and much more.
Here’s how to use MacKeeper’s Memory Cleaner tool:
If the Memory Pressure chart in Activity Monitor is showing up in yellow or red, then you need to free up some more RAM for your Mac to use. There are several different ways to do this, which we’ll outline below.
1. Restart your Mac
The simplest way to empty RAM on Mac is to restart it. This is especially true if you have a Mac developed after 2018, which doesn’t offer the chance to reset RAM.
Here’s how to restart your MacBook:
Open the Apple menu in the top left-hand corner.
Select Shut Down to confirm the action.
Tap Shut Down again when the pop-up window appears. Once your Mac has powered off, it clears all the files from the RAM.
Click on your keyboard’s standby button to turn your Mac on again.
Step 1. Apple logo > Shut DownStep 2. Select Shut Down
2. Update macOS
It’s possible that a macOS bug is causing your Mac to use more RAM than it needs to. This happens from time to time, but Apple is usually quick to fix it with a patch update.
Here’s how to clear RAM on Mac by updating your computer’s software.
Go to System Settings > General > Software Update to check for new updates, which might fix your RAM problems.
If your device is up to date, you’ll see a message on your screen confirming this. But should you need to get the latest version of macOS, select Update Now.
Confirm that you comply with Apple’s licensing agreement and let your computer install the new software.
Step 1. System Settings > General > Software UpdateStep 2. Update Now
Hint from our experts:
Users can also switch on Automatic Updates to ensure that they don’t miss the latest macOS update. The key benefit is that you no longer need to manually check for potential upgrades on your device, allowing you to focus on more important tasks. Here’s how:
Go to Settings > General > Software Update and tap the information icon next to Automatic Updates.
Toggle the following options: Check for updates, Download new updates when available, and Install macOS updates. You can also toggle on Install application updates from the App Store if you want to put that on autopilot as well.
Step 1. Settings > General > Software Update > Automatic UpdatesStep 2. Toggle on the preferred options
3. Close some apps
RAM helps your Mac complete more tasks at once, but we usually only need our Mac to do one or two things at a time. Anything more than that will reduce its capacity to work effectively. If you want to get RAM usage down on your Mac, start by quitting apps you aren’t using.
Follow the steps below to close some unnecessary apps on your Mac:
Take a look at the Dock to see if you’ve got many apps open.
Then, control-click and click Quit to close those apps.
You might also want to kill background processes on your Mac, using Activity Monitor or a memory cleaning app.
4. Close some windows
Even if you need to keep some apps open, try minimizing how many windows and tabs you’ve got open. Two particularly bad culprits for using a lot of RAM are Finder and web browsers. So, you can decrease the problems you have by closing them. Here’s how:
Go to Finder.
Open Window and select Merge All Windows to change multiple windows to tabs.
Close any windows that you no longer need.
Our pro-tip: We’d like to remind you that you can only pick Merge All Windows if you have more than one window in Finder open. If you don’t, the option will be grayed out on your screen.
In a web browser, like Safari or Google Chrome, close as many tabs as possible so you’ve only got a couple of web pages loaded at a time. You can also empty cache in both browsers if computer performance is your primary concern.
5. Quit processes in Activity Monitor
If something is still using a lot of RAM on your Mac, you should be able to find out what it is by using Activity Monitor. For this purpose, follow our instructions:
Open Activity Monitor.
Go to the Memory tab.
Click the Memory column to list all the processes in order of how much memory they’re using.
Close suspect applications
You might also feel like specific applications are consuming the bulk of your RAM capacity. When that’s the case, you can manually close these instead. This works especially well if you’re using creative software that requires significant energy, such as Adobe Photoshop.
Here’s how to close applications you suspect are causing your RAM to perform less efficiently:
Take a look at the items at the top to see if there’s anything suspicious going on. You might need to search online for different processes to find out what they do; some of them are essential for macOS to work, like Kernel_Task.
If you find a process that doesn’t need to be there, select it and click the i button for more information about it. Then, tap the x icon.
When the pop-up window appears on your screen, select Quit (or Force Quit if the app isn’t responding).
Step 1. Highlight app > press the x iconStep 2. Select Quit or Force Quit
6. Scan for malware on your Mac
Computer viruses, adware, spyware, and other types of malware that can infect your Mac might use up all your RAM in the background to make your computer slow. To find out if this is the case, download a reliable malware scanner, like MacKeeper, and run a complete scan of your Mac.
Here’s how to proceed with the full scan of your MacBook within the MacKeeper app:
Terminal is an incredibly useful tool for ending processes that aren’t running properly on your Mac, and it’s one of the best ways to clean RAM and lower RAM usage on Mac.
Here’s how to clear the RAM on your Mac through the Terminal app:
Go to Spotlight and type Terminal. Select the app when it appears in your search results.
In Terminal, type sudo purge. Then, press Enter on your keyboard.
Enter your password and hit the Enter key again.
Close the Terminal app when you’ve finished. Your RAM should now have less space used.
Step 1. Spotlight > TerminalStep 2. Type sudo purge and confirm your password
8. Remove RAM cache
Clearing the RAM cache will also help you free up RAM on your Mac. You can perform this action via the Finder app. Here’s how to do that:
Open the Finder app on your Mac.
Select Go and tap Go to Folder.
Type ~/Library/Caches/ and hit the Enter key.
Drag and drop the folders that you don’t need into the Trash, before emptying your Trash.
Step 1. Finder > Go > Go to FolderStep 2. Type ~/Library/Caches/
Another alternative you can try is MacKeeper’s Safe Cleanup tool. The main benefit is that you don’t need to go searching for caches, and the process is, therefore, faster. Moreover, you can view your caches in an easily displayed format—making it easier to decide what you should and shouldn’t delete.
Here’s how to remove caches with MacKeeper’s Safe Cleanup solution:
Open MacKeeper and go to Cleaning > Safe Cleanup > Start Scan.
When the scan is complete, tick the box next to Caches and anything else you want to delete.
Tap Clean Junk Files when you’re ready to clear out your Mac.
Step 1. Cleaning > Safe Cleanup > Start ScanStep 2. Tick the box next to Caches > select Clean Junk Files
Once you’ve gotten rid of excess caches and other files with the Safe Cleanup tool, your Mac should start running in a more effective manner again. Besides caches, you can delete logs and empty your Trash folder—both of which will free up more space for important files and folders.
9. Clean your Desktop
You should also clean up your desktop and remove files and folders that are no longer required. Doing this will give your computer more space and decrease RAM usage on Mac.
To clean your desktop, do the following:
Simply drag and drop the files, folders, and apps you don’t use into the Trash.
Then, open the Trash folder and select Empty.
10. Setting up Chrome Task Manager
Do you use Google Chrome? You should check which programs and websites are consuming most of your energy. Ending Google Chrome processes is one of the ways to clear up RAM on a Mac.
Here’s how to set up Chrome Task Manager:
Open Google Chrome.
Tap the vertical three dots icon in the top right.
Select More Tools > Task Manager.
For any processes that consume lots of space you don’t need, highlight it, and tap End Process.
Step 1. Three-dot menu > More Tools > Task ManagerStep 2. Highlight the process(es) you want to stop > tap End Process
11. Remove Login Items
Login items are the programs that start when you turn on your Mac. While this feature can be useful for helping you quickly access programs that you regularly use, they also require significant RAM.
However, you can remove login items that aren’t strictly required. Follow these steps to have it done:
Open System Settings by selecting Apple logo > System Settings.
Search for Login Items in the search bar.
Select Login Items and go to the section titled Open at Login.
Highlight the app(s) that you don’t want to open upon signing in to your device.
Tap the - button to remove the app or program from your Login Items.
Restart your Mac once you’ve deleted all of the login items that you don’t want to automatically start up.
Step 1. System Settings > Search Bar > Login Items > Open at LoginStep 2. Highlight apps you want to stop opening at login > tap the - icon
You can also use MacKeeper’s Login Items as an alternative way to remove caches. Here are the steps you should follow to make the process easier and more automated:
Open MacKeeper and go to Performance > Login Items.
Select Start Scan.
Tick the box next to each login item you’d like to delete. You can see which apps your login items belong to on the right-hand side.
Choose Remove Selected Items when you’ve picked all the login items you’d like to stop using.
Confirm your decision by selecting Remove when the pop-up window appears on your screen.
Step 1. Performance > Login Items > Start ScanStep 2. Tick the boxes next to login items you want to stop using > choose Remove Selected ItemsStep 3. Tap Remove when the pop-up window appears
12. Free up disk space
Besides knowing how to get rid of RAM on Mac, it’s also a good idea to learn how to free up memory on your Mac for general maintenance.
There are plenty of ways to free up disk space on your Mac, such as deleting apps and clearing caches. Another highly effective way to ensure that you have more storage on your computer is by getting rid of duplicate files. Besides freeing up RAM, having more disk space also helps declutter your Mac and enable your device to last longer.
To free up disk space on your Mac efficiently, check out our separate guide on how to clean up your Mac.
13. Keep fewer browser tabs open
When using Safari, you might sometimes notice a pop-up message that says a web page is consuming significant energy. But even if you don’t, and regardless of whether you use Chrome, Safari, or Firefox, having fewer browser tabs open will result in your Mac needing to use less RAM.
You should only keep browser tabs open if they’re essential to the task you’re currently performing. And ideally, you won’t have more than 7-10 open at any given time. In addition to freeing up RAM on your Mac, having fewer browser tabs open means that you’ll find it much easier to concentrate on tasks.
14. Use a Mac memory cleaner
If you’re still not sure exactly how to clear RAM on your Mac, the easiest option is to simply use MacKeeper’s built-in Mac RAM cleaner. Here’s how:
Open MacKeeperand click Memory Cleaner in the sidebar. Then, click Open to start using it.
The Memory Cleaner tab will tell you how much RAM is available on your Mac and how much is currently being used. Specifically, look at the Memory Usage or Apps & Processes tabs for more visibility on current processes.
When you’re ready to free up your RAM memory, go back to the Memory Cleaner tab and click Clean Memory.
Once the cleaning is complete, your Mac should have far more RAM available, and, hopefully, it’ll start performing better as well.
How to lower RAM usage
You can reduce your macOS RAM storage in multiple ways. Here are five of the main things you can try:
Delete all apps and programs that you don’t use (unless they can’t be deleted).
Only have one or two apps open at any given time.
Keep your catalogs streamlined in apps that require lots of RAM (e.g. Adobe Lightroom).
Only allow login items that are absolutely essential on your Mac.
Allow fewer apps to run in the background by going to Settings > Login Items > Allow in the Background > toggle off.
How to optimize RAM on Mac
When using your Mac, it’s very easy to optimize the RAM on your device. Below, you’ll find a few more steps that you can take:
Only have a maximum of 2-3 Finder windows open at once (and ideally, one).
Check for and remove all malware on your device. You can use a third-party app like MacKeeper’s Antivirus solution for this.
Check to see which apps are consuming most of your energy in Activity Monitor, before closing these once you’re finished with them.
Buy a Mac with larger RAM capacities if you regularly perform demanding tasks (e.g. you’re a filmmaker or graphic designer).
How to manage memory on Mac
To free up memory on Mac, you’ll need to perform regular checks to ensure that you don’t encounter the same problems again. Here are some ways you can manage your Mac memory:
Audit the apps you use every 3-6 months and delete those that aren’t necessary.
Remove duplicate files, especially if they’re larger ones like RAW or PNG image files.
Clear caches for any apps that you delete if they don’t get removed.
Turn on the Empty Trash Automatically feature in System Settings > Storage > Empty Trash Automatically > Turn On. Your Mac will automatically delete anything that’s been in your trash for longer than 30 days.
Regularly clear your Downloads folder.
How to get more RAM on Mac
Getting more RAM on your device is difficult, and the best way to do so without getting rid of your old device is to follow the steps listed in this guide. However, there are a few additional ways to get more RAM on your Mac:
Buy a newer Mac with larger RAM.
Order upgraded RAM for your Mac. Older Mac models have replaceable RAM modules, allowing you to upgrade your RAM fairly easily by removing the original sticks and installing new ones. It’s a good idea to get a professional to do this, as you can cause significant damage to your device by trying on your own. Sadly, on newer Mac models, RAM is soldered in or part of the Apple silicon chip and can’t be upgraded or replaced.
FAQs
Why is my Mac RAM so full?
Your RAM is probably full because your Mac needs to perform far too many actions at once. Close unnecessary apps and programs, and stop all background processes that aren’t required. For the latter, go to the Activity Monitor app > Memory and highlight the processes you want to quit. Then, select the x symbol and tap Quit when the pop-up window appears.
How much RAM does a MacBook Pro have?
The MacBook Pro now ships with 16GB of RAM as standard, but 24GB, 32GB, 36GB, 48GB, 64GB, and 128GB RAM options are available at checkout when ordering directly from Apple. When ordering from third-party retailers, you’ll have fewer RAM options, but the 24GB and 32GB models are fairly common and easy to obtain.
How can you see what's taking up the most memory on your Mac?
To view what’s consuming most of your memory on a Mac, go to System Settings > Storage. For RAM, go to Activity Monitor > Memory.
How can you save memory on your MacBook?
You can save memory on your MacBook by deleting apps you don’t use and removing login items. Moreover, you can update your software to remove any glitches that may consume more storage space and delete malware.
How to refresh RAM on Mac?
On Mac models released before 2018, you can shut down your device and simultaneously press Shift, Option, Control, and the standby button for 10 seconds. However, this is not possible on newer Macs.
We respect your privacy and
use cookies
for the best site experience.
Privacy Preferences Center
We use cookies along with other tools to give you the best possible experience while using the
MacKeeper website. Cookies are small text files that help the website load faster. The cookies we
use don’t contain any type of personal data meaning they never store information such as your
location, email address, or IP address.
Help us improve how you interact with our website by accepting the use of cookies. You can change
your privacy settings whenever you like.
Manage consent
All cookies
These cookies are strictly necessary for enabling basic website functionality (including page
navigation, form submission, language detection, post commenting), downloading and purchasing
software. The website might malfunction without these cookies.