There are multiple methods to use your MacBook as an external monitor. Before starting, ensure your Mac is updated and running efficiently for a seamless experience. To further enhance performance and minimize potential issues with your Apple machine, consider doing a thorough cleanup using MacKeeper’s Safe Cleanup tool.
Yes, you can use a MacBook as a second monitor, but there are important limitations you should consider. Unlike traditional monitors, MacBooks are built to output video, not receive it as an input. As a result, you can’t simply connect your MacBook as a second screen using a cable. However, there are alternative methods available, which we’ll explore in this article.
Why can’t you use Mac as monitor with HDMI or USB-C directly?
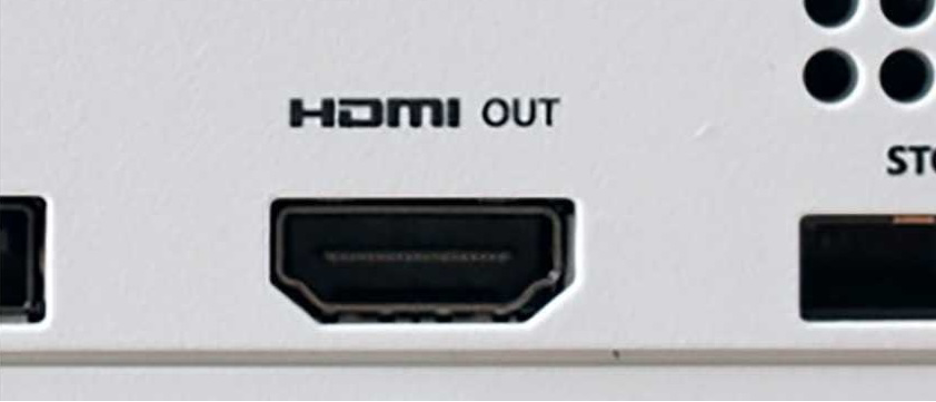
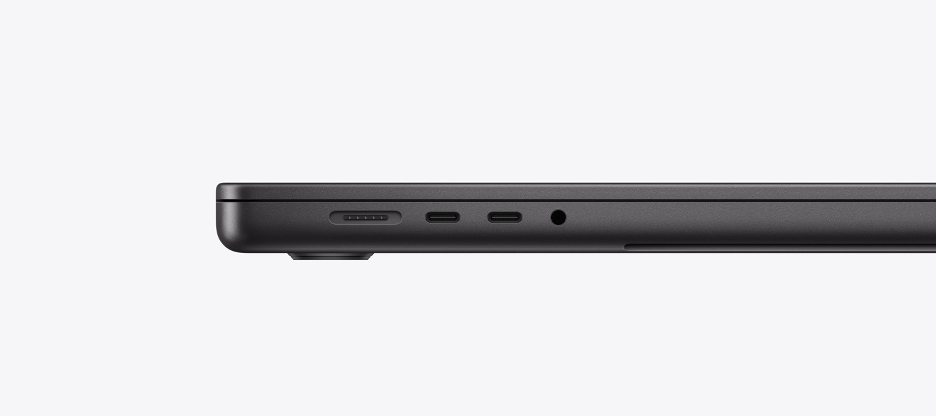
If you’ve tried to make your MacBook act as a monitor with a cable and it didn’t work, don’t worry. You’re not doing anything wrong, and this doesn’t necessarily mean your HDMI port isn’t working. The issue is that MacBooks lack the necessary hardware to receive video input, as they’re designed only for video output.
This means you can’t use an HDMI or USB-C cable to connect devices such as a video game console, PC, or another computer as a display source. For such purposes, our expert team recommends using a dedicated monitor. However, as we’ll discuss later, a USB capture card offers an interesting, though imperfect, workaround.
How to use MacBook as monitor?
There are several ways to use a MacBook as a second monitor, such as AirPlay, third-party apps, a USB capture card, or PlayStation’s Remote Play. Each method has its own pros and cons. As such, the best choice for you will depend on your specific setup, available tools, and personal needs.
A note from our experts:
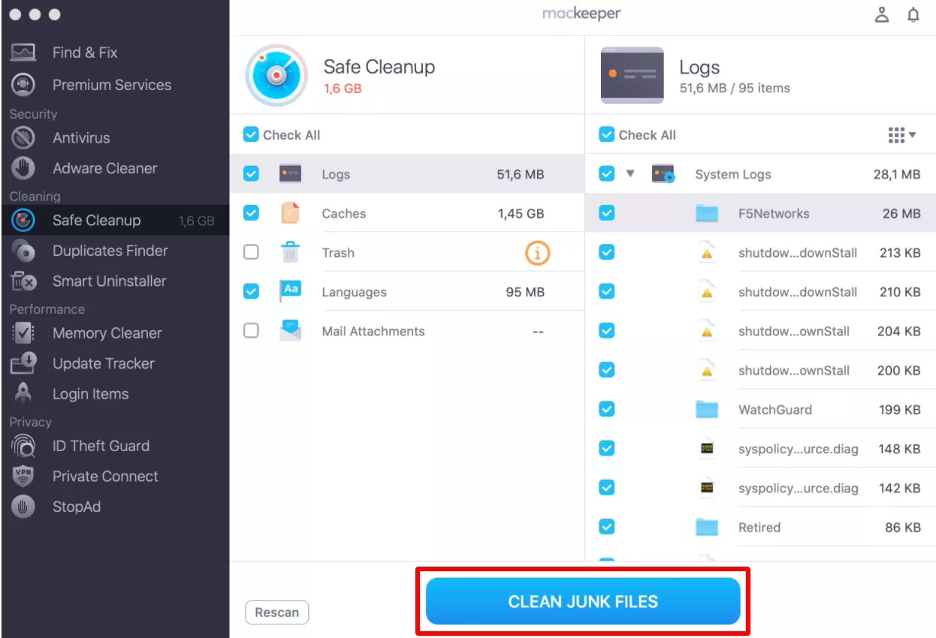
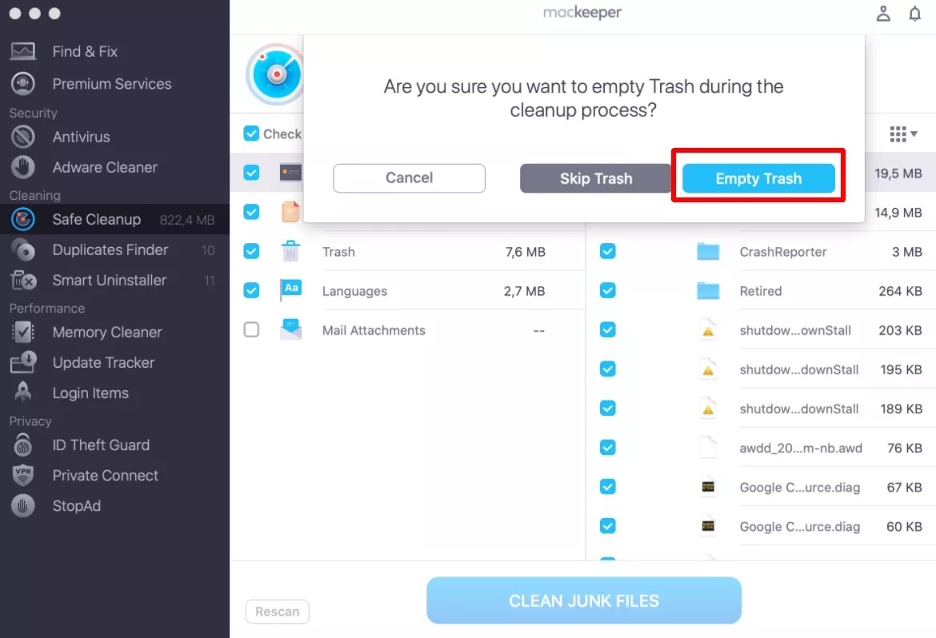
If you plan to use your MacBook as a second screen, we suggest keeping your computer running at peak performance. You might encounter some input delay, so optimizing your Mac’s performance helps ensure a smoother experience. MacKeeper’s Safe Cleanup is a top macOS utility that makes this easy by emptying the Trash, removing junk files without affecting your personal data, and boosting your device’s overall speed.
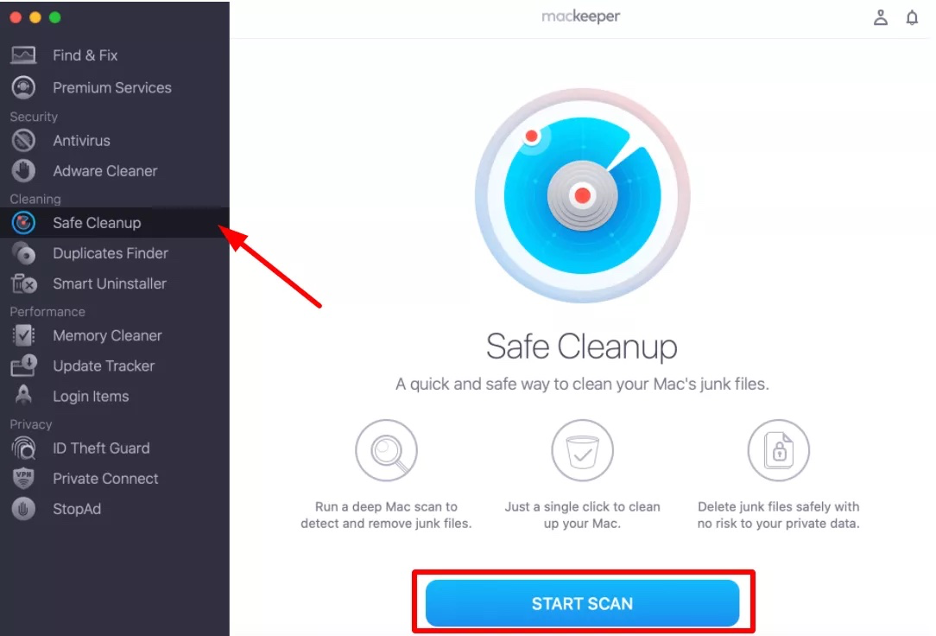
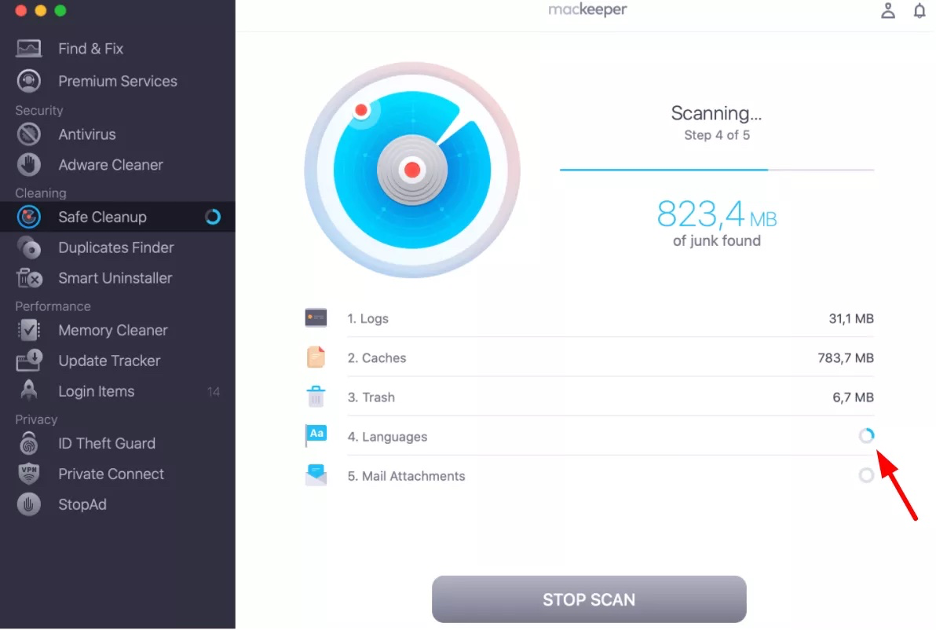
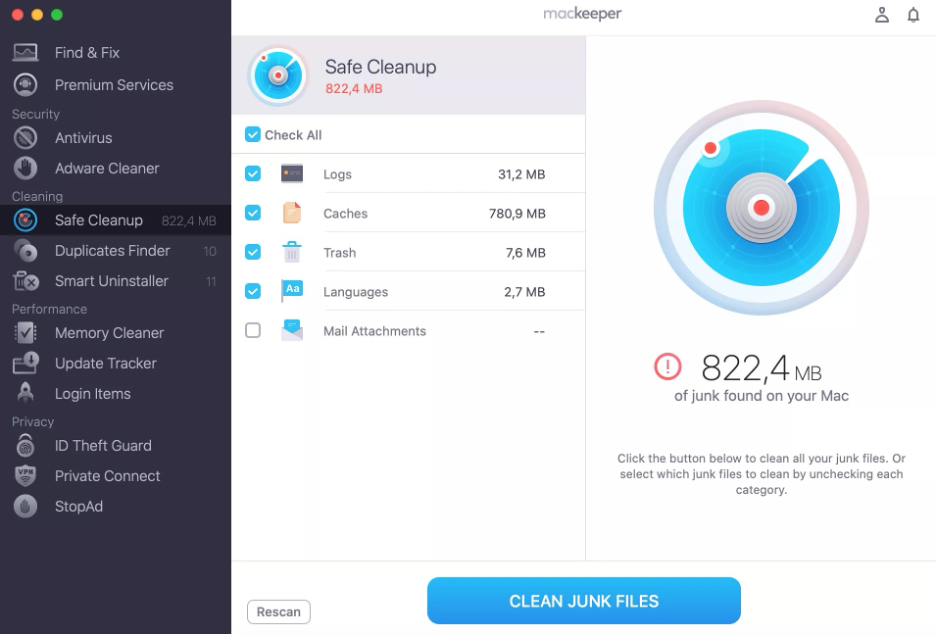
See below how to use MacKeeper’s Safe Cleanup on your MacBook:
Step 1. Safe Cleanup > Start ScanStep 2. Wait until the scan is completeStep 3. Select foldersStep 5. Click Clean Junk FilesStep 6. Click Empty Trash
1. Use AirPlay for another Mac
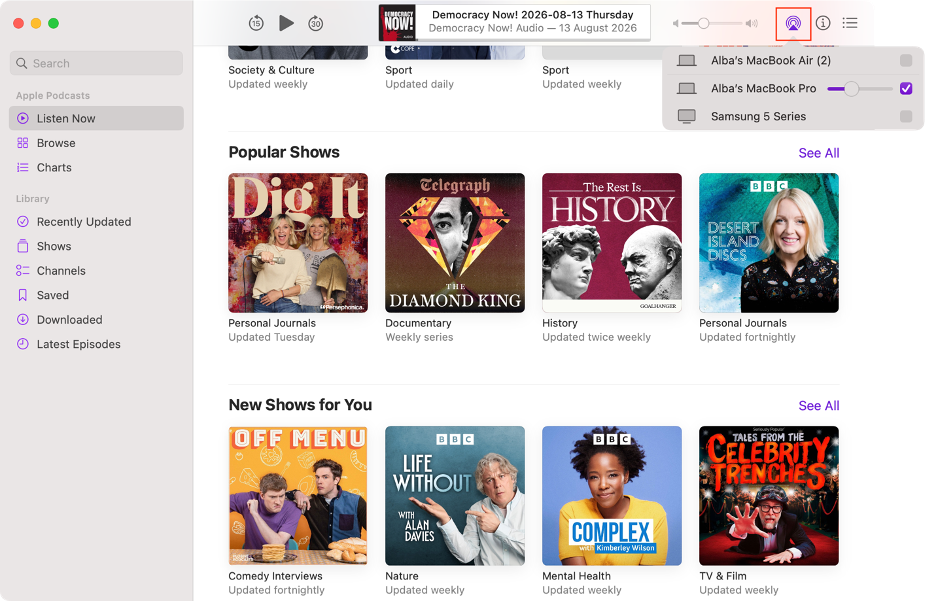
If you want to use your MacBook as a secondary display for another Mac, our experts highly recommend AirPlay. This built-in wireless feature is available on all Apple devices and is ideal for tasks that don’t require ultra-high quality, such as presentations or light multitasking.
Here’s how to use AirPlay on your MacBook to use it as a second screen:
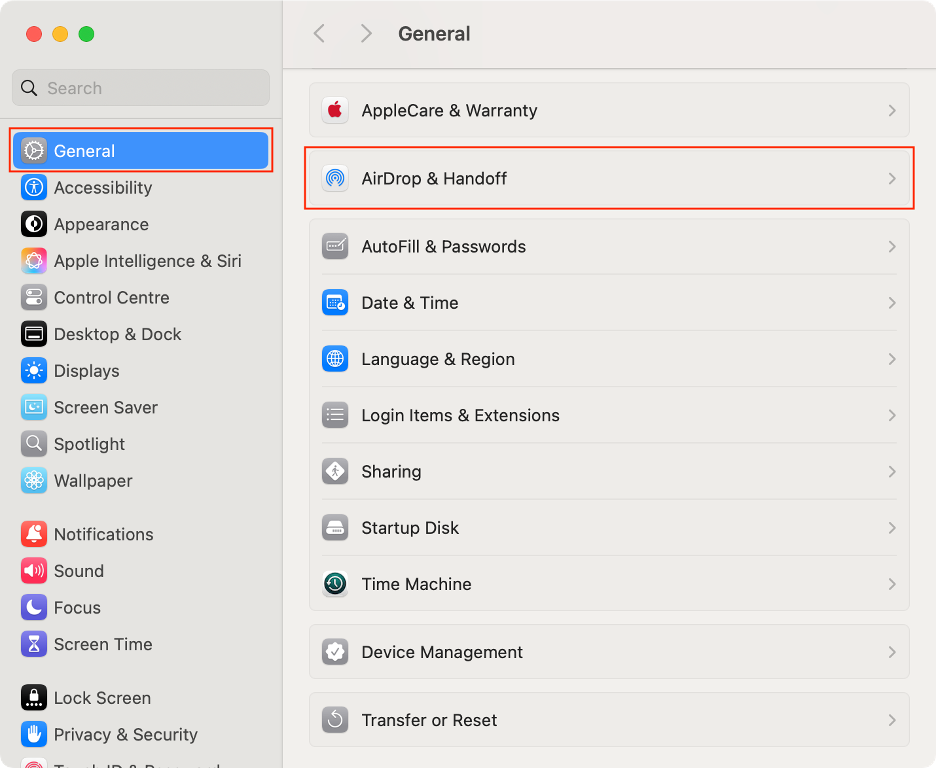
On your MacBook, open System Settings.
Choose General from the left-hand sidebar.
Click AirDrop & Handoff.
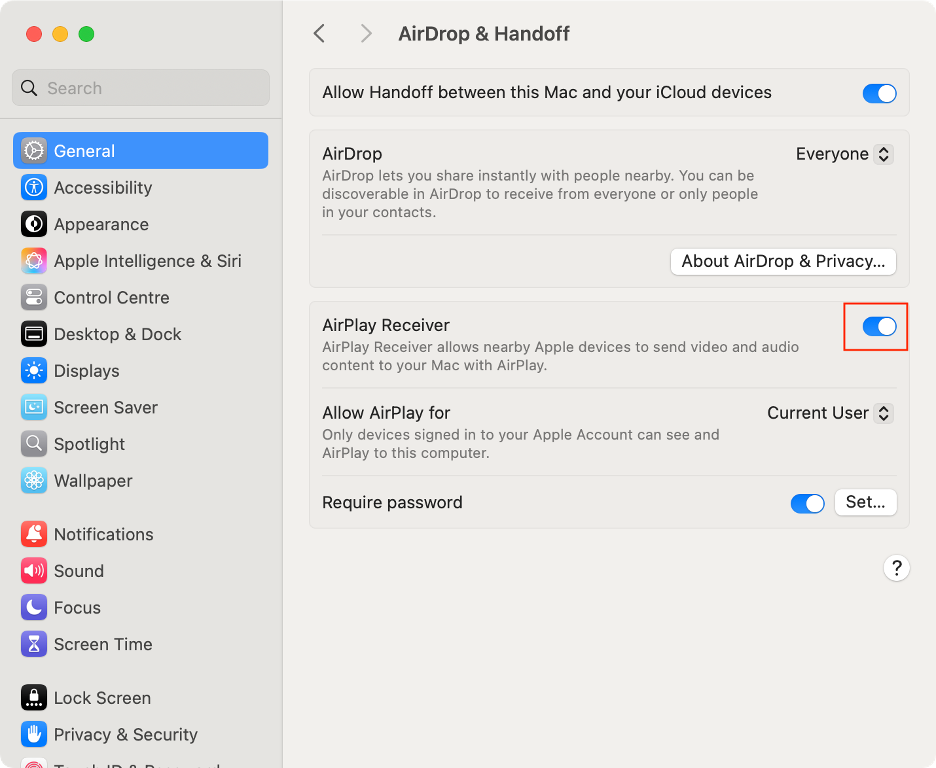
Turn on the AirPlay Receiver switch.
Go to the other device and open the app you wish to share.
Click the AirPlay icon and select your MacBook.
Step 1. System Settings > General > AirDrop & HandoffStep 2. Turn on AirPlay ReceiverStep 3. On the other device, click the AirPlay icon
2. Via third-party apps for Mac or Windows
If you want to use your MacBook as an external display with another Mac or a Windows PC, we recommend using a third-party app. While not every option is free or cheap, most deliver strong performance with minimal loss in resolution or refresh rate.
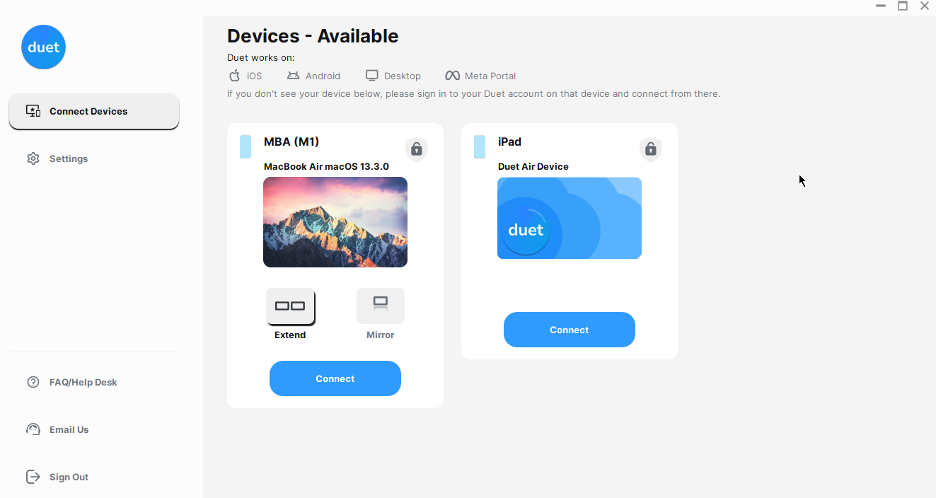
There are many choices available, including Luna Display, Deskreen, and Astropad Studio—but our top pick is Duet Display for its outstanding value. Below, we explain how to turn your MacBook into a secondary display using this tool:
Choose your desired connection method: either Wired or Air.
For USB connection, connect both devices using a USB-C or USB-A cable.
For Wi-Fi connection, connect both devices to the same network.
Install Duet Display on both devices
3. Using capture card for HDMI devices or gaming consoles
As mentioned earlier, Apple doesn’t allow you to turn your MacBook into a monitor simply by connecting a cable to the HDMI port. However, a practical workaround we usually recommend is to use a USB capture card, which converts video signals from external devices into a digital format viewable on your MacBook’s screen.
This method is especially useful for gamers who want to play XBOX games on their MacBook display. Follow these steps to set up your MacBook as a monitor using a capture card:
Plug the capture card into the main device (like a console) using HDMI.
Connect the capture card to your MacBook via USB.
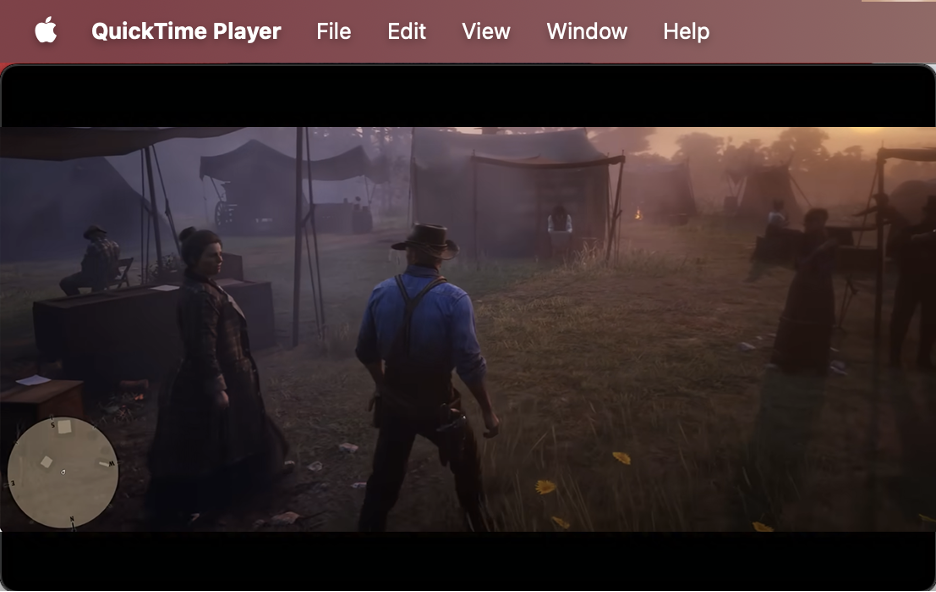
On your Mac, launch QuickTime Player, OBS Studio, or similar to view the other device’s video input.
Step 1. Plug the capture card into your console’s HDMI portStep 2. Connect the capture card to your MacBook’s USB portStep 3. Launch QuickTime Player
4. Via Remote Play for PlayStation gaming
Another excellent option we recommend for gamers is PlayStation’s Remote Play. This feature, available on newer Sony consoles, allows you to wirelessly stream video and audio to another device, including your MacBook. We recommend this method because it makes playing PlayStation games on your Apple machine simple and seamless.
Follow our guide to use your MacBook as a screen with Remote Play:
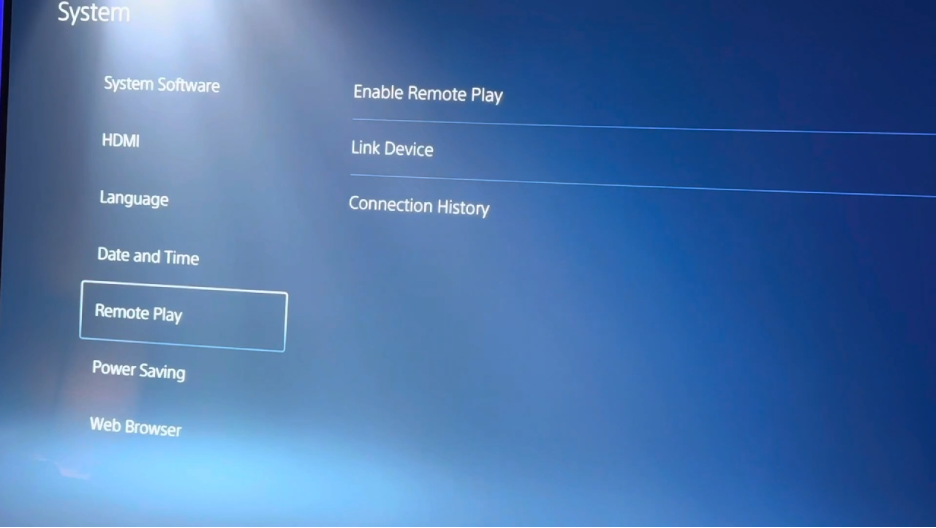
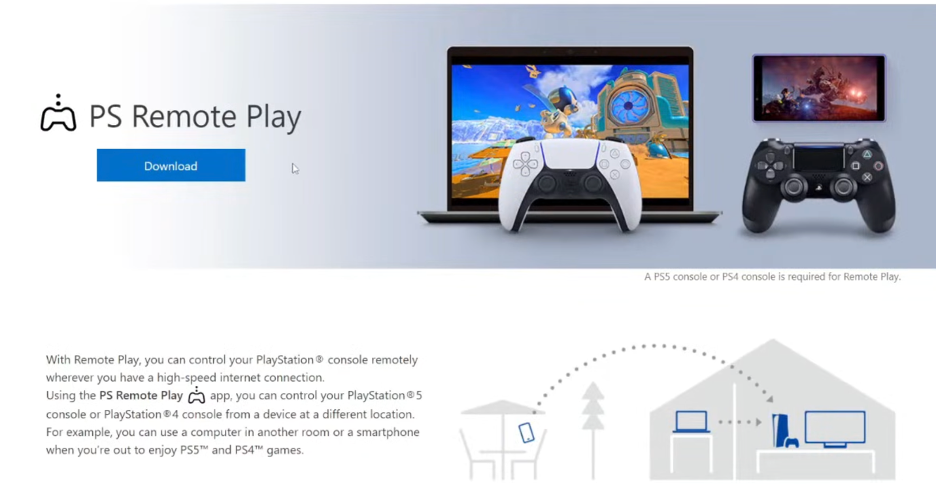
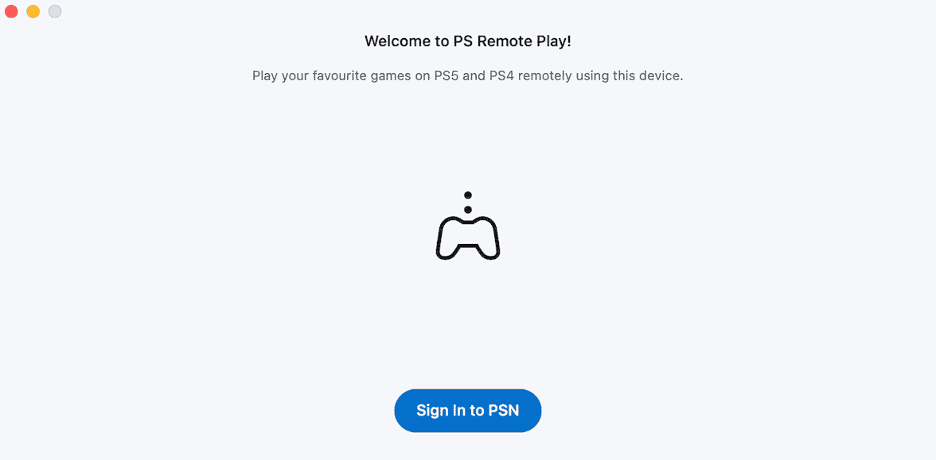
Step 1. Settings > System > Remote Play > Enable Remote PlayStep 2. Install PS Remote Play on your MacBookStep 3. Sign in to your PSN account
AirPlay, third-party apps, capture card, or external monitor: What’s better?
We love using our MacBook as an external monitor to boost productivity, simplify screen sharing during work or college presentations, and even enhance our gaming experiences. However, the best approach varies based on your devices, quality and speed needs, technical expertise, and budget.
For users wanting to mirror their screen from one MacBook to another Apple device, AirPlay is our top recommendation. It’s user-friendly and ideal for presentations or streaming videos. Keep in mind, though, that AirPlay isn’t perfect for extending your desktop, as it may experience performance inconsistencies and limit resolution or refresh rates.
If you’re seeking a more robust solution for display extension, we suggest third-party apps, which are reliable and deliver high performance. While the best apps aren’t free, they often justify their cost with excellent features and stability. Free options exist, but we find them more limited.
Gamers have two main alternatives. For streaming or recording gameplay, capture cards are an affordable and effective choice. However, they’re not ideal for extending your desktop or supporting resource-intensive games. In these cases, we advise using PlayStation’s Remote Play, which lets you play PS games on your MacBook over Wi-Fi. The primary drawback is that it works only with PlayStation consoles and requires a strong, stable wireless connection.
How to get better performance when using MacBook as a monitor?
To increase your Mac’s performance and ensure a smooth experience when using your MacBook as an external monitor, our experts suggest the following tips:
Use a strong Wi-Fi connection of at least 5 Mbps, but preferably 15 Mbps for high resolutions.
Whenever possible, choose wired connections for greater stability and reduced latency.
Verify that your MacBook is compatible with the device you want to connect, whether it’s another Mac, a Windows PC, a camera, or a game console.
Keep both devices updated to the latest software version, or at least to the most compatible mutually supported version.
Close unnecessary background apps, especially resource-intensive ones, to free up system resources.
Avoid using your Mac as an external monitor for demanding games if you want to minimize latency issues.
The ultimate guide on how to use your MacBook as a monitor
While MacBooks aren’t built to serve as external monitors, there are effective alternatives that let you use them as secondary displays. The simplest option, particularly for those fully invested in the Apple ecosystem, is AirPlay. If you want broader compatibility with non-Apple devices, third-party apps are the way to go. For connecting a game console, we recommend using a USB capture card or PlayStation’s Remote Play.
However, performance may not match that of a traditional monitor, which is purpose-built for display tasks. To ensure the best possible experience, keep your devices updated, close unnecessary background apps, and regularly optimize your Mac with MacKeeper’s Safe Cleanup. Notarized by Apple, this app from Clario Tech also frees up memory, protects you against malware, and safeguards your privacy with an integrated VPN.
We respect your privacy and
use cookies
for the best site experience.
Privacy Preferences Center
We use cookies along with other tools to give you the best possible experience while using the
MacKeeper website. Cookies are small text files that help the website load faster. The cookies we
use don’t contain any type of personal data meaning they never store information such as your
location, email address, or IP address.
Help us improve how you interact with our website by accepting the use of cookies. You can change
your privacy settings whenever you like.
Manage consent
All cookies
These cookies are strictly necessary for enabling basic website functionality (including page
navigation, form submission, language detection, post commenting), downloading and purchasing
software. The website might malfunction without these cookies.