To get more space on your macOS Catalina, start with these steps:
- Empty your Trash folder.
- Delete duplicates.
- Remove junk files from your applications.
- Clean up caches from your laptop.
- Get rid of unnecessary software.
- Check and clean your Downloads folder.
- Use cloud drive.
- Refer to the help of Storage Optimizer.
There’s little more frustrating than seeing the “your disk is almost full” notification on your Mac, especially when you can find nothing that you want to delete. Thankfully, we at MacKeeper, have created a complete guide to help you get more empty space on Mac Catalina, without deleting any files that are important to you.
Continue reading to learn in more detail how to free up space on Mac.
Before we start
The quickest way to free up storage on your Mac is to get rid of junk files. With MacKeeper’s Safe Cleanup tool, cleaning can be automated. Find these redundant files and delete them in just a few clicks.
Here’s how to use Safe Cleanup:
- Download and install MacKeeper.
- Open MacKeeper, and select the Safe Cleanup tool.
- Click Start Scan to locate all junk files on your Mac.
- Select the files you want to remove, and click Clean Junk Files.
In this article you will find the following:
How to check disk space on MacBook
Follow our instructions to check how disk your space is used now:
- Open Spotlight search by pressing the Command + Space bar at the same time.
- Type in Disk Utility into the search bar and press Enter. This will provide you with an overview of how much storage you have used, and how much free space you have on your disk.
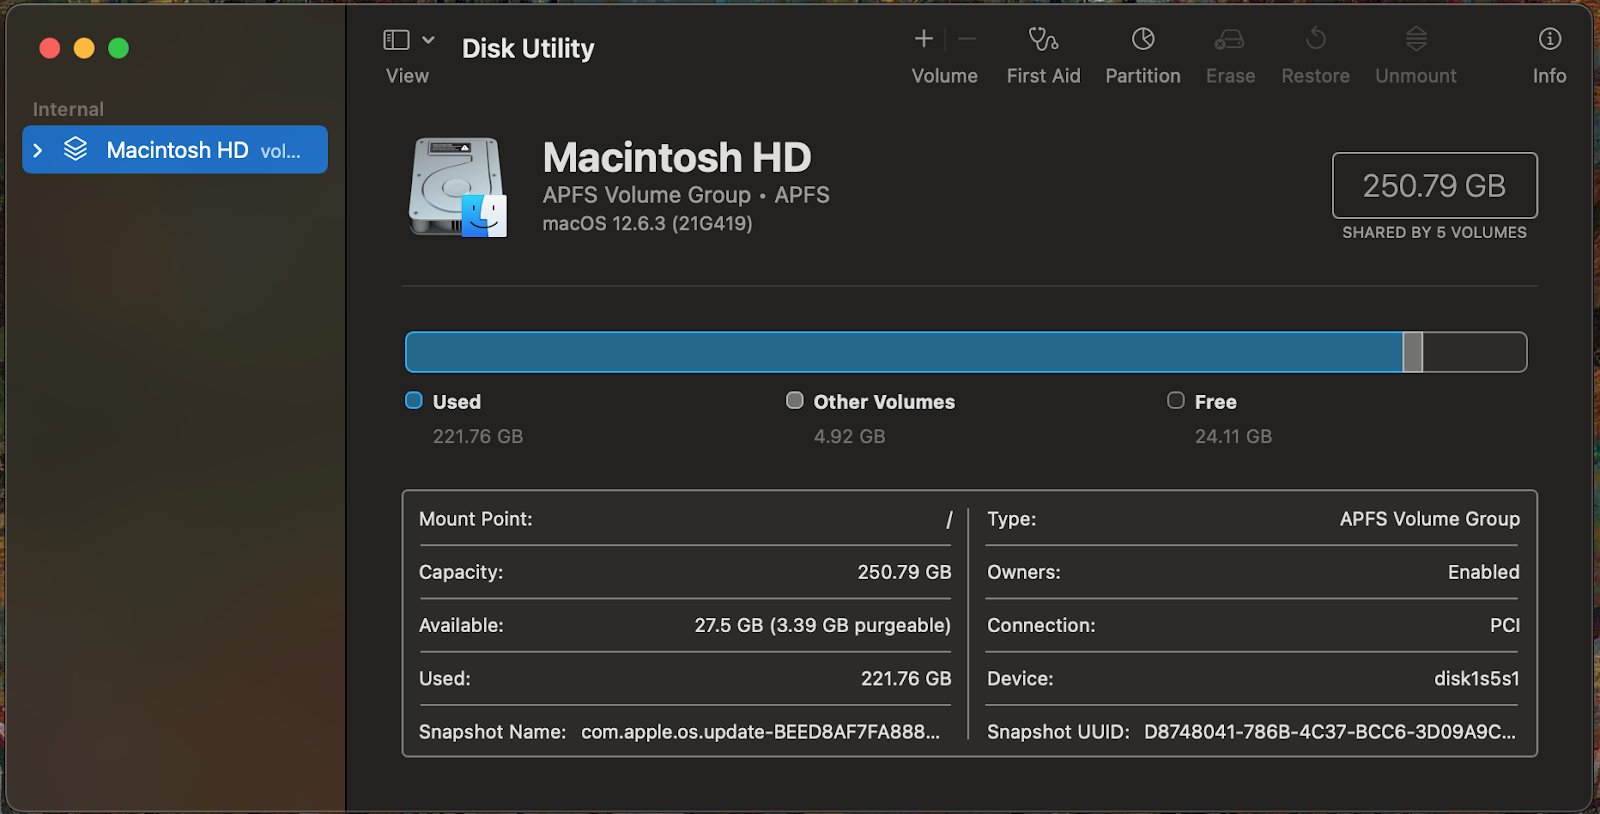
You might see a section in Disk Utility that’s called Other. What does it include? Find out more about what other storage is in our comprehensive guide.
Methods to free up disk space on your Mac Catalina
You should check your storage usage regularly to allow space for important security updates and to speed up your Mac. If your disk is getting full, this will cause your Mac to run slower and restrict you from adding more files to your disk. Luckily, there are many ways you can free up space on Mac:
- Empty trash folder
- Delete unwanted files from the Downloads folder
- Remove applications’ junk files
- Clean duplicates
- Clean up caches from your MacBook
- Delete useless applications
- Use cloud drives
- Use the Storage Optimizer on macOS Catalina
- Use third-party apps
1. Empty trash folder
Your trash folder keeps deleted files in case you want to restore them at a later date. This is a great safety net in case you accidentally delete something. However, if you don’t empty this regularly, deleted files can take up lots of space on your Mac.
To empty your trash on macOS Catalina:
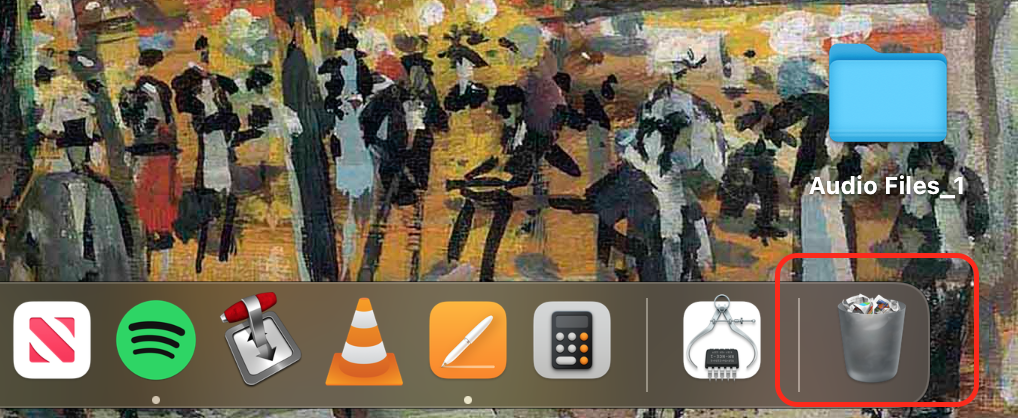
- To open your Trash, click on the trash can icon on the right-hand side of your dock. If the Trash icon shows that it’s empty, this means that there are currently no files in your Trash.
- When inside the Trash window, click the Empty button to delete all files currently in your Trash. This will then open a pop-up asking you to confirm if you’d really like to empty it. Click Empty Trash, and all files in your trash folder will be permanently deleted.
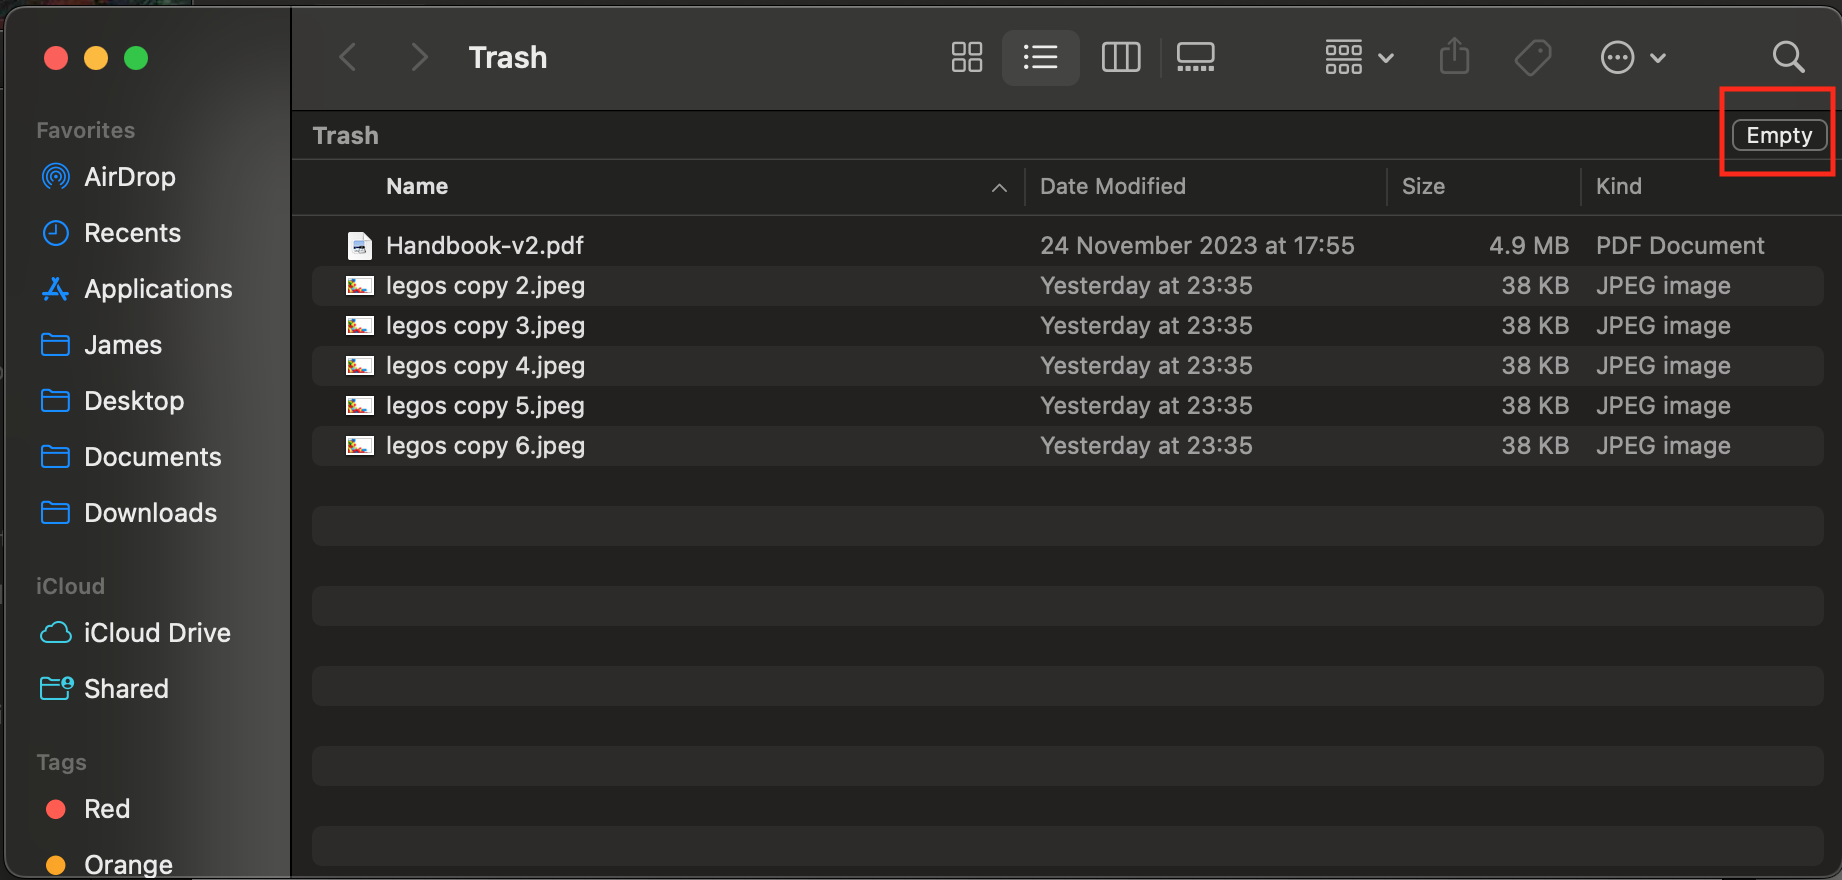
You can also restore items in your trash or delete individual files. To find out how, please see our other piece on how to empty the Trash on a Mac.
2. Delete unwanted files from the Downloads folder
Unless you specifically change the settings to prevent it, your Mac will automatically put all downloaded files into the Downloads folder. This is an important place to look if you want to free up storage, as often, the largest files on your Mac will be located here, and you’ll need to delete your downloads consciously.
Here’s how to delete files from the Downloads folder:
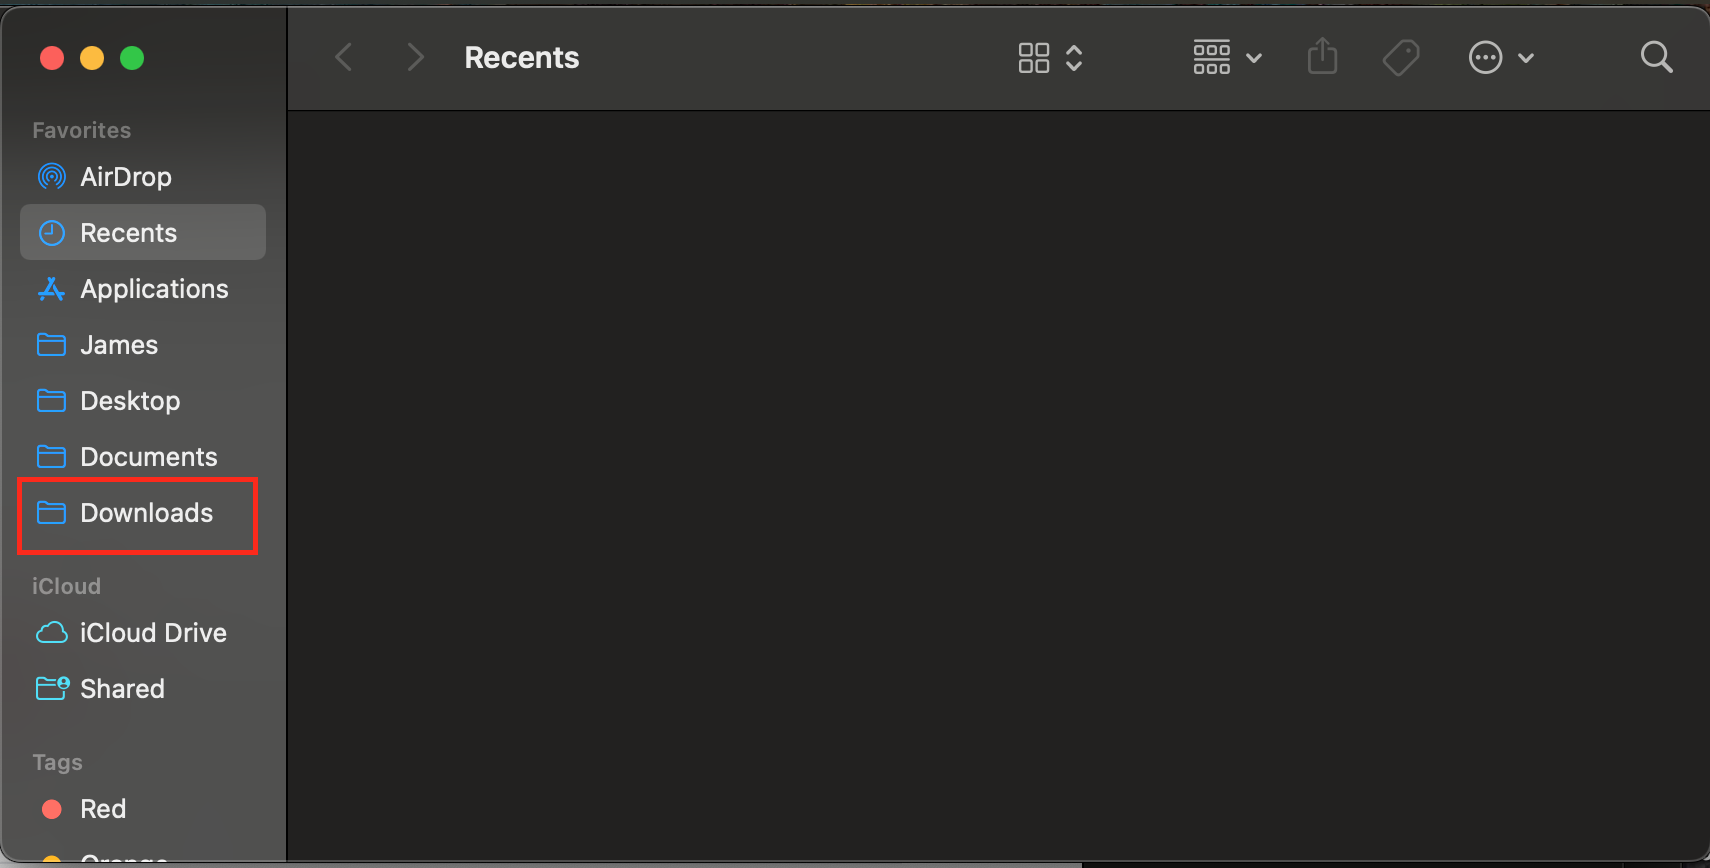
- To find the Downloads folder, open Finder and select Downloads from the sidebar.
- Go to View in the top toolbar, select Sort by, and choose Size. This will order all your downloads by file size, so you can see what files are using up lots of disk space.
- Once you’ve identified some large files that you can get rid of, right-click on them and select Move to Trash. Alternatively, you can drag and drop the file into the trash can in your dock.
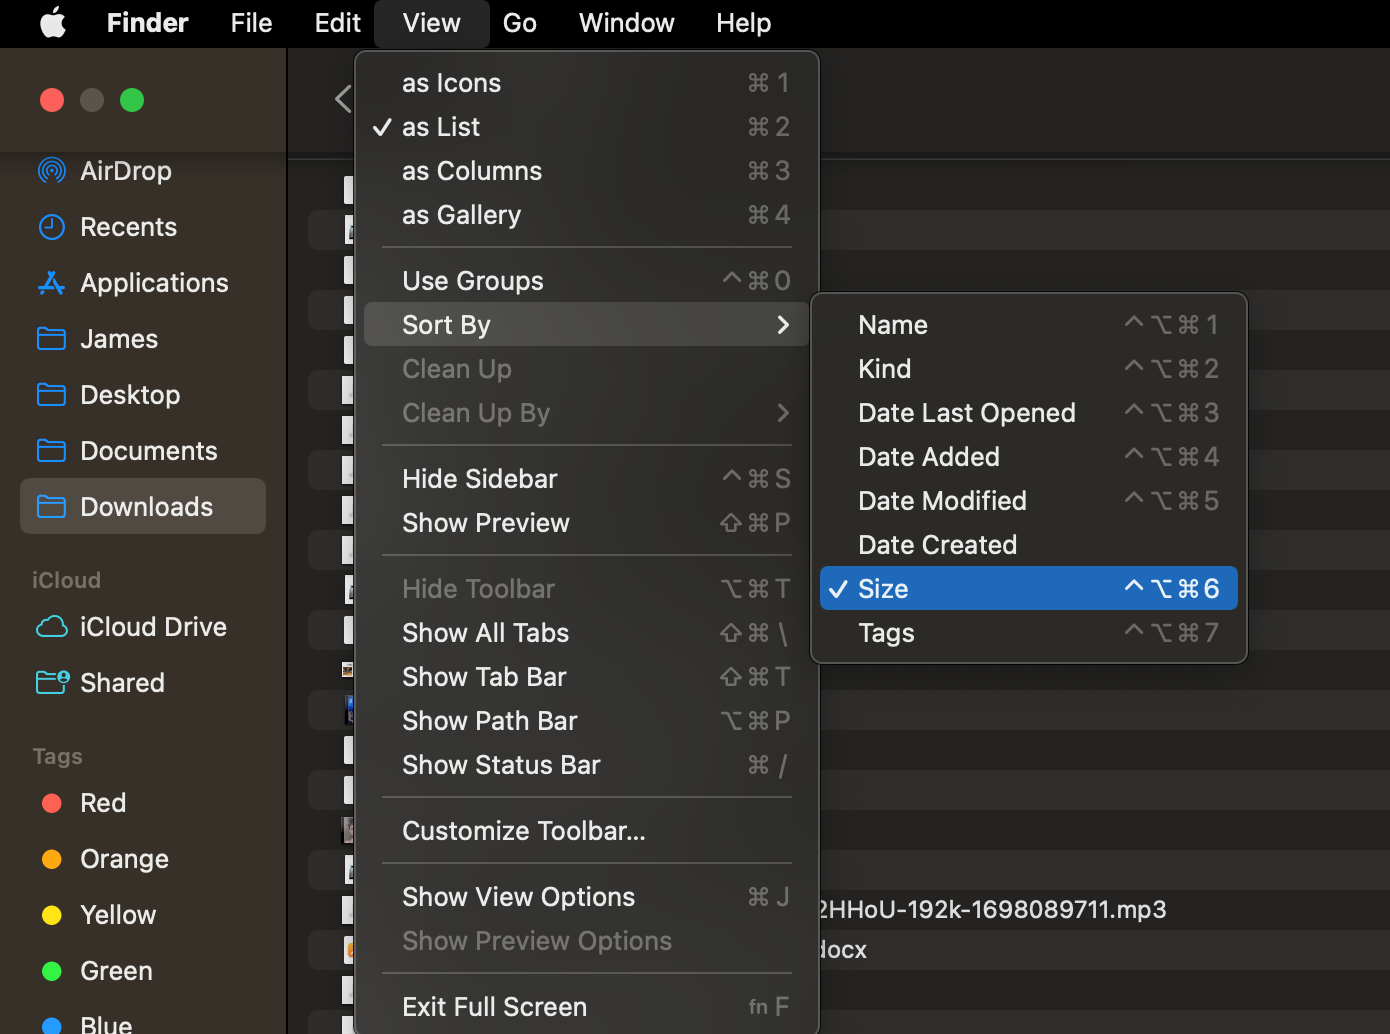
As mentioned above, you’ll need to empty your trash after you delete items from the download folder. Otherwise, this process won’t be complete, and you won’t free up space on Mac Catalina.
3. Remove applications’ junk files
As you install applications, each app will create a cache for itself to help the app load faster. Unfortunately, these caches also take up space, and in some cases, even uninstalled applications continue to take up disk space with junk cache files. If you regularly clean junk files, you’ll free up your storage and speed up your Mac.
To remove applications’ junk:
- Click on your Mac desktop or a Finder window.
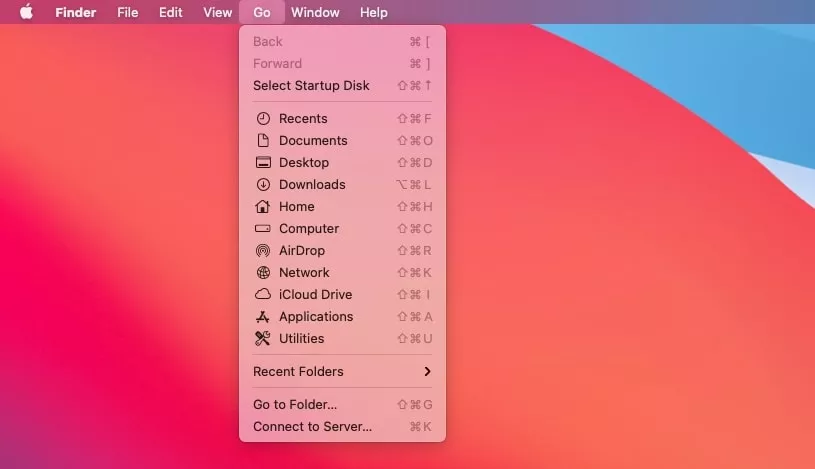
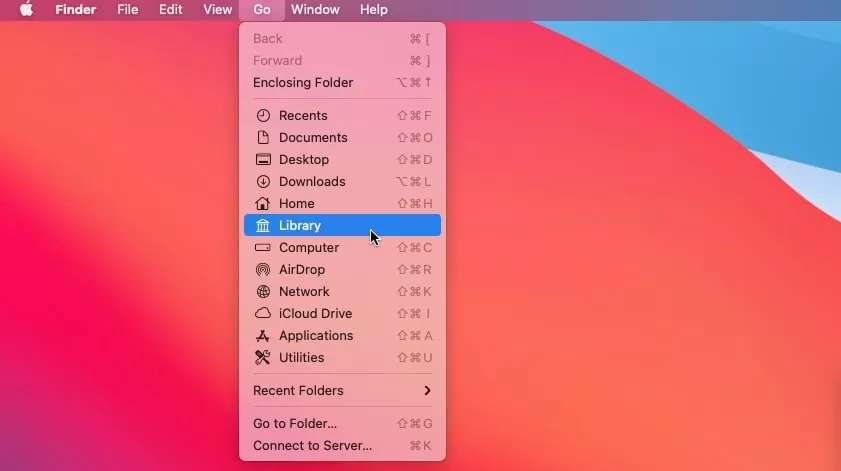
- In the menu bar at the top, click Go.
- Hold down the Option key. Select the Library folder once it appears.
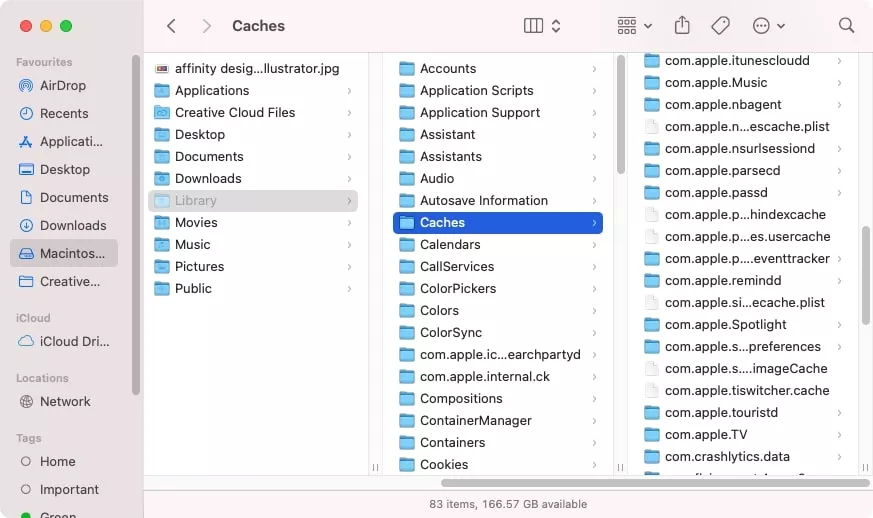
- Navigate to the Library > Caches.
- Click the spyglass in the top right corner of your finder window and search for a recently uninstalled app within the Library folder.
- Select the relevant items, right-click on them, and press Move to Trash.
4. Clean duplicates
Often, your Mac’s precious storage space can be wasted by using duplicate files. Maybe you take 10 to 15 photos at a time with the intention to only keep one, or re-download the same menu from your favorite restaurant. We all end up accidentally hoarding useless files, but the good news is it’s really easy to get rid of duplicates.
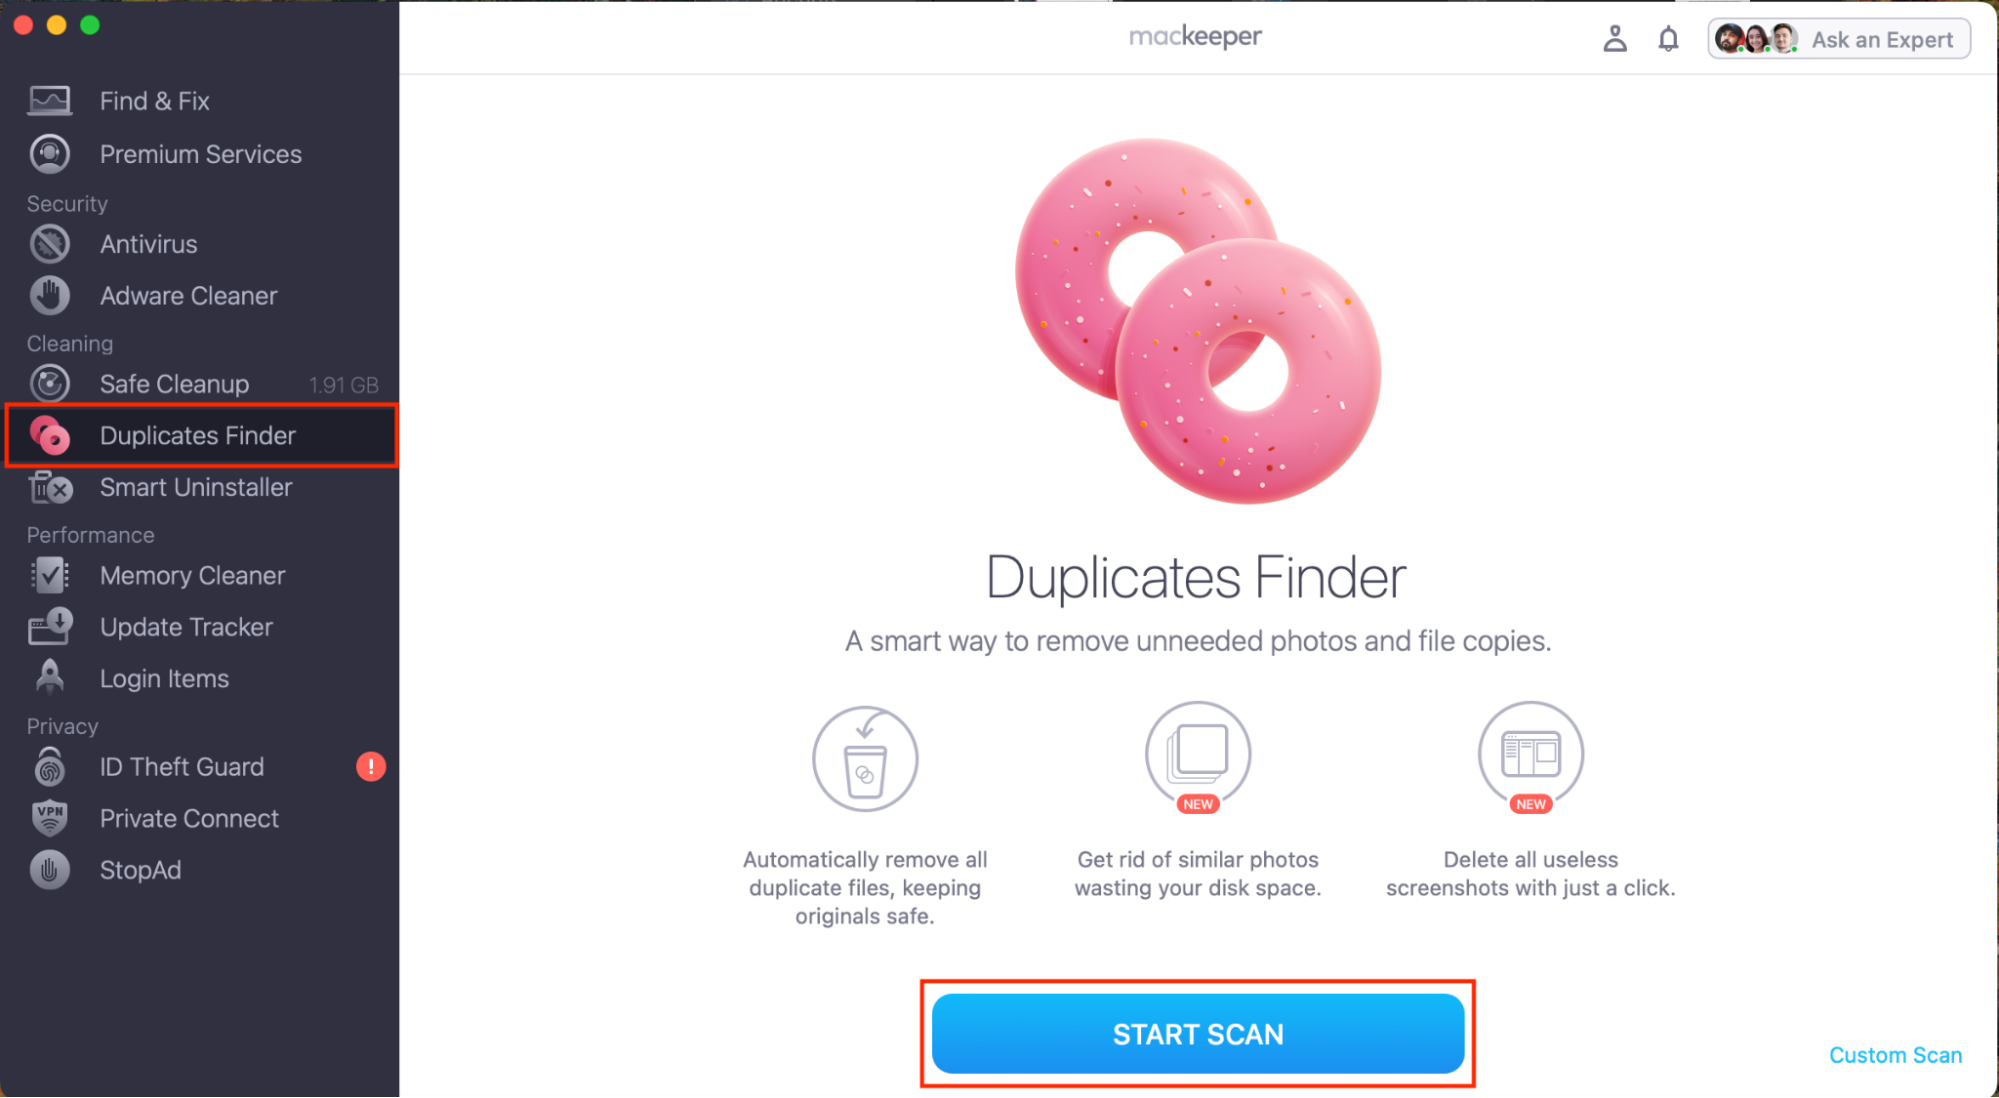
One of the best ways to clean duplicates with just a few clicks is by using MacKeeper’s Duplicate Finder:
- Open MacKeeper, and select Duplicates Finder from the sidebar.
- Click Start Scan to find all the duplicate files on your Mac.
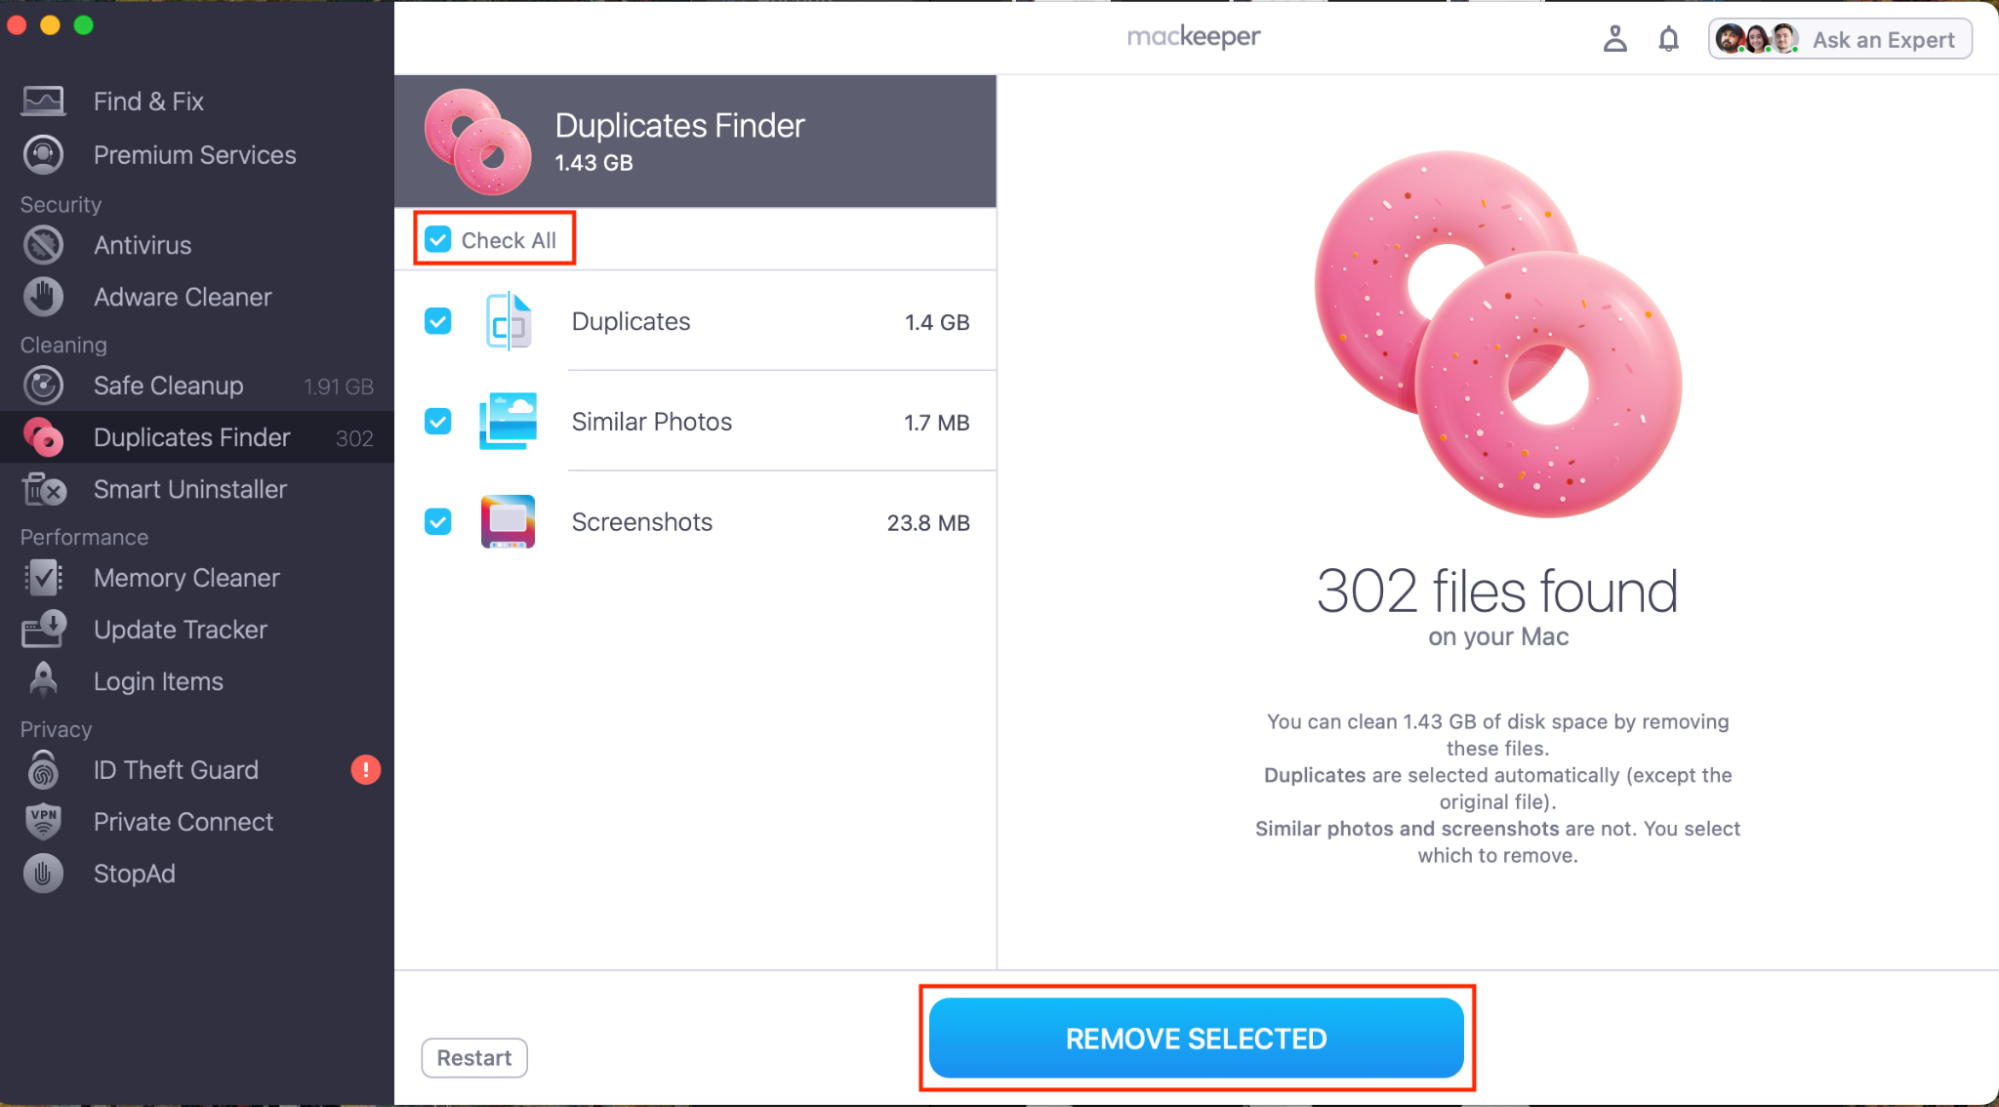
- Select the items you’d like to delete (e.g. photos).
- Click on Remove Selected to automatically delete duplicate files.
5. Clean up caches from your MacBook
Your Mac and its apps will automatically create caches, which allows them to launch quicker. However, cache files can quickly take up increasing amounts of space, so it’s important to clear cache every once in a while to clean up space on your Catalina Mac.
The step-by-step instructions to clear your cache are below:
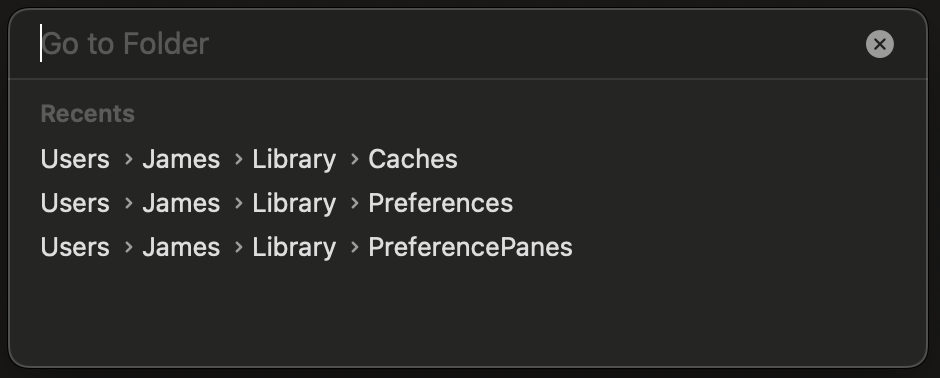
- Open Finder and hit the Shift + Command + G keys on your keyboard, which will display Go to Folder.
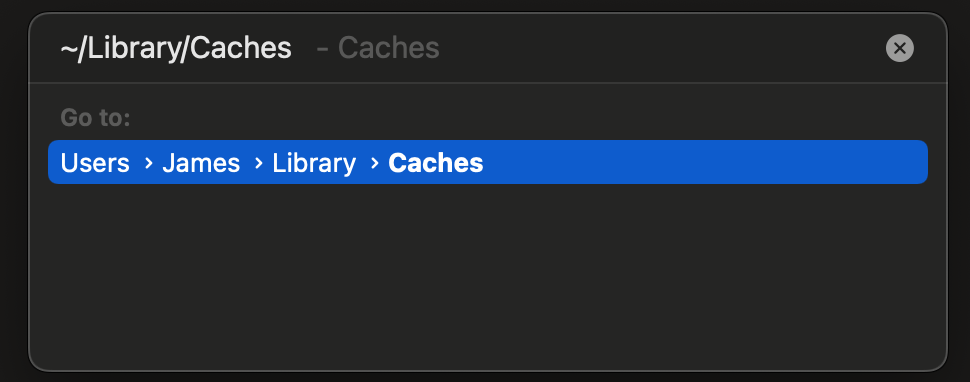
- Enter the following text into the newly opened text box: ~/Library/Caches. Once you’ve entered the text, hit Go.
- Select the desired files you’d like to delete and drag them into the Trash can in your dock.
6. Delete useless applications
We have all installed apps that have only been used once and never touched again—I’m looking at you, Audacity. Fortunately, it’s really simple and easy to delete unused applications and, this way, clear disk space on Mac Catalina. Here’s how:
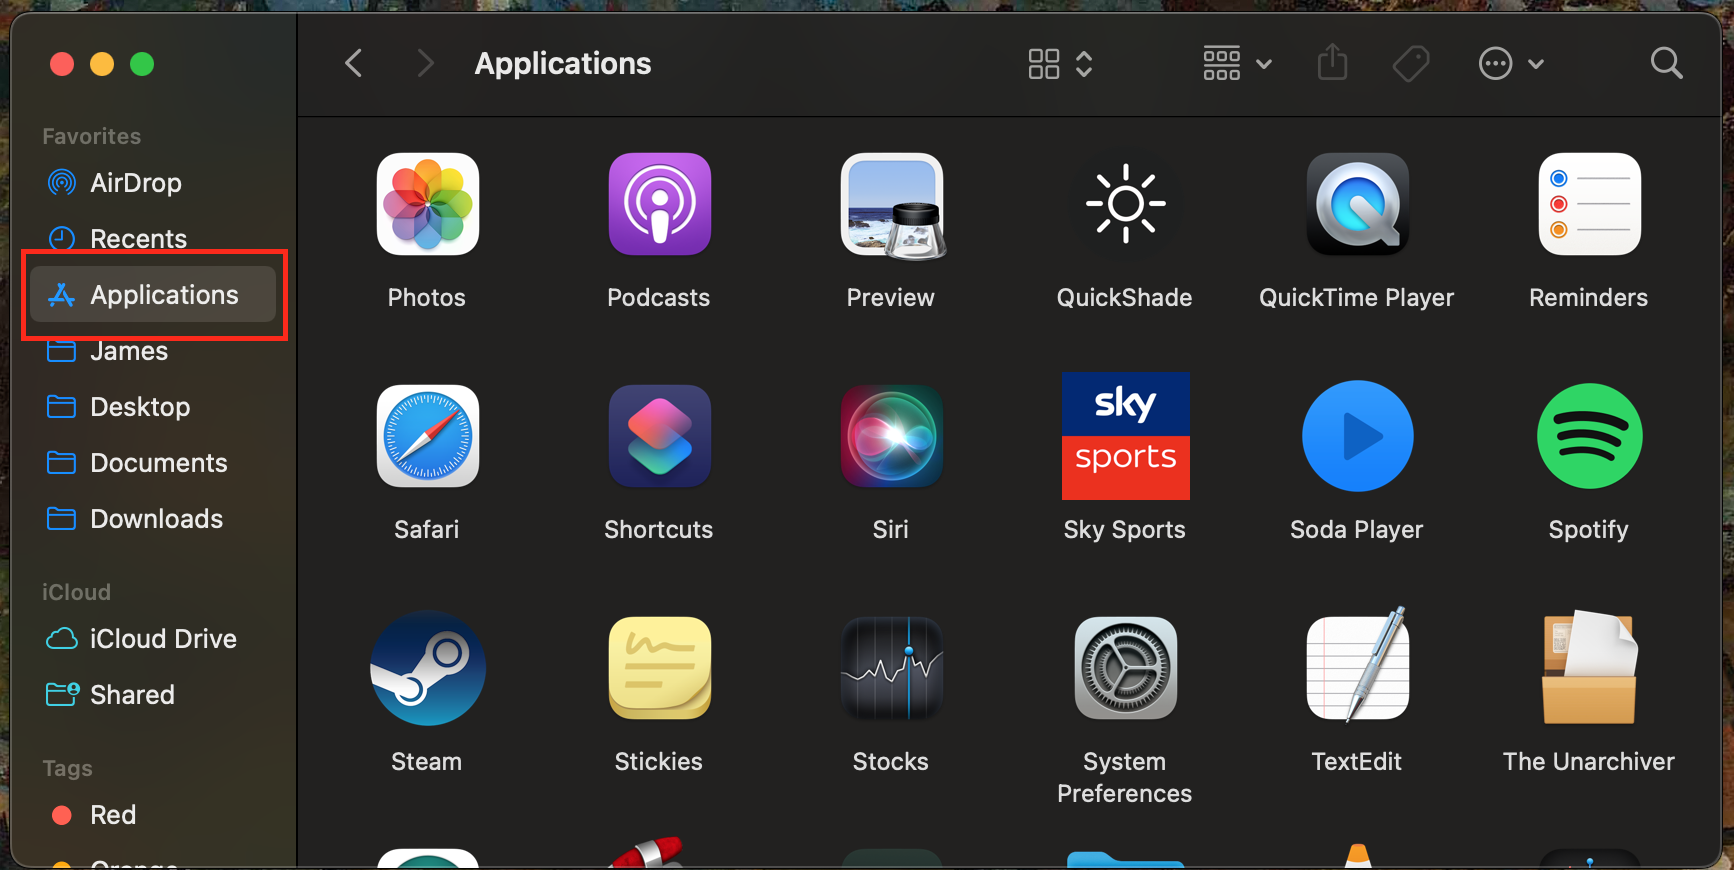
- Open Finder and click on Applications in the sidebar.
- Select the application you want to delete, and drag it to the Trash can in your dock.
- Be sure to empty your Trash to actually delete the item and free up space.
7. Use cloud drives
These days, each of you has thousands of photos that take up lots of space on your Apple device. But as each photo is a memory, most of us are reluctant to delete them forever. Fortunately, there are cloud drives, which are great ways to preserve your memories while simultaneously freeing up disk space. Cloud drives like iCloud work by uploading your files to the internet, meaning that as long as you’re online, you can always access your files.
To shift your files to a cloud drive on Mac:
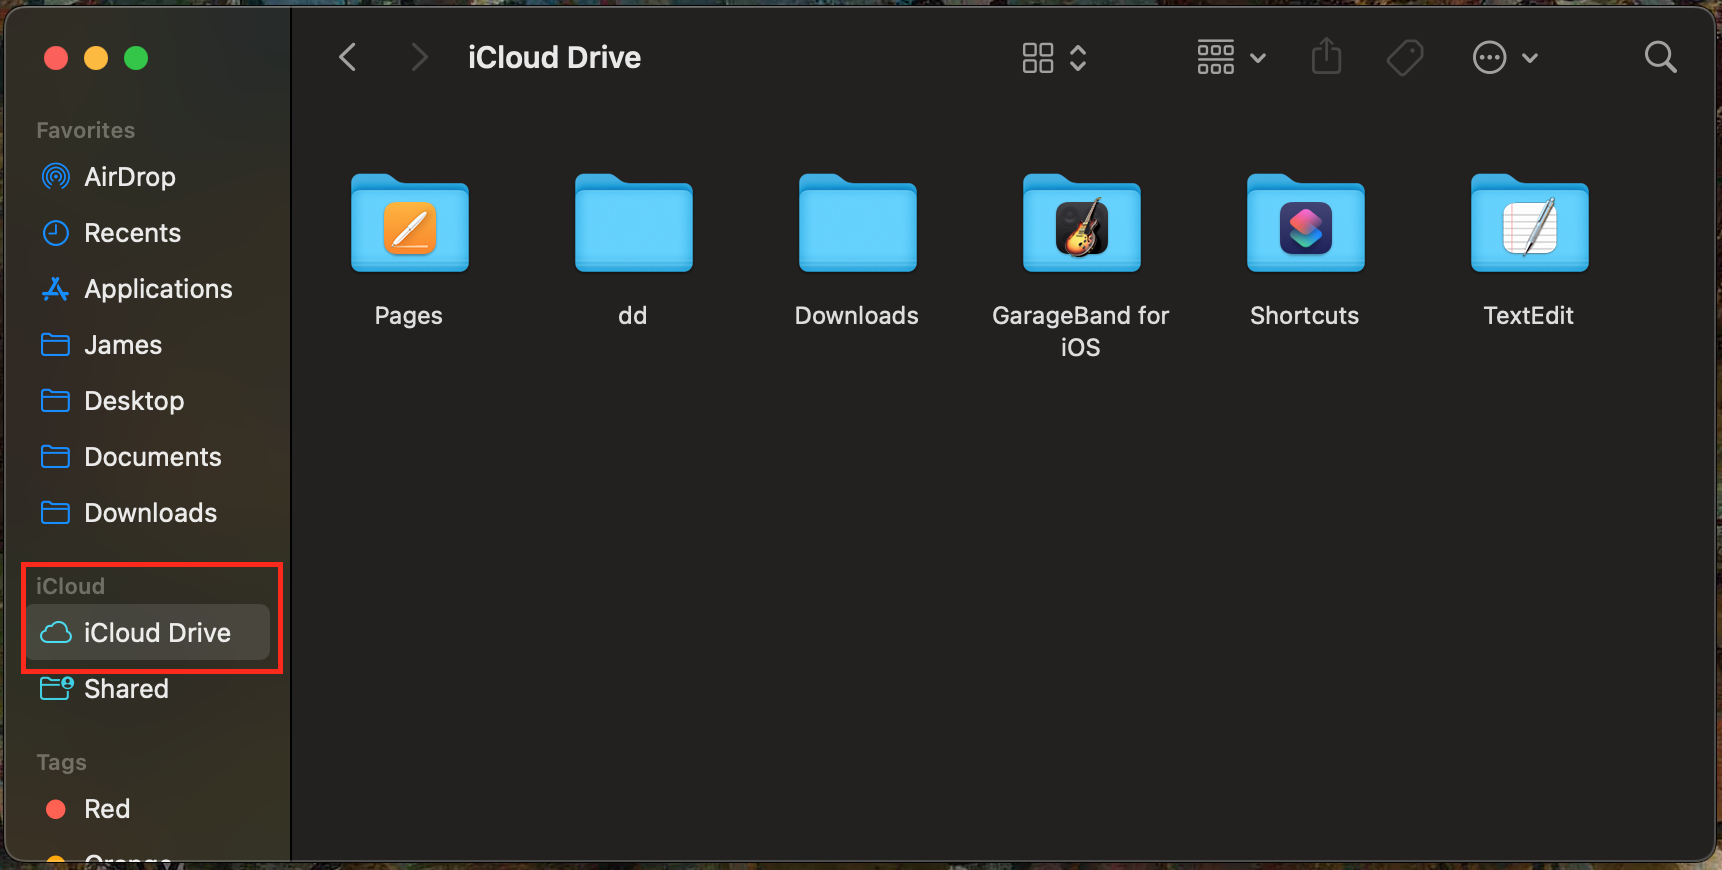
- Open Finder and click on iCloud drive.
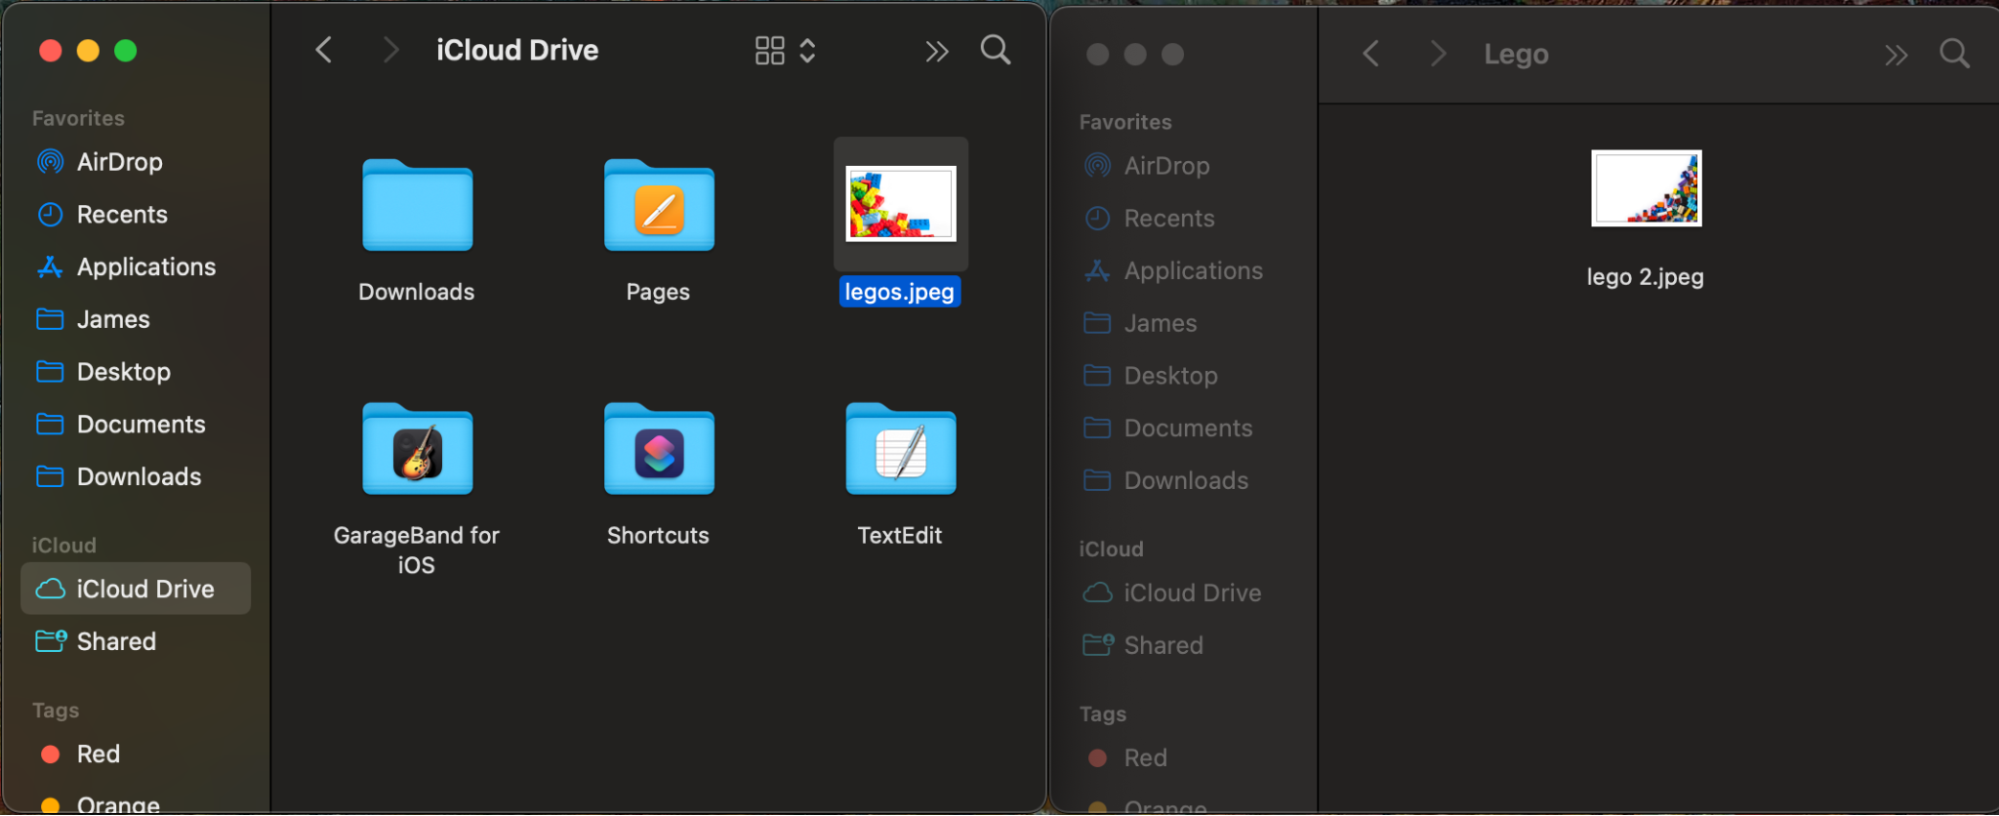
- With this window open, simply drag and drop the files you wish to upload into your iCloud.
- To free up space, once the file has been uploaded, delete the copy of the file on your laptop and empty the Trash.
8. Use the Storage Optimizer on macOS Catalina
If, like me, you enjoy watching movies and TV on your Mac, use the Storage Optimizer on Mac Catalina to remove the ones already watched:
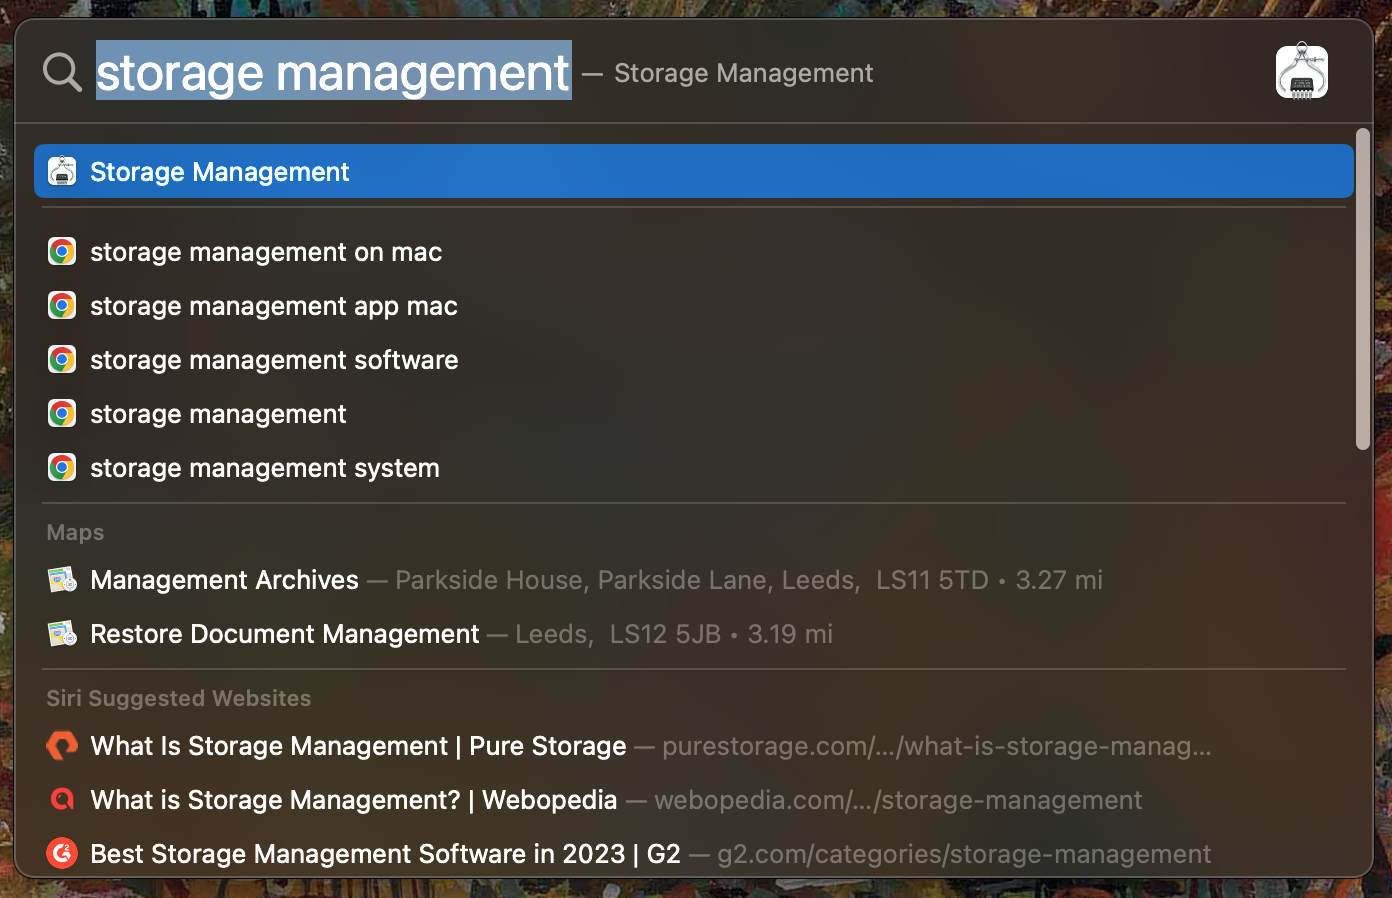
- Press the Command + Spacebar keys on your Mac to open the Spotlight search.
- Type in Storage Management and hit Enter.
- Click the Optimize… button and let your computer do all the work.

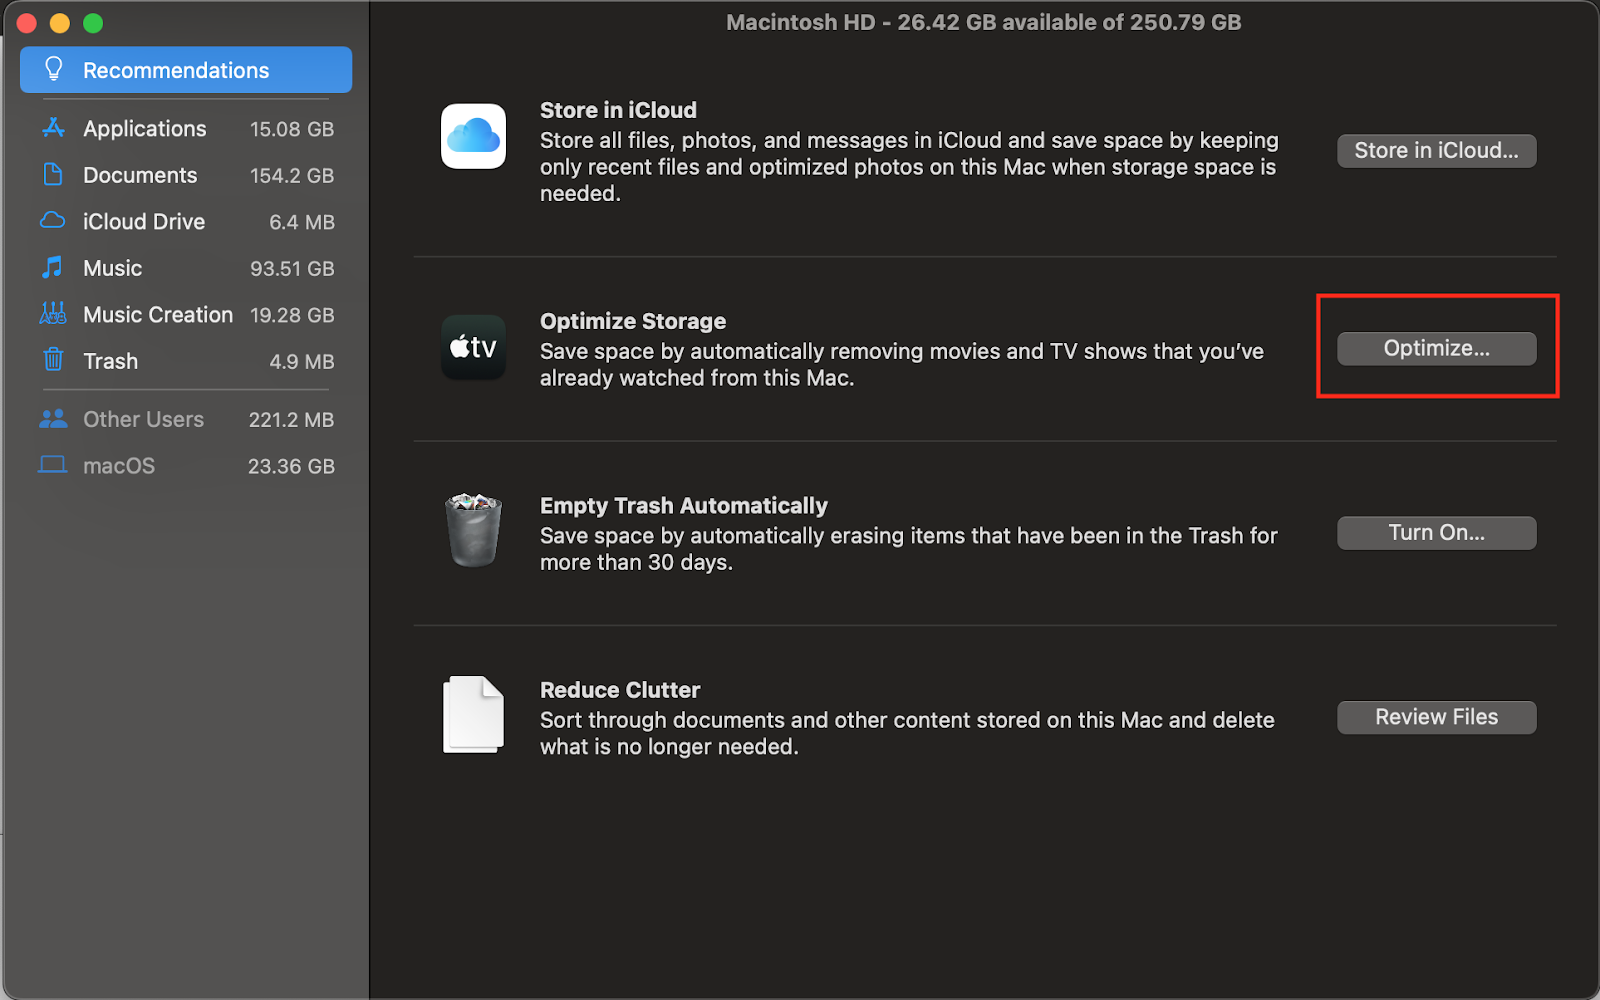
No secret, video files take up so much disk space on your Mac, with the built-in Storage Optimizer, you can automatically delete movies and TV shows you’ve already watched without needing to find the files manually. Don’t worry, these files can always be re-downloaded if you want to rewatch your favorites.
9. Use third-party apps
Wouldn’t it be a breath of fresh air if an app could clear up disk space automatically on your Catalina Mac? Fortunately, you’re in the right place. MacKeeper’s Safe Cleanup can look through all of your files and find out what is taking up lots of storage space on your device so you can delete them. Try it yourself:
- Open the MacKeeper app and select Safe Cleanup from the sidebar.
- Select the relevant items you’d like to delete (e.g. Caches).
- Click Clean Junk Files and let MacKeeper do all the work.
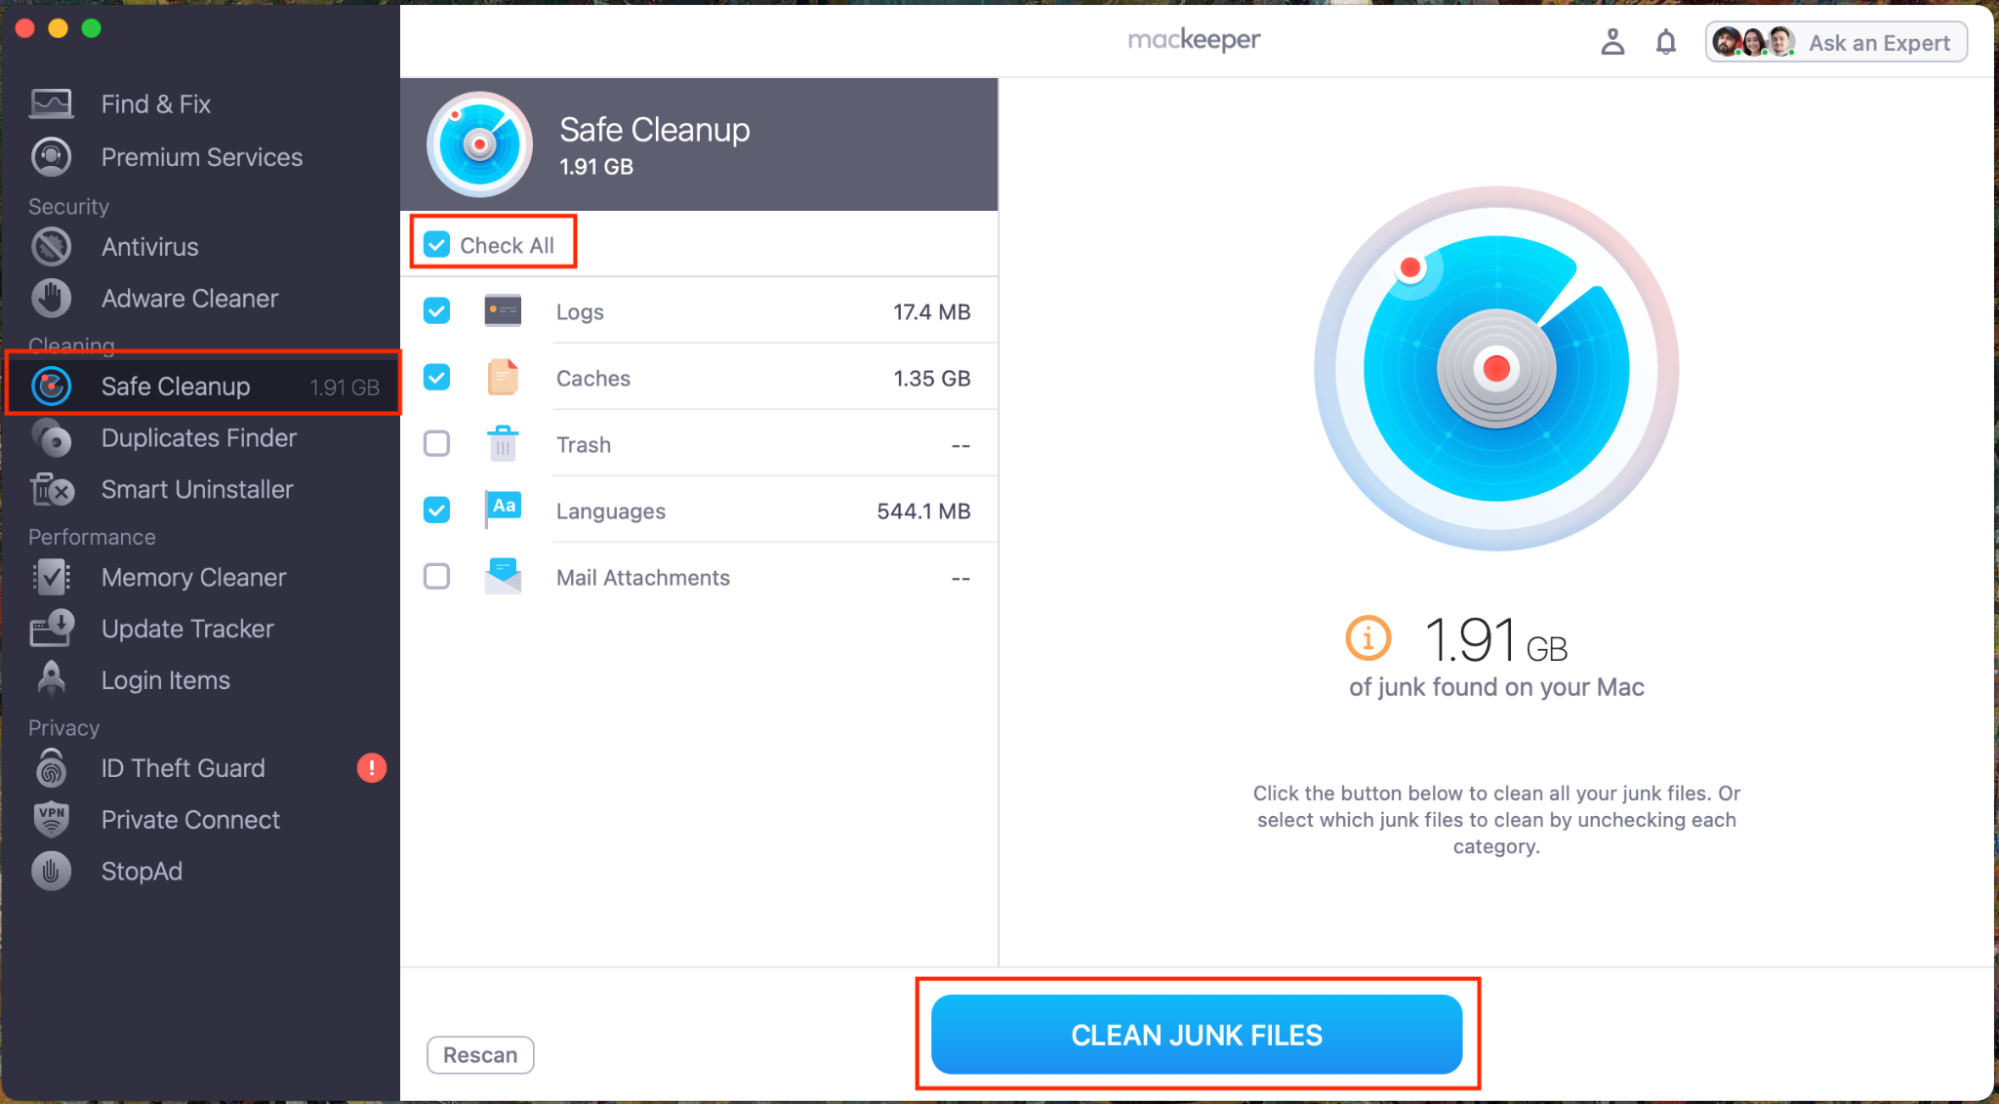
MacKeeper can save you a lot of time by automatically doing the cleaning job in the background. Furthermore, it can also help to speed up your Mac by cleaning up your memory, protecting and repairing your laptop with its built-in antivirus, and keep you safe online with a VP—all in one place. Furthermore, MacKeeper’s software is notarized by Apple, meaning it’s certifiably safe for you to install.
Free up disk space on macOS Catalina with ease
Hopefully, by now, you’ve managed to create some space on your laptop for new data files and understand what was taking up all of that valuable disk space in the first place. We’ve streamlined this entire process in our MacKeeper app, which can help you manage your Mac’s storage and protect and speed up your computer. So, whether you’re a film buff, an app addict, or an amateur photographer, our product will help you save valuable space on your Mac.


