If you’re like most people, you probably take 10 to 15 photos from just one angle. Both your digital camera and phone can end up brimming with images that you later transfer to your Mac, where you edit them and create even more copies. What’s worse, you can duplicate the same photos stored in your phone the next time you connect it to your Mac. Stop this madness and take control by ridding your Mac of useless image duplicates.
There are a few main ways to delete duplicate photos from a Mac, some faster than others. Stick around, and we’ll show you how to get your computer duplicate-free.
Before we start:
Keeping your iMac or MacBook laptop clear of duplicate photos is easy with MacKeeper’s Duplicates Finder. Here’s how to use it:
- In MacKeeper, select Duplicates Finder from the sidebar
- Click Start Scan, and wait for it to finish
- Select what you want to delete, and click Remove Selected.
Easy, right? Don’t just take our word for it—download MacKeeper today and see for yourself.
In this article you will find the following:
How to find duplicate photos on Mac
Duplicate photos tend to accumulate over time, taking up space and potentially making your Mac run slower. Duplicates aren’t always stored in the Pictures folder, either. You’ll find them spread across various folders on your Mac, including:
- Downloads
- Documents
- Desktop.
Unneeded copies of photos can be stored anywhere, so how do you find them? Read on to find out.
How to remove duplicate photos on Mac
Deleting duplicate photos on a Mac can be done manually or with tools that automate the process. Whichever method you choose, finding and removing these unneeded files can be a great way to quickly free up disk space on your Mac.
Eliminate duplicates in the Photos app
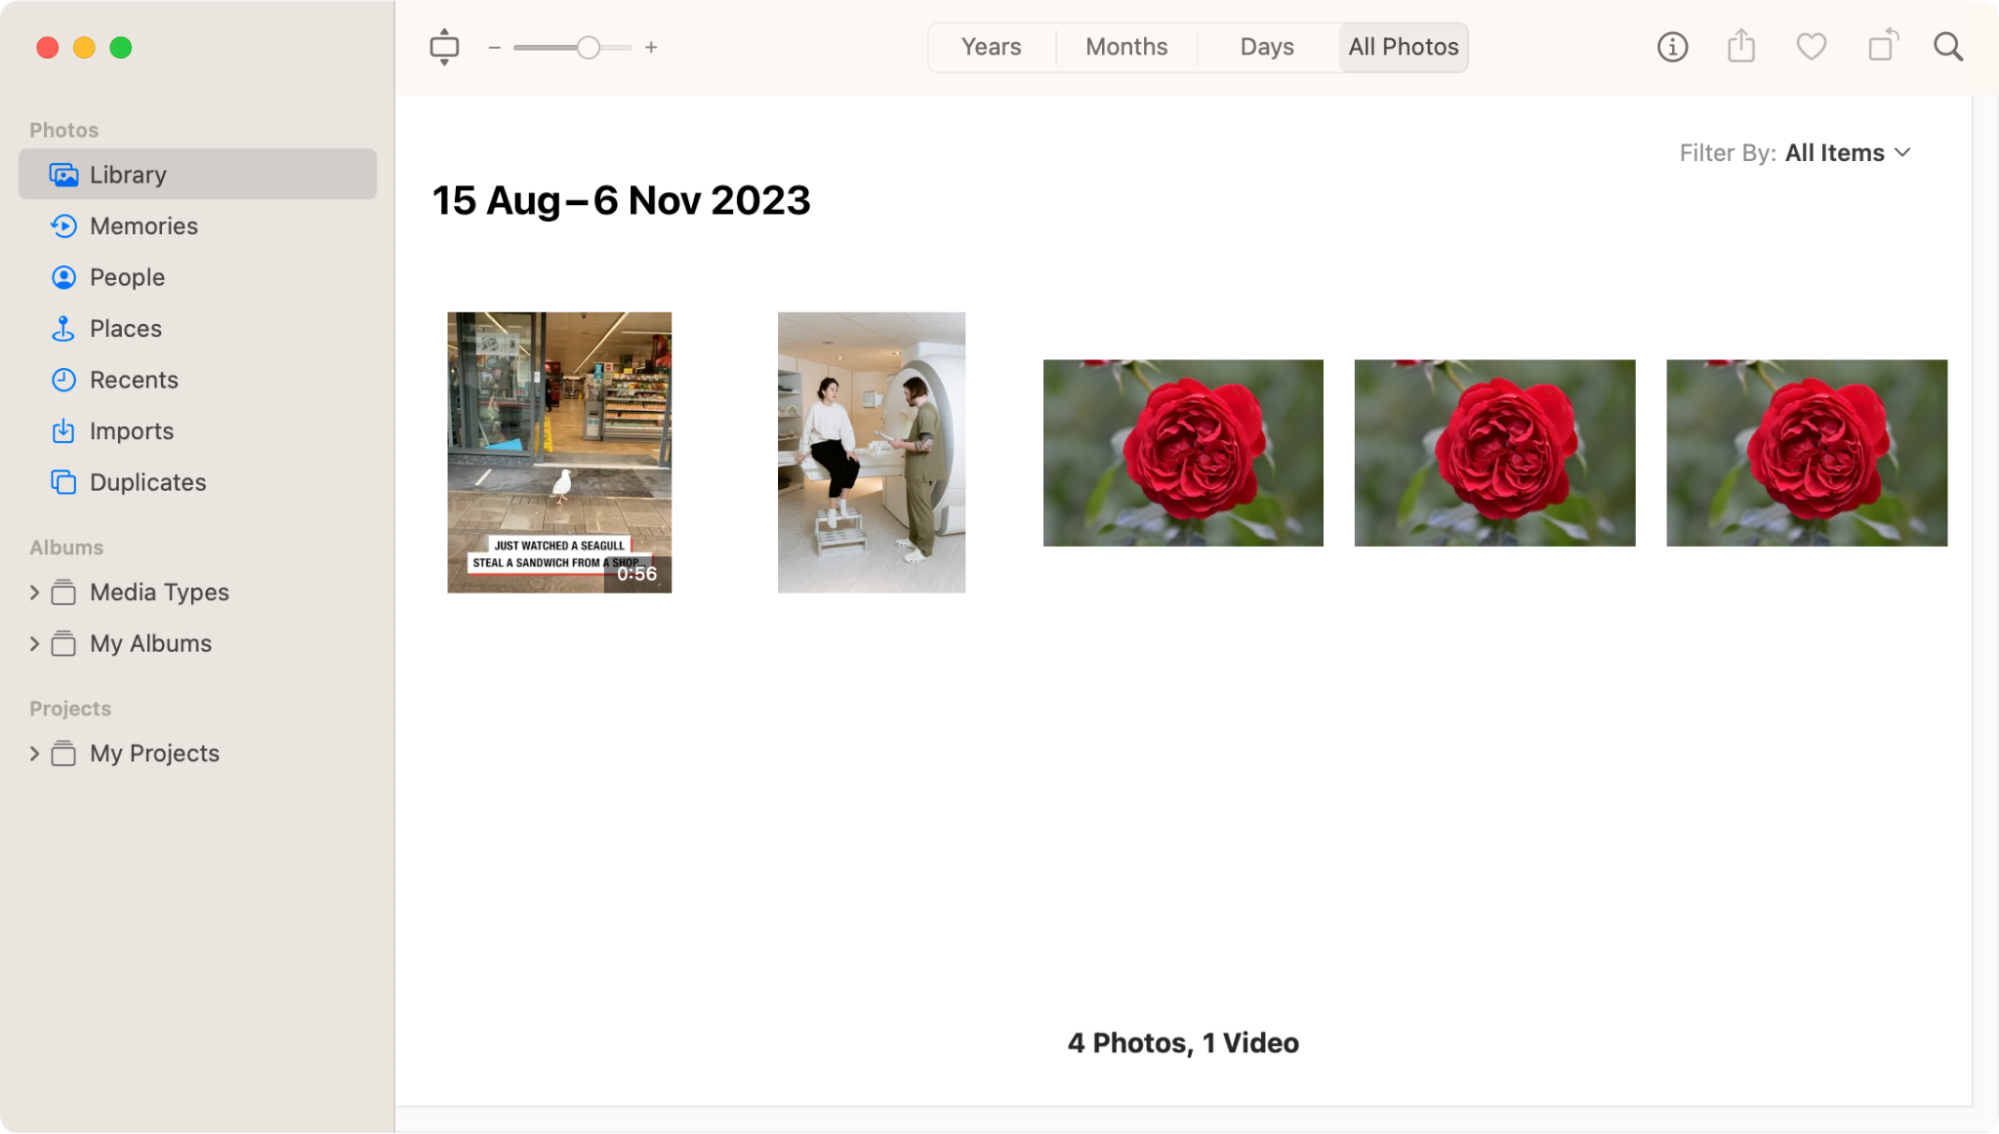
The Photos app automatically detects duplicate images, which makes it easier to delete useless copies. All you need to do is merge duplicate photos, which gets rid of the copies. This feature was added with the release of macOS Ventura, so you won’t have it if you’re using an earlier OS like Catalina, Monterey, or Big Sur.
Here’s how to manage duplicate photos in Photos:
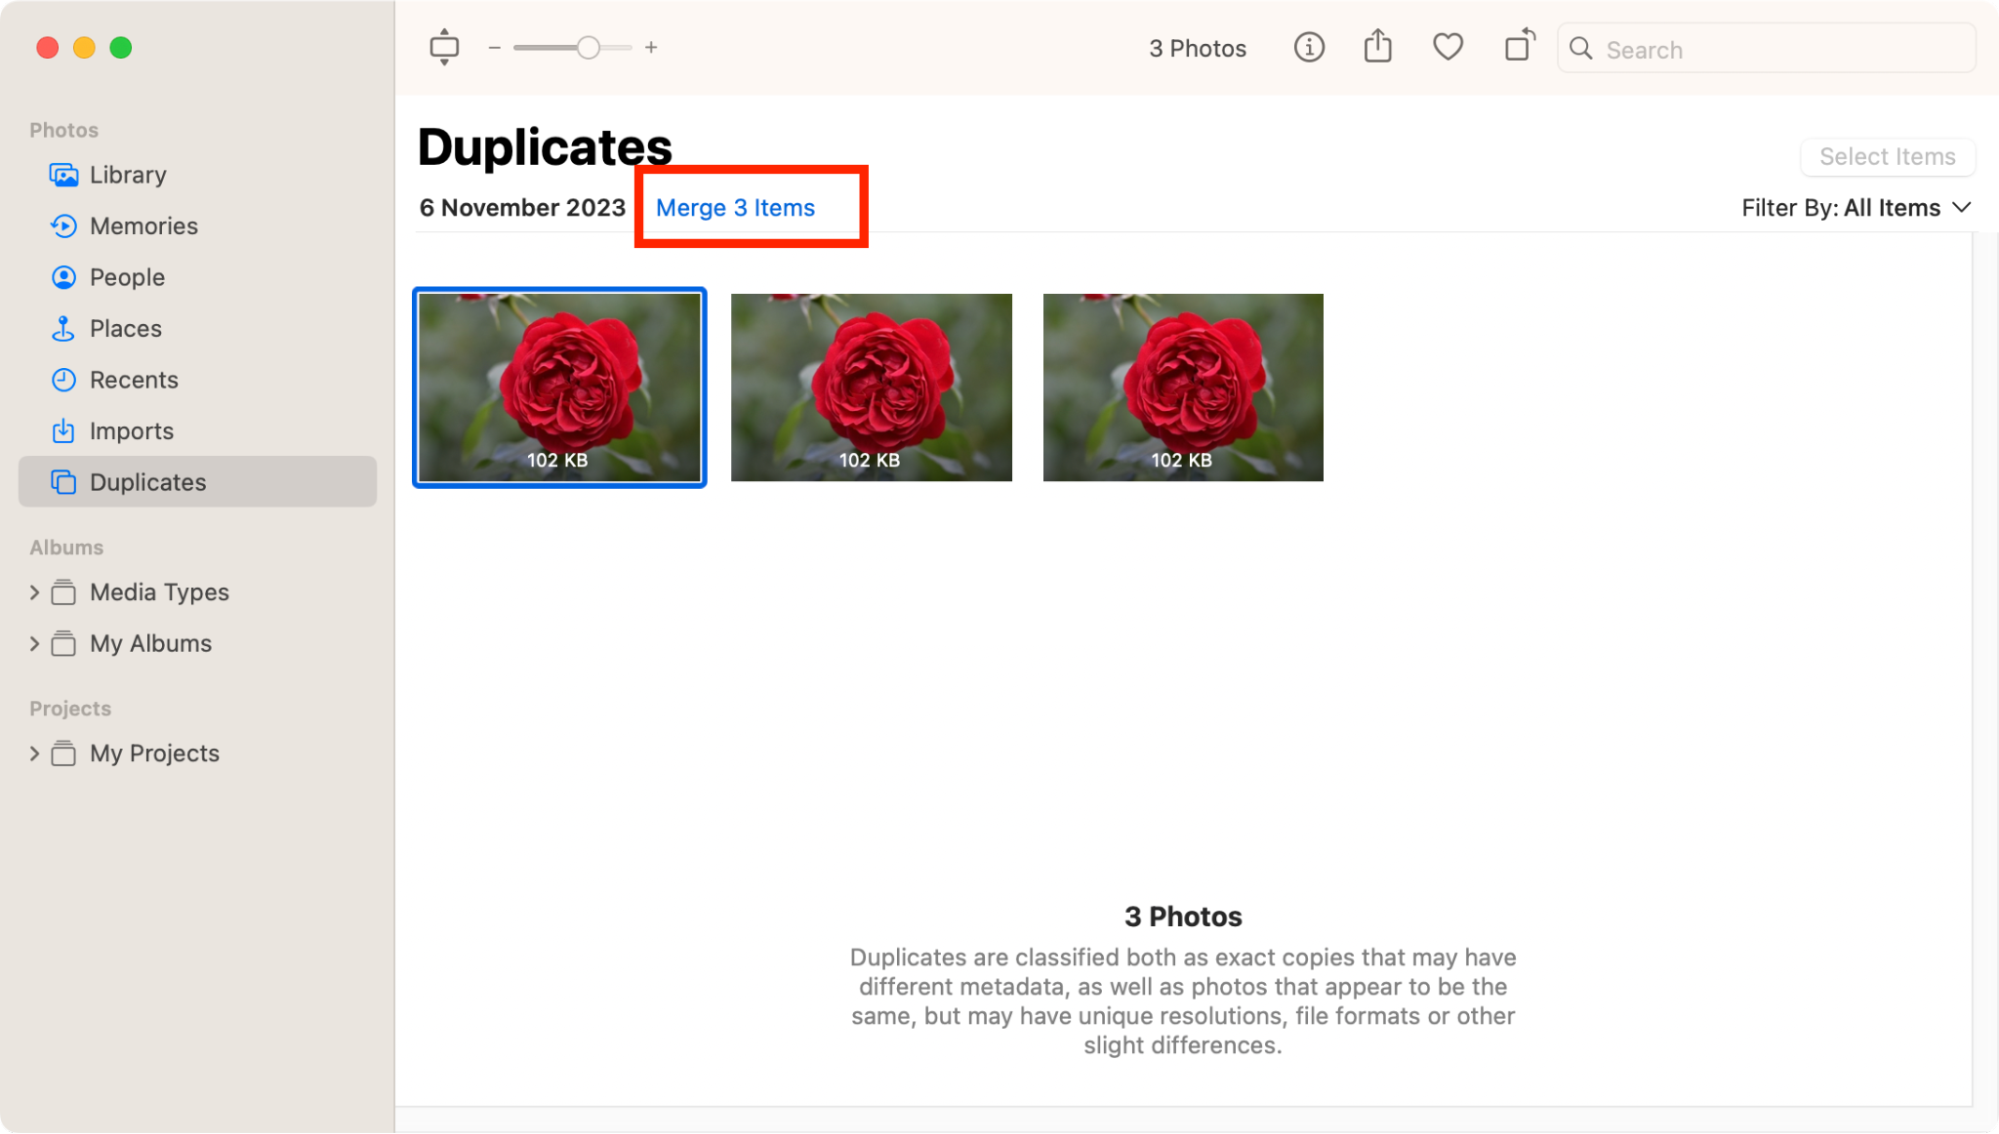
- Open the Photos app and select Duplicates in the sidebar
- Choose the duplicate photos you intend to merge by either selecting photos in one row and merging them, or selecting photos in multiple rows and merging them in one go
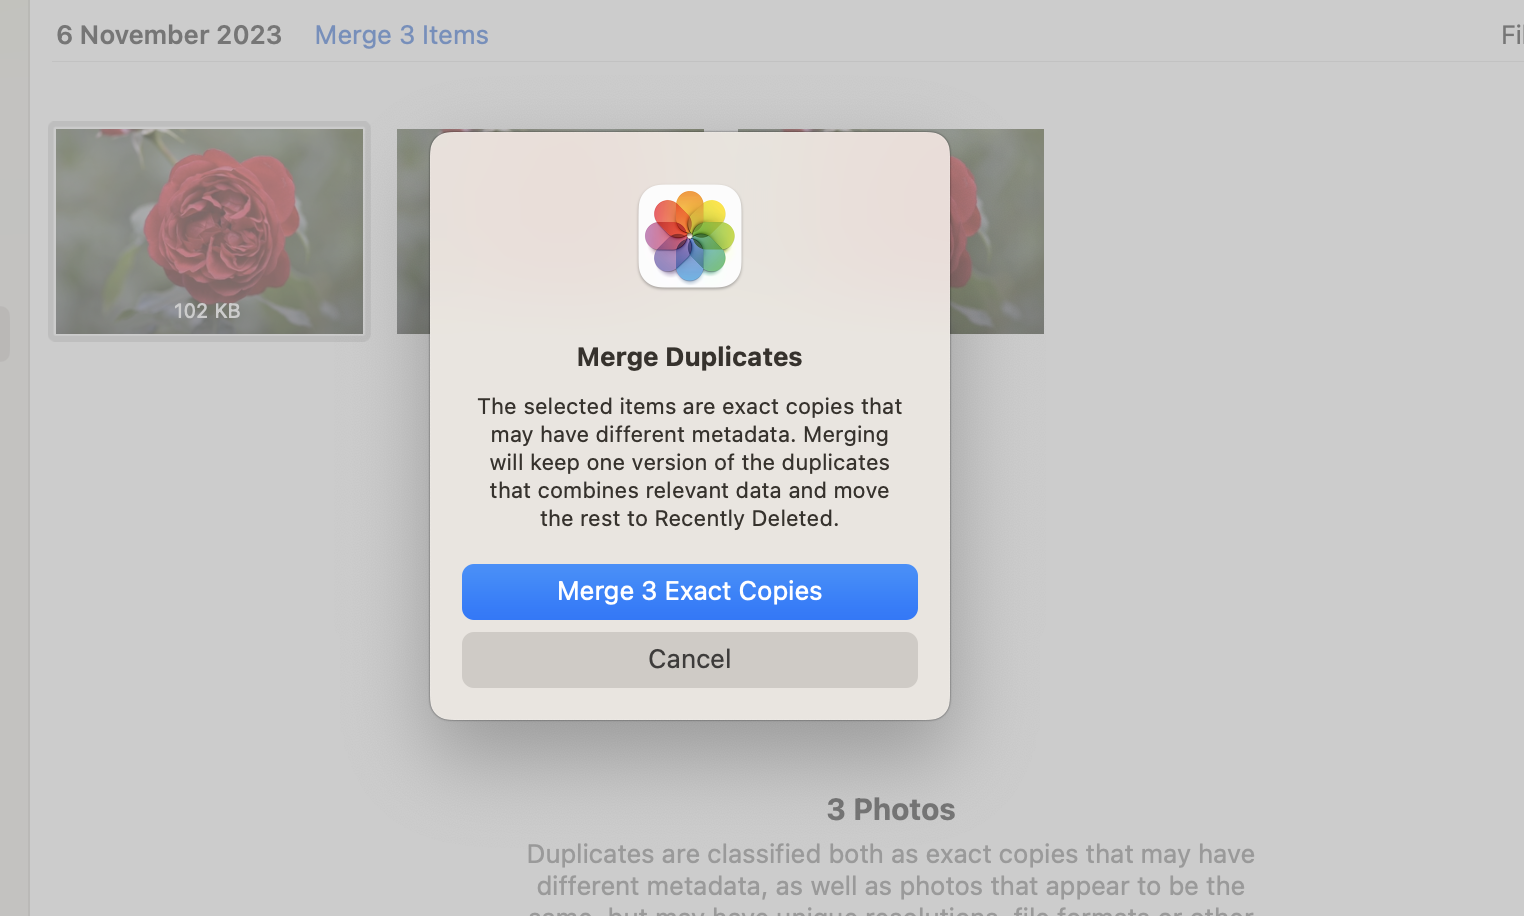
- Click Merge Photos. When you do this, Mac keeps the original version and deletes the copies.
Note from the team: The Photos app will look for duplicates when it’s not running. It can also take a long time to index your photos and show you the duplicates. If you don’t see any duplicates in Photos, then you might just have to give it more time.
Manually get rid of double photos on Mac with Finder
Although duplicate pics (and also videos) could be anywhere on your Mac, you won’t have to scour every folder to look for them. The macOS Finder app has a Smart Folders function, which lets you sort files by specific criteria—useful when you’re trying to identify and clean up duplicate photos.
How to use Smart Folders in Finder to check for duplicate photos:
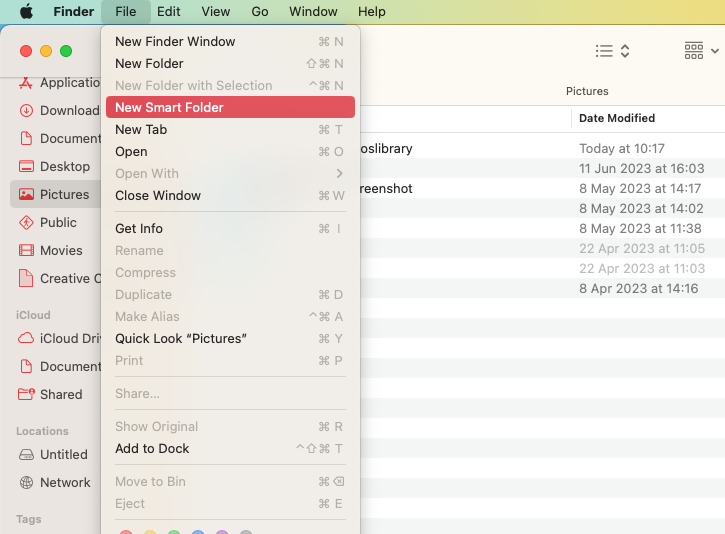
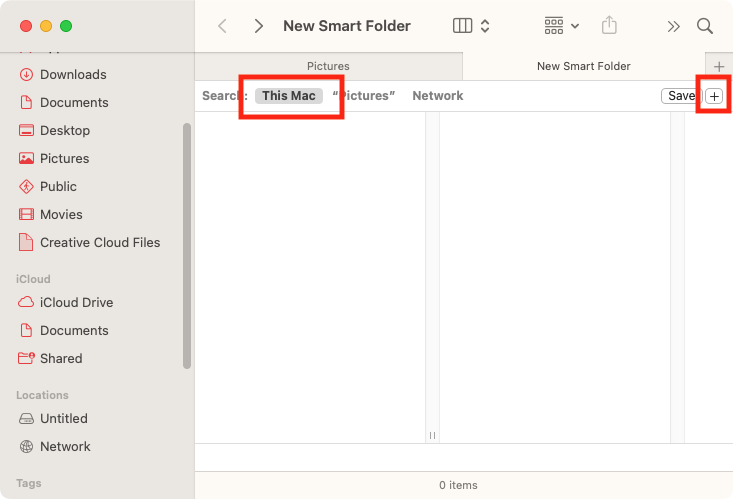
- Open a new Finder window, then click File > New Smart Folder in the menu bar
- Select This Mac, and click on + in the upper-right corner
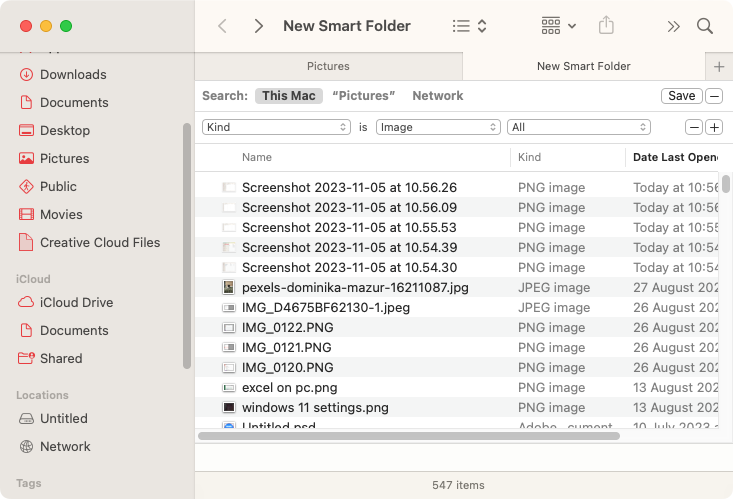
- Select Kind in the first drop-down menu and Image in the second one. Here, you will be able to easily spot duplicate images. You may also want to sort the files by Name
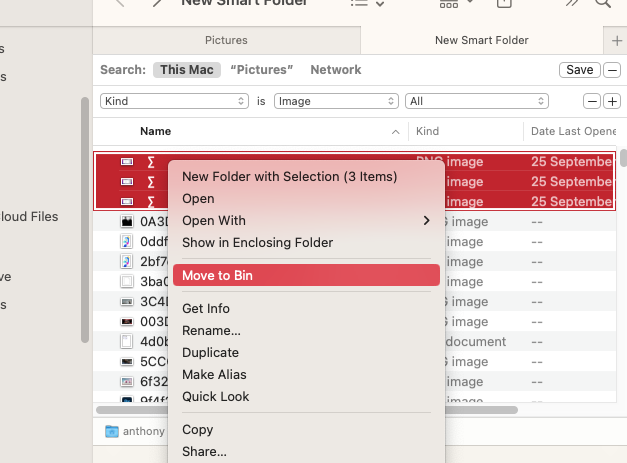
- Select the photos you’d like to delete. Right-click on the images, and select Move to Trash, then empty the Trash.
Hint from our experts: Although Smart Folders can help you find duplicate images, it’s not the best method. Not only is it slow and laborious, but it only works if the doubled-up images have the same or similar file names. It also can’t be used to find similar photos on your Mac, which are almost but not quite the same.
Remove duplicate photos automatically with MacKeeper
MacKeeper has a Duplicates Finder feature that lets you easily check for duplicate photos and other files, so you can erase them en masse. Not only is it much more efficient than using Smart Folders, but it’s more powerful than Apple’s Photos app too—as well as exact copies of images, MacKeeper can find similar photos and duplicate videos, no matter where they’re stored on your Mac. You can also run scans on demand, rather than having to wait, as you do with Photos.
To get rid of duplicate photos and files with MacKeeper:
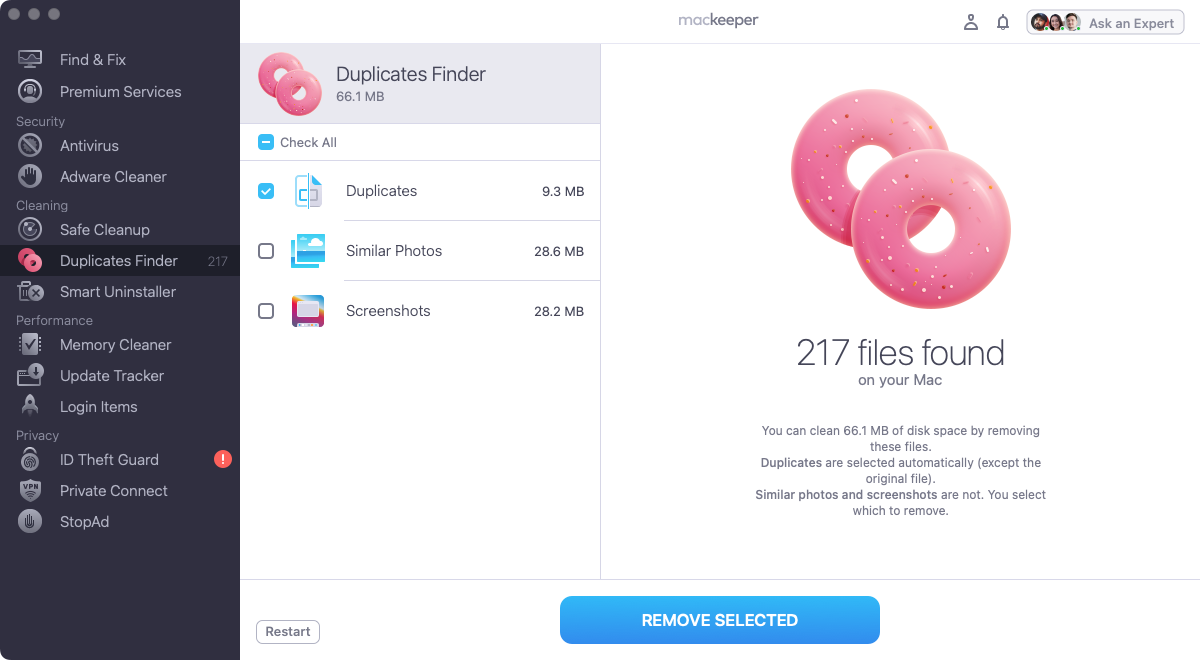
- Download and install MacKeeper. Open it and select Duplicates Finder from the sidebar.
- Click the Start Scan button
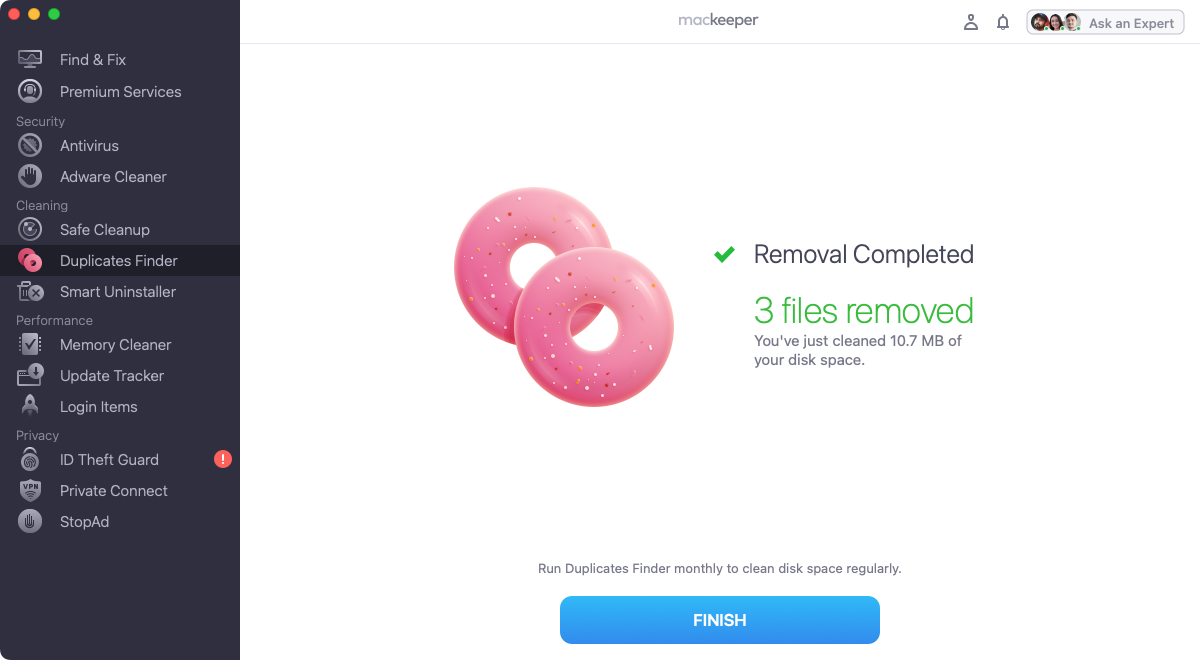
- Once the scan is complete, select what you want to erase, and click Remove Selected
- Click Finish.


Does Mac have a duplicate file finder?
macOS itself doesn’t have a duplicate file cleaner built in, but since macOS Ventura, the Mac Photos app will automatically detect duplicates as you import them. The same app is able to scan your library for duplicates. However, it can’t find duplicate photos that haven’t been added to the Photos library.
FAQ about deleting duplicate photos on Mac
1. How to mass delete double photos on Mac?
The easiest way to delete a large number of duplicate photos in one go is to use MacKeeper’s Duplicates Finder.
- Install MacKeeper, and select the Duplicates Finder tool
- Click Start Scan, and wait for the scan to finish
- When it’s done, select what you want to delete, and click Remove Selected.
2. How to get rid of similar photos on Mac?
There are three main ways to track down and remove duplicate photos from your Mac:
- Manually, using Finder’s Smart Folders feature: Time-consuming and very limited
- With the Apple Photos built-in Duplicates function: Slow and only finds exact copies in the Photos library
- Automatically with MacKeeper’s Duplicates Finder: Fast, efficient, and able to find similar as well as duplicate images, anywhere on your Mac.
3. How to eliminate duplicate photos in iPhoto?
Newer versions of macOS have replaced iPhoto with Photos. The older iPhoto app doesn’t have the Smart Albums feature. As a result, you’ll have to manually sort through the Library folders to find similar image files.
With photos located in different folders, you face the risk of deleting the wrong file. You can avoid the mistake by following these steps:
- Click on the image
- Press Command+I to reveal the file info and verify the photo’s name, file size, and resolution
- Repeat the steps for other images.
The photo’s name lets you see if it’s an exact duplicate, while the file size and resolution let you know which ones have higher quality and should be retained.
Wrapping up on how to remove duplicate photos
Staying on top of duplicates is important if you want to prevent useless files from eating up valuable drive space. Whether you choose to do it manually or using software, make a habit of deleting these junk files from your Mac.
While Smart Folders is an okay starting point, you should, at the very least, use Apple Photos’ Duplicates feature to manage a larger number of duplicate images. If you’re serious about keeping your photo library in shape and your Mac clear of junk, then MacKeeper’s Duplicates Finder is the way to go. With its ability to automatically find duplicate and similar images anywhere on your Mac, it’ll save you time and a lot of unnecessary hard work.
Read more:


