To clear the Spotify cache on your Mac:
- Go to Spotify > Settings.
- Look in Offline storage location, locate your cache folders, and delete them from your Mac.
- Close and restart Spotify.
Over 600 million people rely on Spotify to soundtrack their days, and the world’s most popular music streaming service lets you create and download as many playlists as your device will allow. But as you use Spotify more, you may notice that the app—or your computer—stops performing at an optimal level. Usually, having too many items stored (particularly in a cache) is the culprit.
When your Mac doesn’t run properly, you’ll often have to spend longer completing tasks than would otherwise be necessary. Another annoyance is that you’ll needlessly increase your stress levels when you get frustrated each time your computer crashes.
But while it’s never nice when your Mac runs slowly, it’s very easy to clear Spotify cache on Mac. Today, I’ll show you how to do that and also reveal what happens when you remove the cache to ensure that you keep your computer safe.
Continue reading to learn in more detail how to clear cache on Mac.
Before we start
Although you can manually remove the Spotify cache on your Mac, it’s a time-consuming process. Moreover, you might risk deleting an essential cache that could result in further performance-related issues on your device. You can mitigate these issues with a third-party removal tool like MacKeeper’s Safe Cleanup tool.
Safe Cleanup quickly and safely cleans up all your non-essential Mac caches for Spotify and many other programs. You can also use it for several other handy purposes, such as emptying your Trash and cleaning needless logs.
Here’s how to use the feature:
- Download MacKeeper.
- After downloading the app, go to Cleaning > Safe Cleanup.
- Select Start Scan.
- Tick the boxes for all caches, logs, etc., that you want to delete.
- Select Clean Junk Files again, confirm whether you also want to empty your Trash, and wait for MacKeeper to do the rest.
In this article you will find the following:
What is Spotify cache
The Spotify cache is where the app stores temporary files and information, and it aims to make the app more efficient. Spotify stores your songs and podcasts in the cache.
What does Spotify cache on Mac do
Spotify’s cache aims to speed up essential actions, such as playing music. You normally start each session with a new cache, regardless of whether you use your computer or smartphone.
Do you need to clear the Spotify cache on Mac
It’s not necessary to empty the Spotify cache on Mac, but doing so is sometimes beneficial. For instance, Spotify’s cache consumes significant space and sometimes makes other apps run slowly.
Сan you delete Spotify cache on Mac
Yes, it’s entirely possible to delete the Spotify cache on your Mac. While temporary files are usually removed at the end of each session, Spotify stores caches in folders on your computer.
What happens if you clear the Spotify cache
Clearing the Spotify cache on your Mac normally won’t cause the app to malfunction, but you’ll need to log in again. Furthermore, you’ll have to redownload your songs and playlists.
How to delete Spotify cache on Mac manually
To manually delete the Spotify cache on your Mac, follow our hints below:
- Open Spotify and go to your profile picture.
- Scroll down to Storage and select Clear cache.
Important: Manually emptying the Spotify cache on your Mac depends on whether you want to delete your downloaded or local caches. While you usually have to perform a number of steps, the process isn’t overly complicated.
Hence, in the following few sections, I’ll show you how to get rid of downloaded and local caches manually. Here’s what we’ll cover:
1. Delete local caches from Spotify on Mac
Deleting local caches from Spotify on your Mac will remove your settings and sign you out, but it should also result in your Mac running at more of an optimal level than before. You can easily readjust your settings after you’ve logged back in.
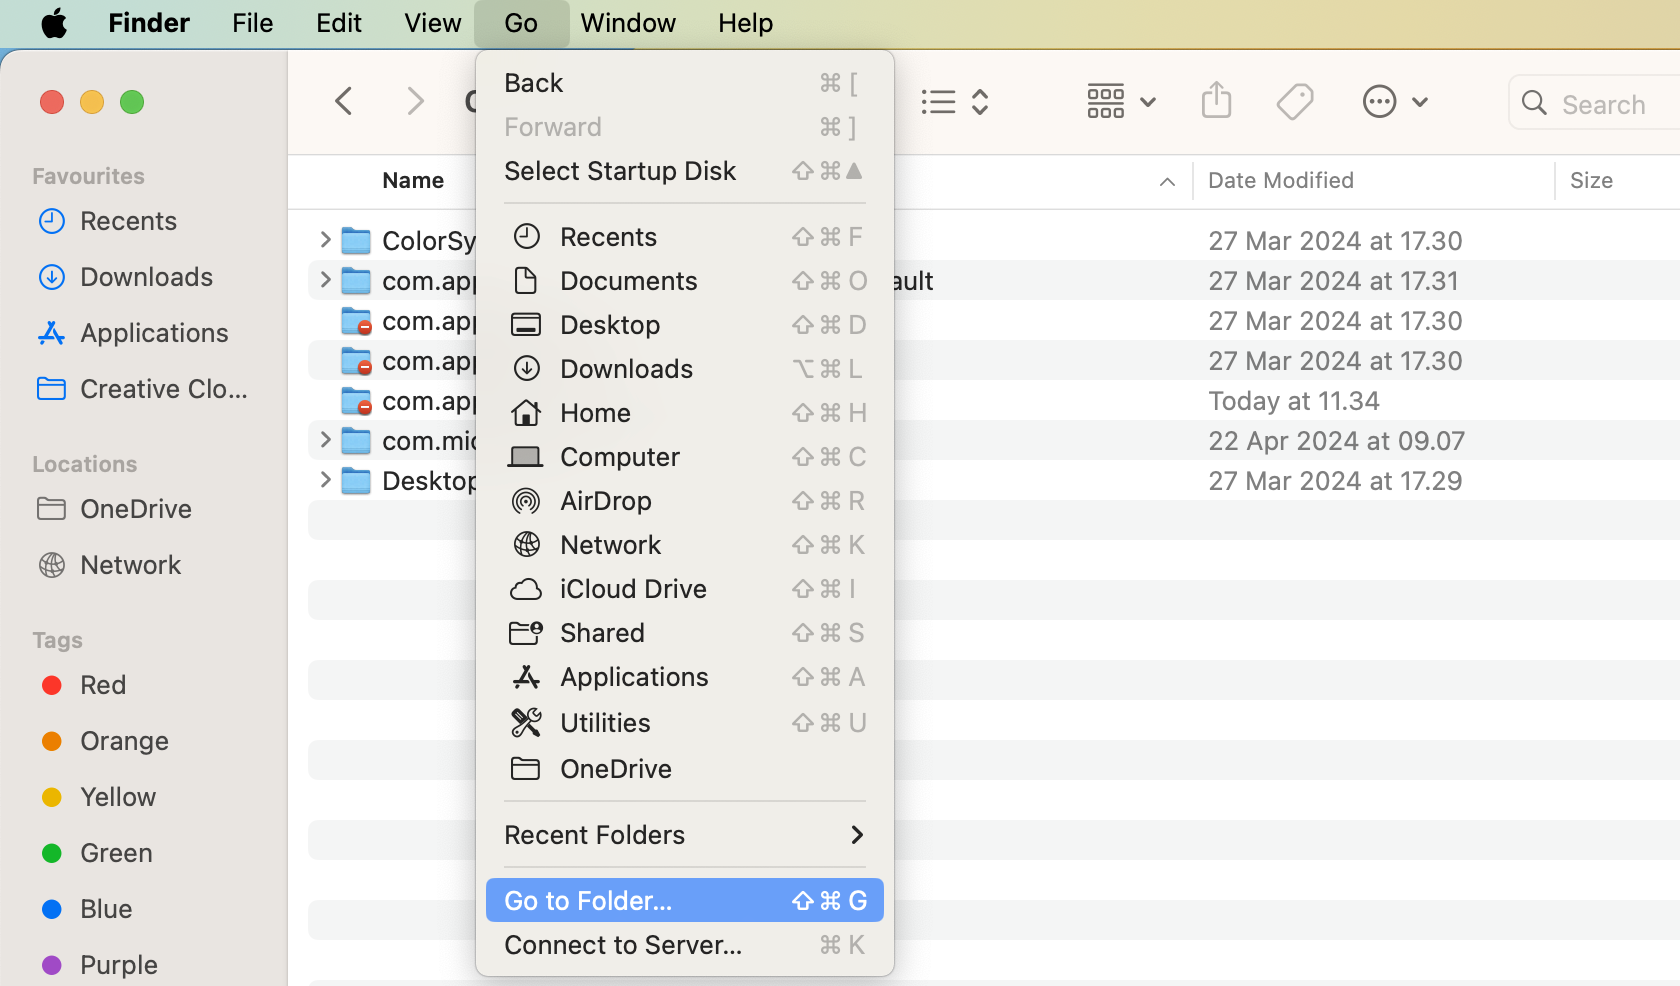
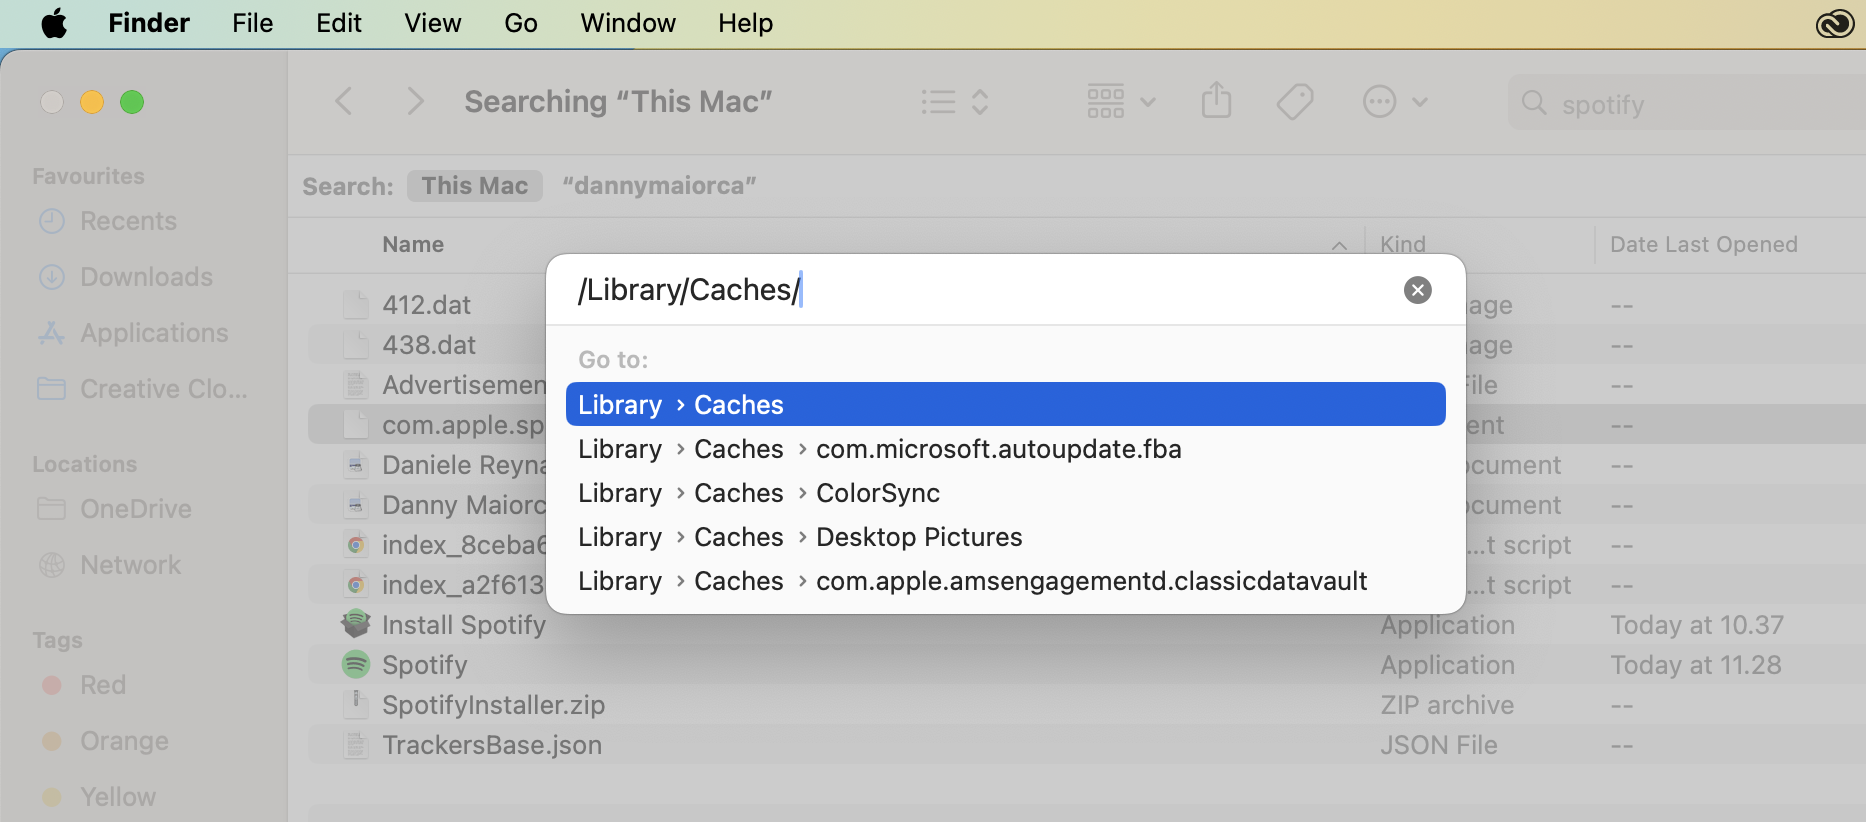
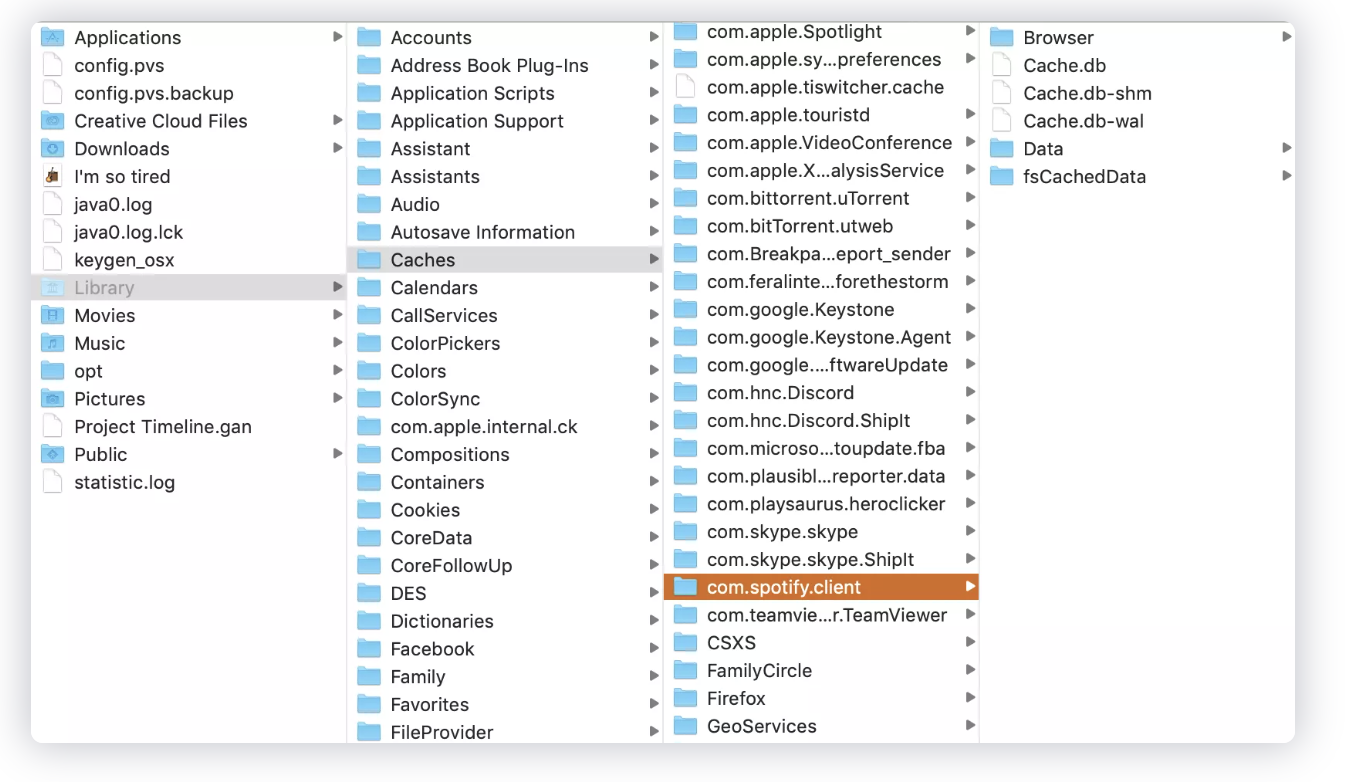
To delete local caches from Spotify on your Mac:
- Open Finder on your Mac.
- Select Go > Go to Folder.
- Search for /Library/Caches and hit the Enter key on your computer.
- Find the folder(s) related to Spotify and move it to the Trash. The folder title should read something like com.spotify.client.
Note from our experts:
Clearing your cache is just one solution to issues you may encounter with Spotify not working on Mac. You can also try restarting your computer and deleting the app before redownloading it.
2. Get rid of downloaded caches from Spotify on Mac
Downloaded caches will remove all the downloads in your library. The process is slightly different from deleting temporary files on Mac (whether Spotify or another app), and these steps will help you achieve your objective.
To remove downloaded caches from Spotify on your Mac:
- Open Spotify and click on your profile picture in the top right-hand corner.
- Tap Settings when the dropdown menu appears.
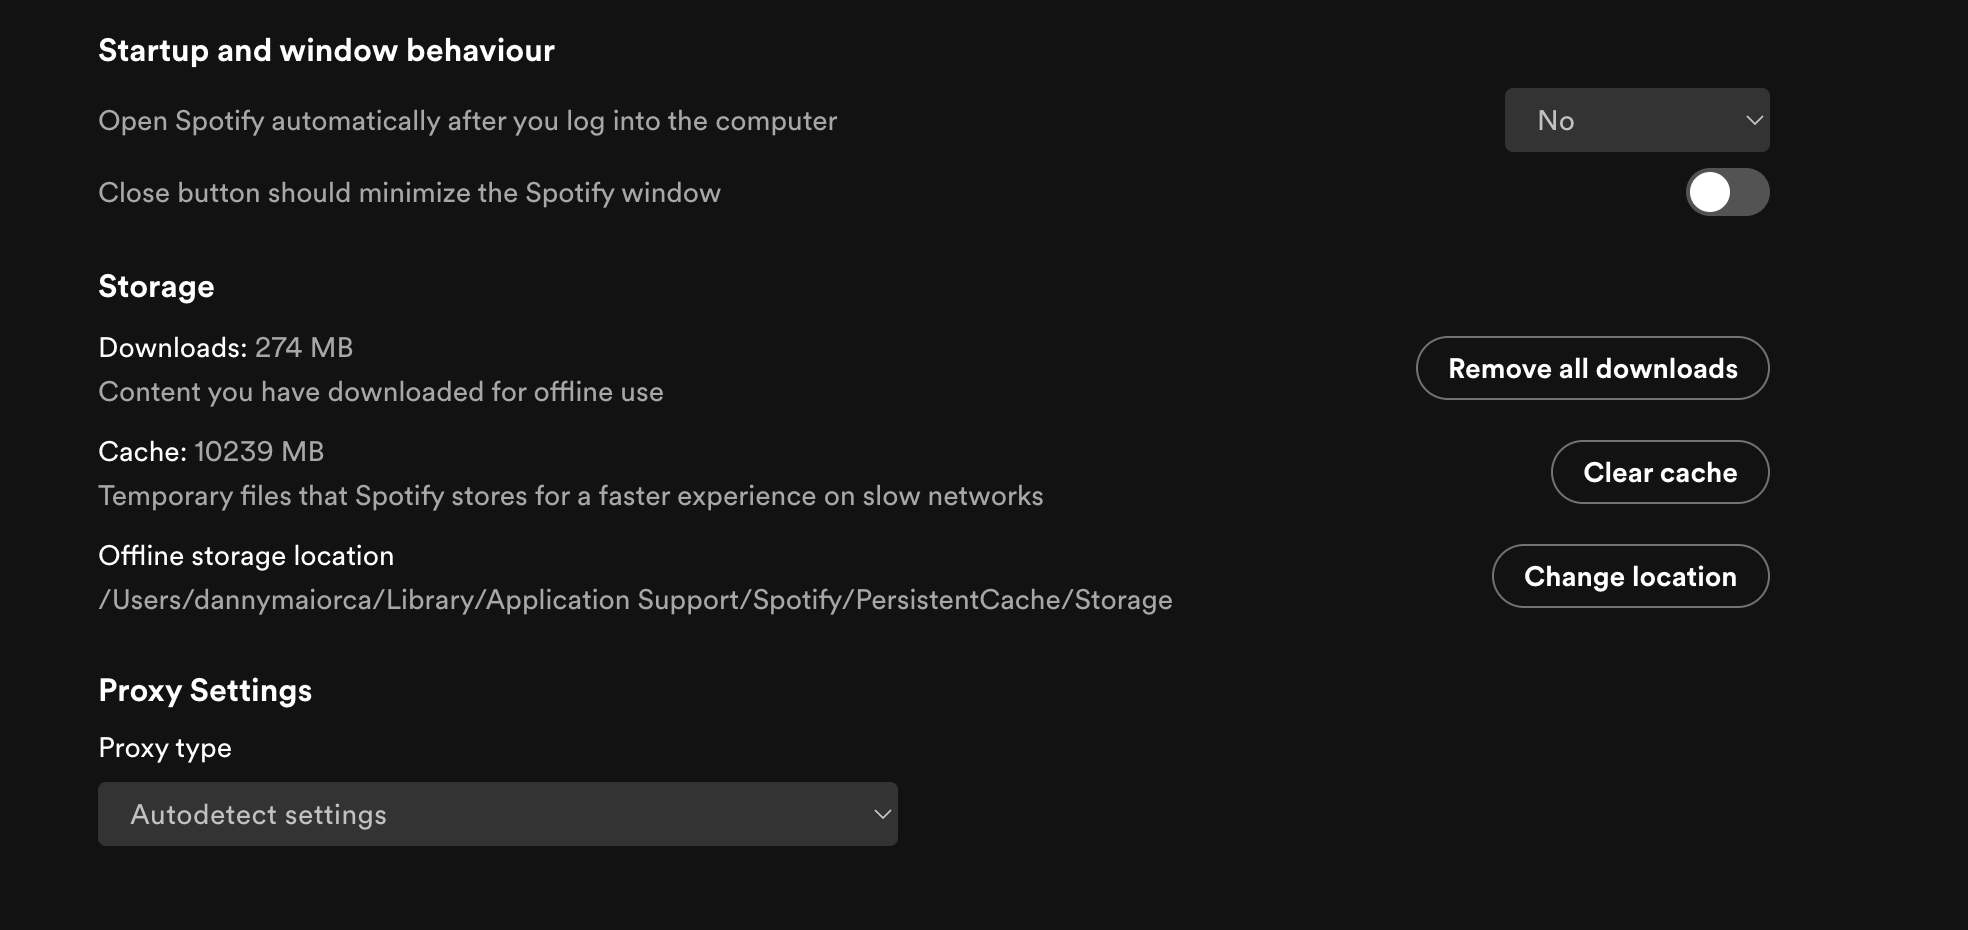
- Scroll down to Offline storage location and make a note of your file location. Unfortunately, you can’t copy and paste the file name—so you’ll need to type this in manually.
- Open Finder, select Go > Go to Folder, and type the file location you saw in Spotify.
- Remove your downloaded caches.

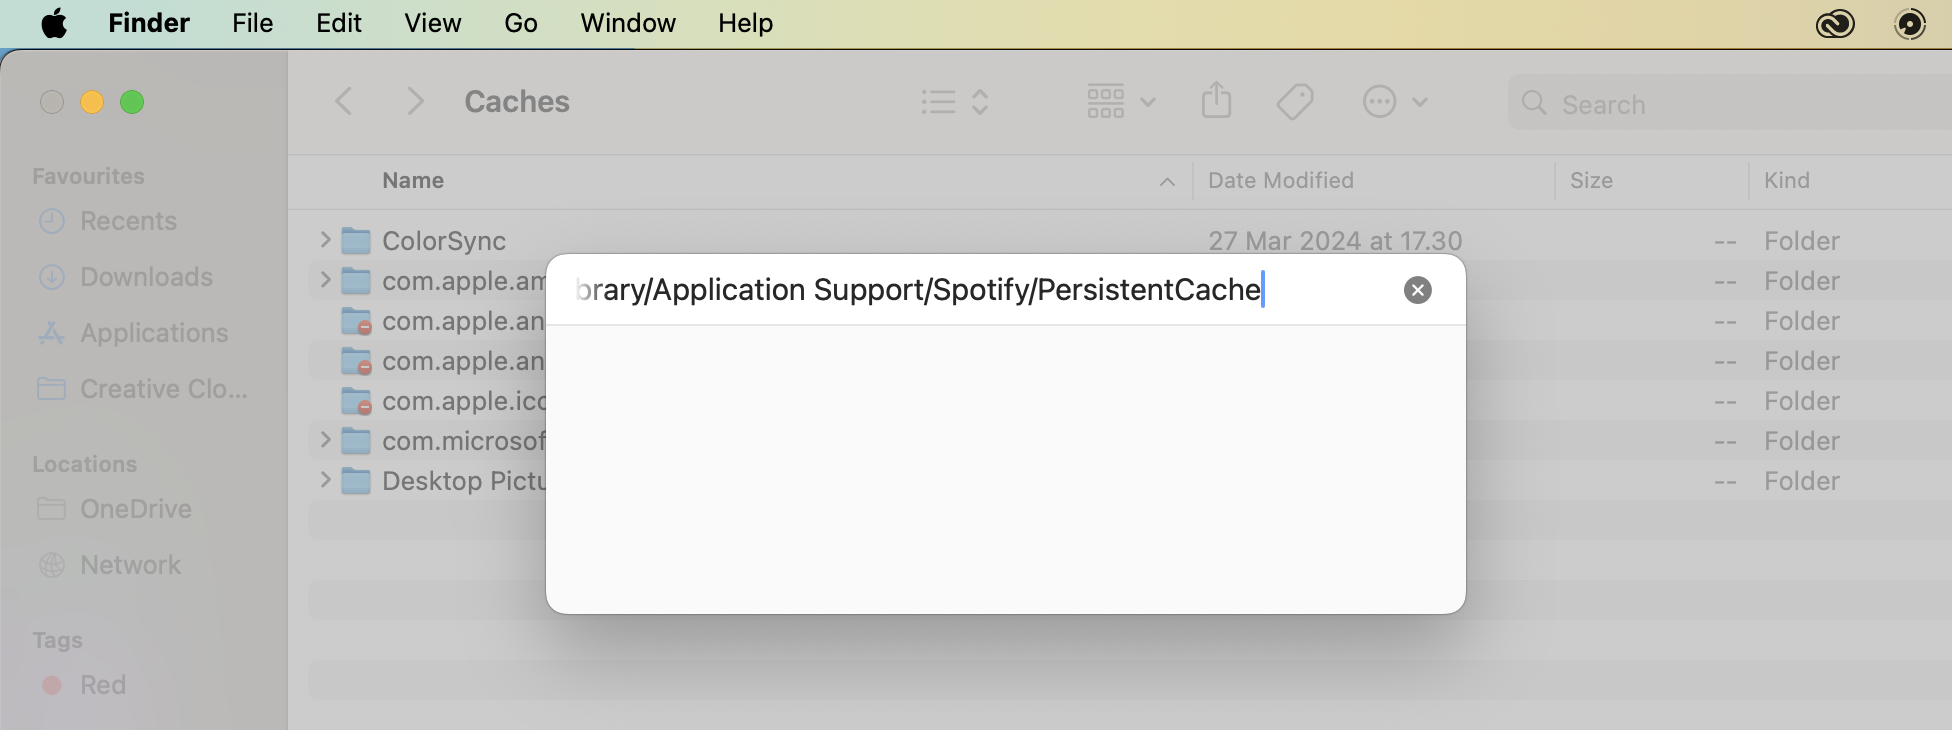
In addition to deleting Spotify’s cache on Mac, you can also remove several other caches. To clear cache on Mac, you’ll similarly need to go to Finder.
How to automatically delete Spotify cache on Mac
As you’ve seen from the previous sections, manually deleting Spotify’s cache on your Mac is sometimes quite time-consuming. MacKeeper’s Safe Cleanup solution significantly reduces the amount of time and effort required to perform the same process.
To automatically delete the Spotify cache on your Mac:
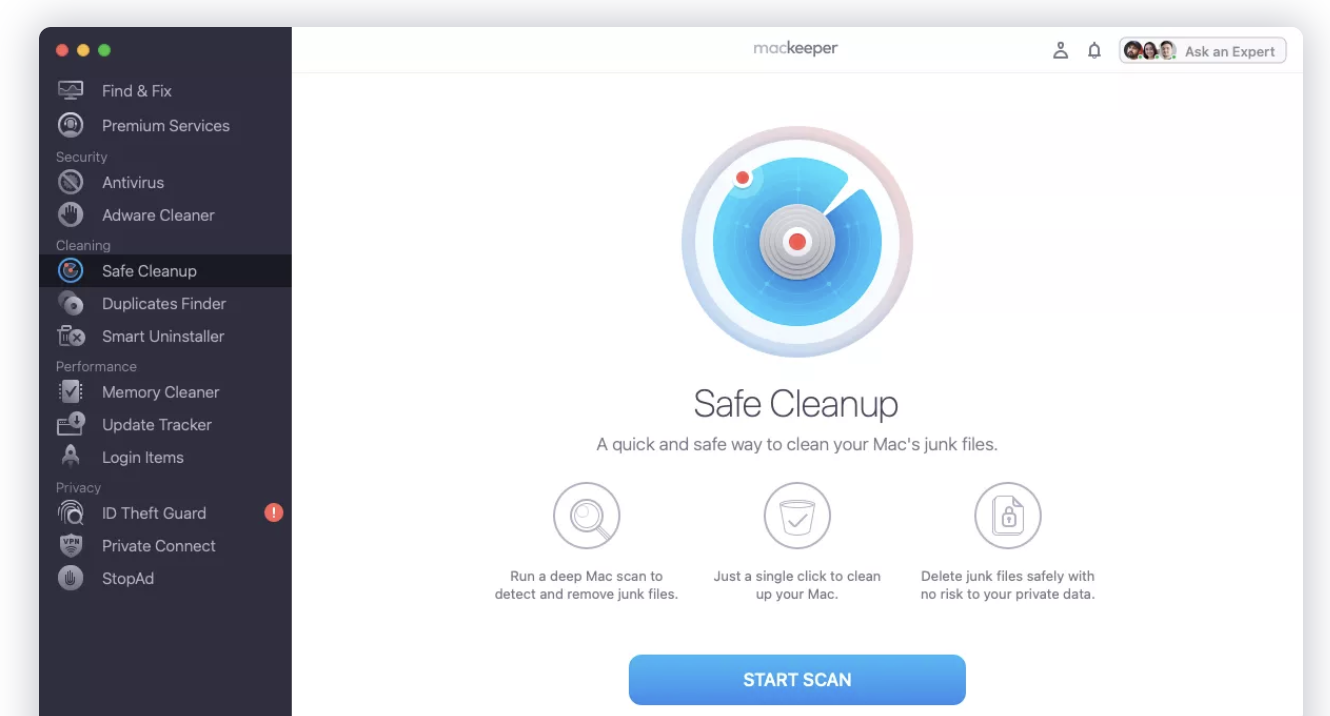
- Open MacKeeper and go to Cleaning > Safe Cleanup.
- Select Start Scan.
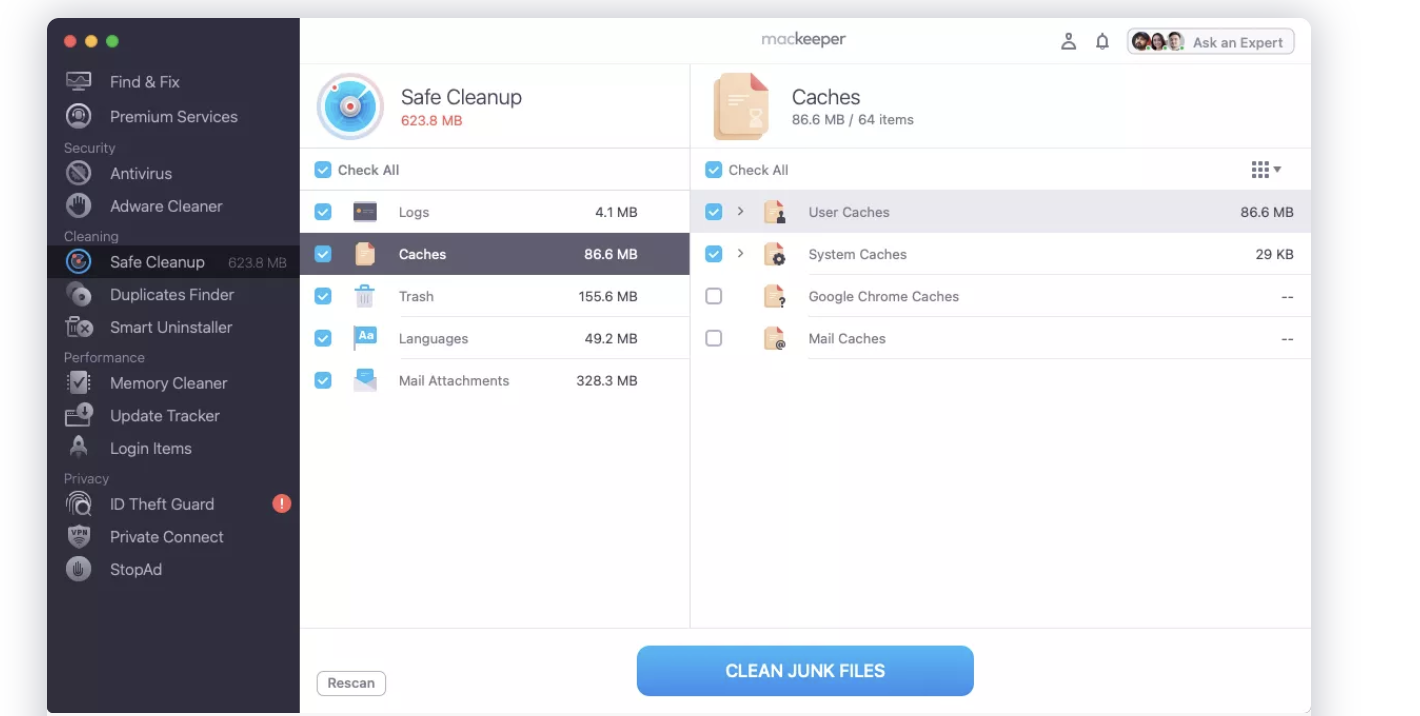
- Tick the box next to Caches if you want to remove all caches from your device or the individual ones associated with Spotify for just the music streaming service.
- Tap Clean Junk Files.
Hint from our team:
For each app you use, you may sometimes need to follow unique steps to clear their caches from your computer. For example, if you want to clear Steam cache on Mac, you can do it directly within the app.
Clearing Spotify cache on Mac: Plenty of choices
The Spotify cache is normally harmless, and the app will typically delete temporary files after your session. But sometimes, you may need to remove these files manually. Doing so has several benefits, such as speeding up your device.
You can get rid of temporary Spotify files and folders by going to Finder, and you should see where offline download locations are within the app. But since both of these are time-consuming, you’re better off using MacKeeper’s Safe Cleanup tool. By this, you’ll remove logs and other programs that you don’t want, too.
FAQ about Spotify cache
1. Will clearing the Spotify cache reduce app size on Mac?
Yes, if you delete the Spotify cache, you can reduce the app size on your Mac. For this reason, we recommend doing this if you don’t have a lot of storage space on your device.
2. How do I limit Spotify cache on Mac?
Limiting the Spotify cache size on your Mac is much easier than you think. You’ll need to use Finder for this:
- Open Finder and select Go > Go to Folder.
- Type ~/Library/Application Support/Spotify. Open the prefs file with Text Editor and type how much space you want to dedicate.
- Save your entry.
3. Does clearing Spotify cache delete playlists?
No, your playlists will still exist in Spotify after clearing the cache. However, you’ll have to redownload anything you had set for listening offline.
4. Is cache important for Spotify?
While you won’t corrupt the app by clearing the cache, it’s essential for saving settings and downloads. Even if you delete the cache, Spotify creates a new one for your next session.


