Is your macOS Mojave device limited in disk space? Maintaining enough space is crucial for a healthy functioning Mac. Considering all the files crammed on your hard drive, where do you begin? Read on to learn how to free up space on Mac Mojave.
But first, let’s delve into why and how to free up space on Mac in the first place. Besides getting annoying reminders about full storage, Mac Mojave may get burdened by a host of issues like:
- System instability: A lack of available disk space can lead to system instability, causing your Mac to slow down, freeze, or even crash.
- Application errors: Running out of disk space may result in errors and malfunctions within applications. Some applications may struggle to launch, and others may fail to save data properly.
- Performance problems: As your disk space diminishes, overall system performance may suffer, affecting the speed and responsiveness of your Mac.
- Inability to install updates: Inadequate space can prevent macOS updates and hinder the creation of Time Machine backups, leaving your system vulnerable and your data at risk.
- Difficulty saving files: With limited space, you may encounter challenges when trying to save new files or download additional content.
Yes, that’s a lot of issues. Having ample storage is crucial for a properly functioning Mac. Luckily, learning how to clean up space on Mac Mojave is relatively easy.
Before we start
The absolute easiest way to free up space on Mac Mojave is with a dedicated cleanup tool. With a few clicks, Mackeeper’s Safe Cleanup feature will deep scan your Mac for unneeded files—it then takes special care to ensure nothing important is deleted.
Here’s how to use MacKeeper’s Safe Cleanup:
- Download MacKeeper and install the app.
- Open the app and select the Safe Cleanup tool.
- Click Start Scan to target all junk files on your Mac.
- Select the files you want to remove, then click Clean Junk Files.
In this article you will find the following:
How to check available disk space on macOS Mojave
Checking how much space you have on macOS Mojave is the first step to freeing up space. Mac will give you a breakdown of your available space—including the file categories that are taking up space. This insight will help you know where to look and what type of files to delete on your Mac.
Here’s how to check your disk space on Mojave:
- Click the Apple logo > About this Mac.
- In the About this Mac window, click the Storage tab. Here, you’ll see a visual representation of your available space corresponding with the file categories.

Now that you have a general idea about your disk space, it’s time to clear up space on Mac Mojave.
How to clear up storage on Mac Mojave
Like all devices, your Mac Mojave’s storage will fill up from regular usage. You’ll have to delete your unneeded files to make more storage space.
Generally, here’s how to free up space on Mac Mojave:
- Clean up junk data
- Remove unwanted apps
- Find and delete duplicate files
- Delete old and large document files
- Delete old download files
- Empty thrash
- Remove old iOS backups
- Clean up space with Time Machine
- Free up storage space with a cleaner app
Remember, your Mac’s storage composition is unique to your usage. For example, your Mac may not have a lot of large documents, or emptying your trash might not be critical. Use this list as a general guide, and focus on the problem areas for your particular clean-up session.
Now, let’s get into how to clear up space on Mac Mojave.
1. Clean up junk data
Cleaning up junk files on Mac is often a surefire way to create more storage. With regular usage, these files tend to accumulate and take up space—often without you even noticing. Though “junk” is a broad category of files, we will focus on system cache files, which help performance and load times but do the opposite when they fill up.
Here’s how to clear junk data:
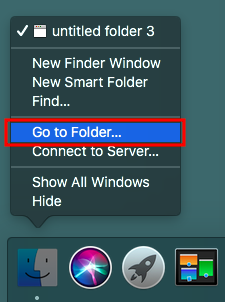
- Right-click Finder on your dock and select Go to Folder from the menu.
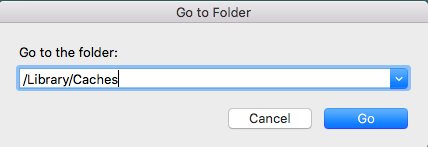
- Enter the following path: /Library/Caches, and press ENTER.
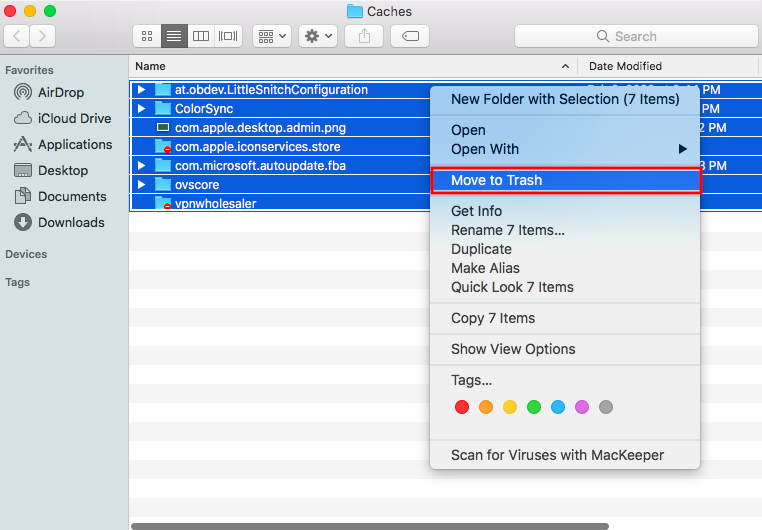
- Select all the folders, right-click, and select Move to Trash.
2. Remove unwanted apps
It’s easy to lose track of unwanted apps, but you should be paying attention. Old apps can potentially take up lots of unnecessary space. Learning how to uninstall apps on Mac properly will help you make room for things that matter—like more apps!
Here’s how to remove unwanted apps:
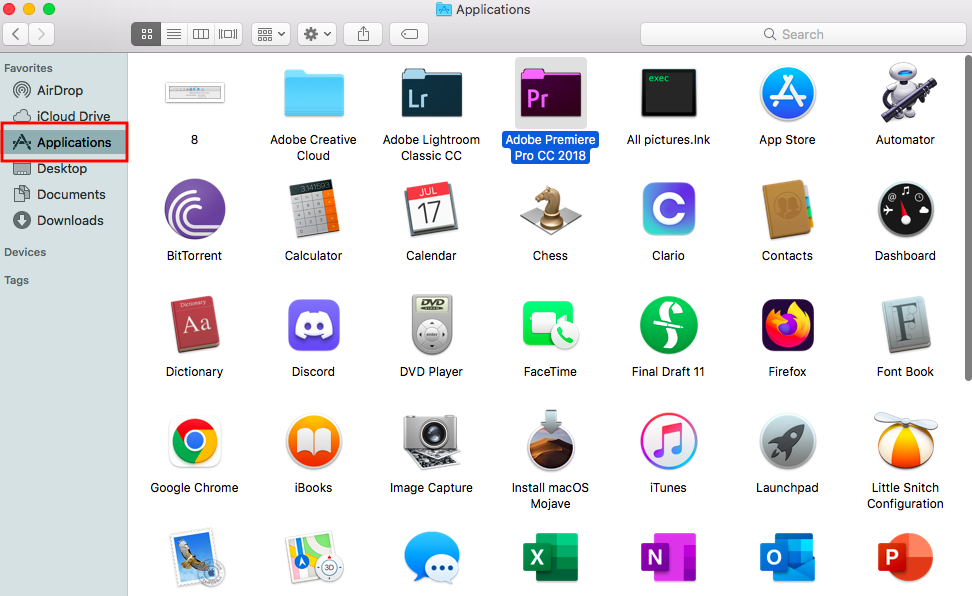
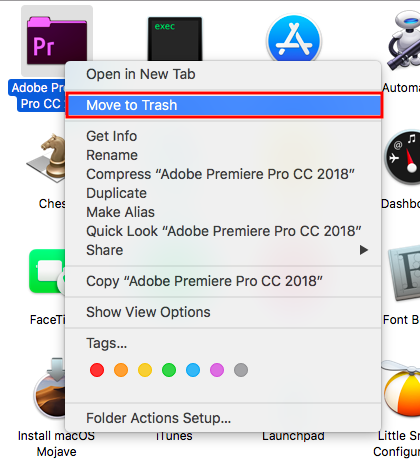
- Open Finder > Applications from the left sidebar.
- Right-click an unwanted app, and select Move to Trash.
- Empty trash.
3. Find and delete duplicate files
Duplicate files are tricky to find because they can exist in multiple places on your Mac. Learning how to use a duplicate finder in MacKeeper can save time targeting these pesky files. But there are ways to spot them, too, manually.
Here’s how to locate and delete duplicate files in individual folders:
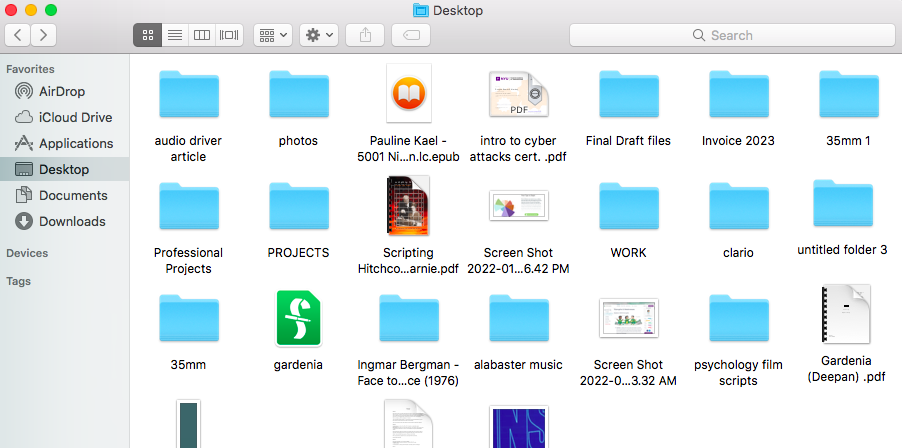
- Open Finder, then go to a folder you suspect to have duplicates.
- Click the View menu > select Kind.
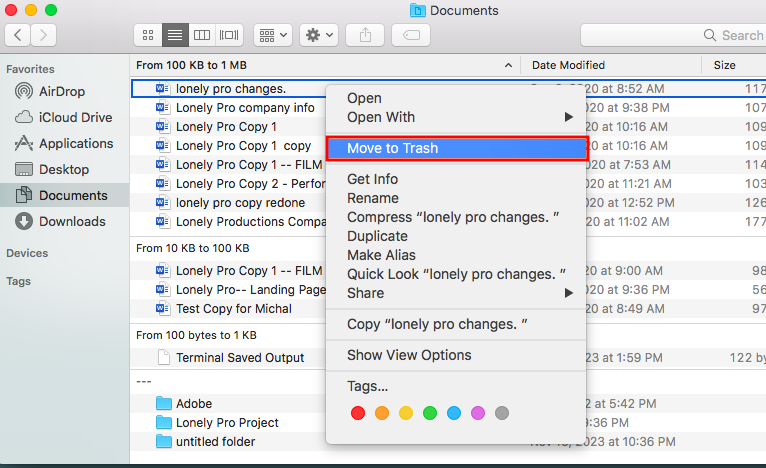
- Scroll through the list, right-click a duplicate file, and select Move to Trash.

4. Delete old and large document files
Just like a cluttered desk, document files can pile up and take up precious space. Chances are a lot of your old and large document files have outgrown their use—so trash them.
Here’s how to remove old and large document files:
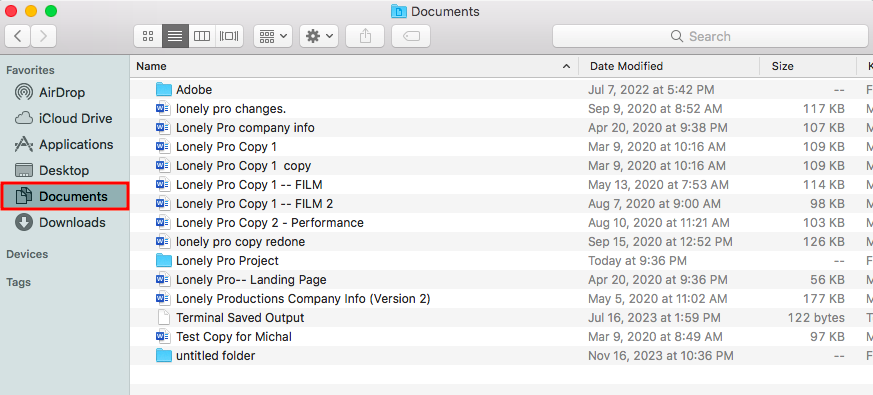
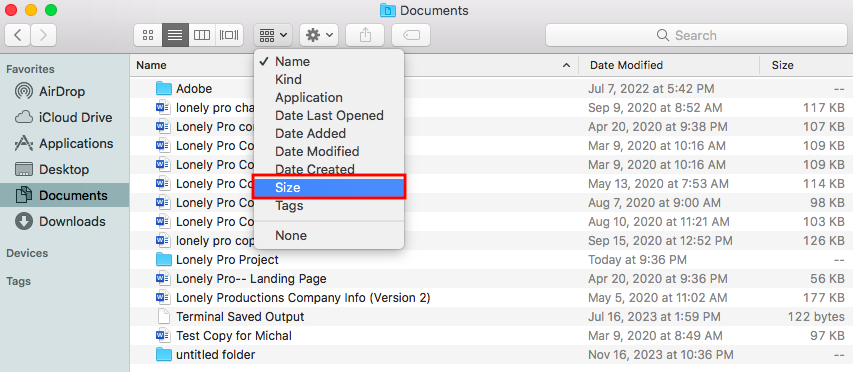
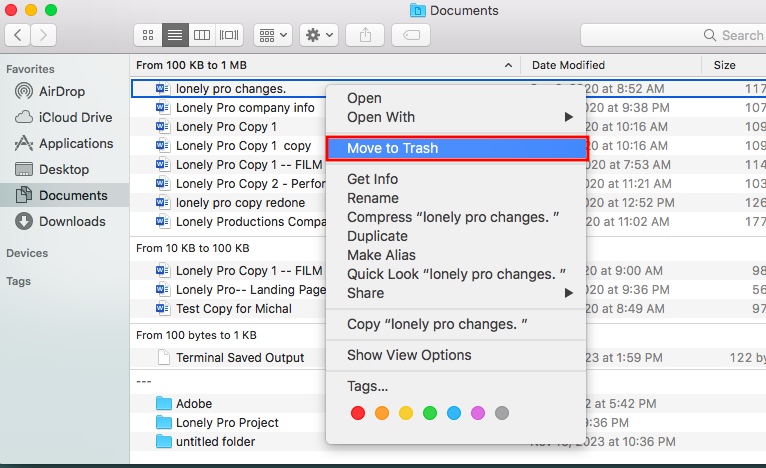
- Open Finder > Documents from the left sidebar.
- In the View menu, select Size.
- With the largest files appearing on top, right-click an unneeded file and select Move to Trash.
There’s more than one way to delete a file on Mac. Learn the tricks of the Mac cleaning trade with our guide to deleting files on Mac.
5. Delete old download files
Old download files tend to pile up quickly on your Mac’s storage because there’s a big variety of them. But whether they are temporary download files from your browser, email, software, or services, they all take up space.
Here’s how to delete old download files:
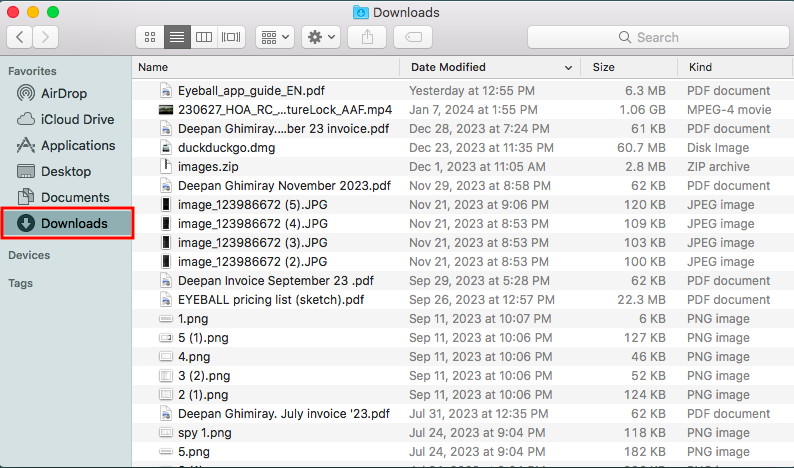
- Open Finder > Download from the left sidebar.
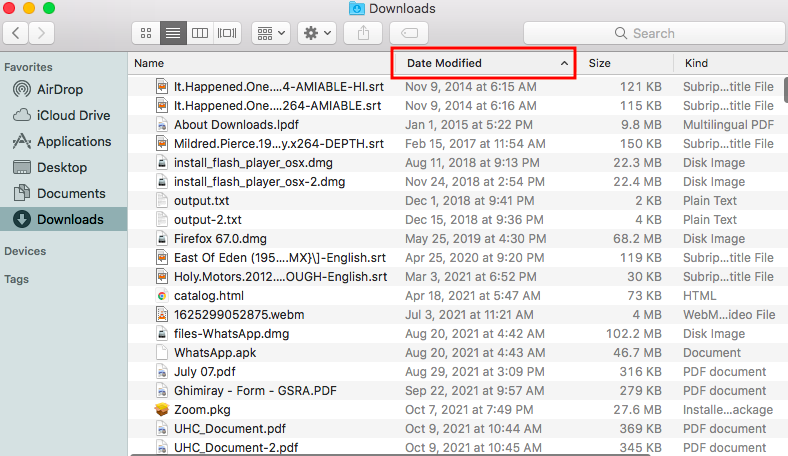
- Click on the Date added or Date modified column to sort files by date, with the oldest files appearing on top.
- Go through the files, right-click an unneeded file, and select Move to Trash.
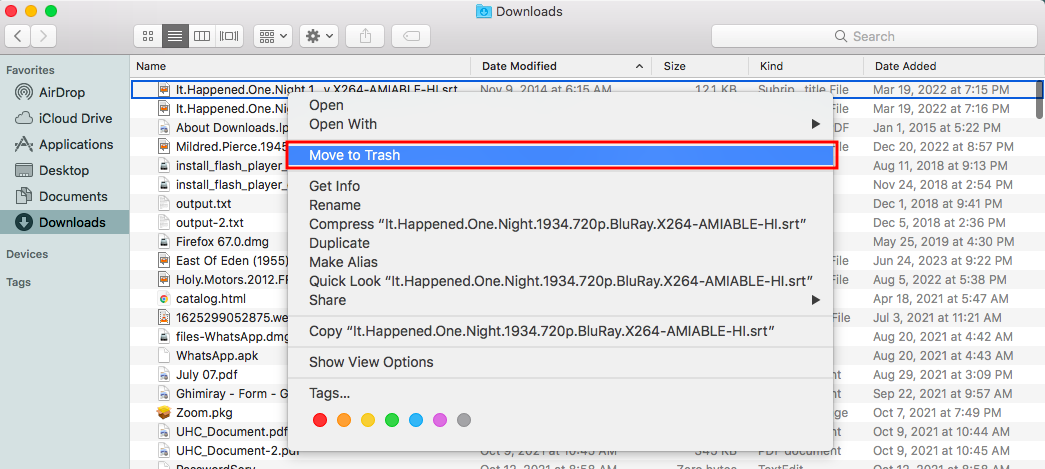
Since these files will start to accumulate again, use our guide on how to delete downloads on Mac to master the art of organizing and clearing your downloads.
6. Empty trash
Just because you dragged a file to the bin doesn’t mean it’s off your Mac’s drive. You have to “empty” your trash to delete files and clean up space on Mac Mojave truly. If this is news to you, you may have a lot of files collected in your Mac’s trash—it’s going to feel great to delete them.
Here’s how to empty Trash on Mac:
- Open the Trash icon, right-click, and select Empty Trash.
- Click Empty Trash when prompted to confirm.
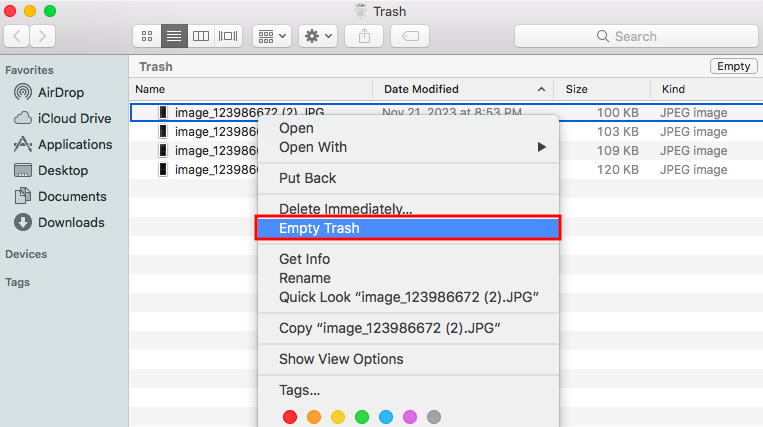
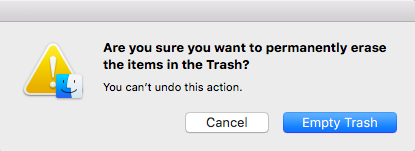
Satisfying, isn’t it? Now read our guide on how to empty trash on Mac to learn some clever ways to get the most out of Mac’s Trash feature.
7. Remove old iOS backups
Old iOS backups can be a lifesaver for your mobile device, but they take up a significant amount of storage space on your Mac. Keep your latest iOS backup, and remove old ones cramming up your Mac’s space. You don’t need backups of backups.
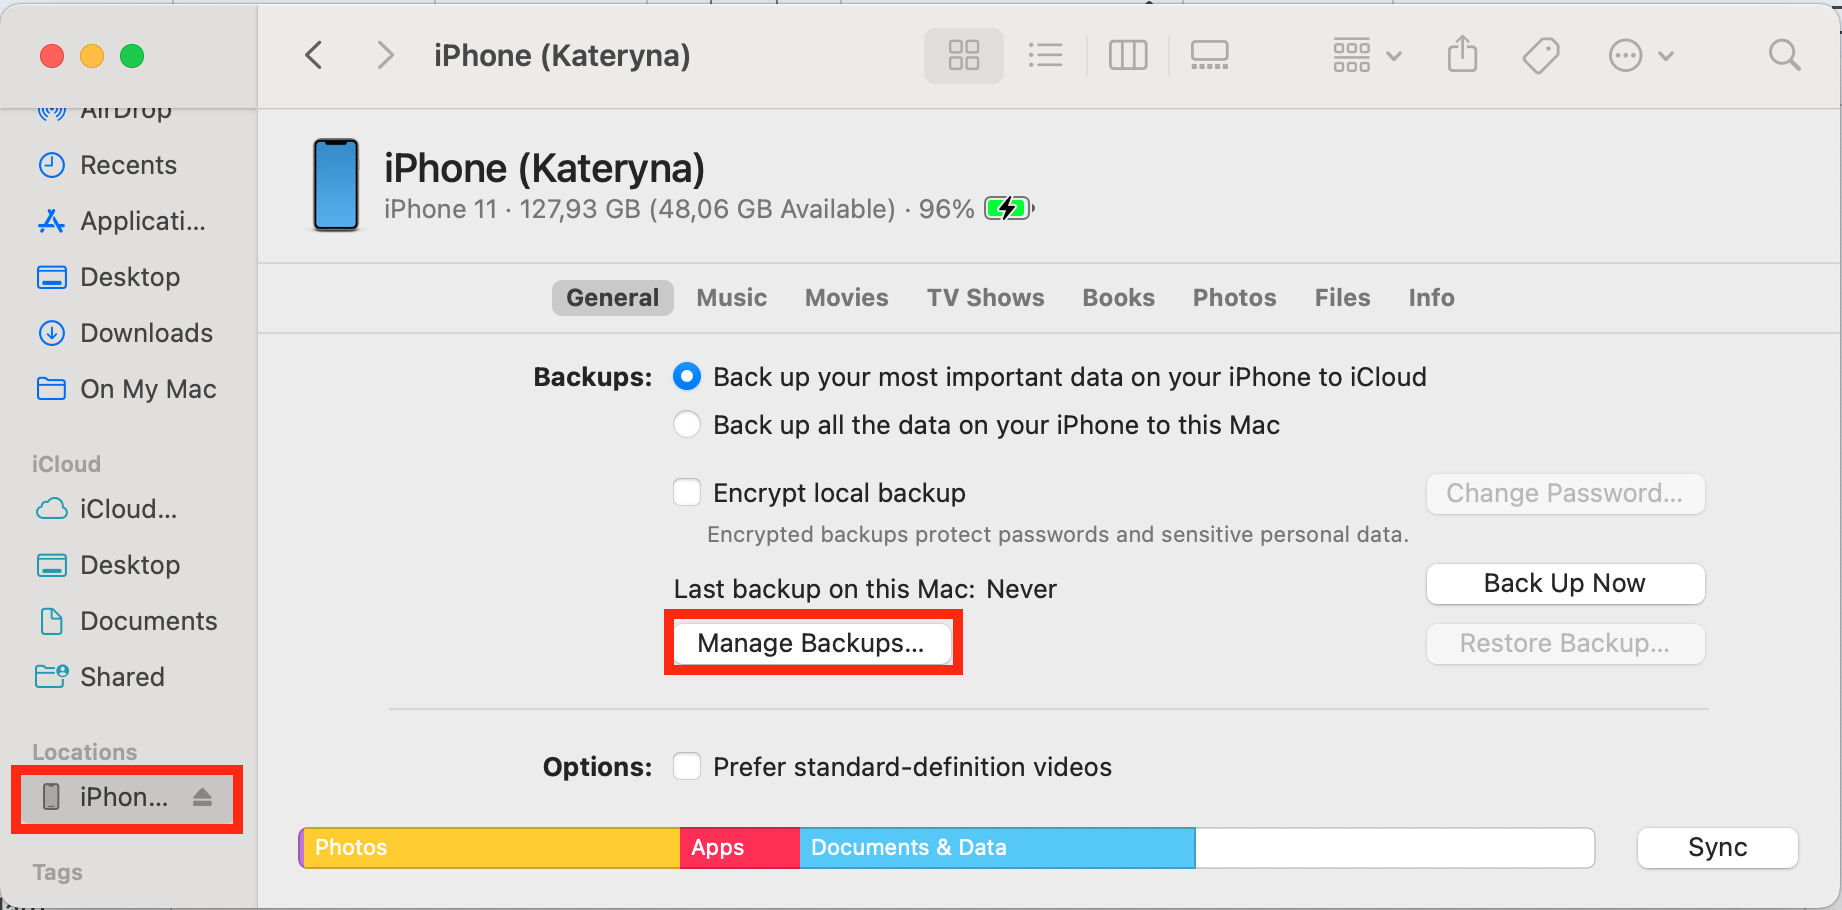
Here’s how to delete old iOS backups:
- Connect your iOS device to your Mac.
- On your Mac, open Finder > click on your iOS device under the Locations section in the left sidebar.
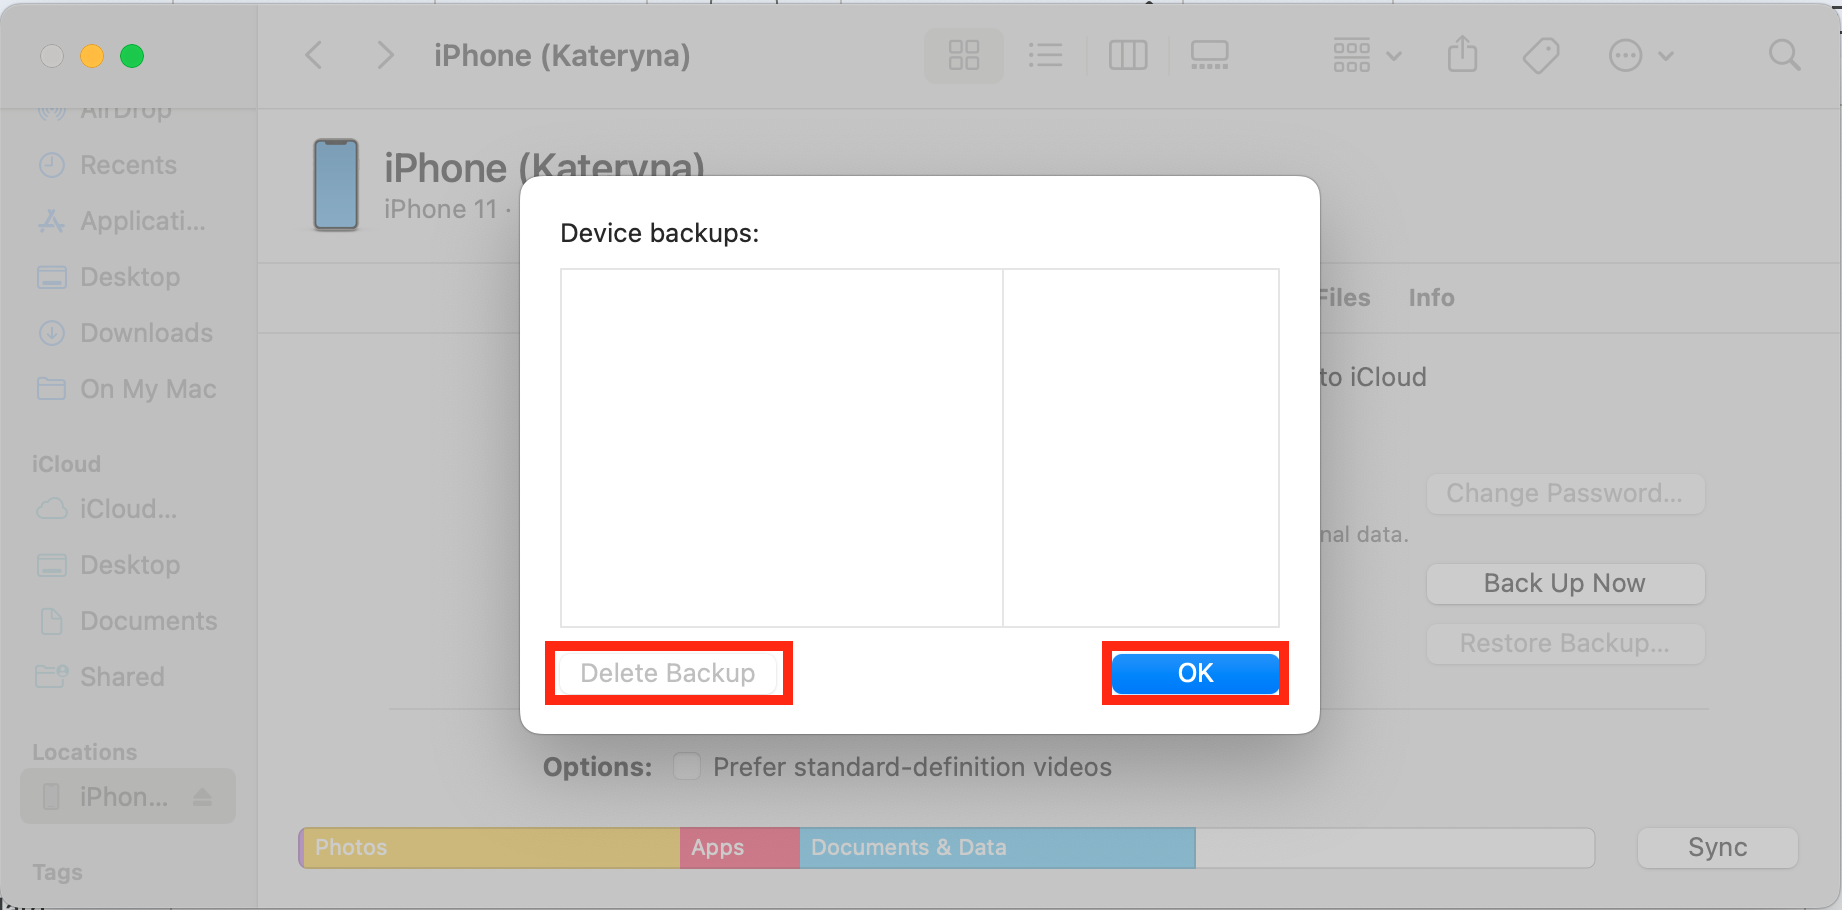
- Under the General tab, look for the Backups section and click Manage Backups.
- In the Backups window, right-click on an old backup and choose Delete Backup.
- Click Delete when prompted to confirm.
- Repeat the steps for other backups if necessary.
8. Clean up space with Time Machine
The Time Machine feature creates incremental backups of your Mac over time—as these backups accumulate, they can take up a significant amount of disk space. If you’re sure you don’t need to restore your system to a specific point in time, delete backups for that time period.
Note: Time Machine uses an external hard drive, so this technique is used more to make space on external drives rather than Mac’s internal hard drive.
Here’s how to delete individual backups on Time Machine:
- Connect your external backup drive to your Mac.
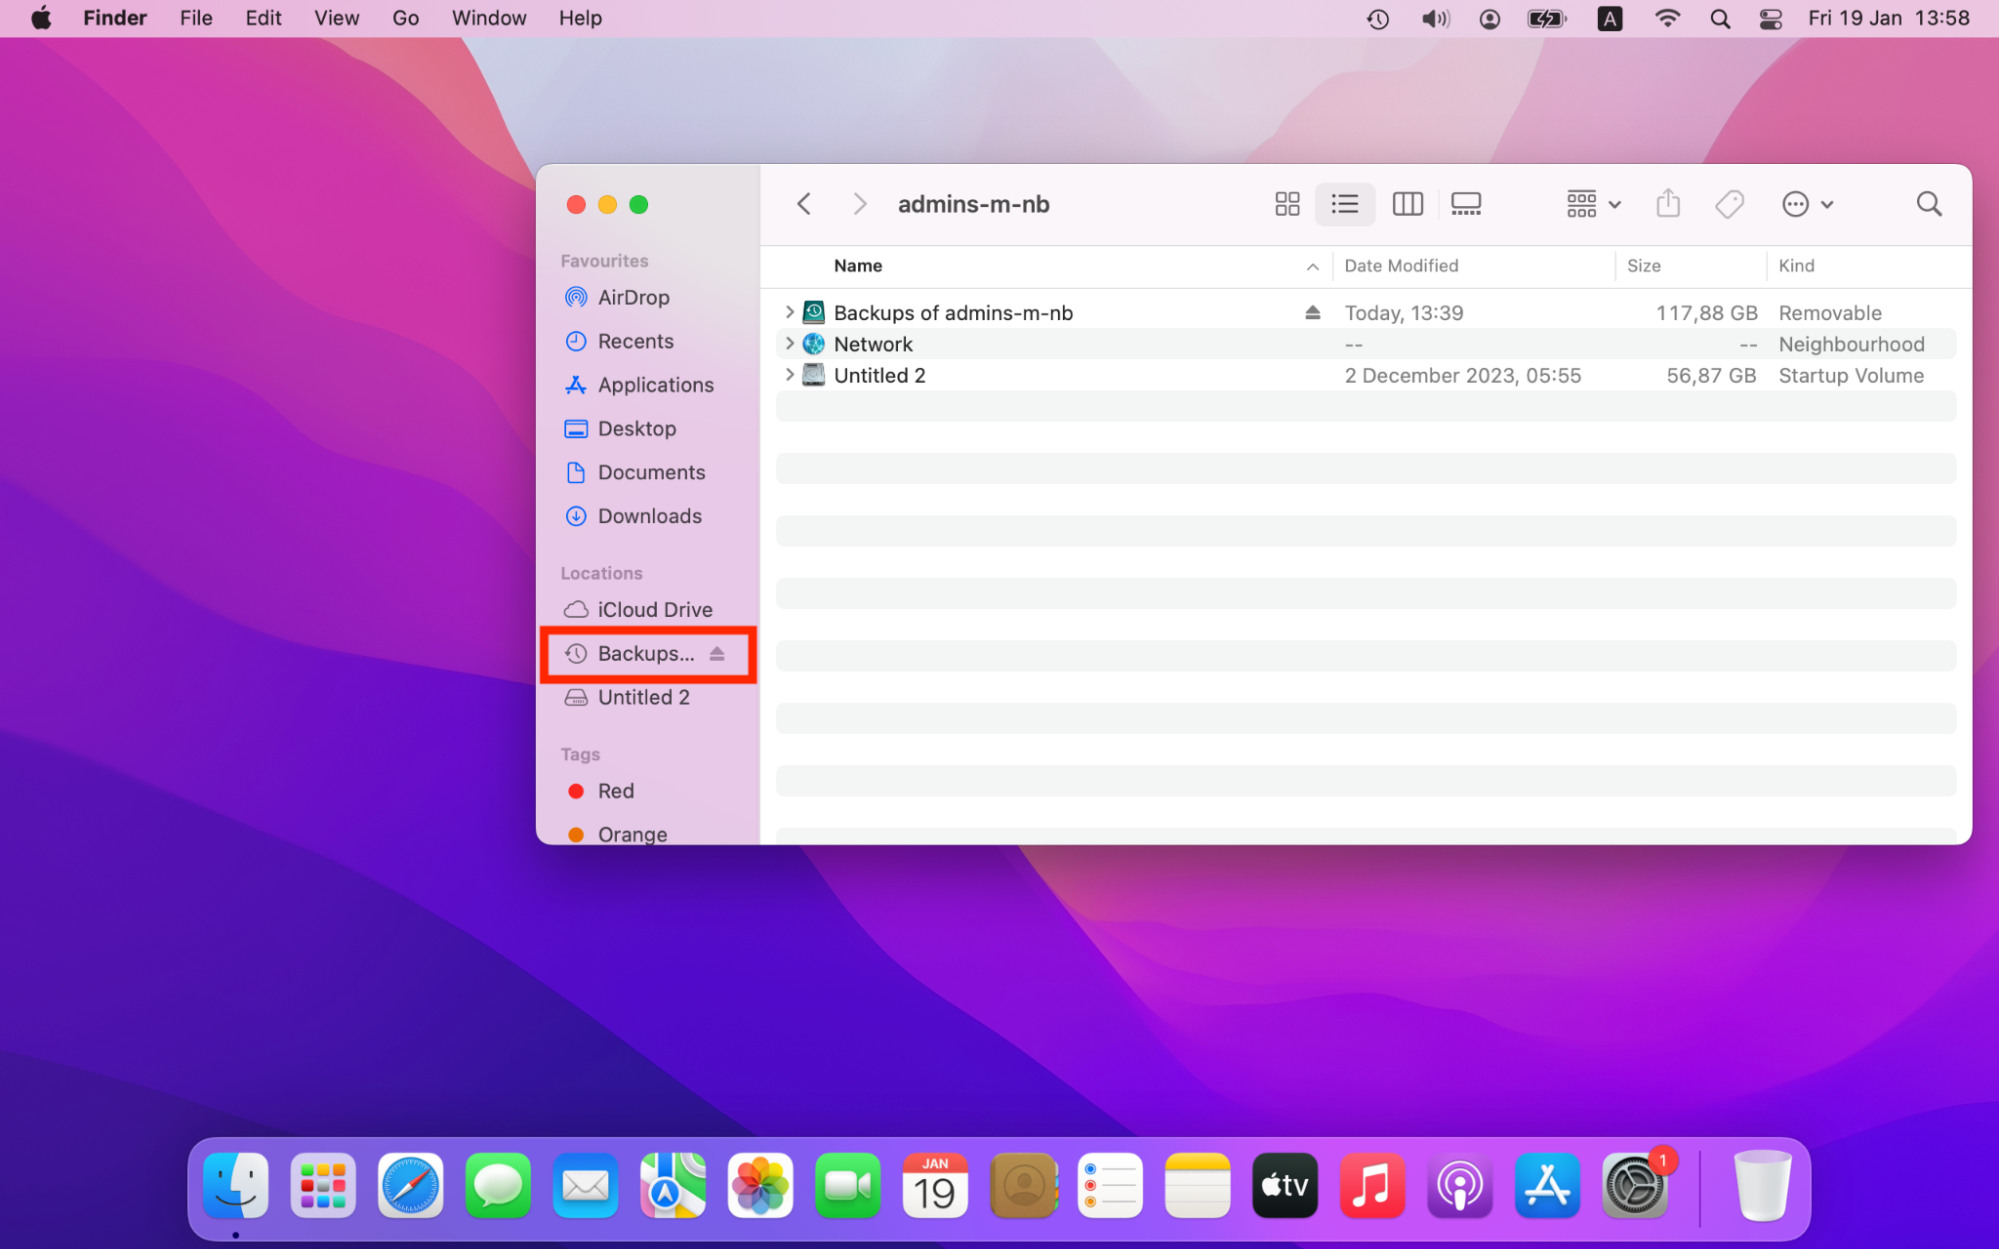
- Open Finder and navigate to the folder storing your Time Machine backups. By default, this is on your external backup disk.
- Locate the folder with the specific backup set you want to delete. Inside, you’ll find specific folders corresponding to specific dates.
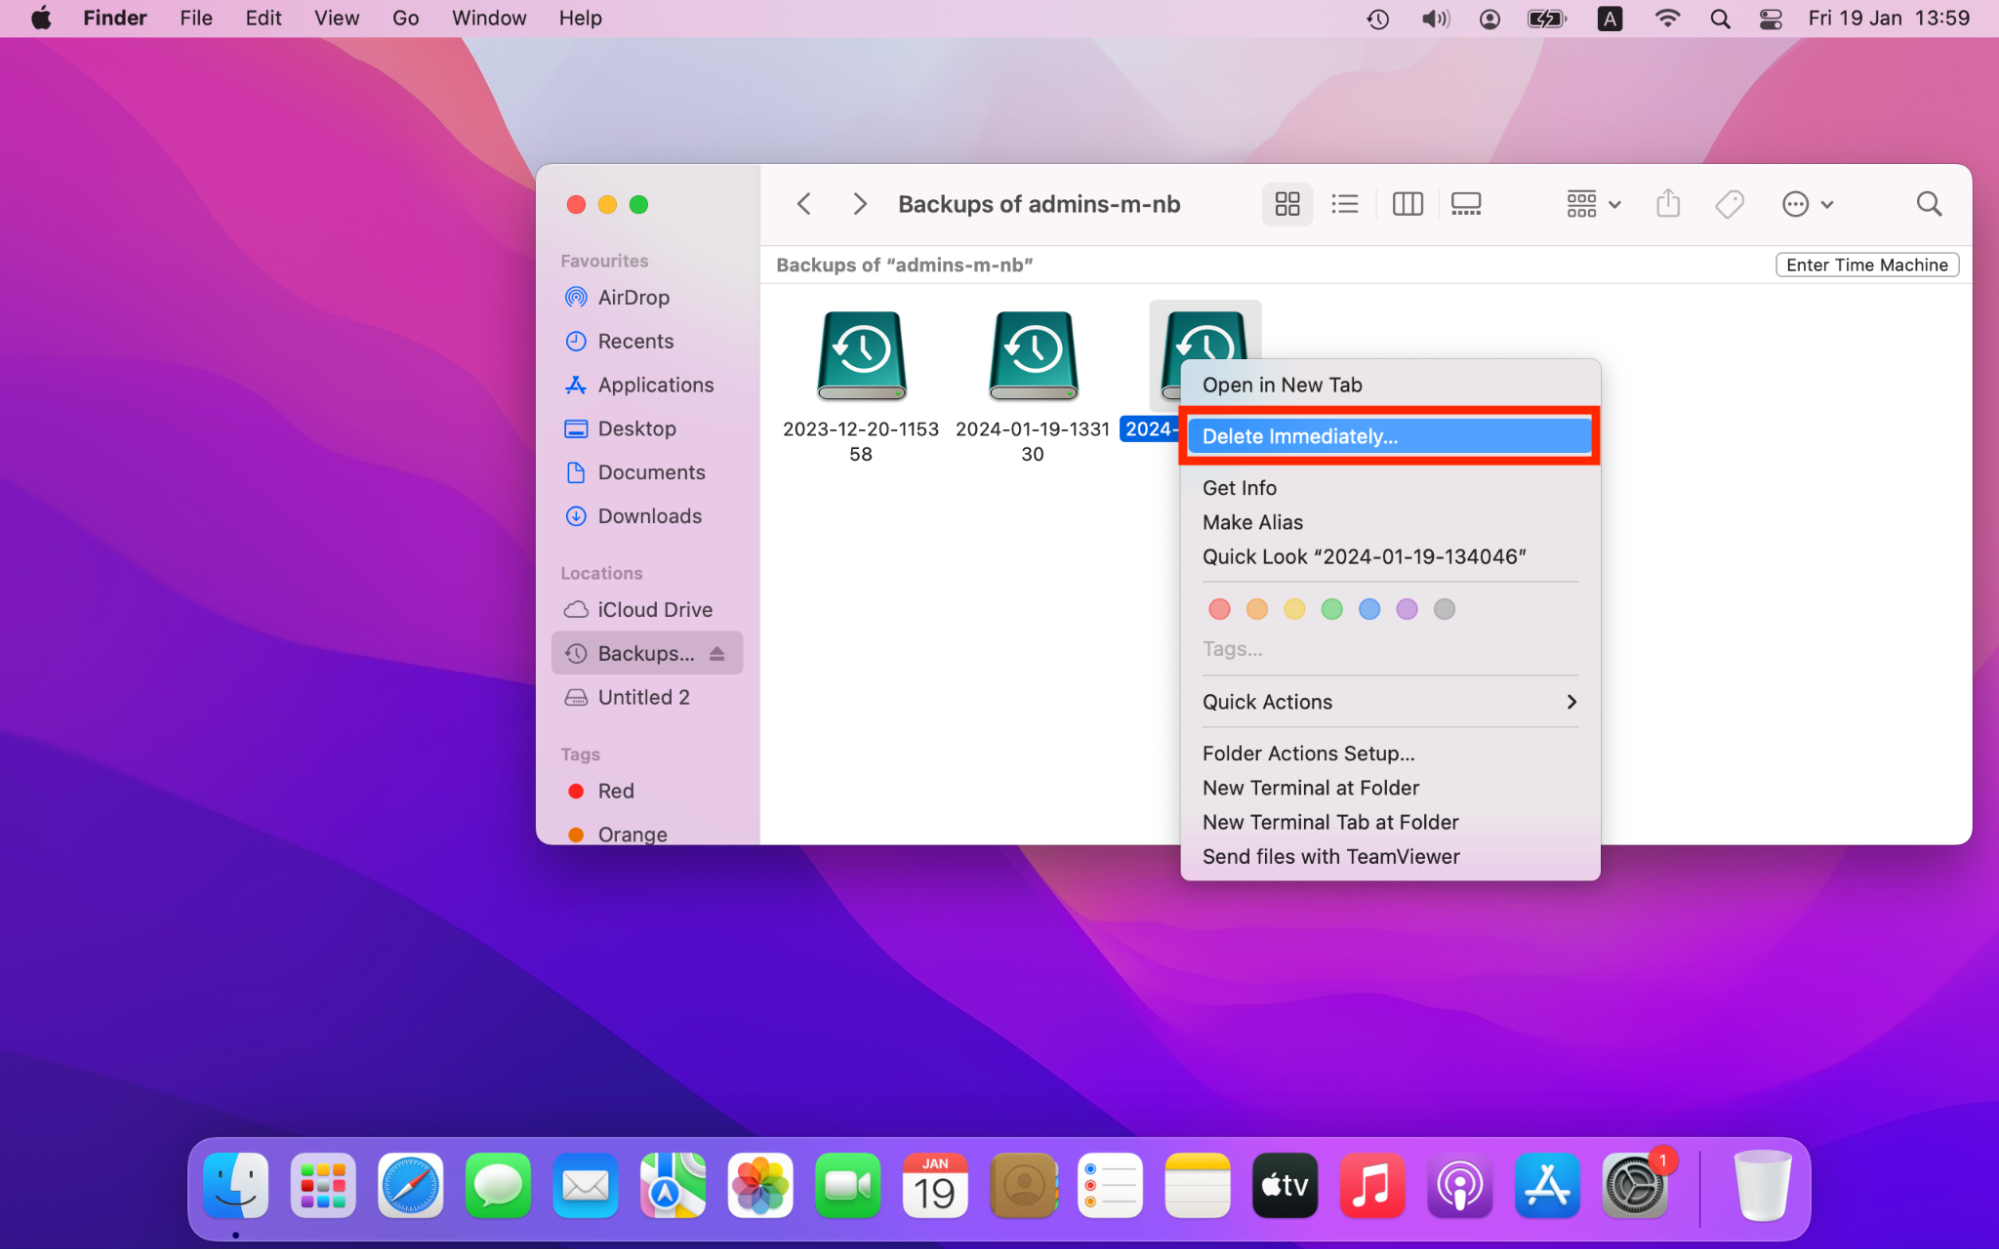
- Double-click the backup you wish to delete and click Delete immediately.
- Repeat for other backups if you wish.
- Empty trash.
Don’t get stuck in the past. Learn the ins-and-outs of deleting old Time Machine backups.
9. Free up disk storage with a cleaner app
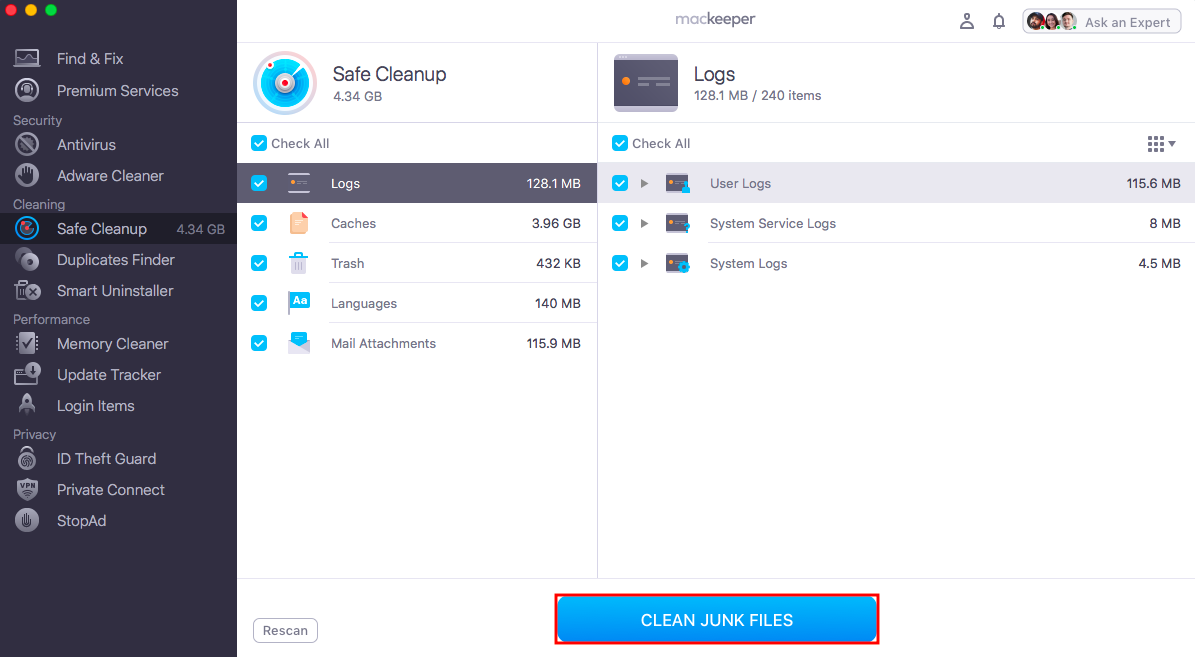
If you want to clear up space on Mac Mojave quickly and easily, use MacKeeper’s Safe Cleanup feature. When freeing up space on your Mac, you always risk deleting something you’ll miss. Safe Cleanup will clear out the gunk without putting your important files at risk.
Here’s how to safely free up space with MacKeeper’s Safe Cleanup:
- Open MacKeeper.
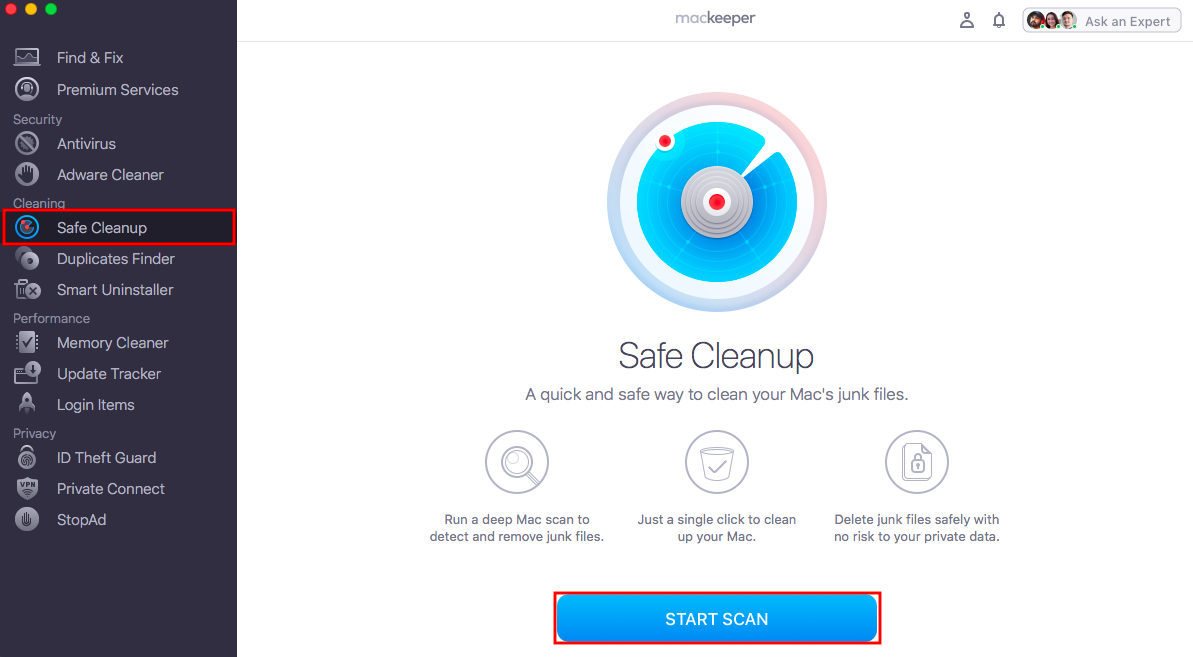
- Select the Safe Cleanup tool and click Start Scan to identify the junk files on your Mac.
- Select the files you want to delete, then click Clean Junk Files.
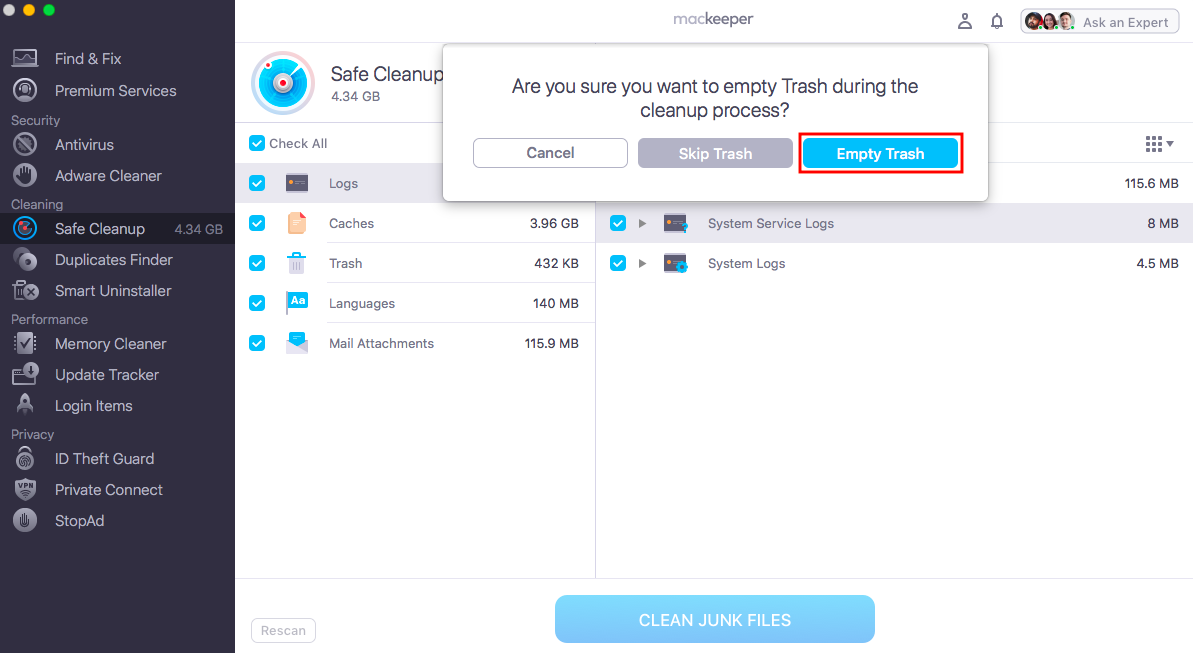
- Click Empty Trash, to automatically empty your trash during the cleanup.
Conclusion
Storage space is crucial for a well-functioning Mac. Even if you get more storage space, it’s important to make it a habit to clean up your Mac regularly—it’s always going to fill up again. However, maintaining storage can be tedious. The process requires a lot of poking and prodding to find the unique space fillers on your Mac.
A dedicated cleanup tool can do the job automatically. MacKeeper’s Safe Cleanup scans your Mac for junk—and then some. It will verify all your files before deleting anything important and remind you when it’s time to clean again. You don’t have to get your hands dirty when freeing up space. Use MacKeeper for all your Mac cleaning needs.


