Time Machine is the best backup software to use with your Mac because it automatically creates incremental backups. An incremental backup means that Time Machine stores multiple versions of your files, making it easy to undo changes or even restore deleted files and folders.
The downside to these incremental backups is that they can end up using a lot of storage. Luckily, there are a few different ways to delete old Time Machine backups from your computer or external drive.
Before we start
One way to avoid clogging up your Mac is to delete local Time Machine backups. However, if you aren’t careful and don’t do it properly, your Mac can still get overloaded anyway.
Instead, try a different path—use MacKeeper’s Smart Uninstaller to delete items permanently and clean your Mac thoroughly by getting rid of leftover files. It does it in a fraction of the time it would take you, and your device should work much smoother.
Try it our yourself:
- Download MacKeeper and select Smart Uninstaller in the sidebar.
- Click on Start Scan, then give the tool a few moments to check your MacBook.
- Check out what MacKeeper found and hit the Remove Selected button when you’re ready to proceed.
In this article you will find the following:
If you’re more interested in deleting Time Machine backups, we’ll show you how to:
- Automatically delete backups
- Use Time Machine to delete backups
- Use Finder to delete backups
- Clear Time Machine backups with Terminal
- Get rid of Time Machine snapshots
- Delete Time Machine backups from external hard drive
- Turn off automatic Time Machine backups
Should you remove Time Machine backups from your Mac?
Time Machine automatically removes older backups when your Mac needs more storage space. However, there are instances when you may need to delete old backups yourself to create more space for important files. It all depends on your needs at the time.
Important:
Are you running out of system storage? Learn how to clear system storage on Mac.
Time Machine usually deletes old backups automatically
Most of the time, you don’t need to do anything to manage your Time Machine backups. This is because Apple designed Time Machine to delete old backups whenever it runs out of storage automatically. It means you don’t need to do anything to make this happen; Time Machine just deletes old backups in the background whenever it needs to.
However, there are rare occasions when you still need to take matters into your own hands. For instance, you might need to manually delete Time Machine backups if you want to create space on your external drive for non-backup files. Other times, Time Machine might tell you there isn’t enough space to create a particularly large backup, refusing to delete the old backups to make space.
Are you experiencing issues backing up your files? Learn what to do when Time Machine is stuck on preparing a backup. But before it, check your Mac storage to have enough space to get ready for a backup.
Ways to delete Time Machine backups on Mac
When it comes to deleting Time Machine backups, you’re spoiled for choice. You can remove them using the Mac Time Machine app and in Finder. You can also use a more complex method involving Mac’s Terminal app and even delete Time Machine snapshots.
1. Delete backups in the Time Machine app
To remove your Time Machine backups:
- Connect the external backup drive you use for Time Machine.
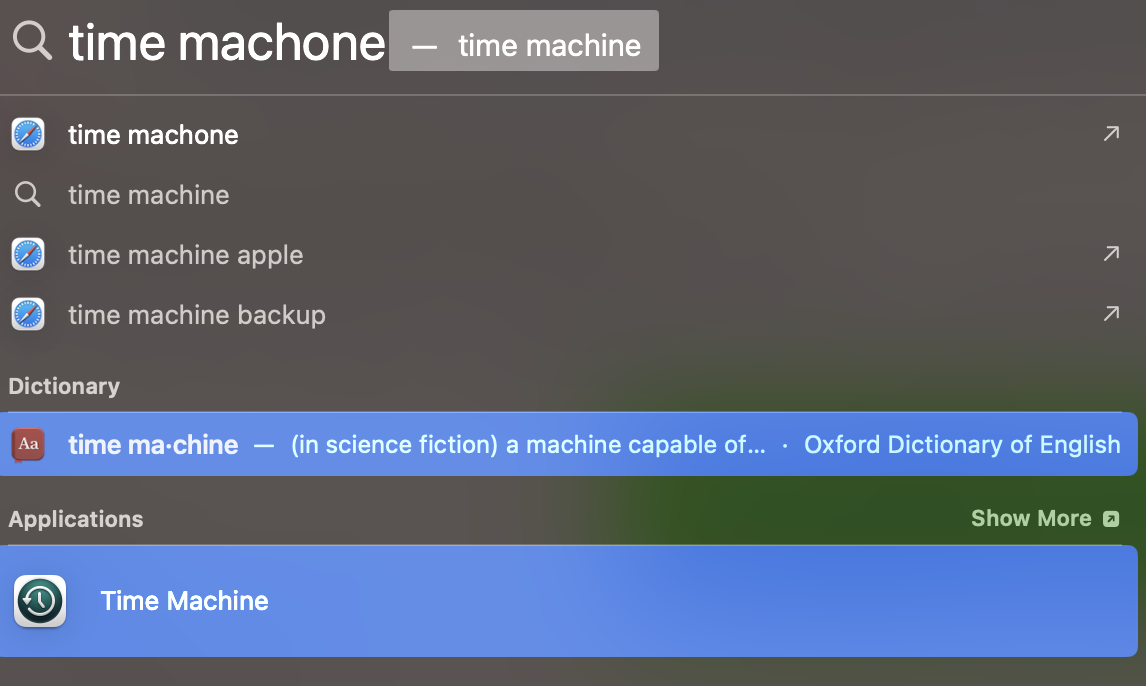
- Launch the Time Machine app via Spotlight, Finder, or the Launchpad on your Mac.
- Navigate to the backup date you wish to delete via the arrows or right-hand timeline.
- Select the file(s) you wish to remove and click on the … ellipsis button.
- Choose Delete Backup or Delete All Backups of [File], based on your preferences.
![To delete backups in Time Machine, launch the app. Use the timeline on the right of the screen or the arrows to navigate to the backup date you want to delete. Click the ellipsis (…) button in Finder and choose to either Delete Backup or Delete All Backups of [Your File]. To delete backups in Time Machine, launch the app. Use the timeline on the right of the screen or the arrows to navigate to the backup date you want to delete. Click the ellipsis (…) button in Finder and choose to either Delete Backup or Delete All Backups of [Your File].](https://static-cdn.mackeeper.com/mk-blog-upload/images/new_xRs1fSHbWt.jpg)
2. Erase Time Machine backups using Finder
Sometimes, it helps to erase Time Machine backups and start over when you run into issues backing up your files. The best reason to use Finder to delete Time Machine backups is if you want to remove all the backups for a specific Mac.
Here’s how to delete Time Machine backups in Finder:
- Connect your external backup drive to your Mac.
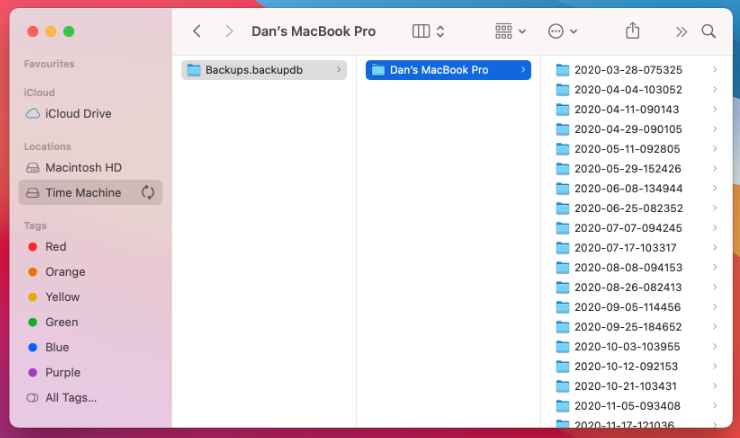
- Open Finder and select your backup drive from the sidebar.
- Go into the Backups.backupdb folder and open the folder matching your Mac’s name.
- All of your backups are listed in separate folders named after the dates they were created, in the format YYYY-MM-DD. Locate the folder for the backup you want to delete.
- To delete a backup, drag that folder to the Trash.
- Make sure you empty the Trash before ejecting your backup drive. Otherwise, your deleted backup will still take up space on the external drive. To do this, open the Trash from the edge of the Dock and click Empty.
Heads-up from the MacKeeper team:
In most cases, you’re better off using the Time Machine app to delete backups rather than using Finder. This is because the Time Machine app knows exactly where each file from a backup is stored, which is practically impossible to find out for yourself in Finder. The reason for this is because of Time Machine’s incremental backups.
Moreover, after the first time you use Time Machine to back up your Mac, it only copies the changes to your Mac rather than copying all of your data again and again. This allows Time Machine to store far more backups in less space. But it also means that if you delete the original backup for a file in Finder, you might also delete any future backups as well that were only saving the changes to that file.
3. Clear Time Machine backups with Terminal
If you’re comfortable using Mac’s Terminal program, you can use it to delete Time Machine backups. Follow these steps carefully to do it:
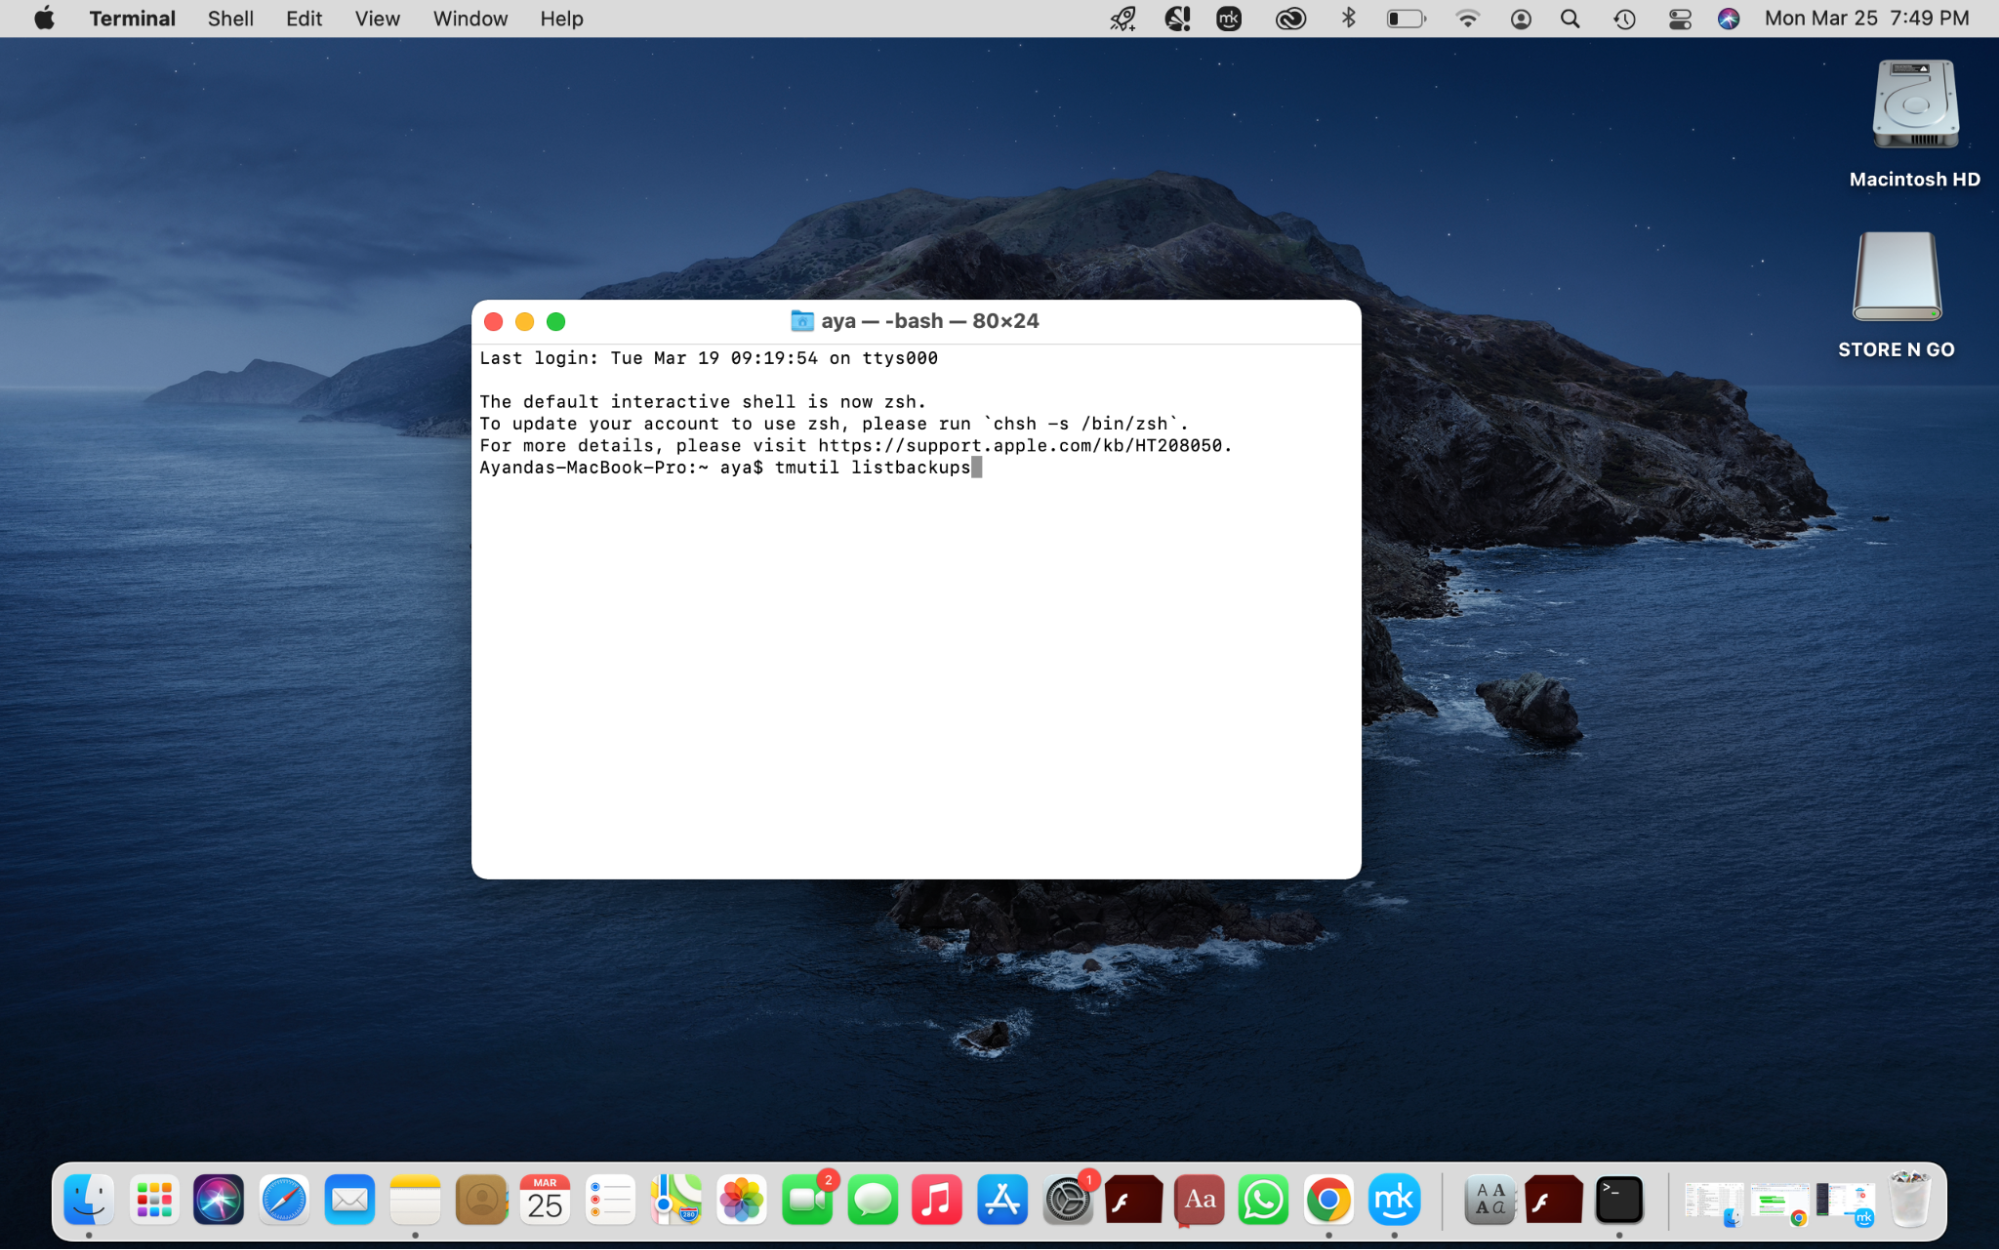
- Click on the Finder icon in the Dock and select Applications > Utilities > Terminal.
- Type in this command: tmutil listbackups and press Enter.
- Find the backup you want to delete (they’re listed by date), write down its directory path, then enter the command: sudo tmutil delete followed by the path you’ve jotted down.
4. Delete Time Machine snapshots
You might discover that a lot of “Other” storage on your Mac is being used by local Time Machine snapshots. These are essentially mini backups that your Mac holds onto until it can transfer them to your external Time Machine drive. However, you can delete Time Machine snapshots to free up disk space. Here’s how to do it:
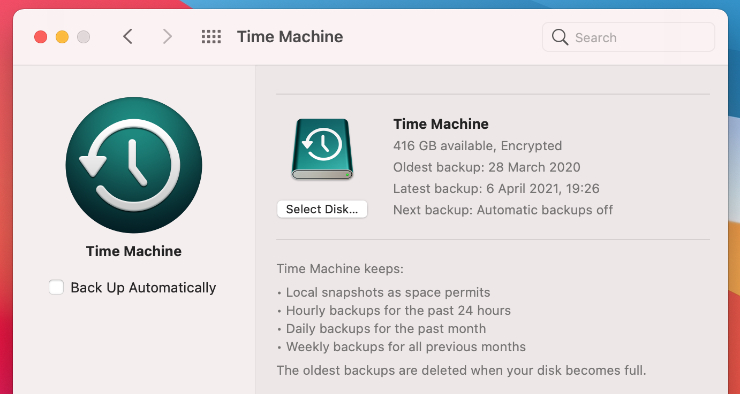
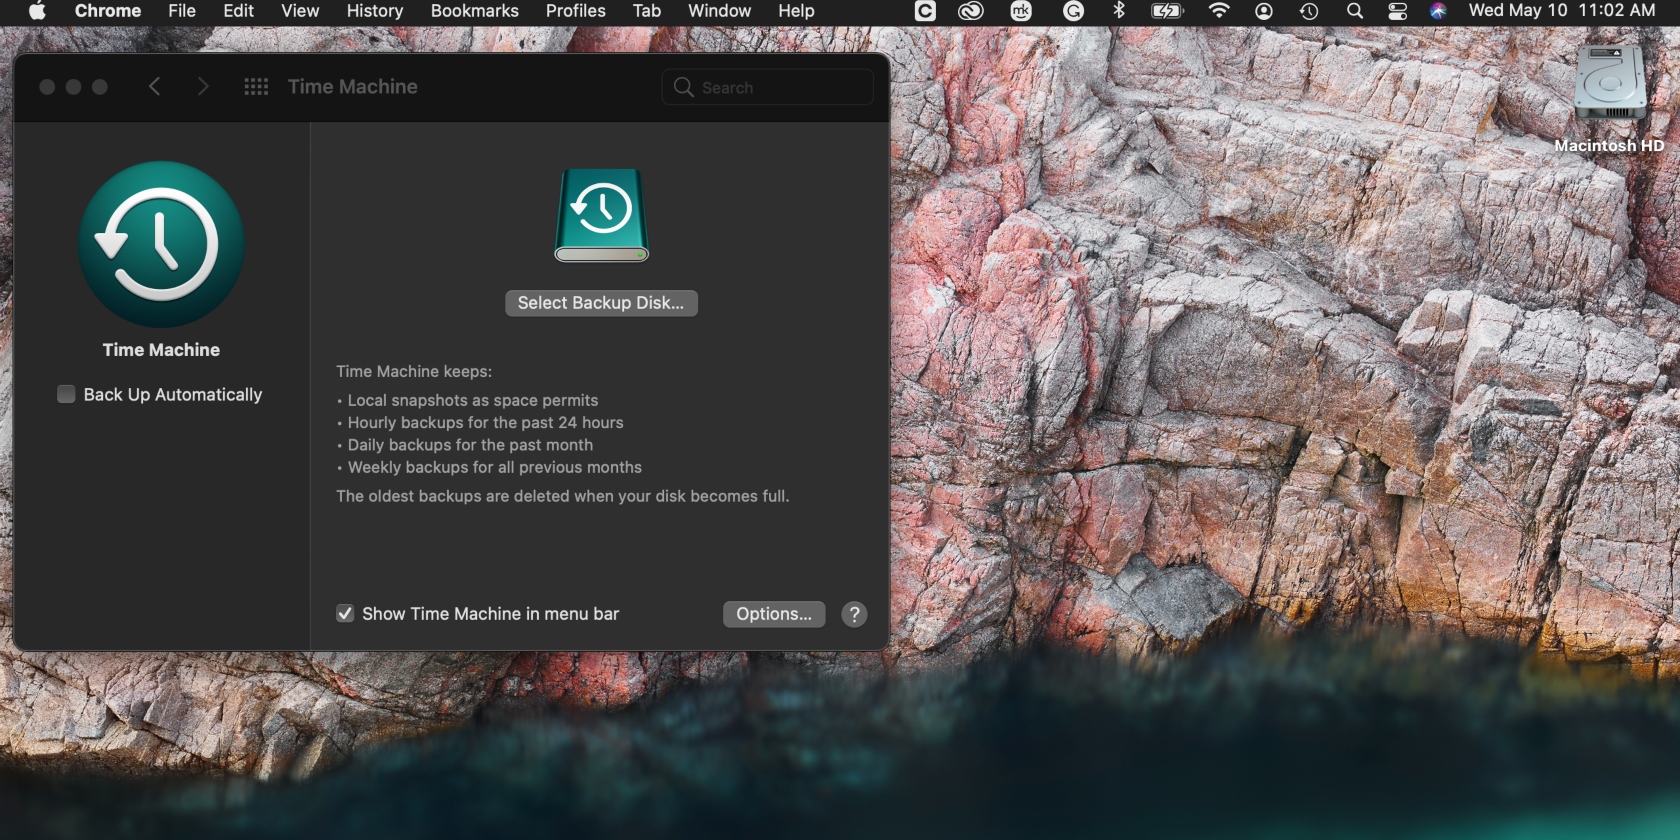
- Open the Apple menu and go to System Preferences > Time Machine.
- Disable the option to Back Up Automatically. This deletes all your saved local snapshots. Now you can re-enable the option to Back Up Automatically.
Important: The easiest way to delete local Time Machine snapshots is to connect your backup drive and complete a new backup. When you do this, macOS transfers the local snapshot to your external drive and deletes it from your internal Mac storage.
4.1 Get rid of Time Machine snapshots in Terminal
Time Machine produces snapshots hourly when you’ve enabled automatic backups, and temporarily stores them on the same disk as their original counterparts. They come in handy when you want to view previous or oldest versions of your files or photos when your normal backup disk isn’t available. But you might want to get rid of them if you don’t need them or when you’re running out of disk space. There are several ways to do this—one of these is using the Terminal app.
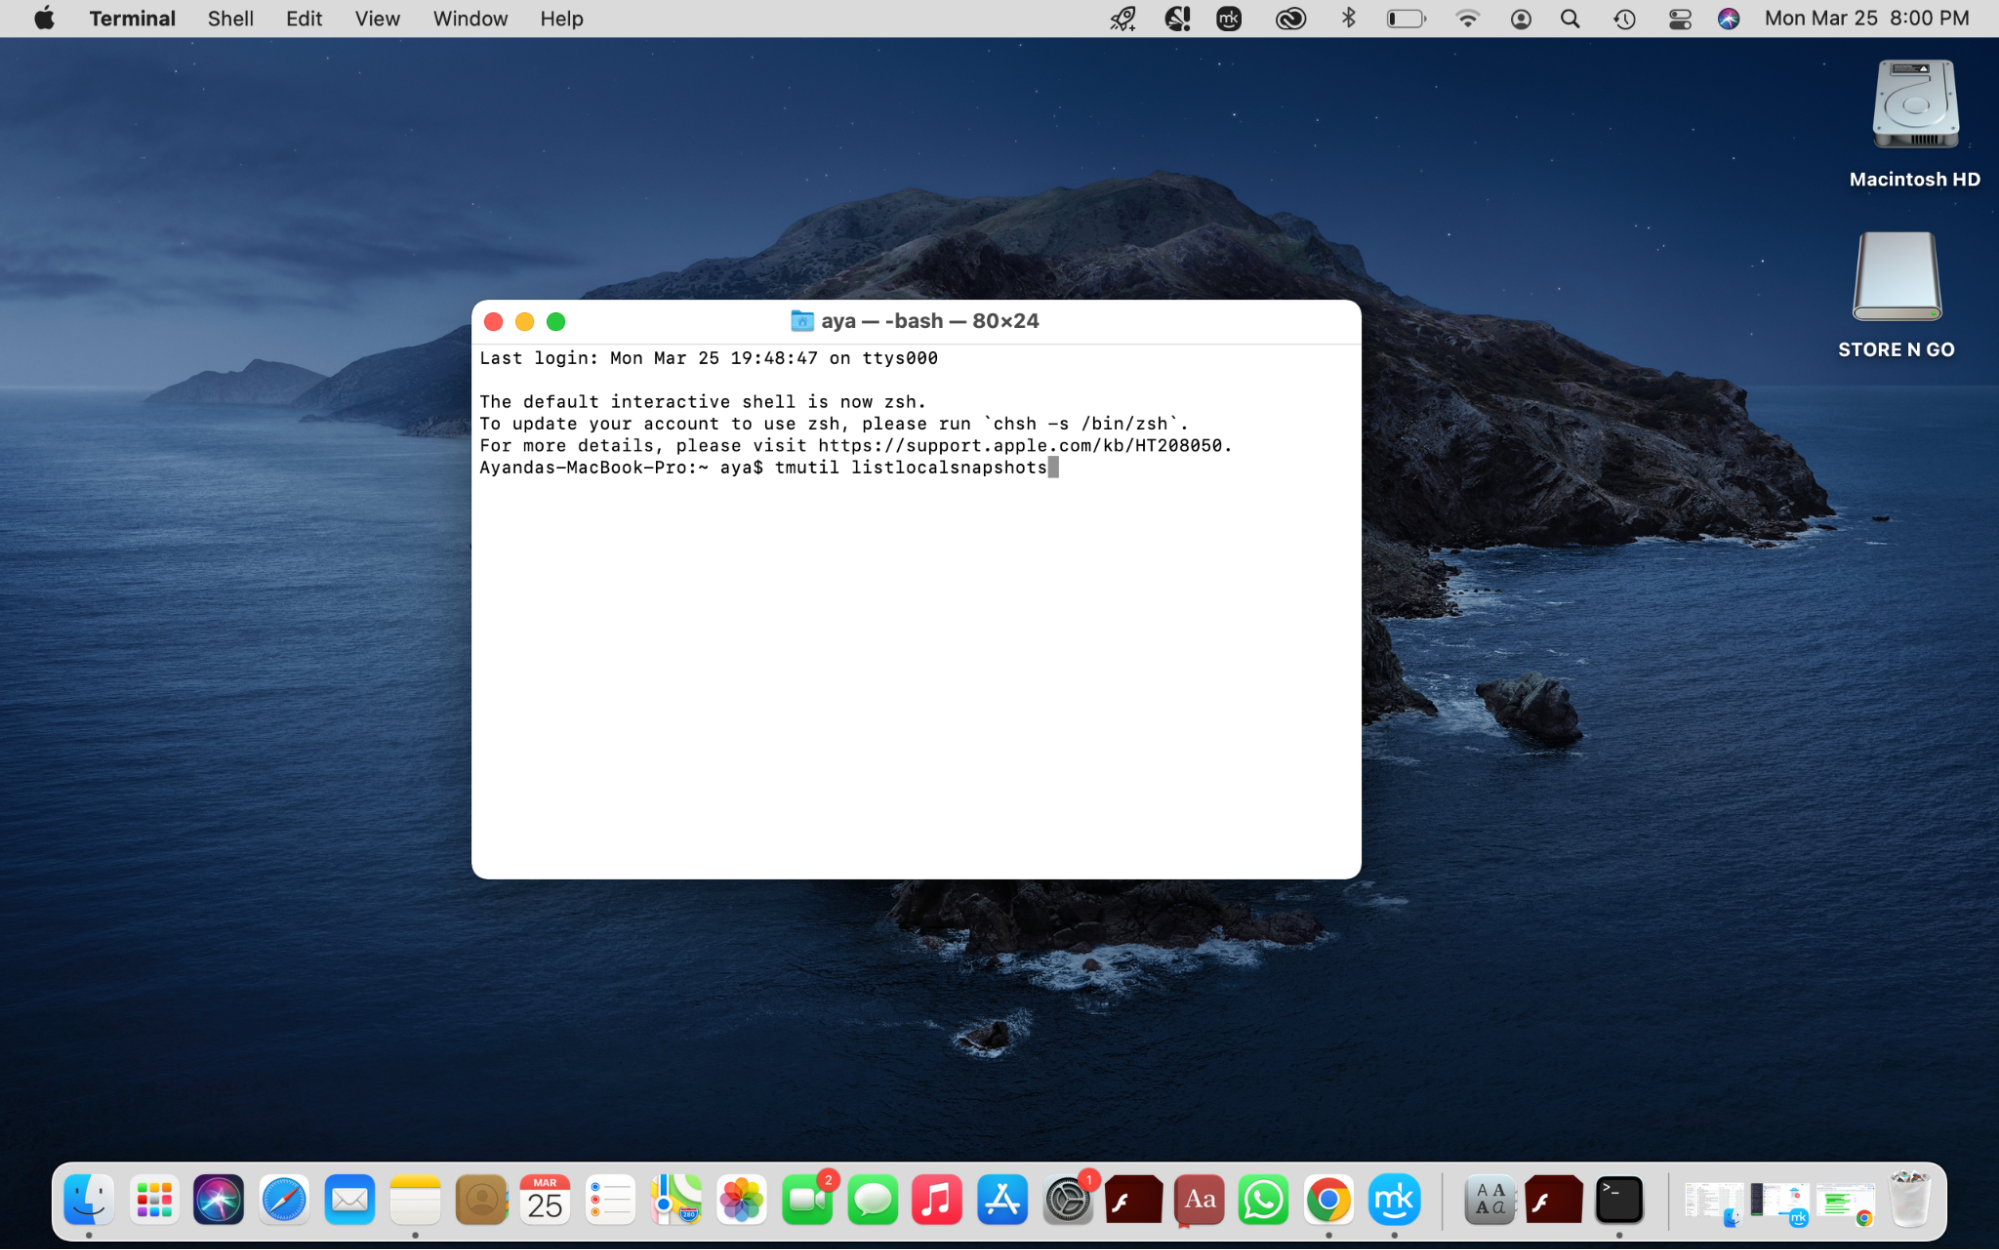
Here’s how to erase Terminal Snapshots in Mac’s Terminal app:
- Go to Finder > Applications > Utilities > Terminal.
- Type the command: tmutil listlocalsnapshots and press Enter.
- Look for the snapshot you want to get rid of and write down its corresponding date as it appears on the list in your Notes app or elsewhere.
- Now type the command: tmutil deletelocalsnapshots followed by the date you jotted down.
- Repeat the process for all the snapshots you want to do away with.
4.2 Remove Time Machine snapshots with third-party software
As you’ve probably realized, deleting Time Machine snapshots is a tedious process. But it doesn’t have to be that way. With the right cleaning software, you can remove Time Machine snapshots in a fraction of the time without the risk of deleting the wrong items. Please note that the process will differ depending on the app or software you use, so ensure you check out the developer’s website for instructions and helpful tips.
How to delete Time Machine backups from an external hard drive
Clearing Time Machine backups is a simple and effective way of freeing up much-needed space on your external hard drive. This helps reduce the clutter on your external hard drive, as you typically do on your Mac. Fortunately, you can do this quickly in Finder. Follow the steps below to get started:
- Connect the external hard drive containing your backups to your Mac and click on Finder in the Dock.
- Choose the relevant Time Machine backup drive, then look for the folder named Backups.backupdb and select it.
- Search for the folder that has your device’s name.
- Now right-click the backups you want to get rid of and choose the Move to Trash option.
How to turn off automatic Time Machine backups
If you’re busy like most people, chances are you don't back up important files regularly and regret it when it’s too late. Luckily, Mac has an automatic backup feature you’ve probably relied on in the past. However, sometimes, you may need to pause it temporarily, like when you’re running out of space.
Disable automatic Time Machine backups until you’re ready to resume them again:
- Click on the Apple menu in the top-left corner of the screen, select System Preferences, and then open Time Machine. (Alternatively, you can bring up Time Machine using Mac’s Spotlight search. To do this, press the command + space bar keys, type Time Machine in the search bar, hit Enter, and select the Time Machine - System Preferences option on the list).
- Look for the Back Up Automatically option in the Time Machine sidebar and disable the setting by unchecking the box so that it’s empty. You’ll find this option on the left side of the window.
Time Machine is the best way to back up your Mac
Time Machine can seem frustrating now and then, but it’s still the best software around for backing up your Mac. With regular Time Machine backups, it’s easy to jump back to various dates in the past and recover long-lost files. You can even restore your entire Mac OS X in the event of a catastrophic hard drive failure.
To keep Time Machine working smoothly, try to avoid using Finder to delete old backups whenever possible. It’s always better to delete backups using the Time Machine app instead. However, other options are available if you get stuck. Use the tips in our guide to delete old Time Machine backups and increase your chances of achieving thorough app and leftover file removal with MacKeeper’s Smart Uninstaller. Our tool boasts various benefits, including freeing up space and optimizing your Mac for your convenience.


