In this article you will find the following:
As our Macs fill up with junk and clutter, available storage can become scarce. When you're struggling for space, identifying unnecessary items on your device can help you formulate a solution.
In some cases, something called Other Volumes in Container or Other Volumes will appear in your storage overview in your System Settings (or in About This Mac on older machines). The inexplicable entry doesn't provide many clues to its origin. Fortunately, with our investigation of the problem and our tips, you can remove Other Volumes in the Container on your Mac and resolve the issue.
Before we start:
If you prefer to avoid tedious troubleshooting, MacKeeper's Safe Cleanup feature can remove unnecessary data, including cache files, unneeded languages, and more.
All you need to do is:
- Download and install MacKeeper.
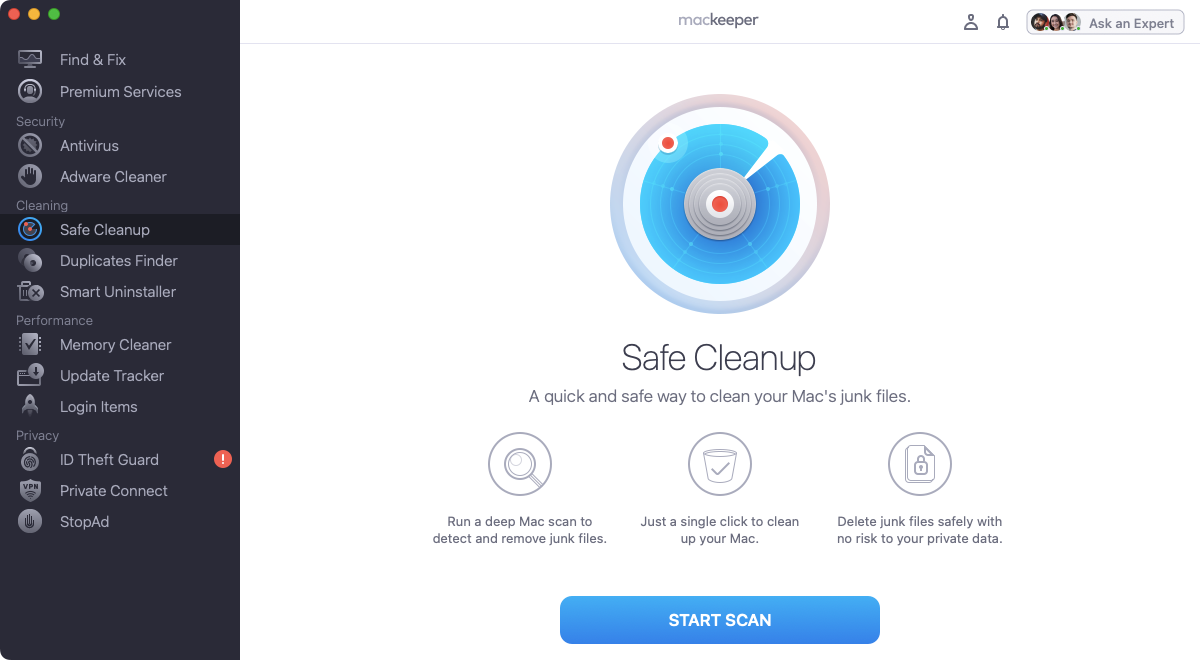
- Launch the app and select Safe Cleanup.
- Start the scan and remove any unwanted clutter.
That's it. If you'd rather do things the easy way, MacKeeper can help you optimize your Mac and free up space. Try our MacKeeper’s app now and approximate your successful deletion of Other Volumes.
What are Other Volumes in Container on Mac?
In 2017, Apple introduced the Apple File System (APFS) to macOS. It first appeared in High Sierra, and then in subsequent releases, including Catalina, Big Sur, and more recently Sonoma. With APFS, containers function similarly to partitions. The top-level disk may hold several containers, and each container could have multiple volumes within. Other Volumes in Container generally refers to additional invisible volumes macOS needs to function correctly.
Other Volumes in Container on a Mac include:
- Preboot: This assists with the boot-up process on Macs using APFS. The size of the volume is generally quite small and shouldn't put a strain on your storage space.
- Recovery: This is important for Mac maintenance and repair and shouldn't consume much space within the main container. If the recovery is using excessive storage, there may be an issue.
- VM: The Virtual Memory volume is a swap file that allows macOS to use hard drive space like RAM. When memory runs low, the operating system (OS) can utilize VM to keep all processes running smoothly. The volume holds only temporary information and shouldn't permanently retain large amounts of data. Rebooting your Mac to clear out VM and RAM should resolve most issues relating to this feature.
If you find your iMac or MacBook is slow, dealing with excess data on your system drive can help.
How to view Other Volumes in Container on a Mac
To get a rough idea of what’s using your Mac’s storage, you can use the operating system’s built-in tools. For more information on how to find what's taking up space on Mac, check out our dedicated guide.
1. Using About This Mac
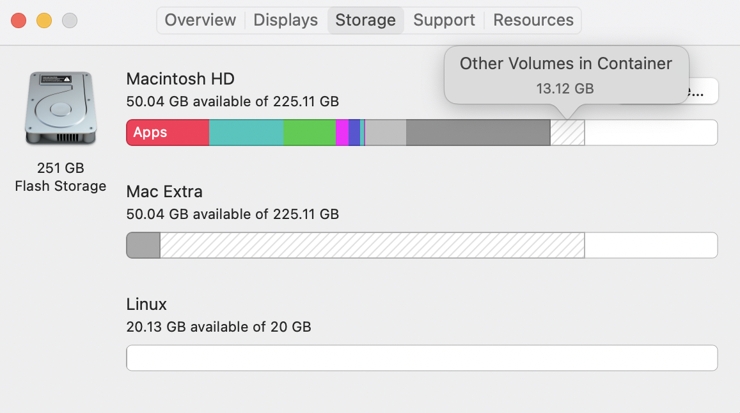
With older versions of macOS and OS X, you can see the breakdown of your storage in About This Mac. Just follow these steps:
- In your menu bar, click the Apple icon, and select About This Mac.
- Select the Storage tab.
- Hover over each section, and see if any of them say Other Volumes in Container.
2. In System Settings
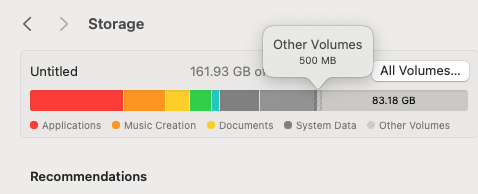
Later versions of macOS don’t operate in the same way, and your storage summary is no longer in About This Mac. Do this instead:
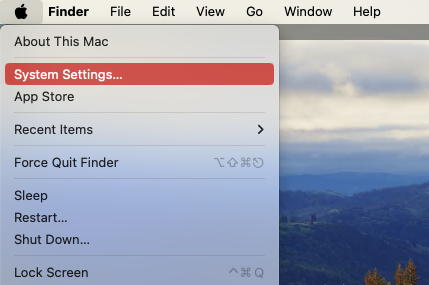
- In your menu bar, click Apple > System Settings.
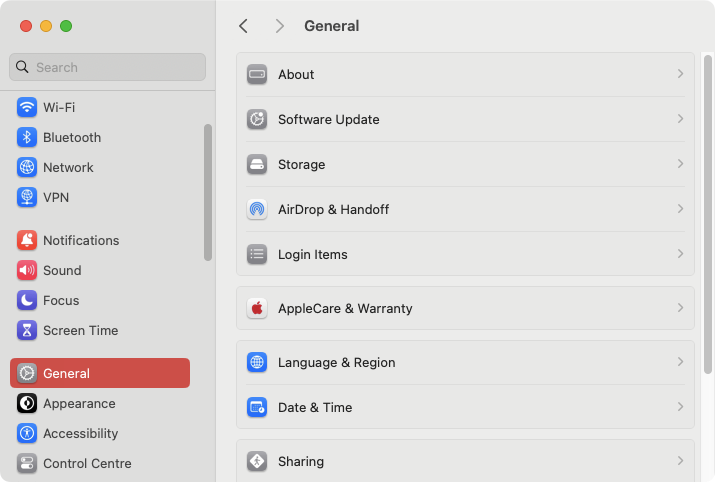
- Go to General.
- Click Storage. You’ll see your storage summary at the top.
3. Via Terminal
If you use the Terminal command line tool, you’ll get a more detailed breakdown of how your storage is divided up. Here's how you can view each volume in a Mac container using Terminal:
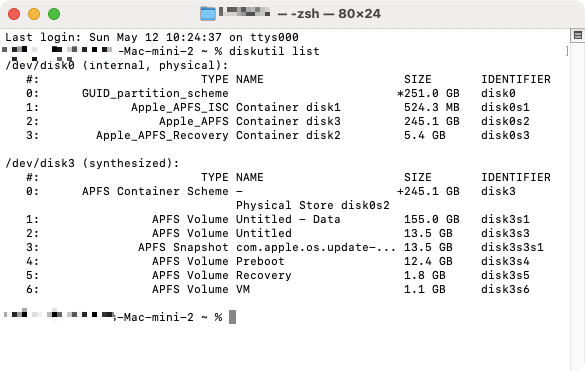
- Launch Terminal. Type diskutil list and press Return.
- Read the output under APFS Container Scheme.

Note from our experts:
You should see the three previously mentioned volumes—Preboot, Recovery, VM—and your system volume (usually Macintosh HD) accompanied by a snapshot. On top of that, you should see a Data volume that holds all of your additional files.
Your system volume and the accompanying snapshot will be quite large, as they hold your entire OS. Data can also contain a massive amount of information, depending on how much you've added to your Mac. However, the other essential volumes shouldn't be holding a lot of data, especially after a fresh reboot.
If Other Volumes are consuming an unusual amount of storage on your Mac or you notice an odd entry in the list, take further steps to remedy the issue.
Is it safe to delete Other Volumes in Container on your Mac?
When you find Other Volumes in a Container, it’s possible they contain nothing important. If you know that for sure, then it’s safe to delete the volume. But if you notice a size issue with one of macOS's essential volumes or can't identify an obvious cause, deleting the culprit isn't an option. Luckily, we have several other suggestions that may help resolve the issue—check out our guide on how to get more space on your Mac for more options.
How to remove Other Volumes in Container on MacBook
If you've examined the other volumes within the container and seen a sizable entry that shouldn't be there, you may be able to delete it. But first, you should back up all important files and ensure that you know the exact purpose of the rogue volume.
There are a few ways to deal with Mac storage showing Other Volumes in Container:
- Use a Mac cleaner
- Create a new user account
- Disable content caching
- Delete an extra APFS volume
- Find and remove questionable programs
- Using Disk Utility
- Erase the disk and reinstall macOS
- Check your hardware
1. Use a Mac cleaner
If you want to avoid manually clearing Other Volumes in Container data, MacKeeper can help clean your system with minimal fuss. The app's Safe Cleanup feature automatically removes the clutter from your Mac, saving you the hassle of manually identifying issues.
Here's how to use MacKeeper to get rid of Other Volumes in a Container on your Mac:
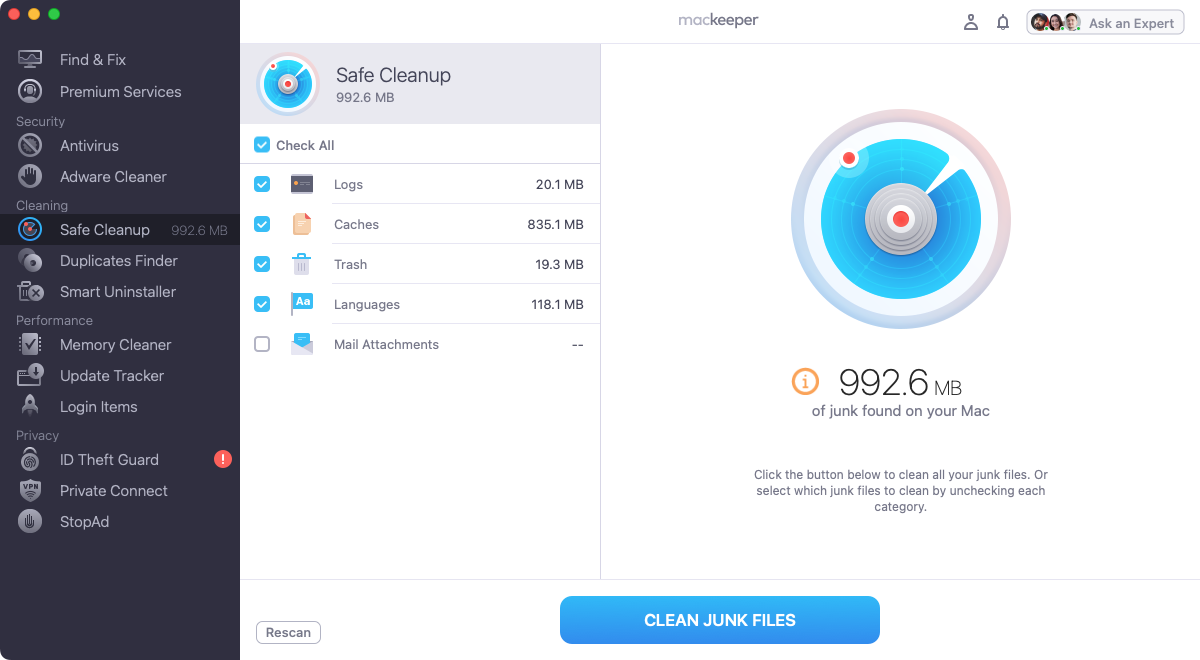
- Download and install MacKeeper. Launch the app and select Safe Cleanup in the side menu. Click Start Scan.
- Select the items you want to remove and click Clean Junk Files.
Important:
MacKeeper is adept at identifying unnecessary items on your device and removing them with your permission. Safe Cleanup and other optimization tools, such as Memory Cleaner, Duplicates Finder, and Adware Cleaner, keep your Mac running smoothly with minimal effort. Try MacKeeper now, and you'll soon notice the difference.
2. Create a new user account
If you don't have an obvious entry to delete, creating a new user account can sometimes resolve glitches that involve other volumes taking up space on your Mac. Here's how to create a new user account on macOS:
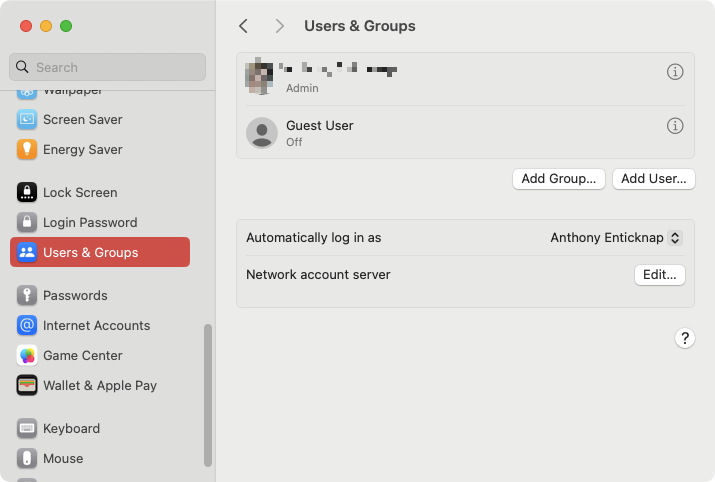
- In System Settings, select Users & Groups in the sidebar. Click Add User. Enter your password, and click Unlock.
- Add the user account details, and click Create User.
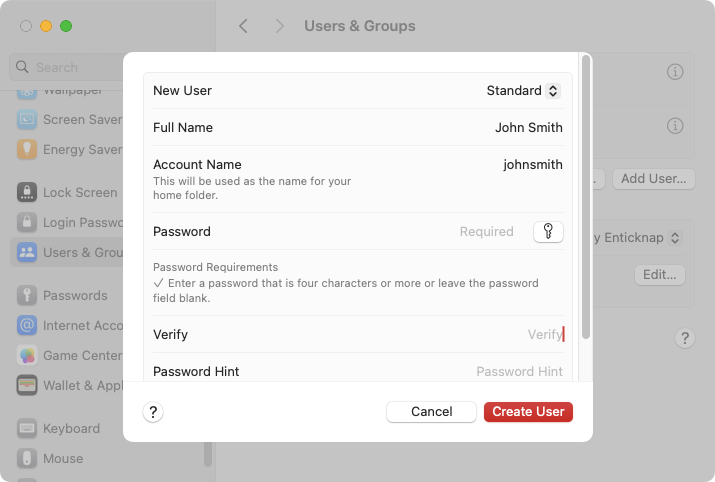
Now you can log out of the current user and into the new account. Once you're logged in, you can check to see if Other Volumes in Container have reduced to a reasonable size. If nothing has changed, you should try restarting your Mac and checking again.
3. Disable content caching
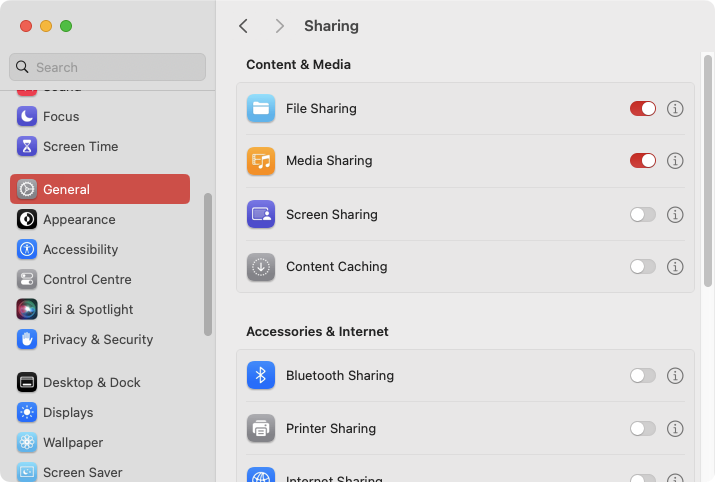
Content Caching allows you to store downloaded information, such as software updates and iCloud data, on your Mac for other local devices to access. The feature helps save bandwidth but could contribute to unexpectedly high storage consumption. Here's how to disable Content Caching on macOS:
- Go to System Settings > General > Sharing.
- Use the switch next to Content Caching to disable it. If no immediate changes occur, you should try restarting your Mac and checking again.
4. Delete an extra APFS volume
If you've positively identified a rogue entry you want to delete — and you've backed up your data—you can use disk utility to remove the unwanted APFS volume from your Mac. Here's how to delete Other Volumes in Contain on Mac:
- Launch Disk Utility from Applications > Utilities. Click the View icon and select Show All Devices.
- Identify the volume you want to delete and mount it if necessary. Right-click the entry and select Delete APFS Volume.
- Click Delete to confirm.
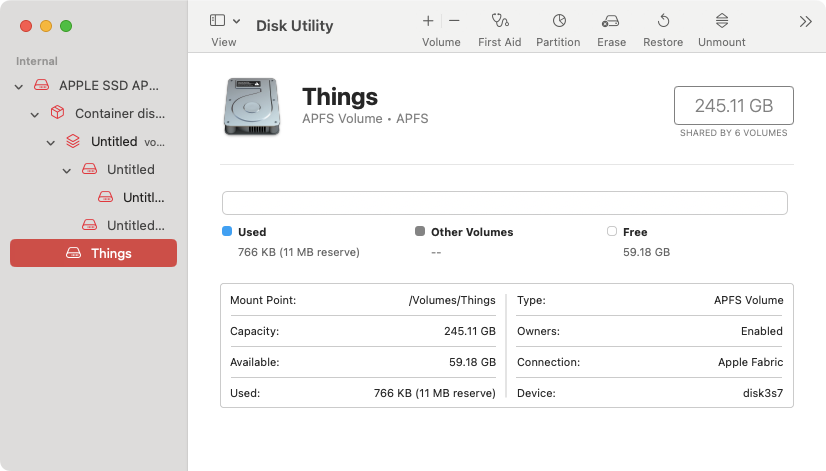
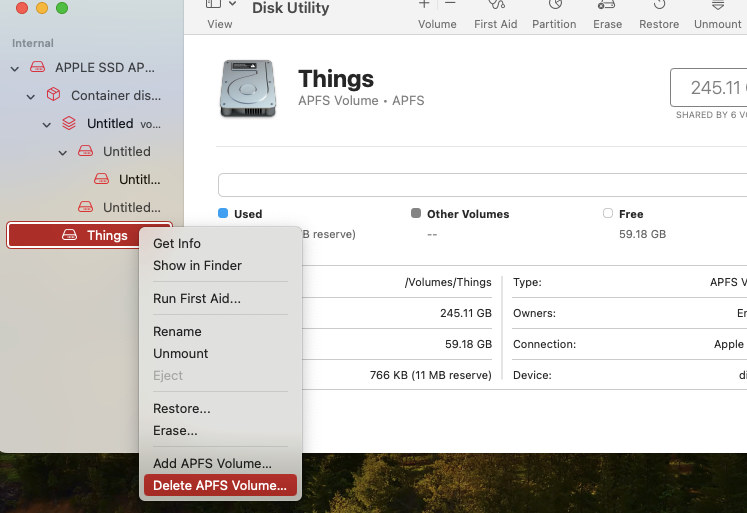
Once the process completes, you can recheck your storage, and macOS should have reclaimed the space.
5. Find and remove questionable programs
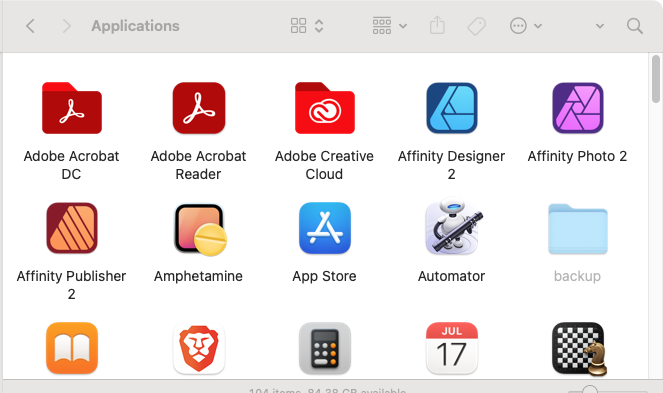
It’s possible that rogue third-party apps on your Mac could be taking up precious storage space. In some cases, that’s because they’re actually malware, but even legitimate apps can cause issues if they’re badly coded. Getting rid of these apps completely may be enough to help you reclaim space on your Mac:
- Open your Applications folder.
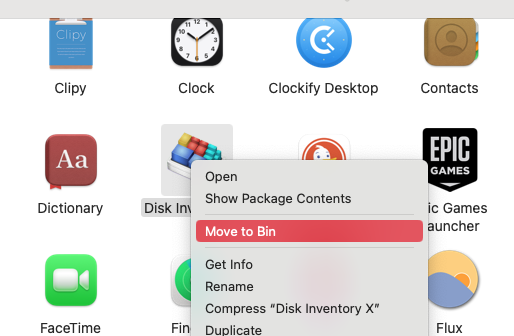
- If you see any apps that you don’t recognize, delete them, remembering to empty your Trash afterward.
Tip from our team:
When you delete apps in macOS, they often leave behind data, meaning they’re not gone completely. You can fully uninstall apps using MacKeeper’s Smart Uninstaller. It’s a quick and easy way to rid your Mac of unwanted programs, plugins, widgets, and more.
6. Using Disk Utility
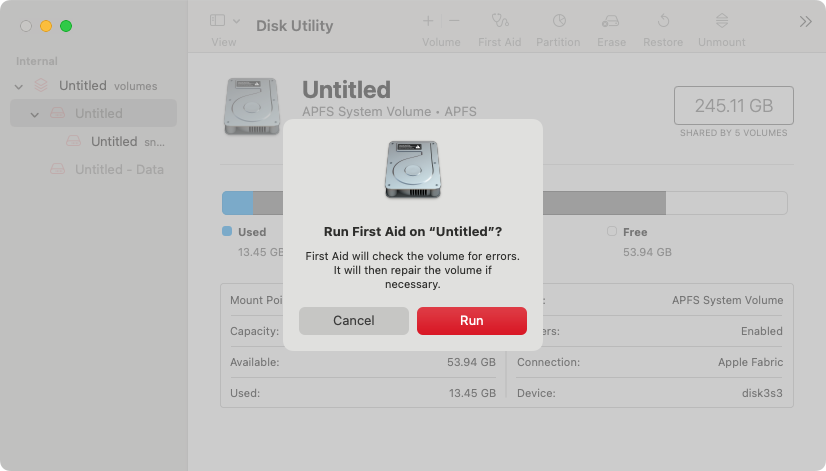
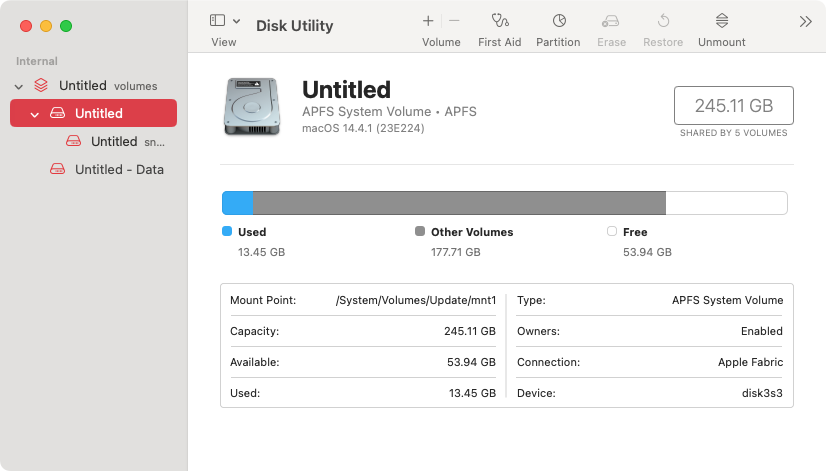
If your Mac’s main drive has corrupted data on it, you might see a large amount of storage taken up by Other Volumes. You can potentially fix this issue using Disk Utility’s First Aid feature. Use the following steps:
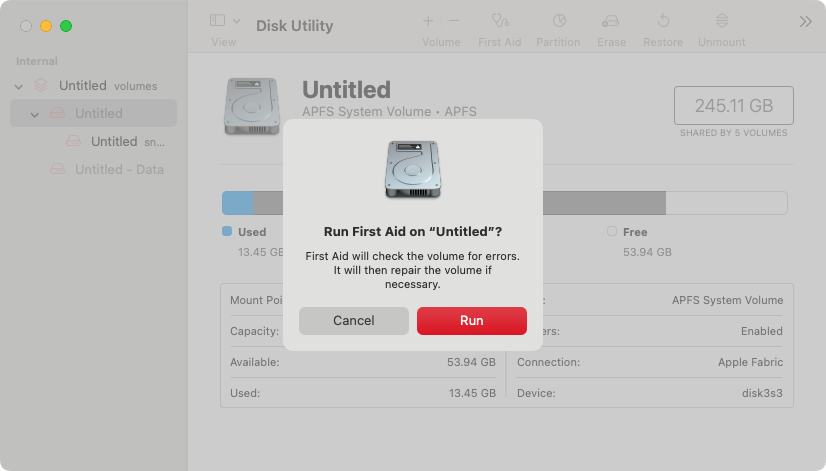
- Open Disk Utility, and select your main storage drive in the sidebar. Click First Aid.
- In the window that pops up, click Run.
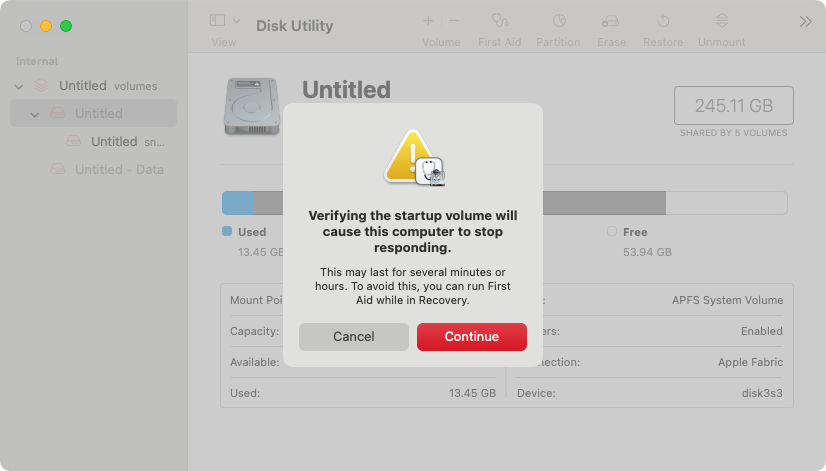
- You’ll see a warning window. This explains that the First Aid process may take a while, and your Mac may become unresponsive during this time. Click Continue and wait to see what the scan reveals.
7. Erase the disk and reinstall macOS
If your Mac is being particularly stubborn with its storage, you can resolve the Other Volumes in Container issue by erasing your hard drive and reinstalling the operating system. This step is a last resort and is rarely necessary. However, sometimes the need to factory reset your Mac does arise. Here's how to erase your hard drive and reinstall macOS:
- Back up your data using Time Machine or another method.
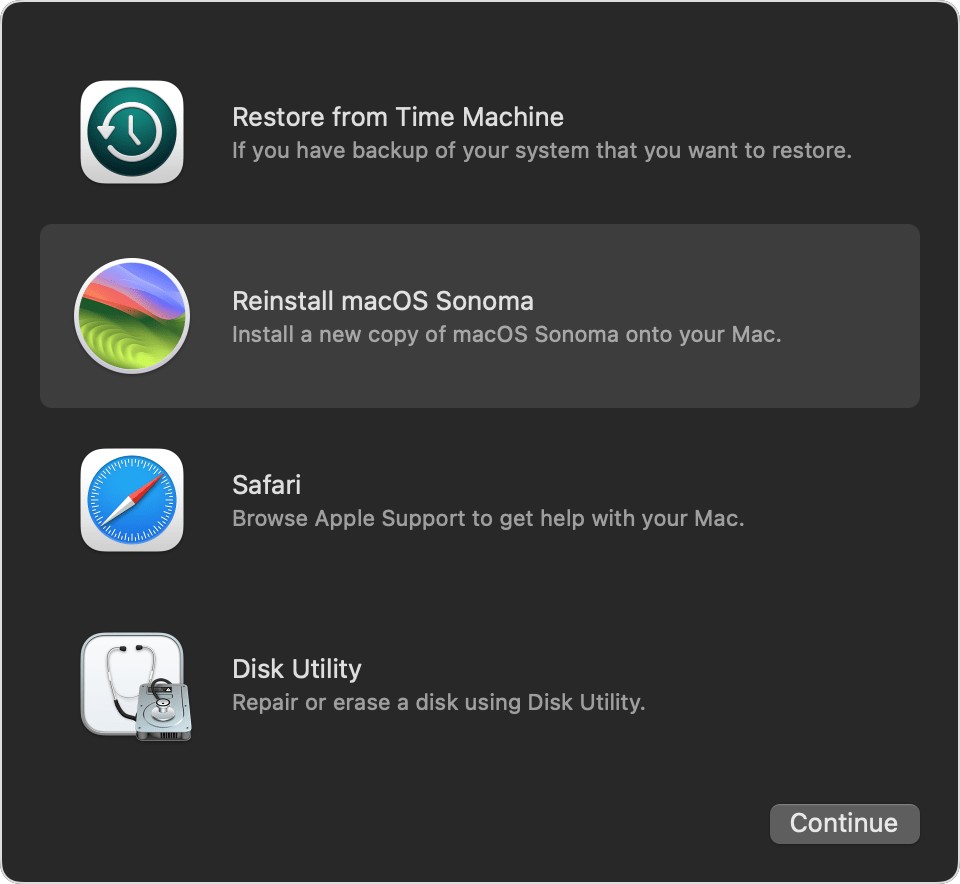
- Boot to recovery using the process appropriate to your Mac model.
- Select Disk Utility and click Continue.
- Click the view icon and select Show All Devices.
- Select your system volume, usually Macintosh HD.
- Click Erase, set format to APFS, and click the Erase button.
- Control-click any old volumes in the container and select Delete APFS Volume to remove them, keeping Macintosh HD.
- Close Disk Utility, select Reinstall macOS, and complete the installation process.
- When the installation completes, you can set up your Mac and check that the issue is resolved before transferring or migrating any data.
8. Check your hardware
Issues with your startup disk may mean you see Other Volumes in Container on your Mac. You can check your Mac’s hardware using Apple Diagnostics. Use the following steps to run Apple Diagnostics on an Apple Silicon Mac:
- Turn off your Mac.
- Press and hold the power button to see the startup options screen.
- Press and hold Cmd+D.
- Wait for the scan to run, and check the results.
If you have an Intel Mac, do the following to get into Apple Diagnostics:
- Power off your Mac, then turn it back on. Immediately press and hold D.
- Release the D key when you see a progress bar or screen about choosing a language.
- Check the results when the scan is done.
How to get rid of Other Volumes in Container on external drives
You might also want to remove Other Volumes in the Container on your external disks. Most of the solutions we’ve looked at for internal system disks will work with external devices too. One important difference, though, is that external drives don’t store your operating system, so it’s easier to reset them.
Hence, you can simply create a backup of your external drive to a folder on your Mac, then completely erase the external drive with Disk Utility. After that, move to transferring the data back to the external drive.
Take control of your Mac’s storage
While certain glitches can cause macOS to store excessive amounts of data in other volumes, the issue usually comes with a reasonable explanation. A rogue or forgotten volume may be hogging space, or the storage used is within the expected ranges.
If, however, you're struggling to identify the cause of the issue, MacKeeper can save you a lot of time and effort. Its Safe Cleanup feature helps you clean up Mac storage in just a few clicks. Plus, it’s packed with loads of other features that help you troubleshoot issues with your trusty Apple computer.
FAQ about removing Other Volumes in Container
1. How to access Other Volumes in Container on Mac?
For a complete and detailed breakdown of your Mac storage, you can use Terminal. Open if from Applications > Utilities, then type diskutil list and press Return. It will then give you a summary of how your storage is divided up.
2. What is the difference between deleting APFS volume and erasing the volume group?
APFS volumes simulate separate disk drives. Introduced in macOS Catalina, the APFS volume group collects several volumes into a single entity. If you delete an APFS volume group, you’ll erase all the APFS volumes within it.
3. What happens if I delete Other Volumes in Container on Mac?
Hopefully, nothing will happen other than you get back some storage space. However, it’s not a good idea to delete things if you’re unsure what they’re for or what they contain. You might lose precious data or damage macOS. Try removing unwanted apps and junk files from your Mac using MacKeeper instead. It’s faster, easier—and much safer than trying to manually data yourself.
4. Why are Other Volumes in the Container so large?
Other Volumes in the Container can include all kinds of data. If you find it’s very large, it’s possible your Mac has a problem, such as:
- A faulty hard drive creating inaccuracies in macOS
- Rogue apps downloading files to your Mac
- Leftover files from a previous macOS installation
- Lots of junk files and other unneeded data on your Mac’s storage


