In this article you will find the following:
Lines appearing on the screen of your MacBook? Alarming, right? Whether they’re white, blue, green or purple, no need to fret, as it's likely not indicative of a serious concern.
While it's conceivable that colored lines on a Mac’s screen could be attributed to a complex hardware problem that will require an Apple genius for support, we advise not to jump to conclusions. Instead, try some of the suggestions we've gathered and tested for you. Be aware this is a different issue than in case of MacBook white screen or iMac black screen.
Before we start
To avoid overheating, your MacBook keeps freezing, and errors that can cause lines on your MacBook screen, it’s best to ensure smooth performance. Of course, you can do this manually, but using MacKeeper’s Memory Cleaner tool will get it done much faster.
To use MacKeeper’s Memory Cleaner:
- Download MacKeeper and install it on your Apple computer.
- Choose the Memory Cleaner tool located on the left panel > click Open.
- Now wait until the Memory Cleaner finishes its job, scanning your current memory use.
- Click on Clean Memory to optimize the Mac’s performance.
- The tool will have now freed up memory so that your system is performing optimally.
What causes lines on MacBook screen?
Lines on your MacBook screen can stem from diverse causes: hardware-related, such as a damaged graphics chipset cable, or software-related, like power management glitches. But the most common reason is overheating caused by the resource-consuming processes, such as video editing, or your environment impact (high outside temperature).
But as horizontal, vertical, colored, and other lines appear on your MacBook screen appear for a reason, we suggest you start with checking the following nuances.
Hardware problems causing the lines on Mac’s screen:
- Your display may be damaged due to a drop, a knock, or overheating.
- The cable that connects the graphics chipset to the display is damaged.
- Screen burn-in is also caused when an LCD display has the same image displayed for a long period of time. Although the damage from this may look like lines, it more than likely isn’t, and this is a separate issue you should take up with an Apple specialist.
Software problems leading to the same effect:
- Power management issues may be the villain causing your display issues.
- Outdated graphics drivers are the next to blame, as your system will be unable to process images correctly.
- Software conflicts can cause bugs as well.
How to fix horizontal, vertical, colored, and other lines on MacBook screen
There are several different approaches to eliminate the MacBook display problems marked by vertical lines. One of the most common fixes is to reset the SMC. This is recommended because the SMC plays a crucial role in managing power distribution, battery performance, fan operation, and other essential functions.
However, there are some other methods for you to take, and we’ll gladly guide you through each solution step by step to get your MacBook back to its normal state.
- Check your display connection
- Use external display
- Check MacBook temperature
- Use additional cooling
- Reset SMC
- Reset NVRAM
- Check graphic card updates
- Reinstall macOS
1. Check your display connection
One of the first things you should do is to check the connection to your display. If you’re using a desktop Mac connected to a monitor, take a look around the back of your system as well as the monitor to ensure the cable connecting them is fully in. If this doesn’t your MacBook screen flickering or you still see the static lines on your screen, move on to the next suggestion.
2. Use external display
The lines on your MacBook screen could result from a defective graphics card or display malfunction. To check if this is the case, if you can, connect an external monitor for a clear indicator.
Here’s how to connect an external monitor to your Mac:
- Connect your MacBook to an external display using an HDMI cable or a USB-C cable. This will depend on the monitor you’re using.
- Check if the external monitor is displaying and working correctly without any lines. In this case, unfortunately, it’s likely to be a hardware problem with your MacBook.
- You’ll need to take your Mac to an Apple service center for further assistance to get rid of lines of the display.
3. Check MacBook temperature
A common reason you may be seeing lines across your Macbook screen is the temperature of the system being too high.
Here’s how to check your MacBook’s temperature:
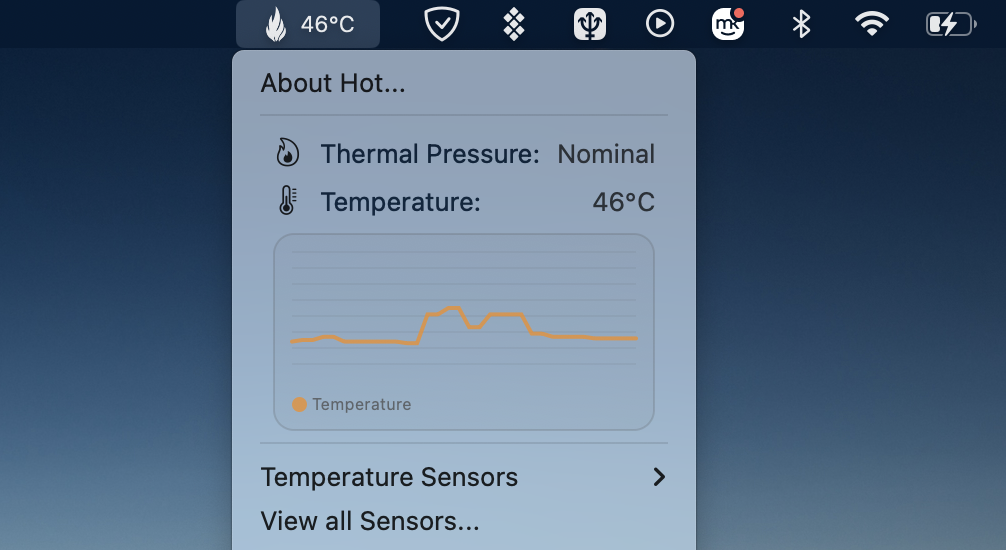
- Download the Hot app from the iMazing website. You may need to scroll down to find it
- Once the download has finished, drag the icon to your Applications folder and open it.
- The Hot icon will appear in your Mac’s Menu bar. The temperature will fluctuate based on what you’re doing. However, it shouldn’t exceed 192°F (89°C) for extended periods. If it does, this may be your issue.
- If your MacBook’s temperature is too hot, try using it in a cooler area or cooling your current area by opening windows or using fans.


4. Use additional cooling
As a rule, your device might have overheated due to extensive power usage. If the lines on your MacBook screen are caused by overheating, the best solution is to provide your system with additional cooling before attempting a reboot. If heat is the issue, it’ll usually be vertical colored lines on the MacBook screen, but not always.
Here are several things you can try:
- The lines on your MacBook may just be a temporary issue with overheating, so we suggest you first turn off your machine and give it some time to cool down.
- It may be that your room is too hot rather than it being a machine-specific issue. Ensure you’re working in a well-ventilated area and open windows if you can.
5. Reset SMC
The System Management Controller (SMC) oversees several power-related tasks on your Mac, including power regulation, video mode changes, hibernation, LED, and sleep functions. When facing persistent problems like lines on your MacBook screen, performing an SMC reset could provide a solution.
To fix lines on your MacBook screen by resetting the SMC, follow these steps:
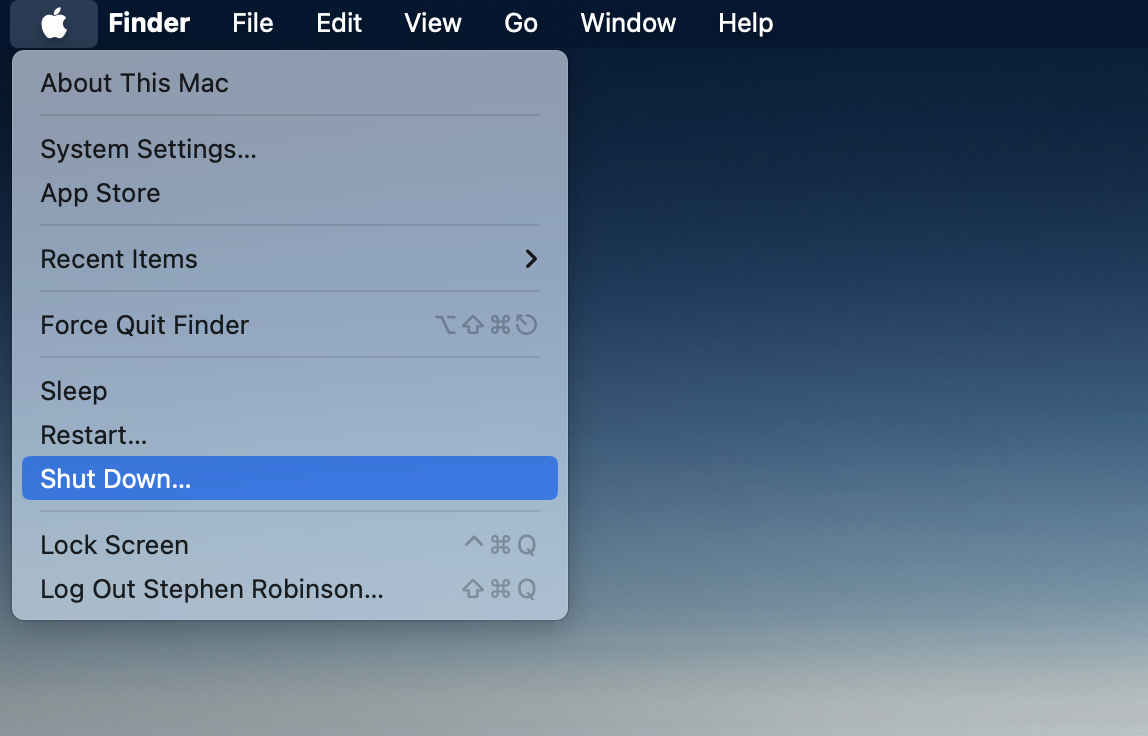
- Click the Apple logo in your Mac Menu Bar and click shut down.
- Press and hold the Shift + Option + Control keys, and at the same time, hold the power button.
- After 10 seconds, release all the keys. Replug the power cable and turn on your Mac.

6. Reset NVRAM
NVRAM, or non-volatile RAM, is a memory segment within macOS capable of retaining data, even when the computer is powered down. It safeguards your preferences such as display resolution, brightness, startup-disk, and more. Should the lines on MacBook screen result from settings-related complications, a reset of NVRAM could potentially help you.
To fix lines on your MacBook display by resetting the NVRAM, follow these steps:
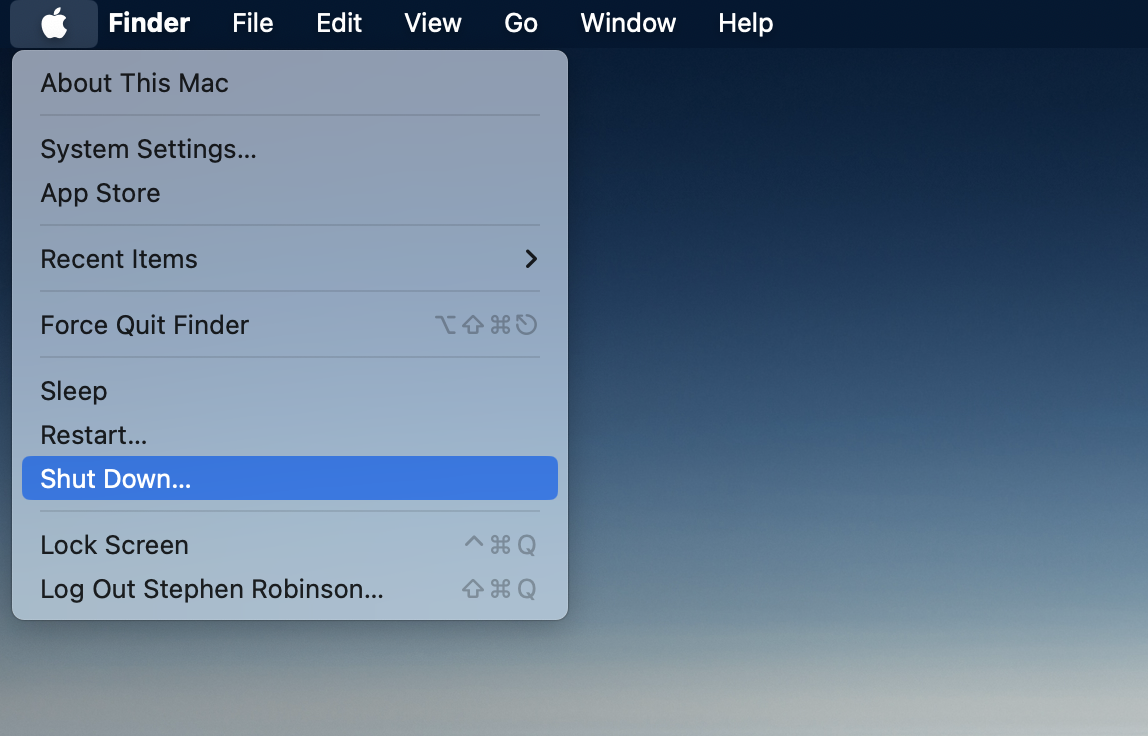
- Click the Apple logo in your Mac’s menu bar and choose the Shut Down option.
- Turn your Mac back on, and while it reboots, press and hold the Option + Command + P + R keys. Release the keys when you hear the second startup sound.

Hint from our team: If you’re using a T2 security equipped Mac, hold the Option + Command + P + R keys on reboot when you see the Apple logo appear and disappear for the second time.
7. Check graphic card updates
Not all graphics card updates might be available directly through this system information window. Depending on the graphics card and your macOS version, updates might be available through the App Store or the manufacturer's website.
The general instructions to check the graphics card updates are the following:
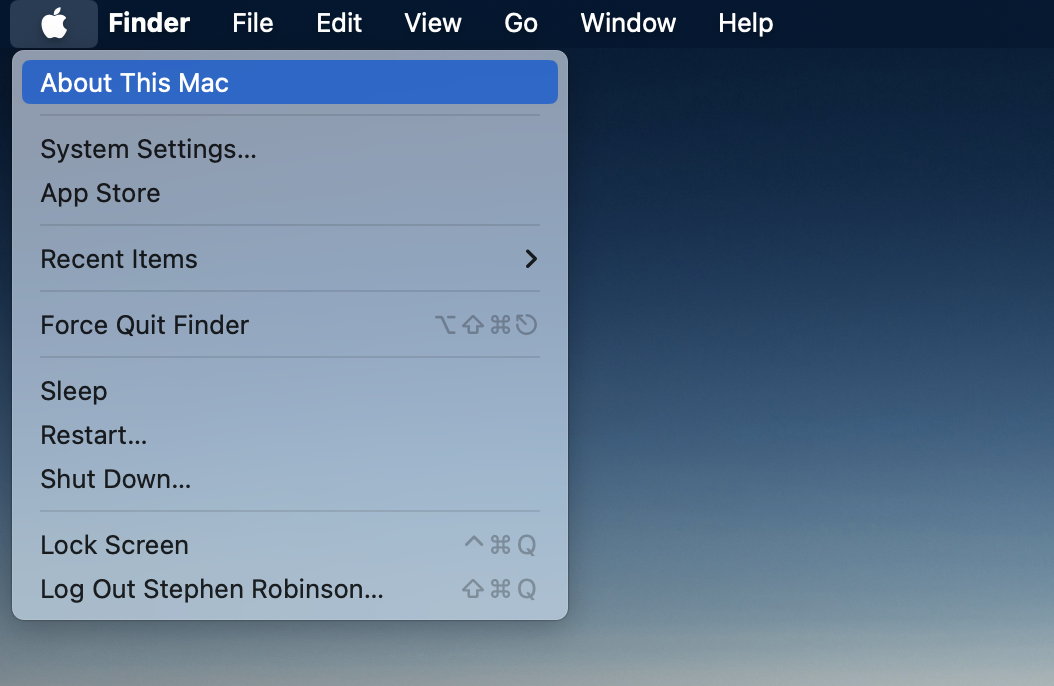
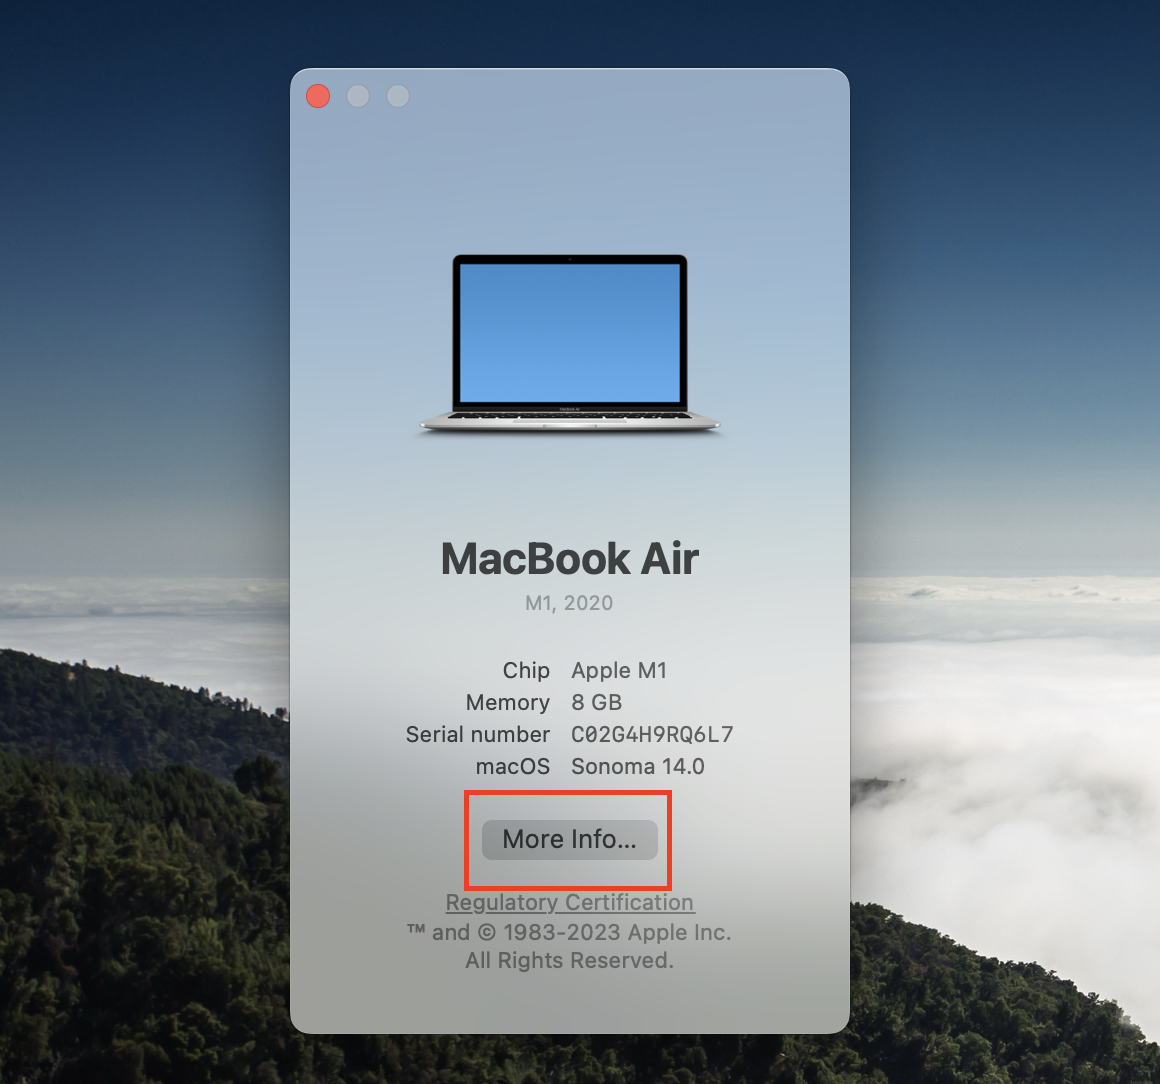
- Click on the Apple logo in the top-left corner of your screen to open the dropdown menu and choose the About This Mac option.
- A window will appear displaying system information about your Mac. Next, click the More Info… button.
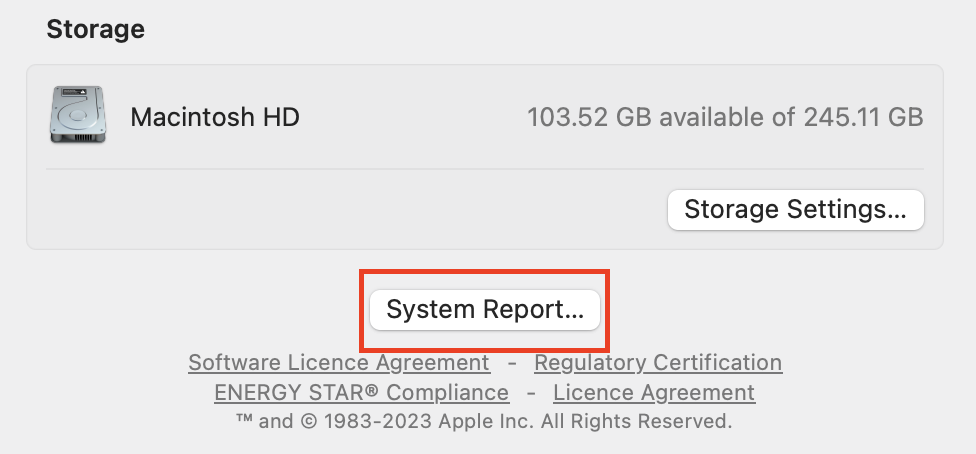
- The About section in System Settings will open. Scroll down and click System Report…
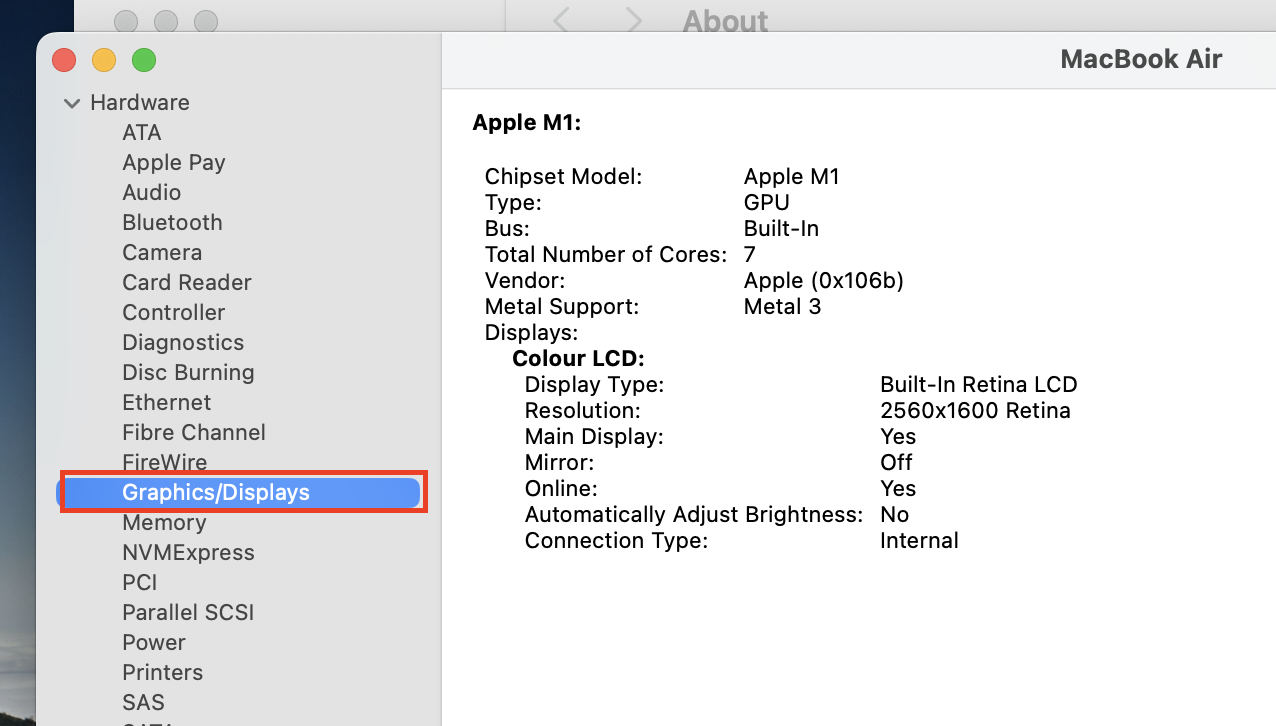
- The System Information window will open. Find Graphics/Drivers in the left-hand panel and click to open it. This window will display detailed information about your Mac's graphics cards.
- If updates are available, you should see a link to download them. Click on this to access additional details about the update or commence the updating process.
8. Reinstall macOS
Not having any luck? Your last step before heading to an Apple genius is to reinstall macOS. It offers a clean start while preserving your data and a fix of any corrupt software. Remember to back up your files before proceeding.
Here’s how to reinstall macOS:
- Enter macOS recovery mode
- Once in recovery mode, select the Reinstall that matches your version of macOS, and click Continue
- If you’re asked to unlock the disk, enter your username and password
- If the installation process is interrupted by the request to choose between Macintosh HD or Macintosh HD - Data, choose Macintosh HD
- Wait until the installation ends. Don't worry if your Mac screen is blank, restarts, and then shows progress numerous times. This is completely normal.
- When the installation is over, your Mac may restart to a setup assistant.
Note from our experts: Sometimes, when you reinstall macOS, you can encounter your MacBook stuck on Apple logo issue. To resolve it, you may need to reboot your system, reset your NVRAM, or reset your SMC.
Get a clearer view with our tips and tricks
The appearance of stripes across your Mac screen, though initially alarming, might not necessarily indicate a serious issue. While it's possible that complex hardware problems might require the expertise of an Apple pro, it's best to explore other solutions before doing so.
The lines on your MacBook screen can happen for different reasons. Some are because of how the hardware works, like if you dropped your laptop causing damage or it got too hot. Others are because of software issues, like when things aren't working well between different parts of your computer.
Hopefully, with the help of our recommended methods, you’ll resolve your Mac’s display issues. Also, don’t forget to check out MacKeeper’s Memory Cleaner to timely stop energy-intensive tasks, keep your Mac running smoothly, and reduce the likelihood of vertical or horizontal lines on your MacBook screen.


