In this article you will find the following:
The Secure Empty Trash on Mac Big Sur was widely regarded as one of the platform's best functions. However, with the release of OS X El Capitan, Apple discontinued Secure Empty Trash. From then on, users could only use the traditional method to empty Trash on Mac.
So, how can you securely empty the Trash on your Mac if you’re using Mac Big Sur? We've done the research and compiled the best methods available, and we'll share more details in this article.
Before we begin:
If you plan on deleting personal data and sensitive documents from your Mac, it’s important to ensure that nobody can recover them. This is where MacKeeper’s Safe Cleanup tool comes in super handy. Not only does the app help free up disk space and optimize your Mac’s performance, but it also ensures the secure removal of files you don’t need.
Here’s how to use MacKeeper’s Safe Cleanup feature to empty your Mac’s Trash safely:
- Download and launch MacKeeper.
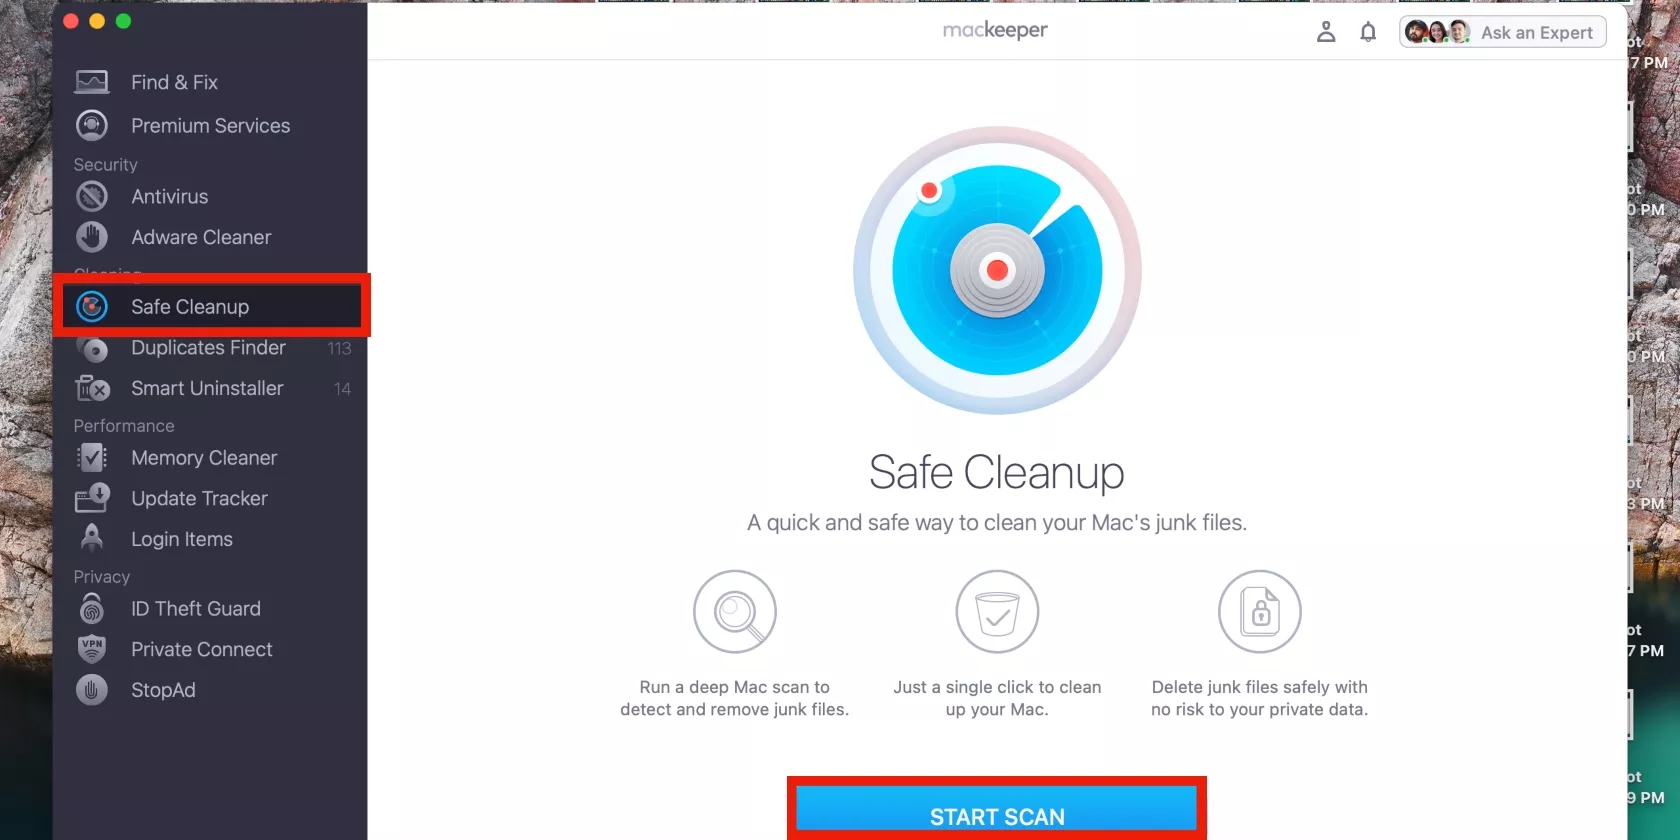
- Select Safe Cleanup.
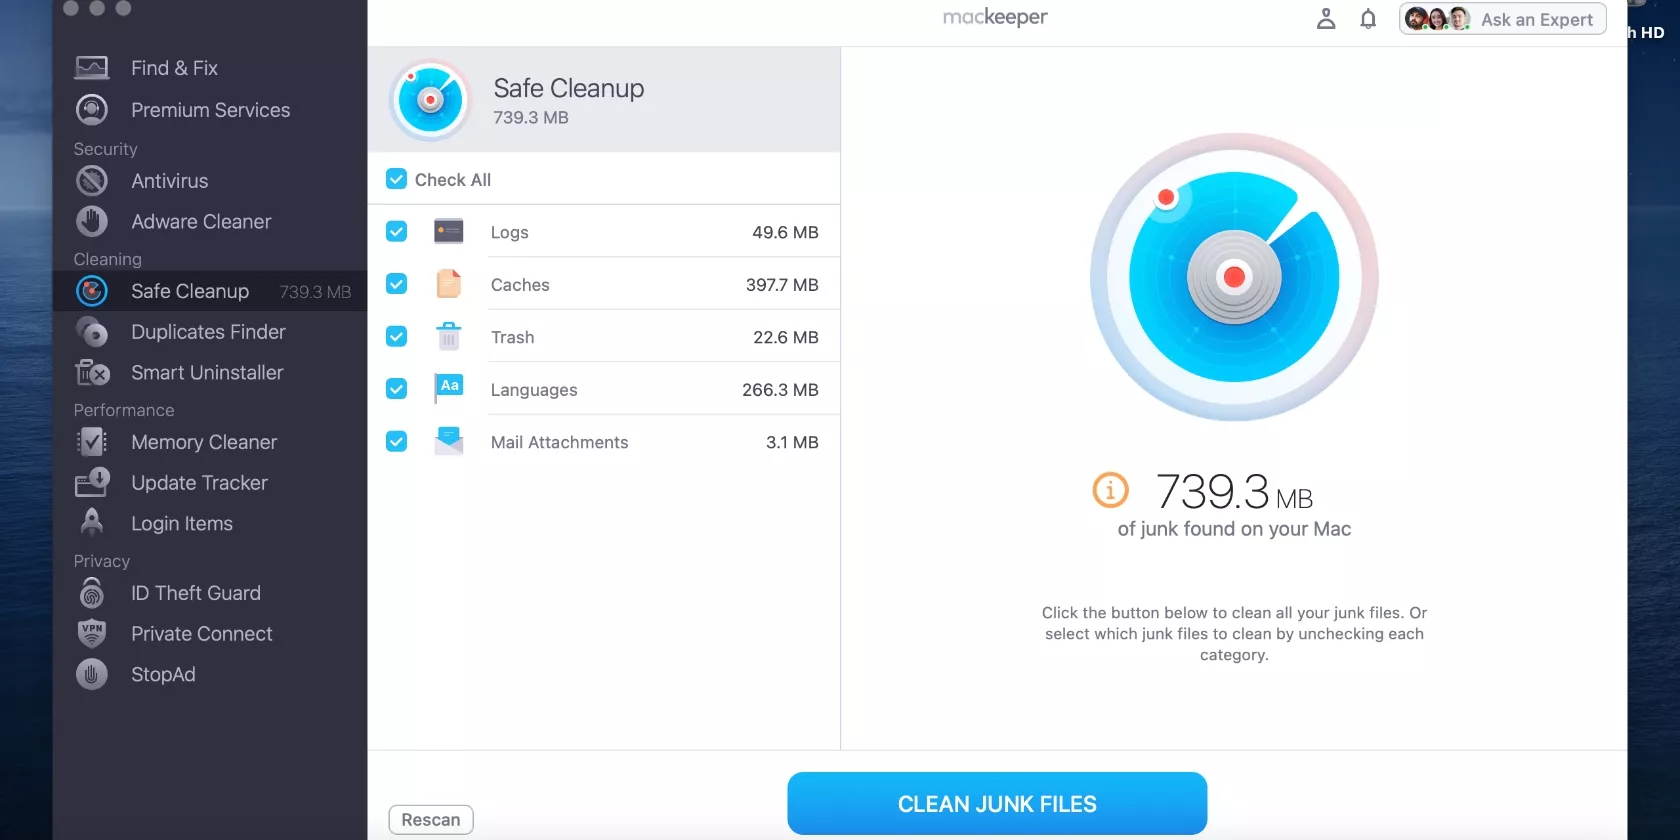
- Run the scan, and once completed, tick Trash. Then, choose Clean Junk Files to delete all the junk it finds.
What does Secure Empty Trash mean on Mac
In a nutshell, secure empty trash is a feature that completely deletes files from the trash bin in older Mac operating systems like Big Sur or earlier. When you use this feature, it writes random data over the deleted files, making them very hard to recover.
You see, when you put files in the Trash on your Mac and then empty it, you might assume the files are gone for good, but that's not entirely true. When you empty trash on your Mac, it only removes the catalog information, which is the data your Mac uses to locate files on the disk. The actual files remain on the disk. This method saves time because fully deleting files, especially large ones, would take much longer.
To fix this, Mac Big Sur had the Secure Empty Trash feature. This allows you to delete both the catalog information and the actual files, making sure they are completely removed from your hard disk.
What happened to the Secure Empty Trash feature on Mac Big Sur
Previously, Mac’s Secure Empty Trash feature allowed you to safely empty the trash. However, Apple removed this feature, claiming that it couldn't guarantee the secure deletion of Trash files.
How to permanently remove files on Mac Big Sur so they cannot be recovered
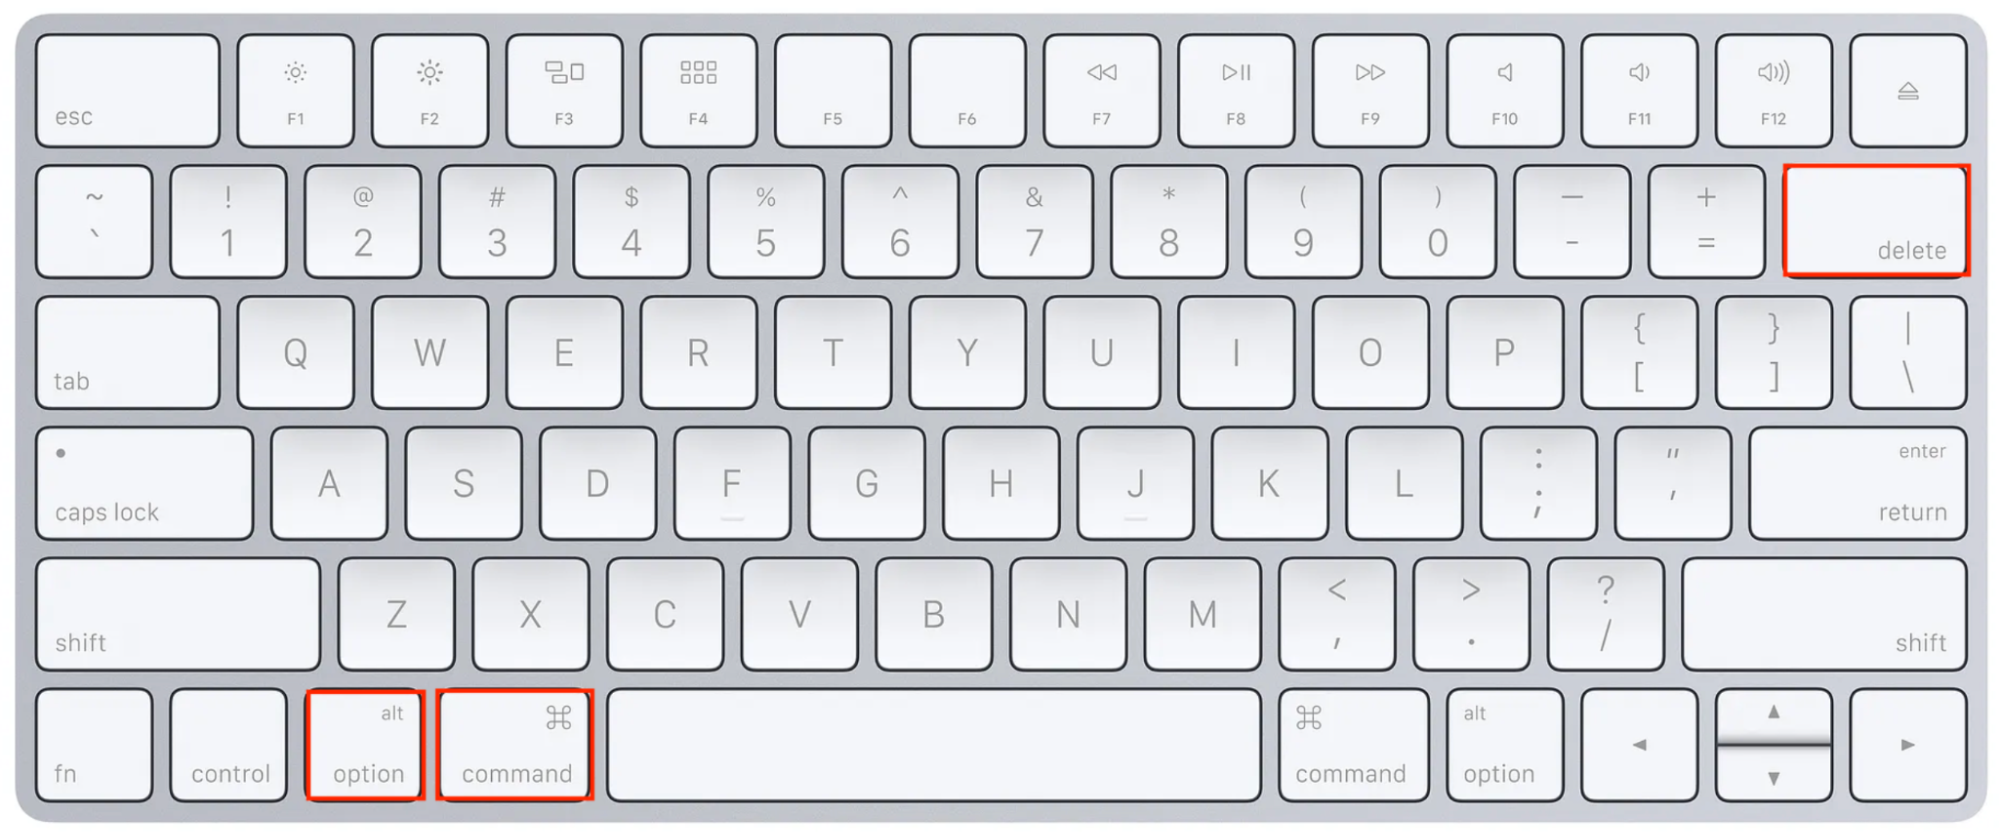
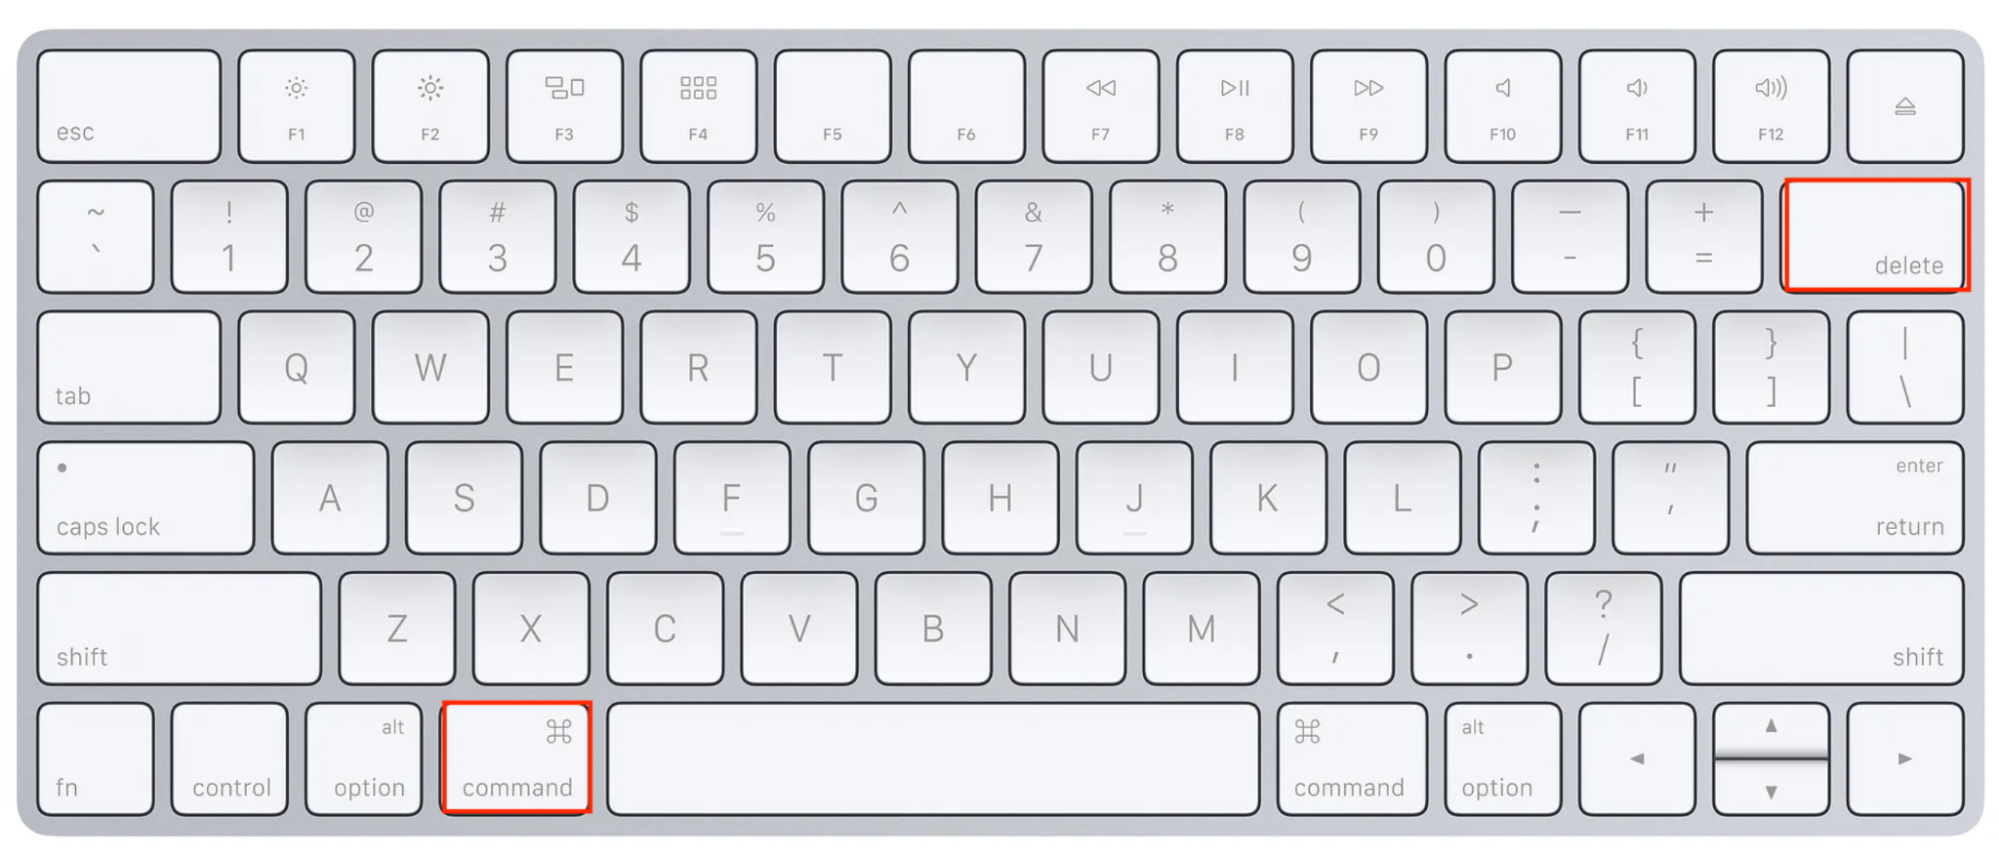
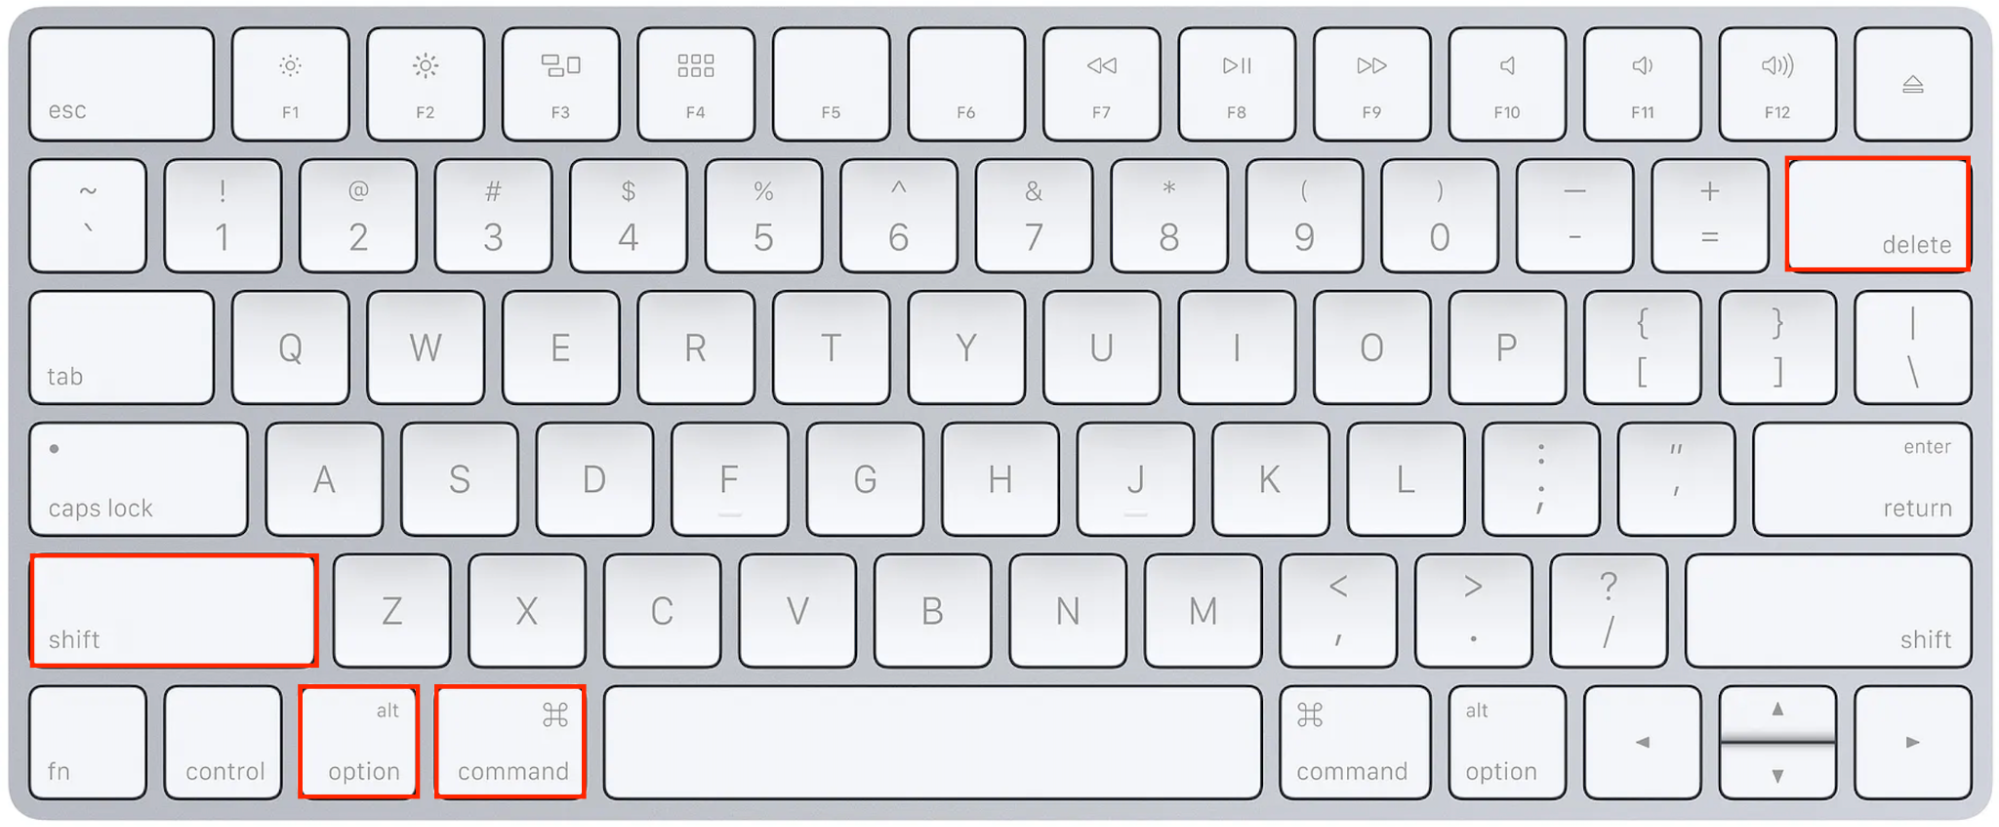
Even without the Secure Empty Trash feature on a Mac Big Sur, you can permanently delete a file or folder with a few simple keyboard shortcuts:
- Press Option + Command + Delete for locating and deleting a file.
- To move a file to Trash, press Command + Delete.
- To empty your Trash, press Command + Option + Shift + Delete.
Why you need to use Secure Empty Trash on macOS Big Sur
Even though Apple has discontinued the Secure Empty Trash feature, many Mac users still need a method to delete files securely. As previously mentioned, when you empty the Trash on a Mac, the system only removes the file's index entry, leaving the file itself on the hard drive. So, securely deleting files from your Mac can:
- Help you manage your device’s storage space by allowing you to remove purgeable space on Mac Big Sur.
- Stop hackers or unwanted prying eyes from accessing sensitive information and private data.
How do you prepare Mac Big Sur to Secure Empty Trash
If you’ve noticed that your Mac Big Sur no longer has the Secure Empty Trash feature, there’s no need to worry. You can still empty all of your Trash on Mac Big Sur:
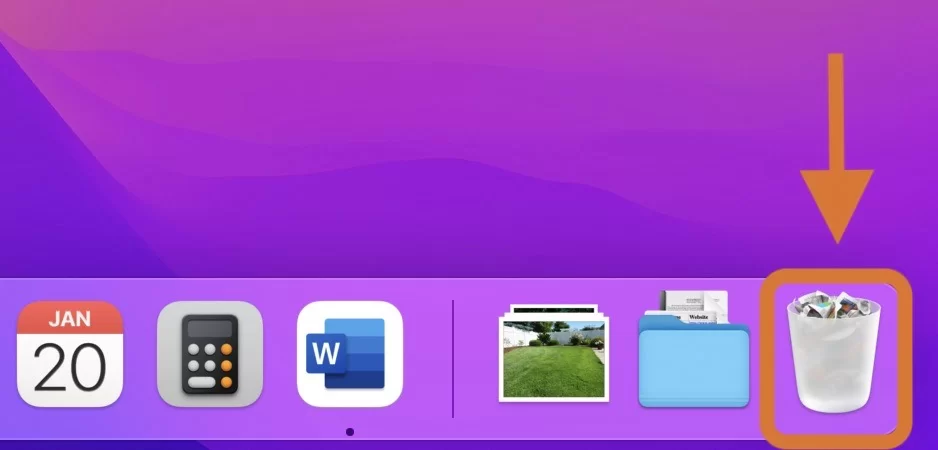
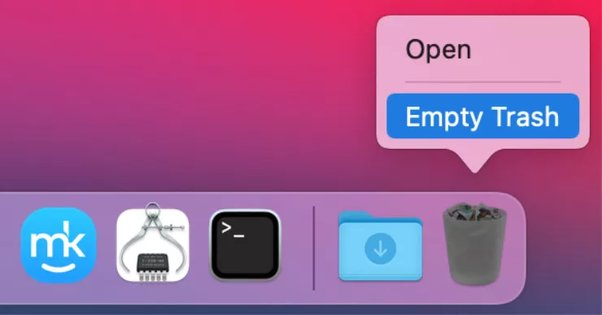
- Simply click on the Trash icon in your Dock.
- Then, click the Empty button found in the top right corner of the window.
- Confirm the action by clicking Empty Trash.
How to Empty Trash securely on macOS Big Sur
While macOS Big Sur doesn’t offer Secure Empty Trash to clean up your Trash thoroughly, you still have plenty of ways to safely delete files from Trash:
- Remove trash via Finder
- Safe removal with Disk Utility
- Delete files from Trash
- Delete trash via Terminal
- Empty trash securely in safe mode
- Use a third-party app
1. Remove trash via Finder
A super quick way to remove unwanted files from your Mac is by using Finder. To remove trash via Finder, follow these steps:
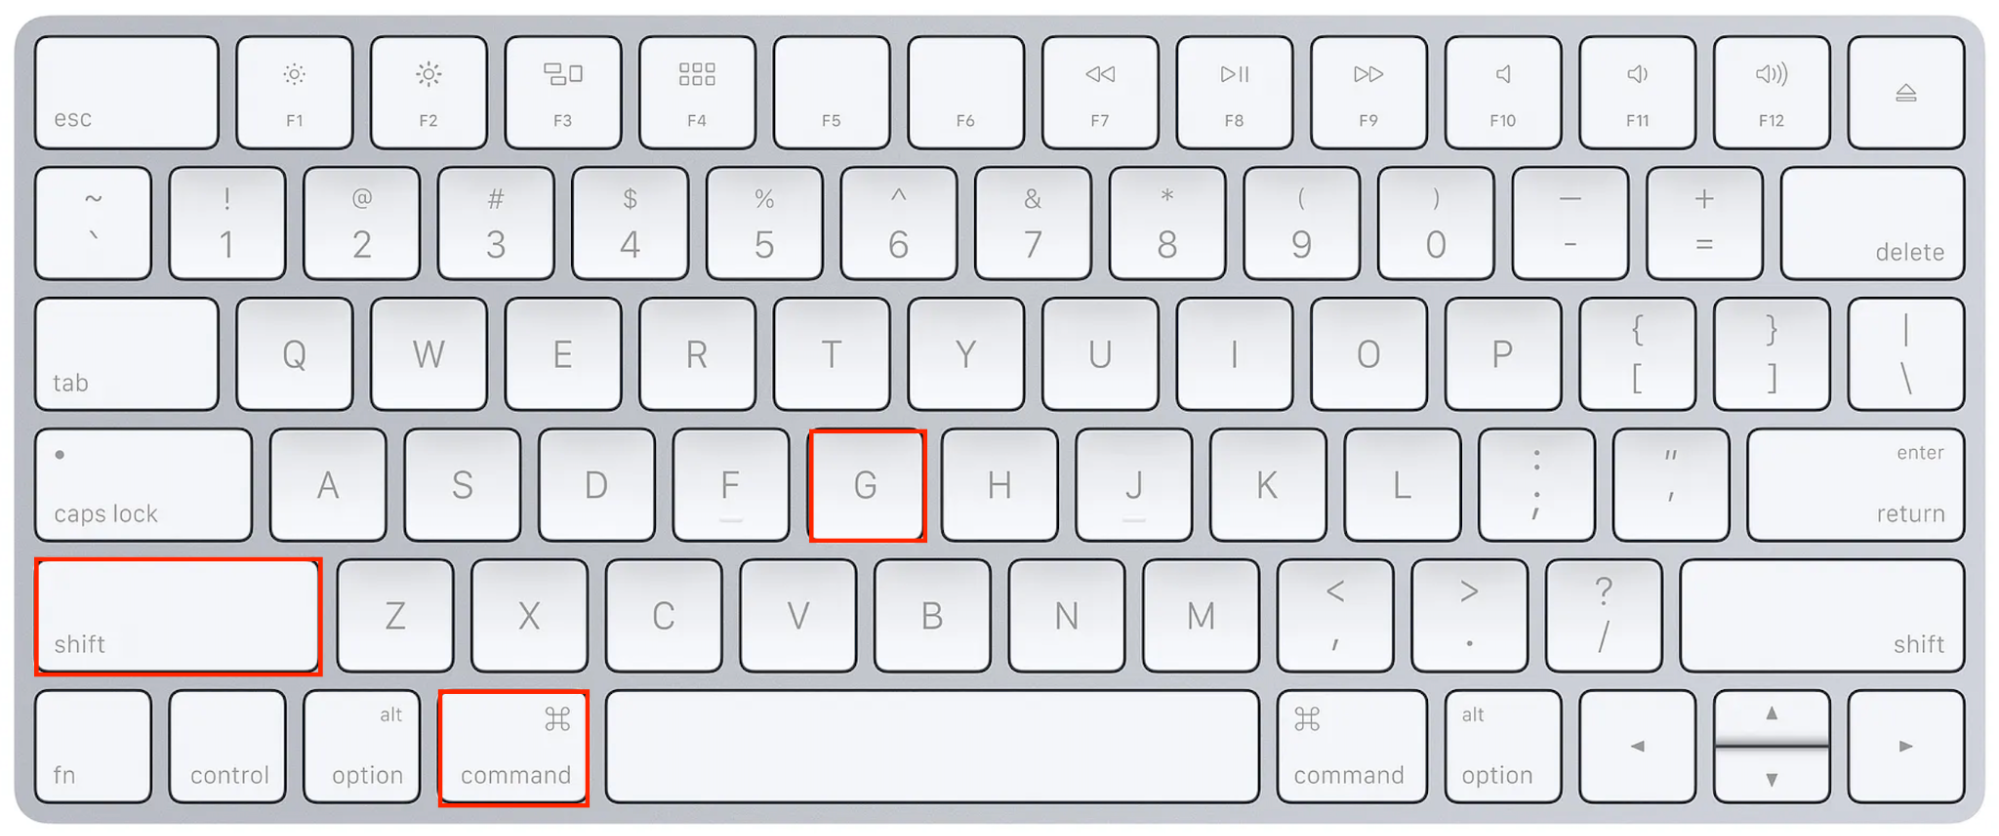
- Open Finder by using the keyboard shortcut Command + Shift + G.
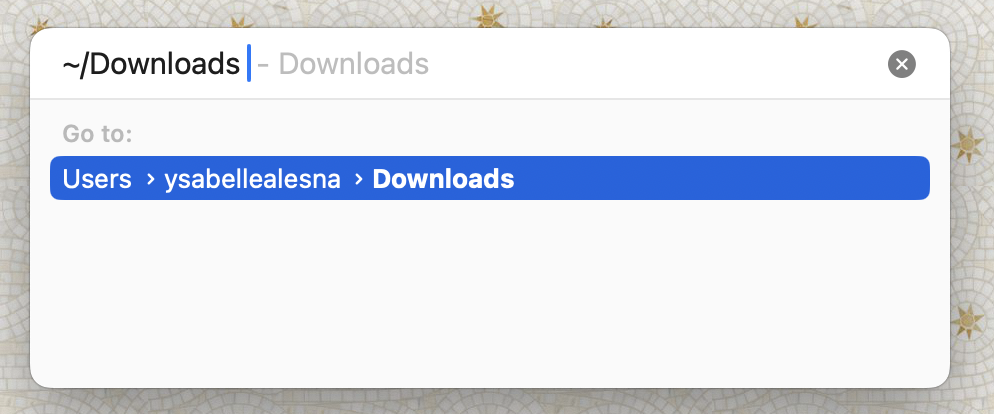
- In the popup, type in the following prompts and delete any unwanted files:
- ~/Downloads
- ~/Library/Caches
- ~/Documents
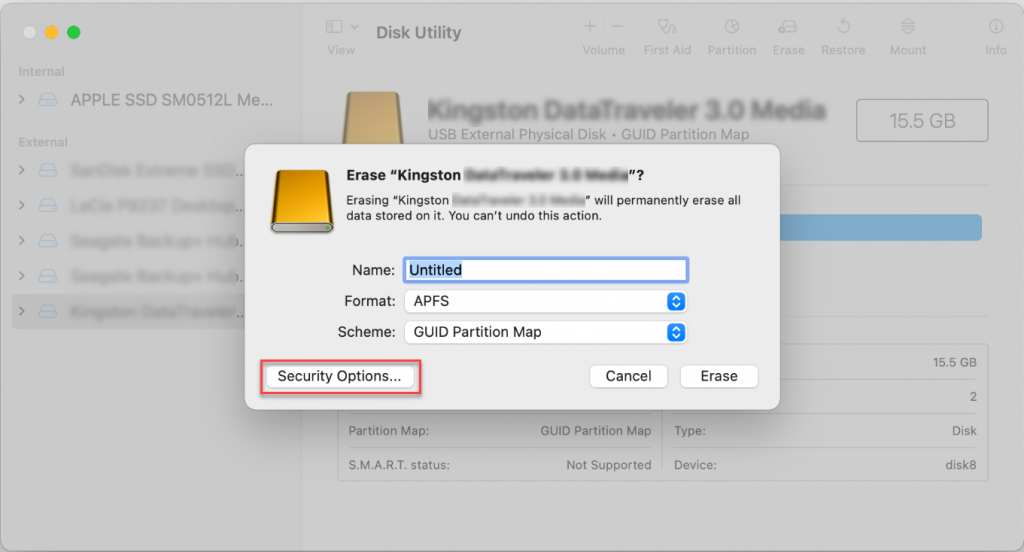
2. Safe removal with Disk Utility
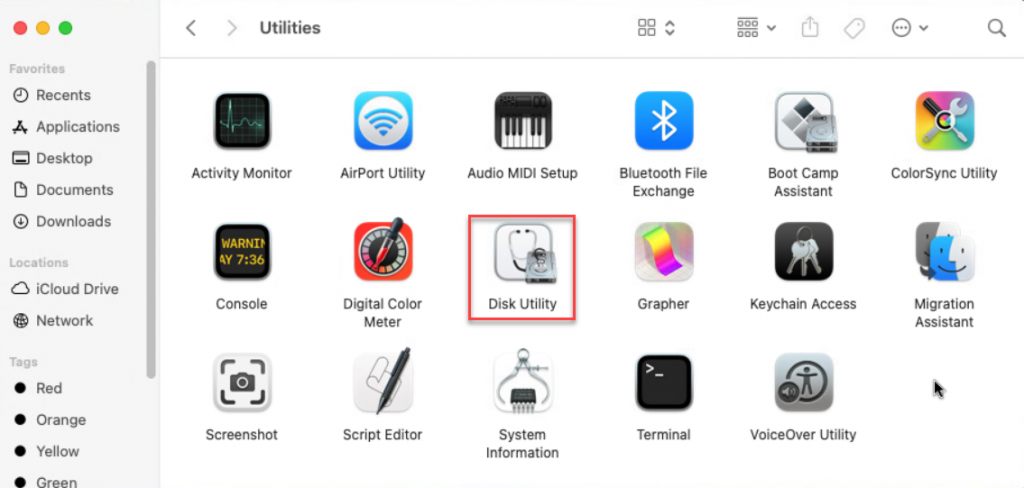
Alternatively, you can securely remove files by using Disk Utility. This way, you can potentially revolve most Mac Big Sur issues, like slow performance speed and storage space. Here’s how:
- Open your Applications folder and go to Utilities > Disk Utility.
- Choose the hard drive from the left-hand panel.
- Click Erase and select Security Options.
- Choose Secure Erase Mode, then click Erase.
3. Delete files from Trash
Emptying the Trash on a Mac is a simple and quick process that ensures deleted files are removed from your system. There are three different ways to delete files from the Trash—follow our guide to see each.
Option 1
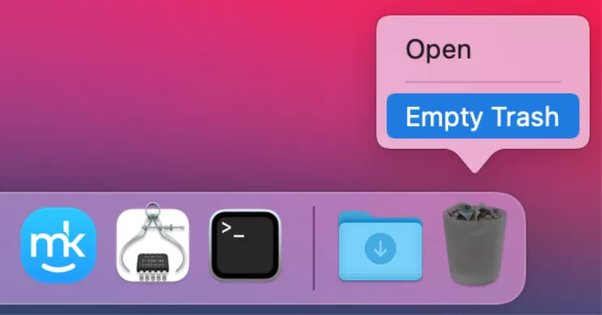
This first method is the most commonly used way to empty files from Trash. It’s super easy to do and gets the job done in seconds:
- Right-click on the Trash icon found on your Dock.
- Select Empty Trash.
Option 2
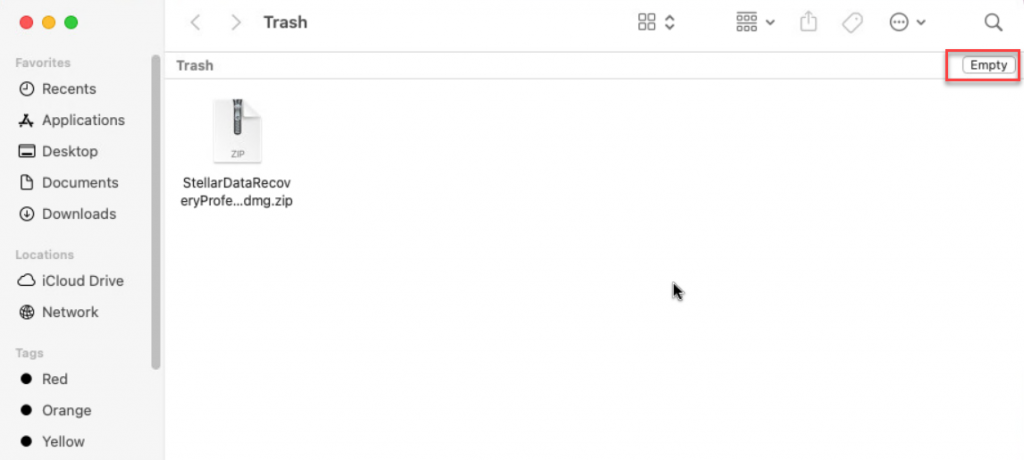
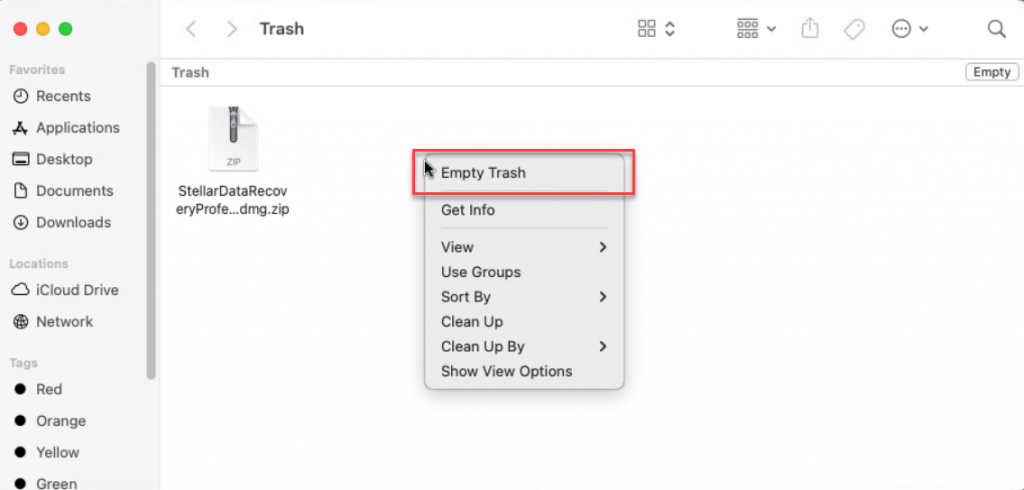
If you want to see what’s inside your Trash before totally wiping it clean, you can do so by following these steps:
- Open your Trash folder.
- Click on the Empty button found in the top-right corner of the window.
- Or right-click any blank area in the opened window and select Empty Trash.
Option 3
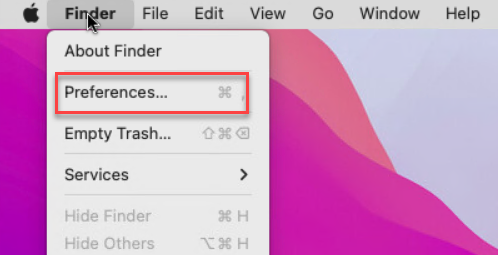
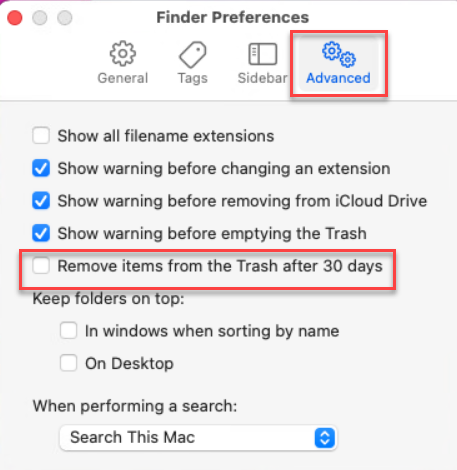
If you don’t want to manually empty your Trash bin all the time, you can simply set up your Mac to clean your Trash automatically. Here’s how:
- Click on Finder > System Preferences.
- Go to the Advanced tab and tick the box to Remove items from Trash after 30 days.
Our expert’s tip:
When it comes to deleting files from your laptop, the usual method of manually dragging and dropping files to Trash can be tedious and time-consuming. A faster solution is using tried-and-tested cleaning software like MacKeeper’s Safe Cleanup. It’s a quick and easy process and the answer to how to clean up Mac storage.
4. Delete trash via Terminal
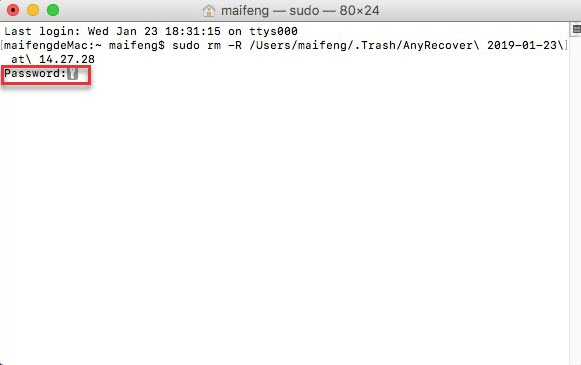
You can do a lot more in the Mac Big Sur Terminal app than you can in the regular interface. This includes securely erasing data and emptying the Trash on your Mac using specific commands:
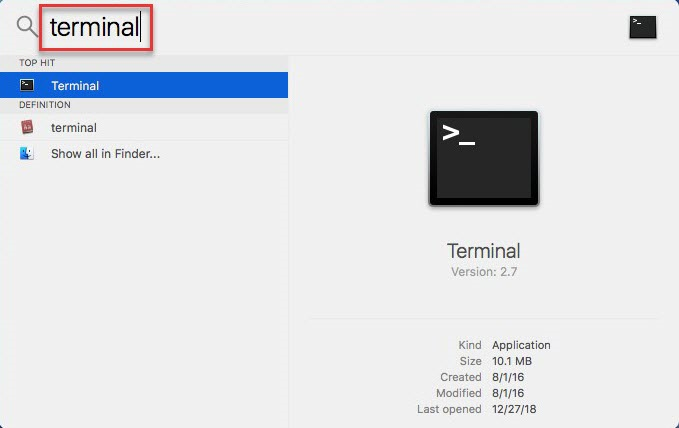
- Go to Applications or use Spotlight to search and open Terminal.
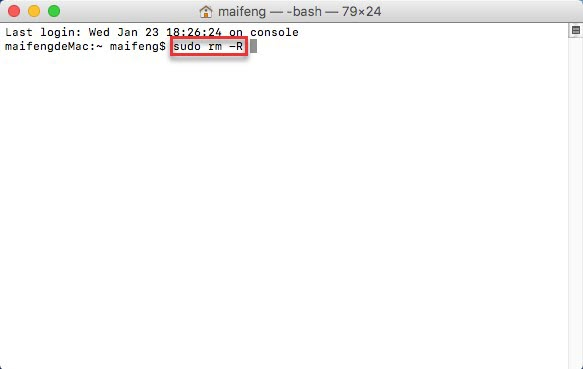
- Type in this terminal prompt: sudo rm -R followed by a space, do not hit the Enter button.
- Open Trash, select the items you want to delete, and drag them to the Terminal window. Press Enter.
- Type your administrator password and press Enter again, and you’re done!
Hint from our team:
Deleting files from Trash using Terminal may take some time, depending on how many files you have. To speed up the process, use the automatic Empty Trash option within MacKeeper’s Safe Cleanup usage.
5. Empty trash securely in safe mode
If your Mac says a file you’re trying to delete is in use, it might be because a startup or login item is using it. If that’s the case, try restarting your Mac in Safe Mode, which stops certain software from loading during startup. Here's how:
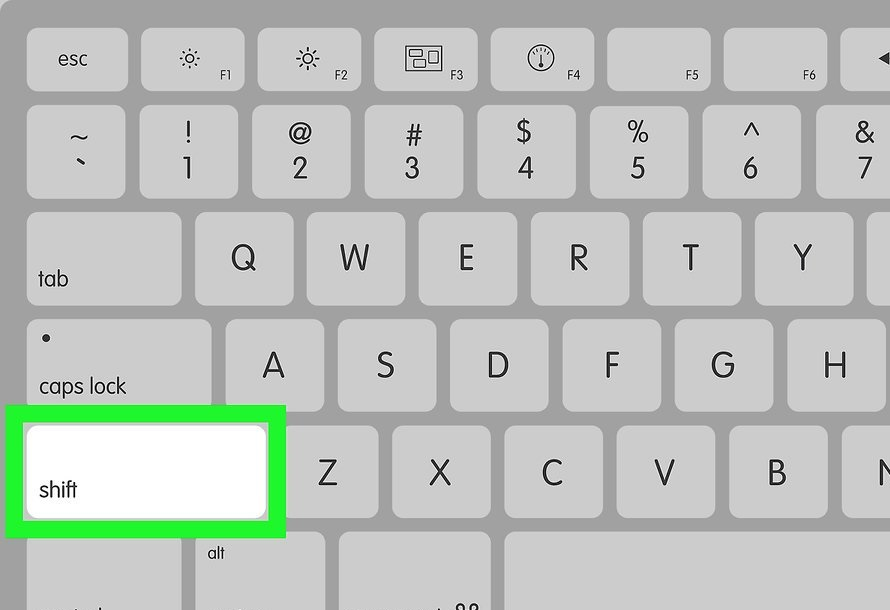
- Turn on or restart your Mac, then immediately press and hold the Shift key.
- Release the key when you see the login window with the words Safe Boot in the upper right corner.
- Empty Trash, then restart your Mac.

6. Use a third-party app
If you're wondering how to find what's taking up space on your Mac, consider this: when you toss a file in the trash, it's essentially flagged for deletion, but it stays there until you officially empty the trash. To reclaim space and ensure deleted files are truly gone, consider using a trusted and powerful cleaner and app uninstaller like MacKeeper to recover space on your Mac.
With just three easy steps, MacKeeper’s Safe Cleanup tool lets you totally remove trash on your macOS Big Sur:
- Open the MacKeeper app.
- Select Safe Cleanup from the menu on the left.
- Click Start Scan, then click Clean Junk Files to finish the removal process.
The quickest way to permanently remove files on Mac Big Sur
So, as you’ve read, despite Mac Big Sur losing its Secure Empty Trash feature, there are still plenty of ways to quickly clear Trash files from your Mac laptop. You can manually empty your Trash and use keyboard shortcuts or even Terminal commands to permanently delete these files.
But if you’re looking for a simple way to manage your Trash, use MacKeeper’s Safe Cleanup tool. It automatically deletes Trash files, making it easy to erase all hidden junk and delete cache on your Mac with just a few clicks.


