In this article you will find the following:
It should go without saying that making backups is important. But backing up can be a chore, something that’s easy to put off until another day. That’s what’s great about Apple’s Time Machine. It makes backing up easy, automating the process so you don’t have to think about it constantly.
In this guide, we’ll show you how to do a backup using Time Machine, and how to choose a location to back up to.
Before we start:
There’s no point in backing up duplicate files. They just take up space and make your backup take longer. Use MacKeeper’s Duplicate Finder to track them down and delete first:
- Download MacKeeper.
- Start it, and select Duplicate Finder from the left.
- Click Start Scan.
- When it’s done, select any duplicate it finds.
- Click Remove Duplicates.
With your Mac clear of wasteful duplicates, you can do your Time Machine backup. Give it a try today.
What is Time Machine on Mac?
Time Machine is, of course, macOS’s built-in backup tool. It originally appeared in Mac OS X 10.5 (Leopard) and has since gone from strength to strength, giving Mac and MacBook users an easy way to save and restore files.
Time Machine creates a copy of any data that isn’t part of the original macOS installation—including files, folders, and settings. Depending on how you set it up, Time Machine can make backups automatically or whenever you choose. You can then restore individual files or your entire Mac.
To use Time Machine properly, you need an external disk to save your backups to. However, Time Machine also creates ‘snapshots’ on your main system disk, so you can quickly restore previous versions of files. These are temporary backups, which automatically delete themselves as necessary.
Why should you use Time Machine for backups?
As a built-in tool, Time Machine is the ideal way to back up Mac computers. It can be useful in a variety of situations:
- When you want to restore an older version of a file or folder.
- To get back files or folders that you’ve accidentally deleted.
- If you want to restore your whole Mac to an earlier state—maybe to recover from a malware attack.
- To protect against data loss, which could occur due to hardware failures, security threats, and so on.
- If you want to back up your iPhone to your Mac, and then save the backups.
How to choose an external drive for the backup destination
The idea of Time Machine is to make a copy of your startup disk somewhere else. This means that even if your Mac isn’t working, you can still access your backups. There are a number of locations Time Machine can save backups to, so look for one of these solutions:
- Use another Mac as a Time Machine destination
- Use an external USB drive
- Create a Time Machine backup on a network-attached storage (NAS) device
- Use an AirPort Time Capsule
Note from our experts:
We should warn you that only certain NAS drives are compatible with Time Machine, so if that’s the route you want to take, check first before buying one. There are also a few extra steps needed to get a Mac ready to be used as a Time Machine destination for another Mac. Other than that, it’s quite simple to set up Time Machine on a Mac.
The key factor is disk size. You should choose a Time Machine destination that is at least twice the size of your Mac’s main storage.
1. Use another Mac as a Time Machine destination
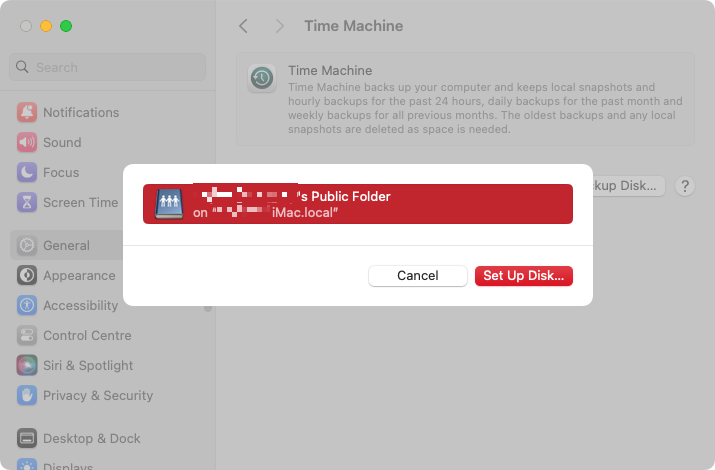
If you set up a shared folder on one Mac, you can use that folder as a Time Machine backup destination on another Mac. Here’s how to make a Time Machine backup using another Mac:
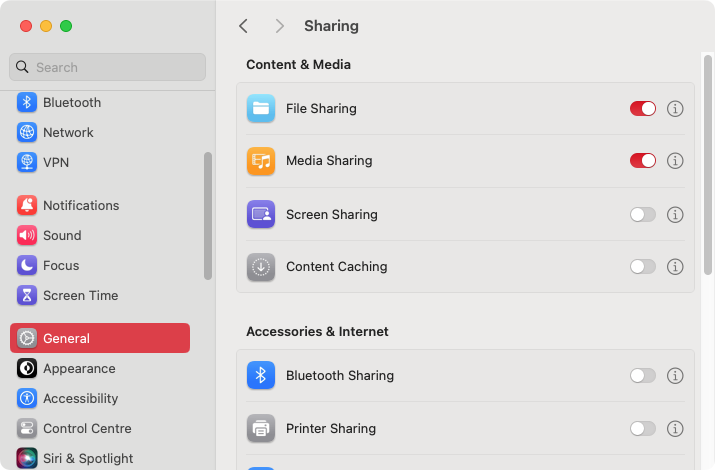
- On the Mac, you’re going to use as a Time Machine backup, go to System Settings > General > Sharing. Enable File Sharing. Click the i button, then the Options button.
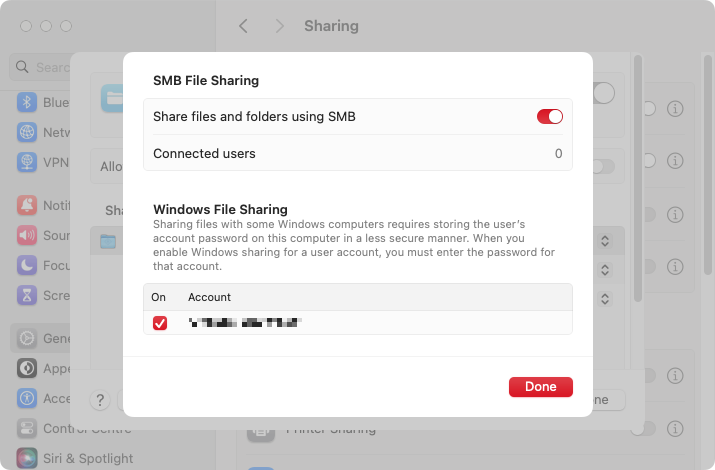
- Enable Share files and folders using SMB, and click Done.
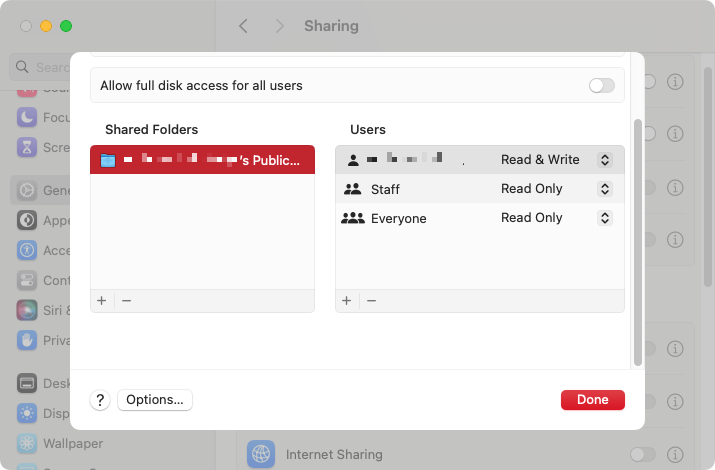
- Under Shared Folders, click the + button. Select your Time Machine folder, and click Done.
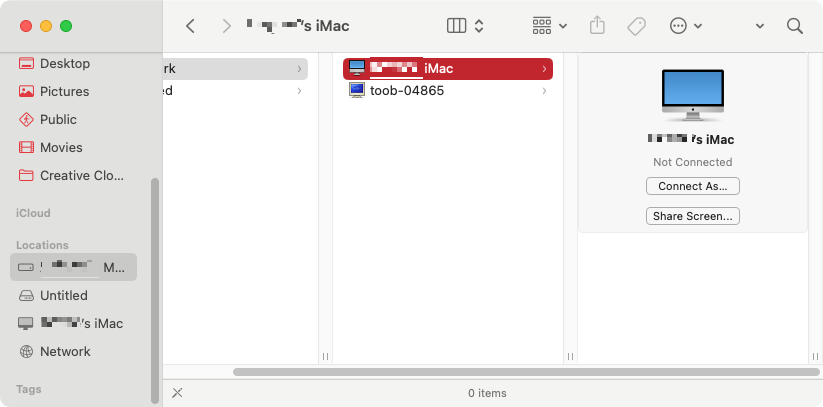
- On your main Mac, open Finder, and go to Network. Find the other Mac, and click Connect As. Enter your login details for the other Mac. Select the backup folder to connect to it.
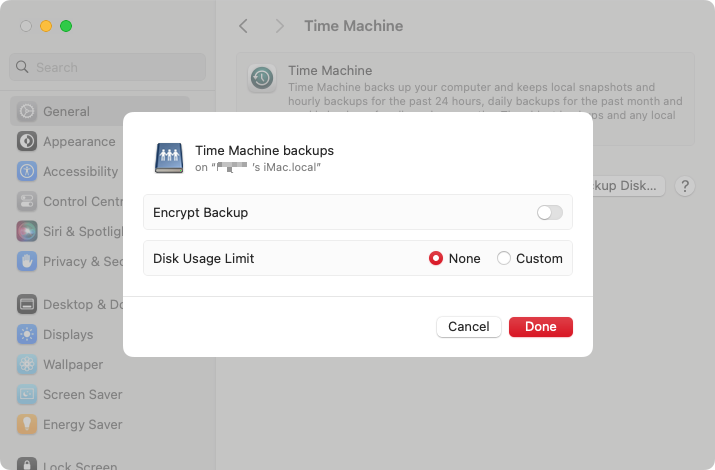
- Next, go to System Settings > General > Time Machine, and click Add Backup Disk. Select the backup location, and click Set Up Disk. Enter your password and username for the other Mac if prompted.
- Choose your backup preferences, and click Done.
2. Use an external USB drive
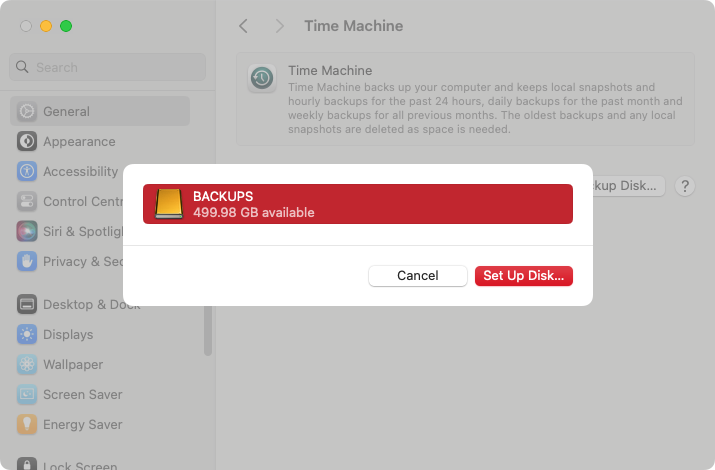
Using a USB hard drive or SSD to create a Time Machine backup is simple. The drive will need to be formatted first, but the Time Machine setup tool will do that for you:
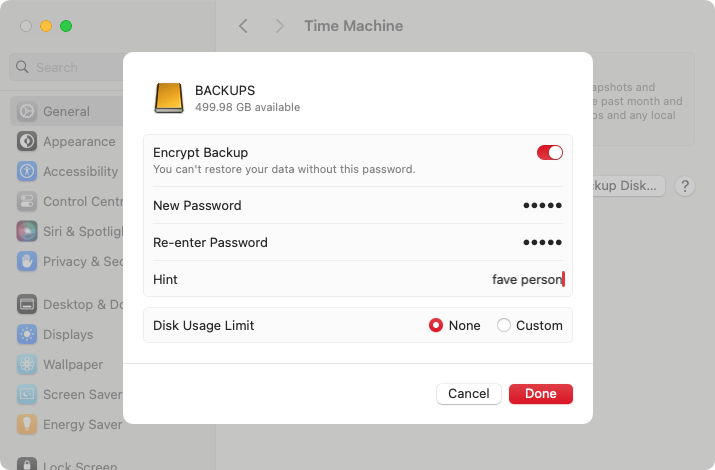
- Plug in your USB drive, then go to System Settings > General > Time Machine, and click Add Backup Disk. Select your USB drive, and click Set Up Disk.
- Choose your backup settings, and click Done.
3. Create a Time Machine backup on a network-attached storage (NAS) device
Time Machine supports NAS drives too. As long as macOS is connected to a shared folder, it’ll be available to use in Time Machine. How you do this will vary depending on what NAS drive you have, but the basic process looks like this:
- Open a web browser and navigate to your NAS drive’s control panel.
- Use the NAS drive’s tools to create a shared folder. Call it something like ‘Time Machine backups’.
- Connect your Mac to the shared folder in Finder.
- Go to the Time Machine settings in System Settings, and click Add Backup Disk.
- Select the NAS drive, and click Set Up Disk.
- Enter your preferences, and click Done.
4. Use an AirPort Time Capsule
The Time Capsule was a device that purpose made for Time Machine, combining a Wi-Fi router and internal storage for backup. It’s now been discontinued, but if you have a Time Capsule, using it with Time Machine is easy:
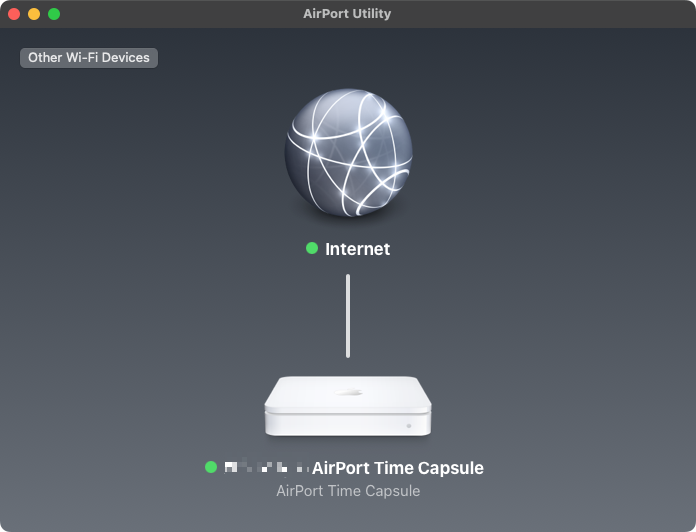
- Make sure your Time Capsule is on and connected to your Mac. Open Airport Utility from Applications > Utilities to be sure.
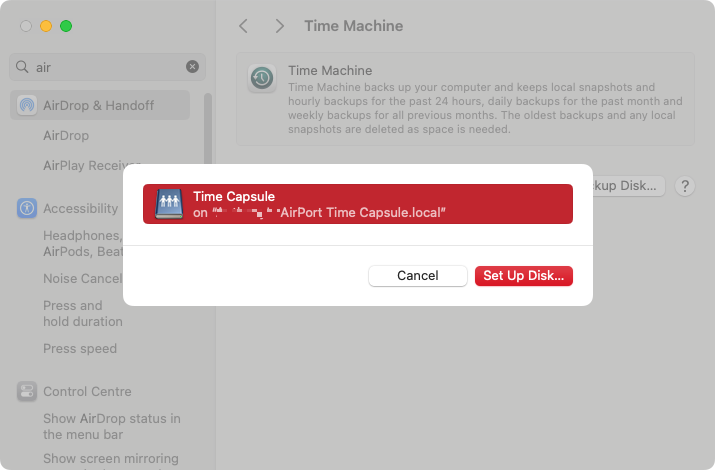
- Now go to System Settings > General > Time Machine. Click Add Backup Disk. Select the Time Capsule, and click Set Up Disk.
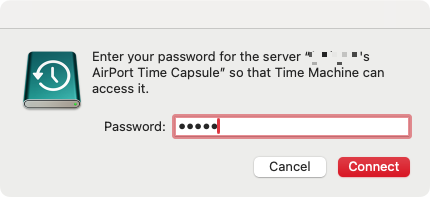
- Enter the network password, if prompted. Choose backup settings, and click Done to start your Time Machine backup.
How to back up manually with Time Machine
When you enable Time Machine, it’ll be set to back up automatically by default, and it’ll do a backup immediately. You can also manually initiate a Time Machine backup at any time:
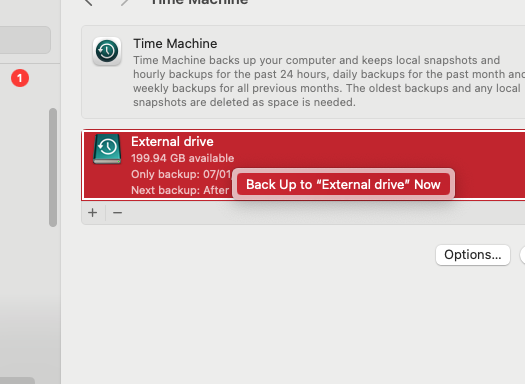
- Go to the Time Machine settings in System Settings. Right-click your backup location and select the option to do a backup now.
- You can also click the Time Machine icon in your menu bar, and select Back Up Now.
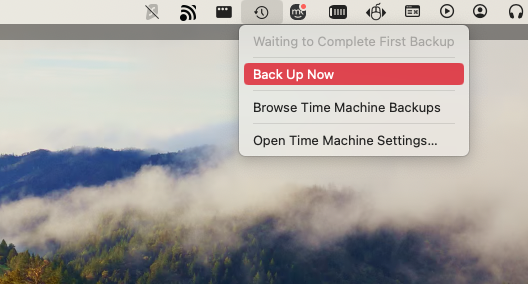
Important: The first time you back up your Mac with Time Machine could take a while, depending on how many files you have. After that, Time Machine will back up your data periodically: hourly, daily, and weekly. It only updates the files that have changed since the previous backup, so future backups are much quicker.
How to exclude files and folders from Time Machine backups
Unless you say differently, Time Machine will back up your entire system drive. Obviously, the more there is to back up, the longer it’ll take. And there are probably files on your Mac you don’t need to back up—things like app installers, which you can just download again.
Here’s how to exclude items from your Time Machine backups:
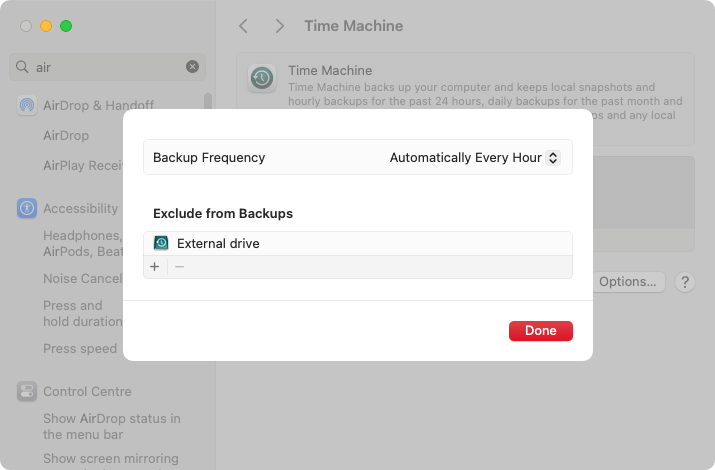
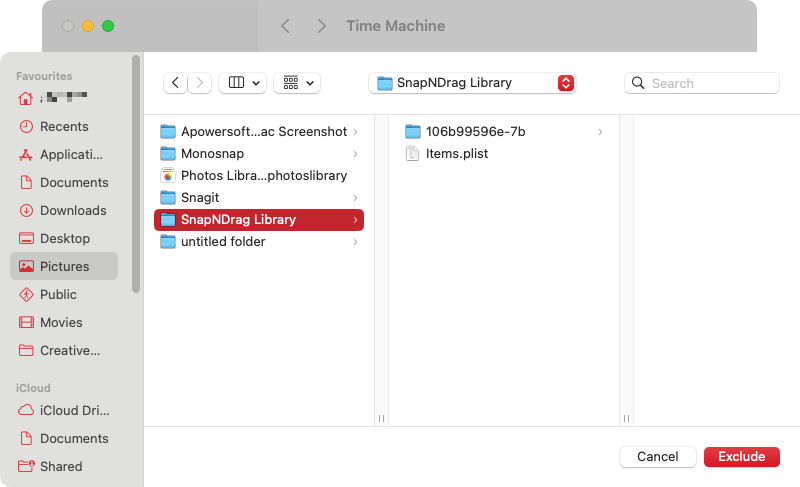
- Open your Time Machine settings from System Settings. Click the Options button. Under Exclude from Backups, click the + button.
- Select some files and folders you want to exclude, and click Exclude. Repeat the process for any more files or folders you want to leave out of your backups. Click Done when you’re finished.
How to turn on automatic backups with Time Machine
By default, Time Machine will create backups automatically every hour. You can turn this off and on at any time and alter the backup frequency as well:
- In System Settings, go to General > Time Machine. Click Options.
- Next to Backup Frequency, use the dropdown menu to choose how often Time Machine automatically does backups. You can also choose Manually, to turn off automatic backups. Choose an automatic setting to turn on Time Machine again.
How to restore your whole startup disk with Time Machine
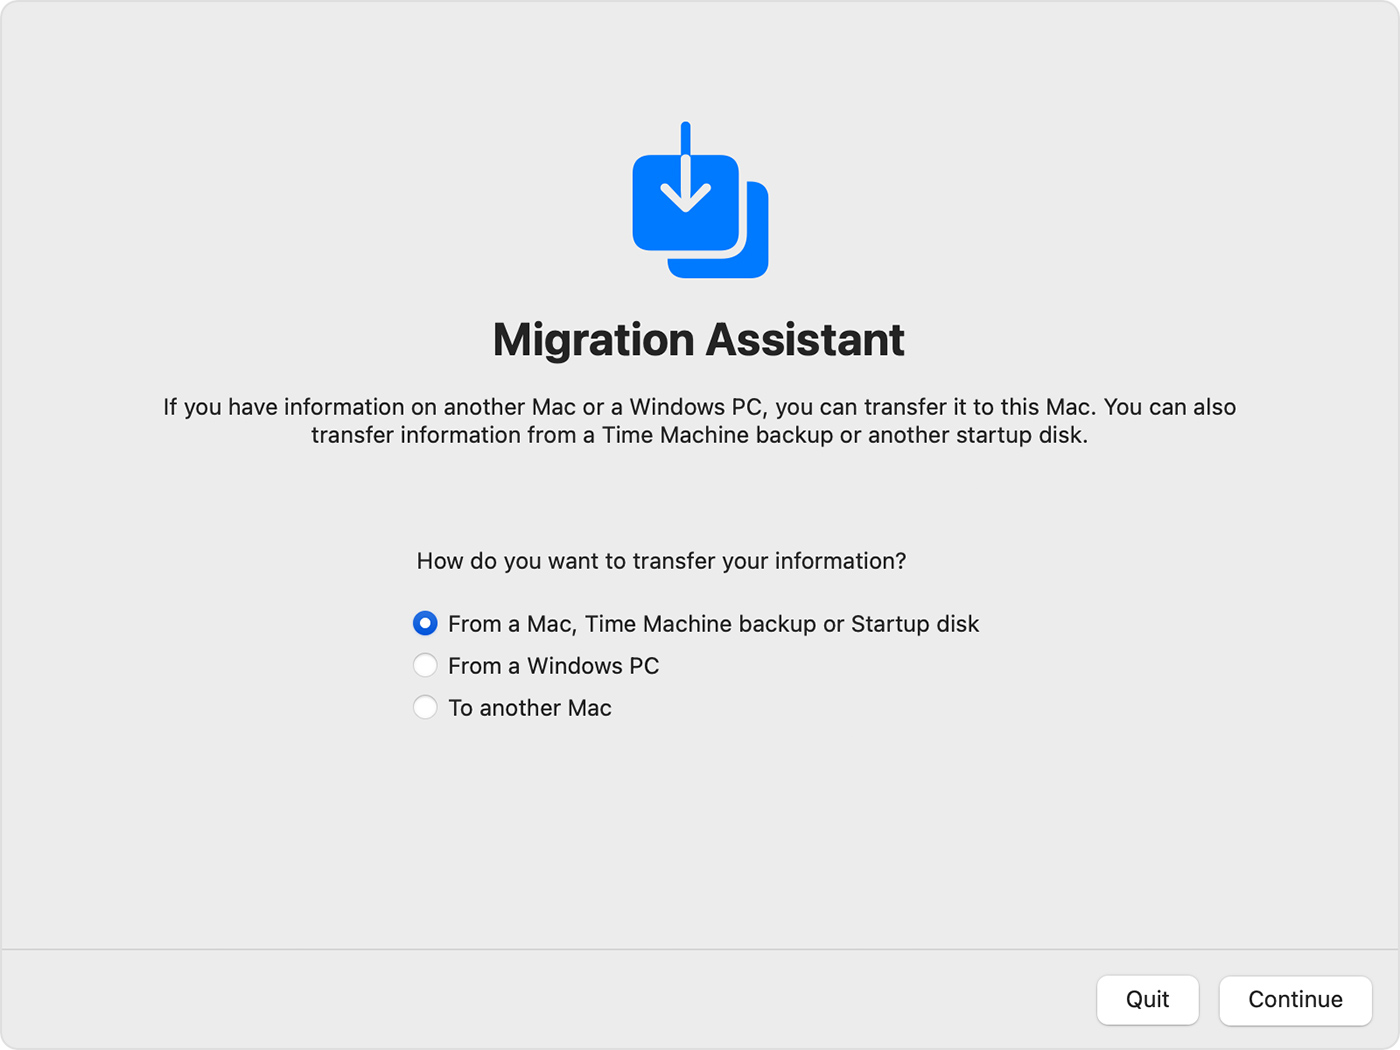
If something goes wrong with your Mac, and it won’t start, you can run Time Machine backup to restore your machine completely. You’ll need to factory reset your Mac and reinstall macOS, then use the Migration Assistant to restore your Mac.
To restore your Mac with Time Machine:
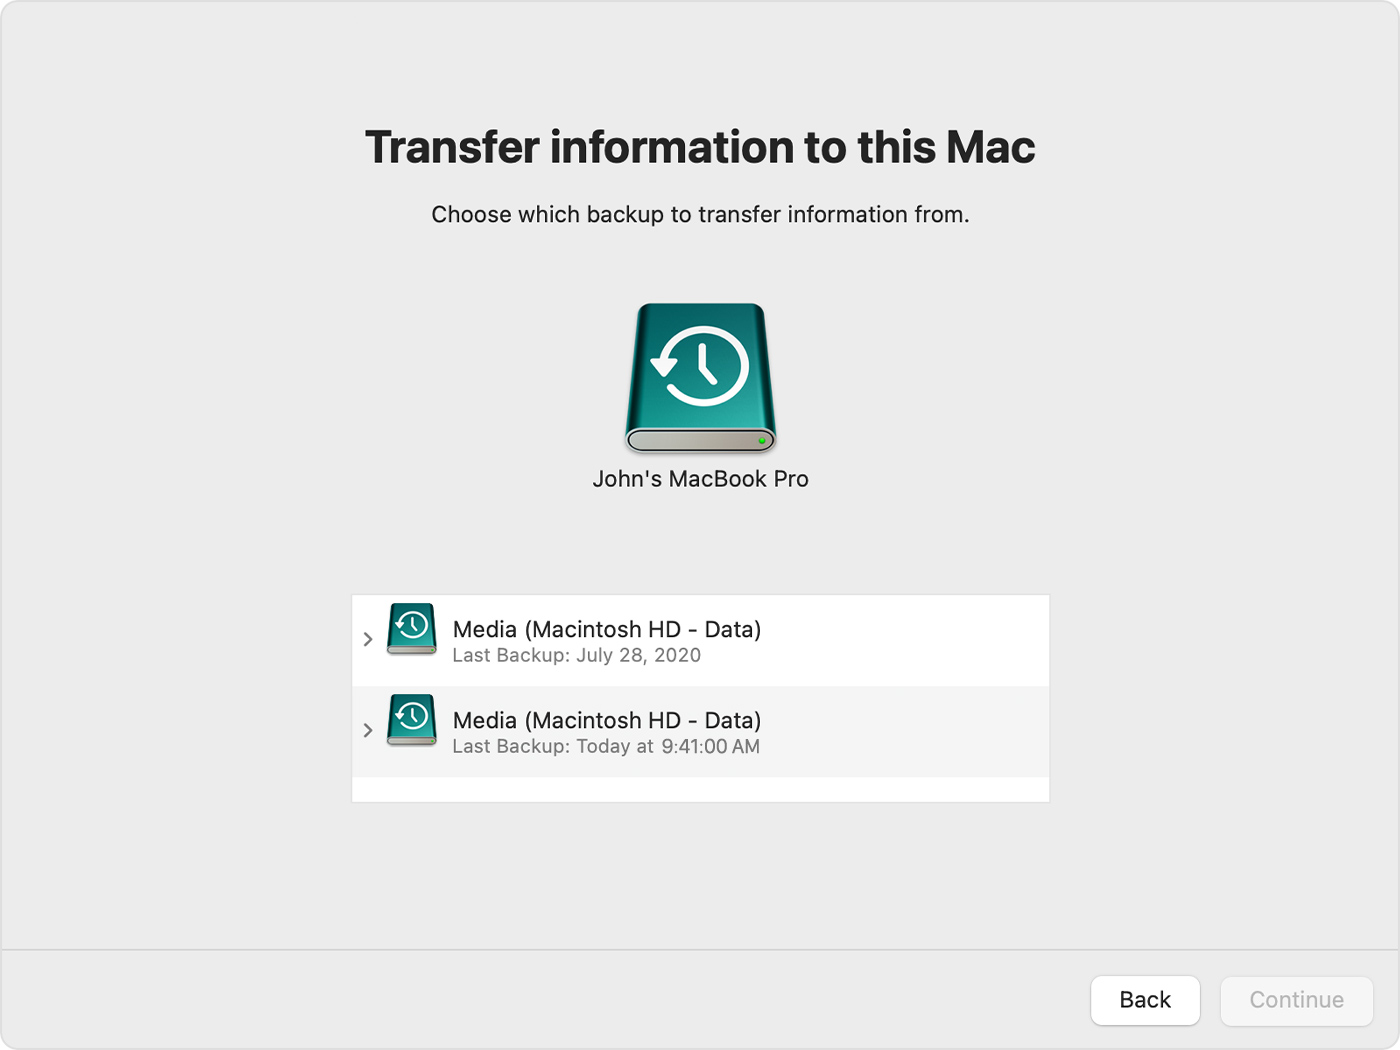
- After reinstalling macOS, boot up your Mac, and open Migration Assistant from Applications > Utilities. Select From a Mac, Time Machine backup, or Startup disk, and click Continue.
- Select your Time Machine backup, and click Continue.
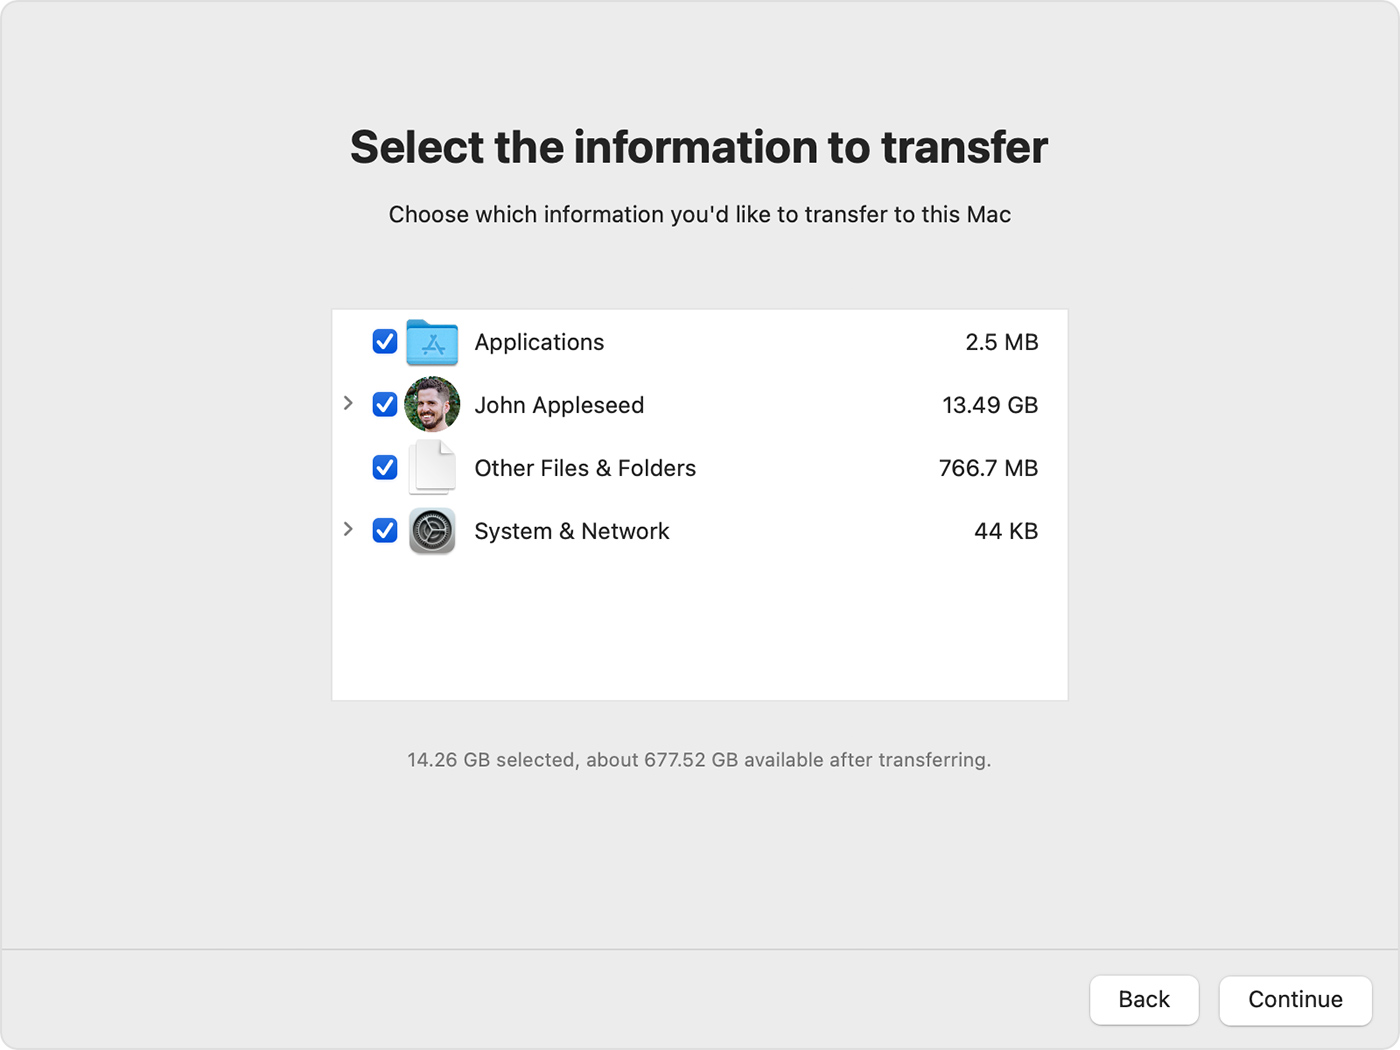
- Select what you want to restore, and click Continue. Create a password when prompted, and click Continue. Wait while Migration Assistant restores your files.
Hint from our team:
Most of the time, you won’t want to restore your whole Mac with Time Machine. Generally, you’ll only use that feature if something is seriously wrong with your Mac or if you’re moving to a new computer. If you’re having performance issues with your Mac, make sure to update macOS before you think about restoring from a backup.
How to restore individual files and folders using Time Machine
Once it’s all set up and has been running for a while, you can access Time Machine backups to restore individual files and folders any time you want.
Here’s how to use Time Machine to restore items:
- Click the Time Machine icon in your menu bar. Select Browse Time Machine Backups.
- You’ll see a stack of Finder windows. Each of these represents a different backup. You can navigate through these, as well as look in each backup for files and folders. Select what you want to restore, and click the Restore button.
Make the most use of backups
Time Machine is a smart solution for backing up important files and even your whole Mac. If anything goes wrong, you can quickly restore your data, as if nothing happened. However, it’s important to make sure your Mac’s storage isn’t filled with junk before you back it up. Otherwise, your backups will be bigger and will take longer to complete. If Time Machine gets stuck on preparing a backup, check our guide.
You can save space by excluding folders you don’t want to back up with Time Machine. For example, you might want to leave your download folder out of your backups.
If you have any particularly important files, you can also back them up to iCloud or another cloud service. Combined with Time Machine, you’ll give yourself extra security against data loss.
It also makes sense to remove duplicates, including identical and similar images. MacKeeper’s Duplicates Finder can help you with both of those. In just a few clicks, it’ll search your Mac for files you can safely delete, helping you reduce the size of your Time Machine backups.
FAQ
1. How much space does the Time Machine need?
We generally recommend using a Time Machine destination that is at least twice as large as your startup disk. But the bigger, the better, so if you can get more space, you should. You can also exclude files and folders from your backups if you need to reduce the size of your Time Machine files.
2. How do I know when Time Machine is done backing up?
You can see Time Machine’s backup progress in the Time Machine preferences pane. It tells you how much data is left to back up and roughly how long it will take to finish.
3. How long should a Time Machine backup take?
There’s no simple answer to this. How long your Time Machine backups take is entirely dependent on how much you’re backing up, and where you’re backing it up to.
4. Where are Time Machine backups stored on Mac?
Your main Time Machine backups are stored in which external location you choose to back up to. Time Machine snapshots, meanwhile, are stored in a hidden folder on your main system drive. It’s unlikely you’ll ever need to access this folder manually, though.
5. How often does Time Machine create new backups?
You can schedule Time Machine to back up automatically every hour, every day, or every week. You can also manually initiate backups at any time.
6. Will Time Machine back up everything on my Mac?
Time Machine will back up anything that wasn’t part of your macOS installation. This will include apps, music, documents, settings, and so on, but not the default software that comes with your Mac. You can also exclude files and folders, to customize your backups.


