Any Mac user can print documents—the only condition is to have a printer. You can learn how to install a printer on a Mac and do the printing by reading our guide and the instructions supplemented with your particular printer model.
Check if your printer is compatible with your Mac
To check if your printer is compatible with your MacBook device, do this:
- Go to your printer manufacturer’s website, find the feature to check for device compatibility, and look for your Mac model.
- If your Mac device appears on the list of results, follow the instructions to download and install the driver or app. Conversely, if it doesn’t appear on the list, your printer isn’t compatible with your Mac.
In this article you will find the following:
Before we start:
To ensure your Mac and any devices connected to it work seamlessly, you need to keep it optimized on a regular basis. However, sometimes your efforts fall short, or you hit a wall trying to add or connect a printer to your Mac devices, causing you to want to pull your hair out. That’s where MacKeeper’s Premium Services comes in.
MacKeeper’s Premium Services feature helps you troubleshoot and fix your connection issues, saving you valuable time and energy. It connects you to MacKeeper’s experts, who go beyond regular support, delivering expert assistance across all of your software and apps to get to the root of the problem and provide a workable solution.
Here’s how to use it:
- Download MacKeeper and select Premium Services from the sidebar.
- MacKeeper will assign a tech expert to you. Describe the issue you’re facing with your printer and follow the expert’s instructions to fix it.
Most printer models can be easily added to a Mac and fully set up with AirPrint. The advantage here is that you don’t need to download any drivers for each separate printer—you can simply use a Wi-Fi and Ethernet connection, or even the old-fashioned USB cable.
When you connect your Mac to a printer that doesn’t support AirPrint, the required macOS software is installed automatically. The specific details of the connection process vary depending on the type of printer you have.
Did you uninstall printer on Mac by mistake? Not to worry. In this guide, wel’ll demonstrate various methods to connect printer to MacBook, so you can continue to be productive.
1. Add a printer to Mac via Wi-Fi
Knowing how to set up printer on Mac is one of the MacBook basics every owner should know. Most of the time, you won’t even have to think about how to connect a wireless printer to your Mac—printing devices connected to the same Wi-Fi network as your computer are displayed automatically. Follow these steps to add a printer to your Mac:
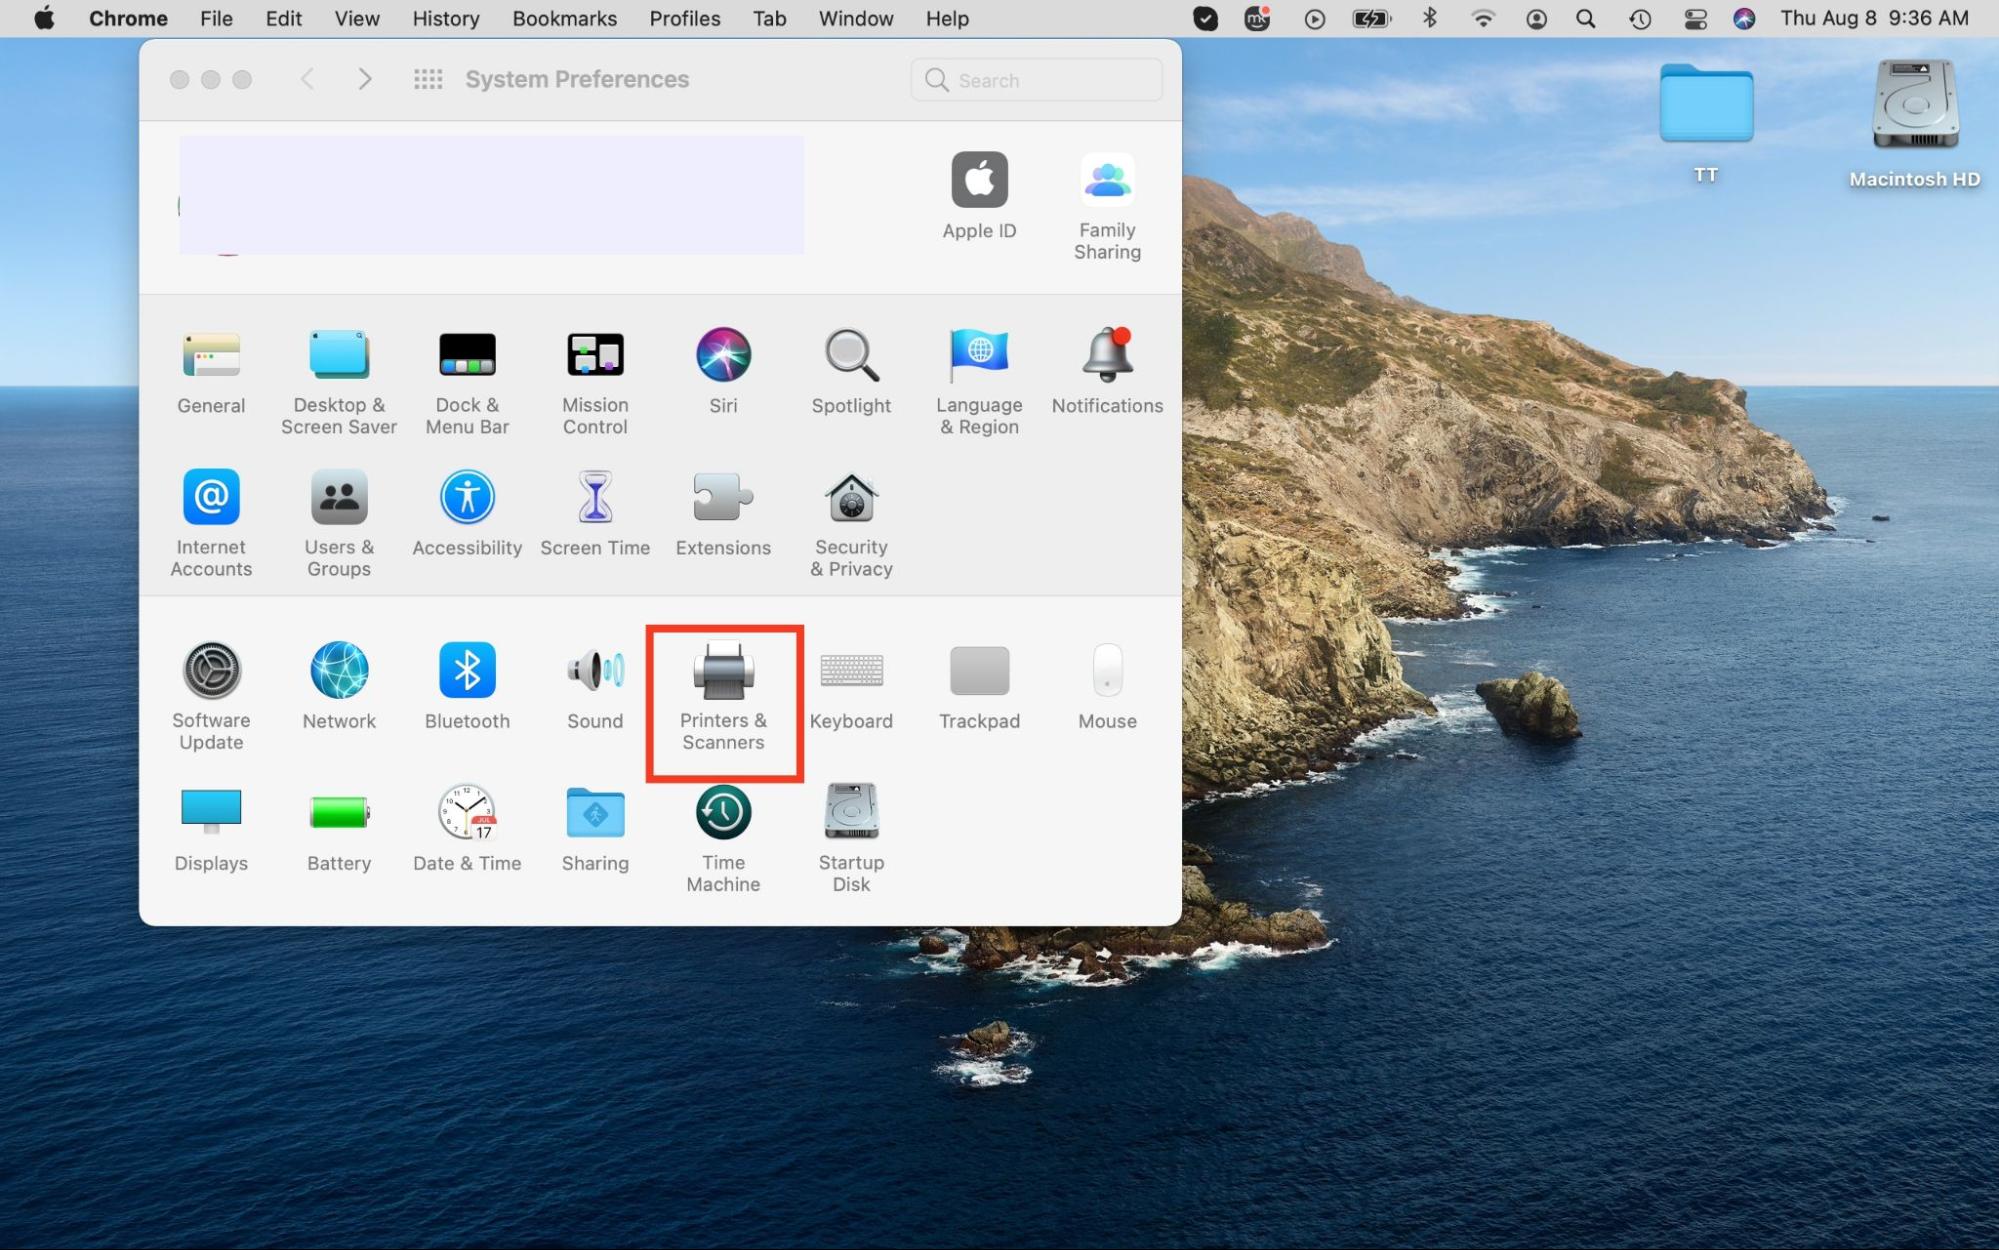
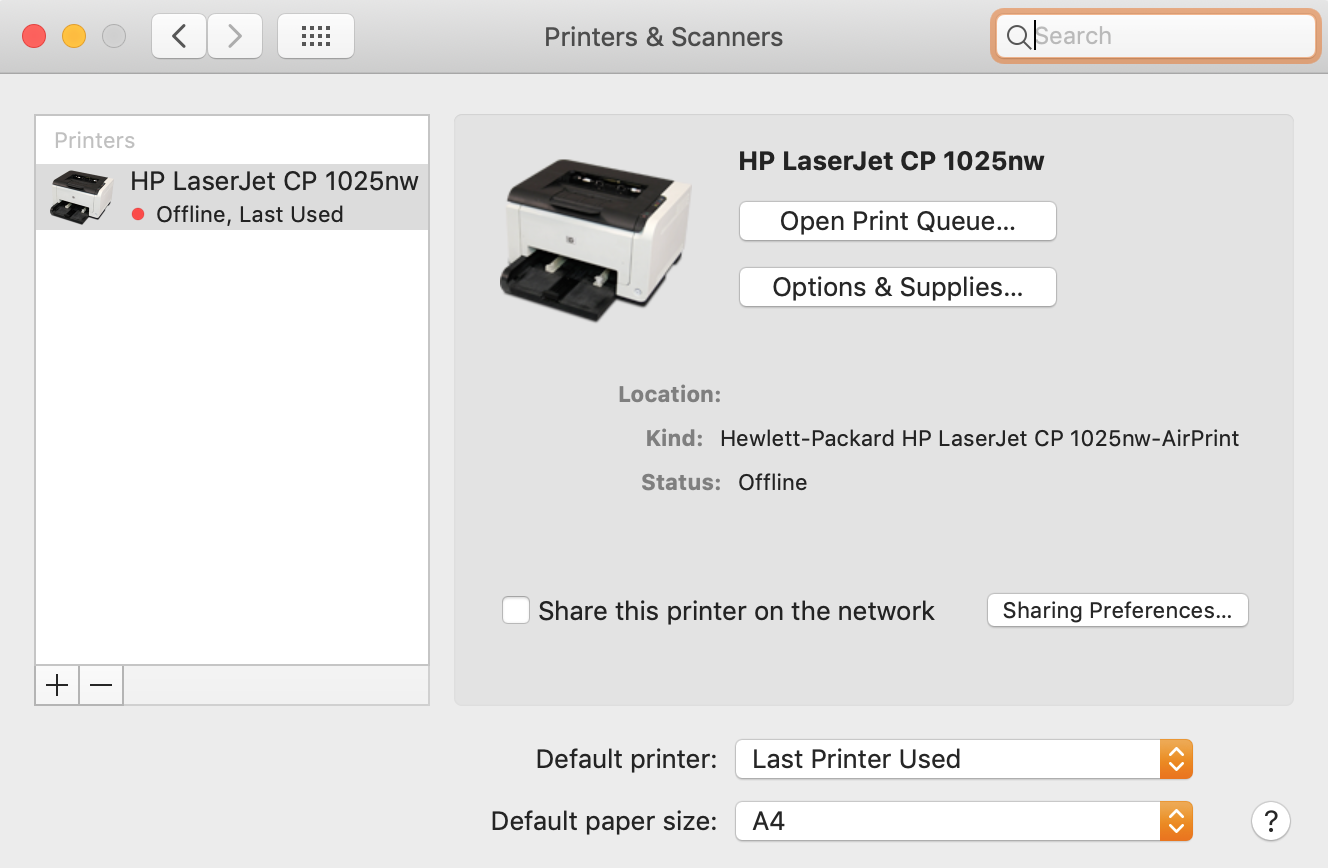
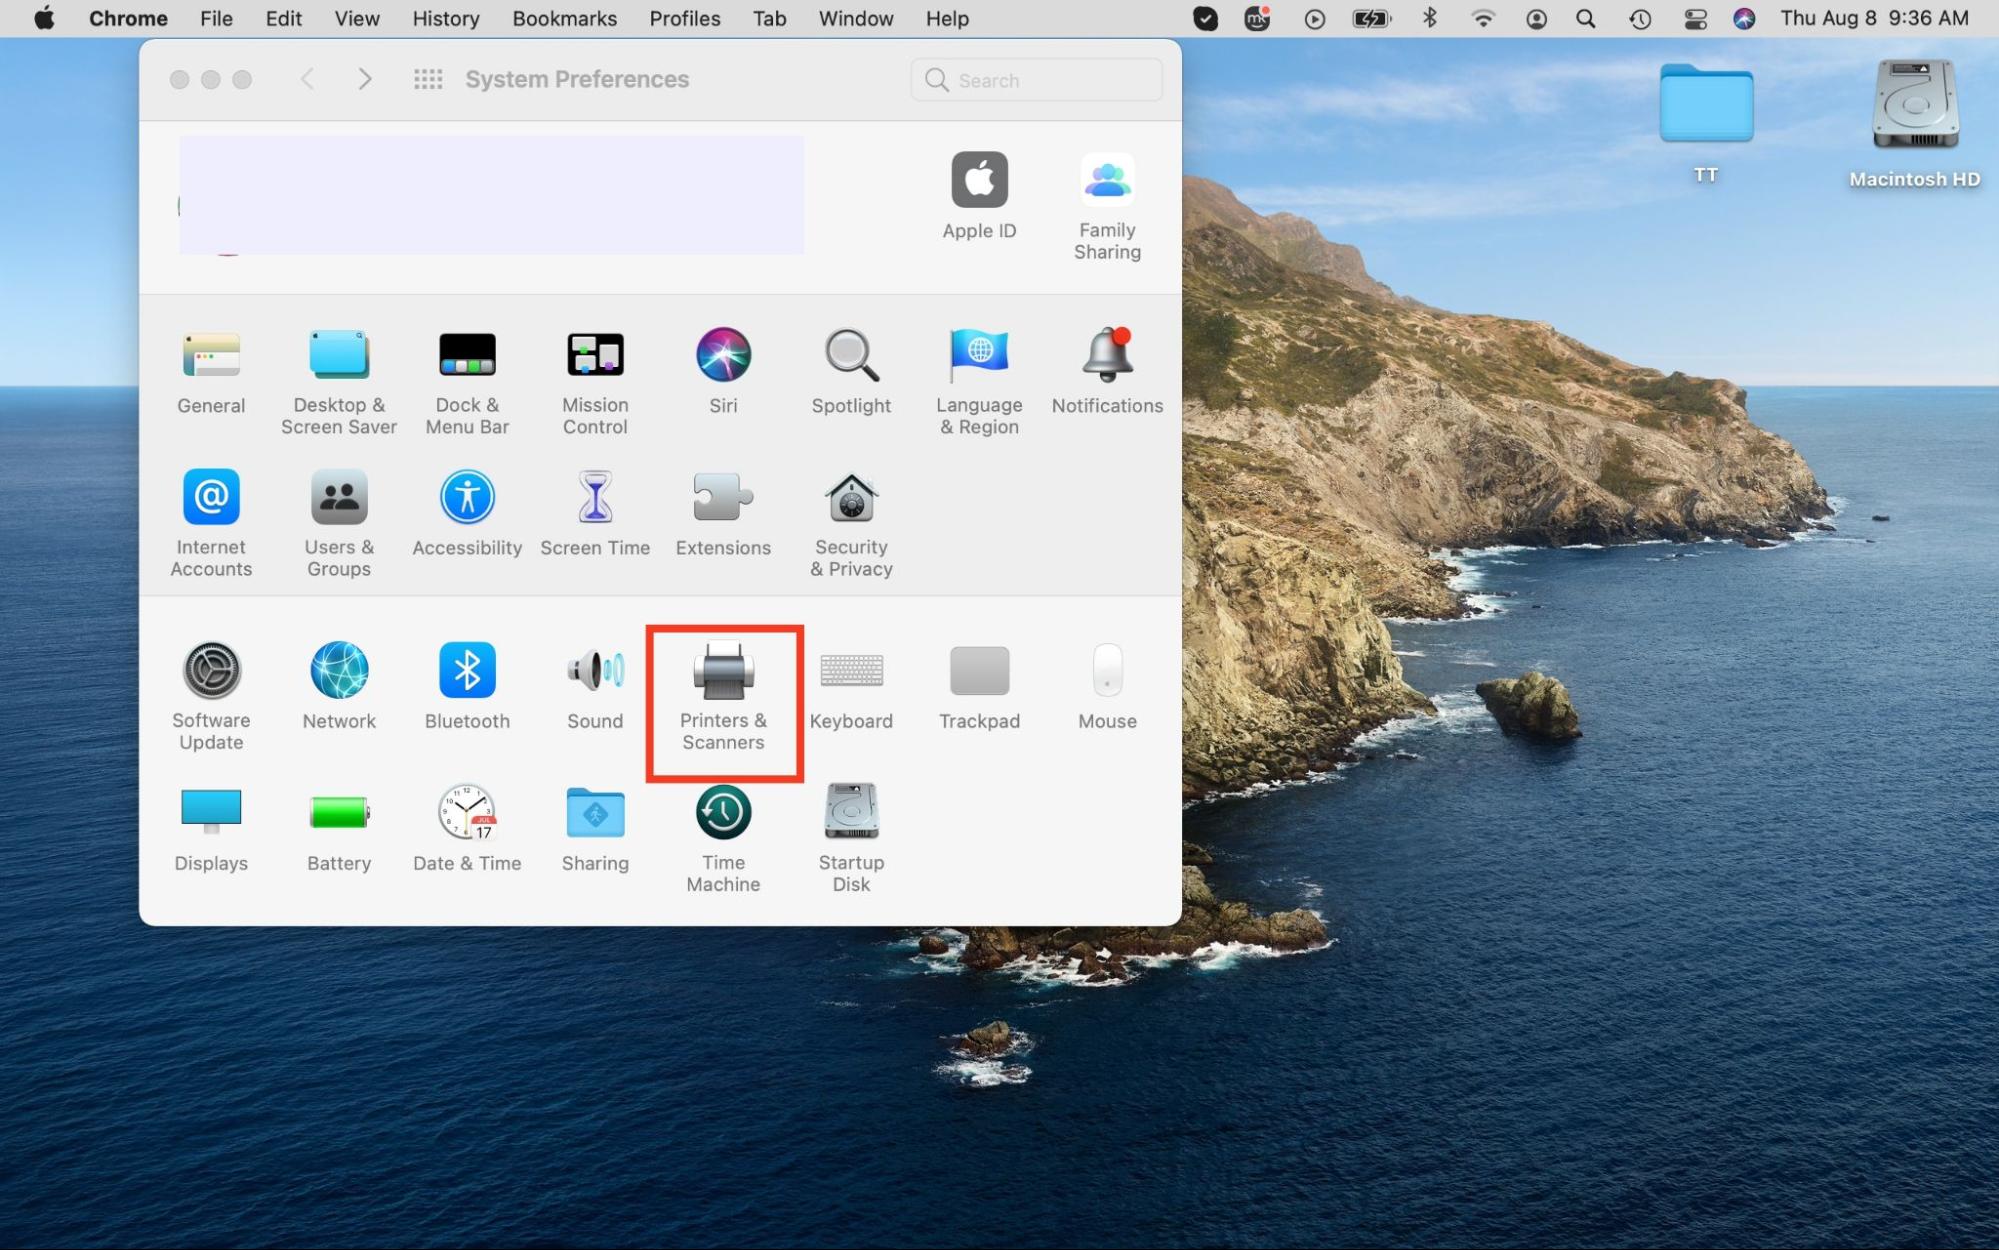
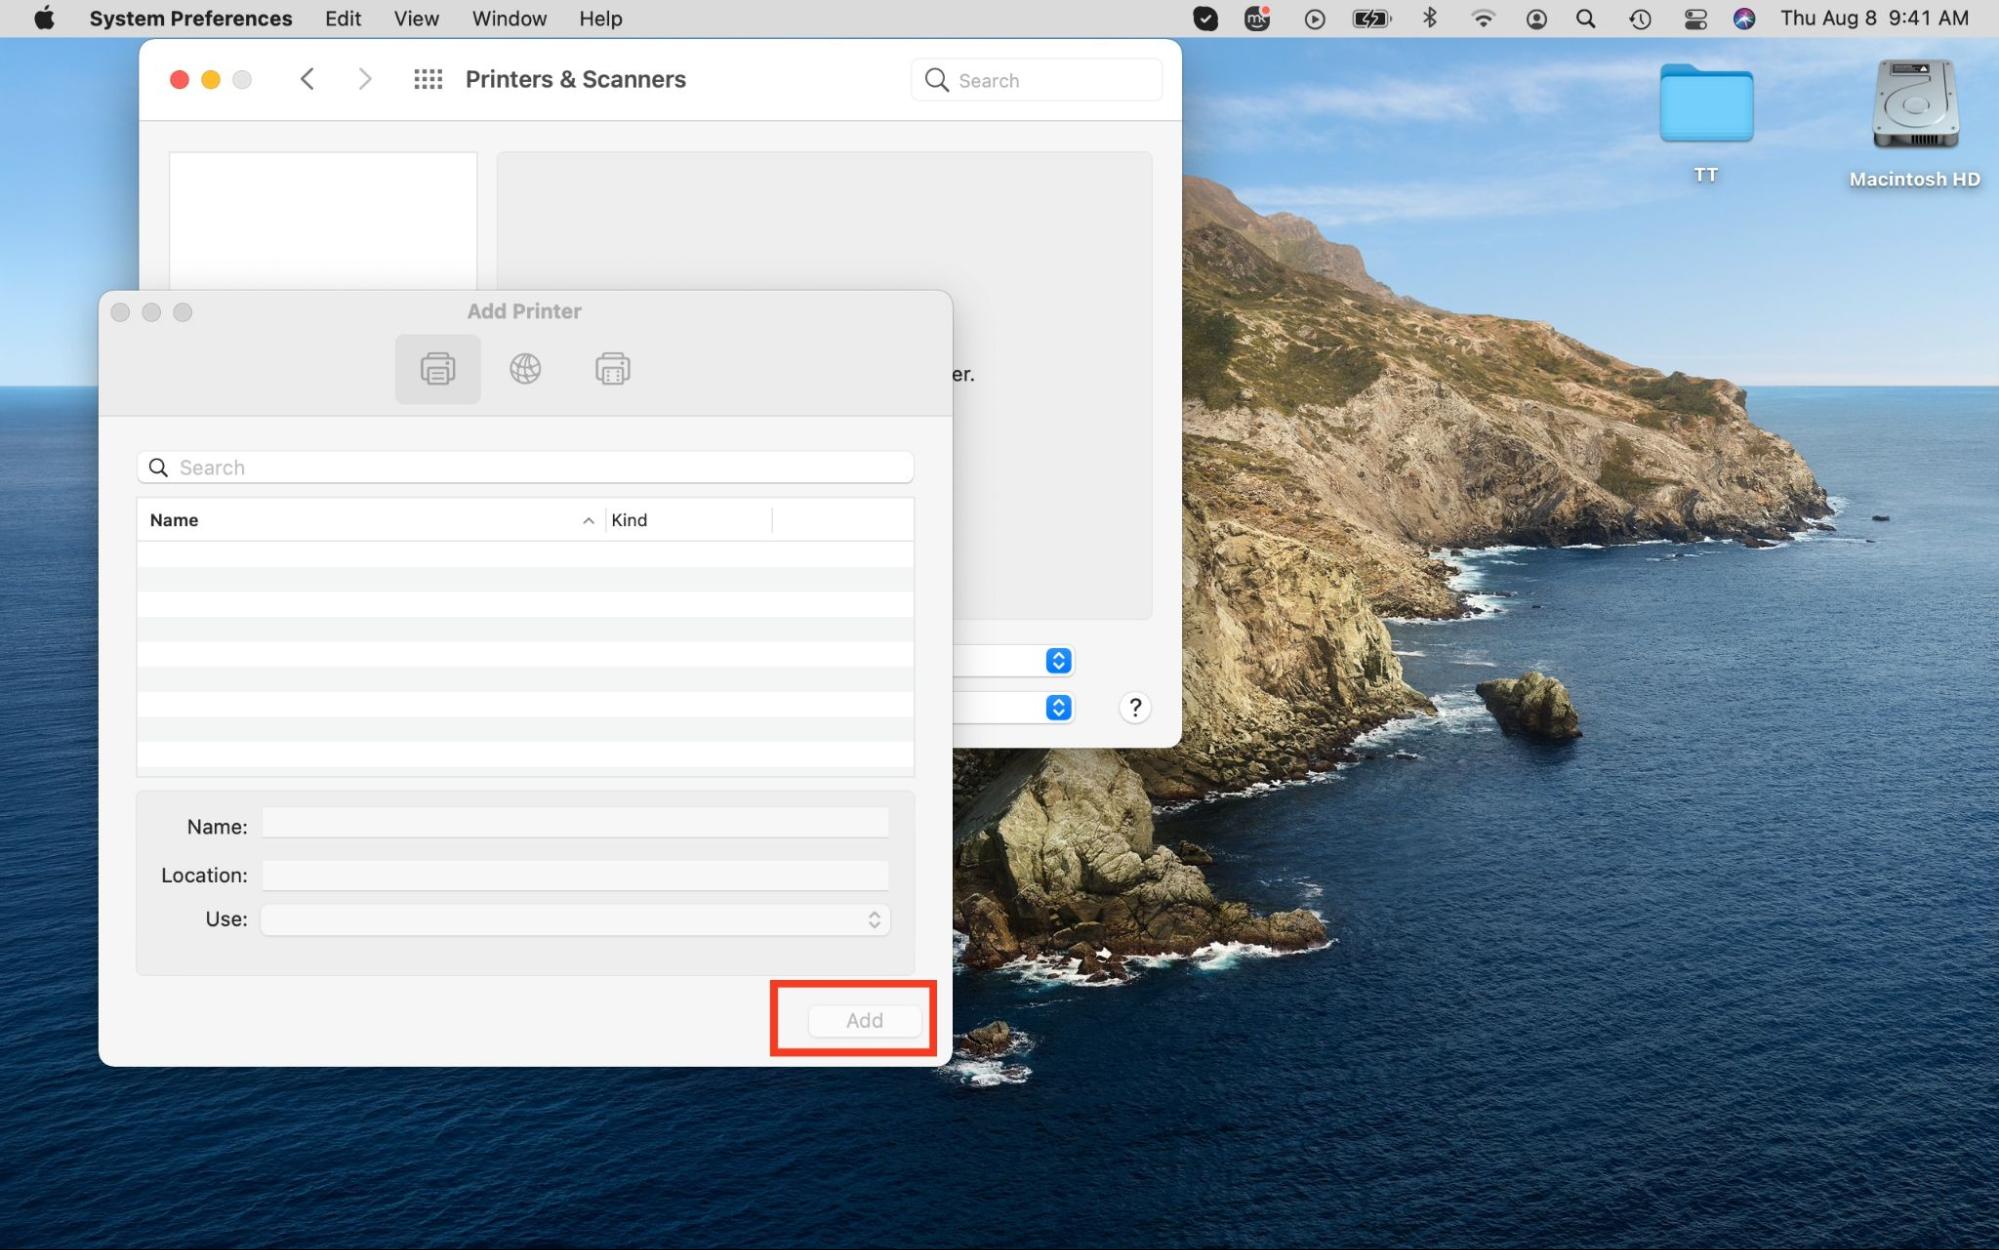
- In the top left corner of the screen, click on the Apple menu sign > System Preferences > Printers & Scanners. All connected devices will be displayed in the sidebar on the left.
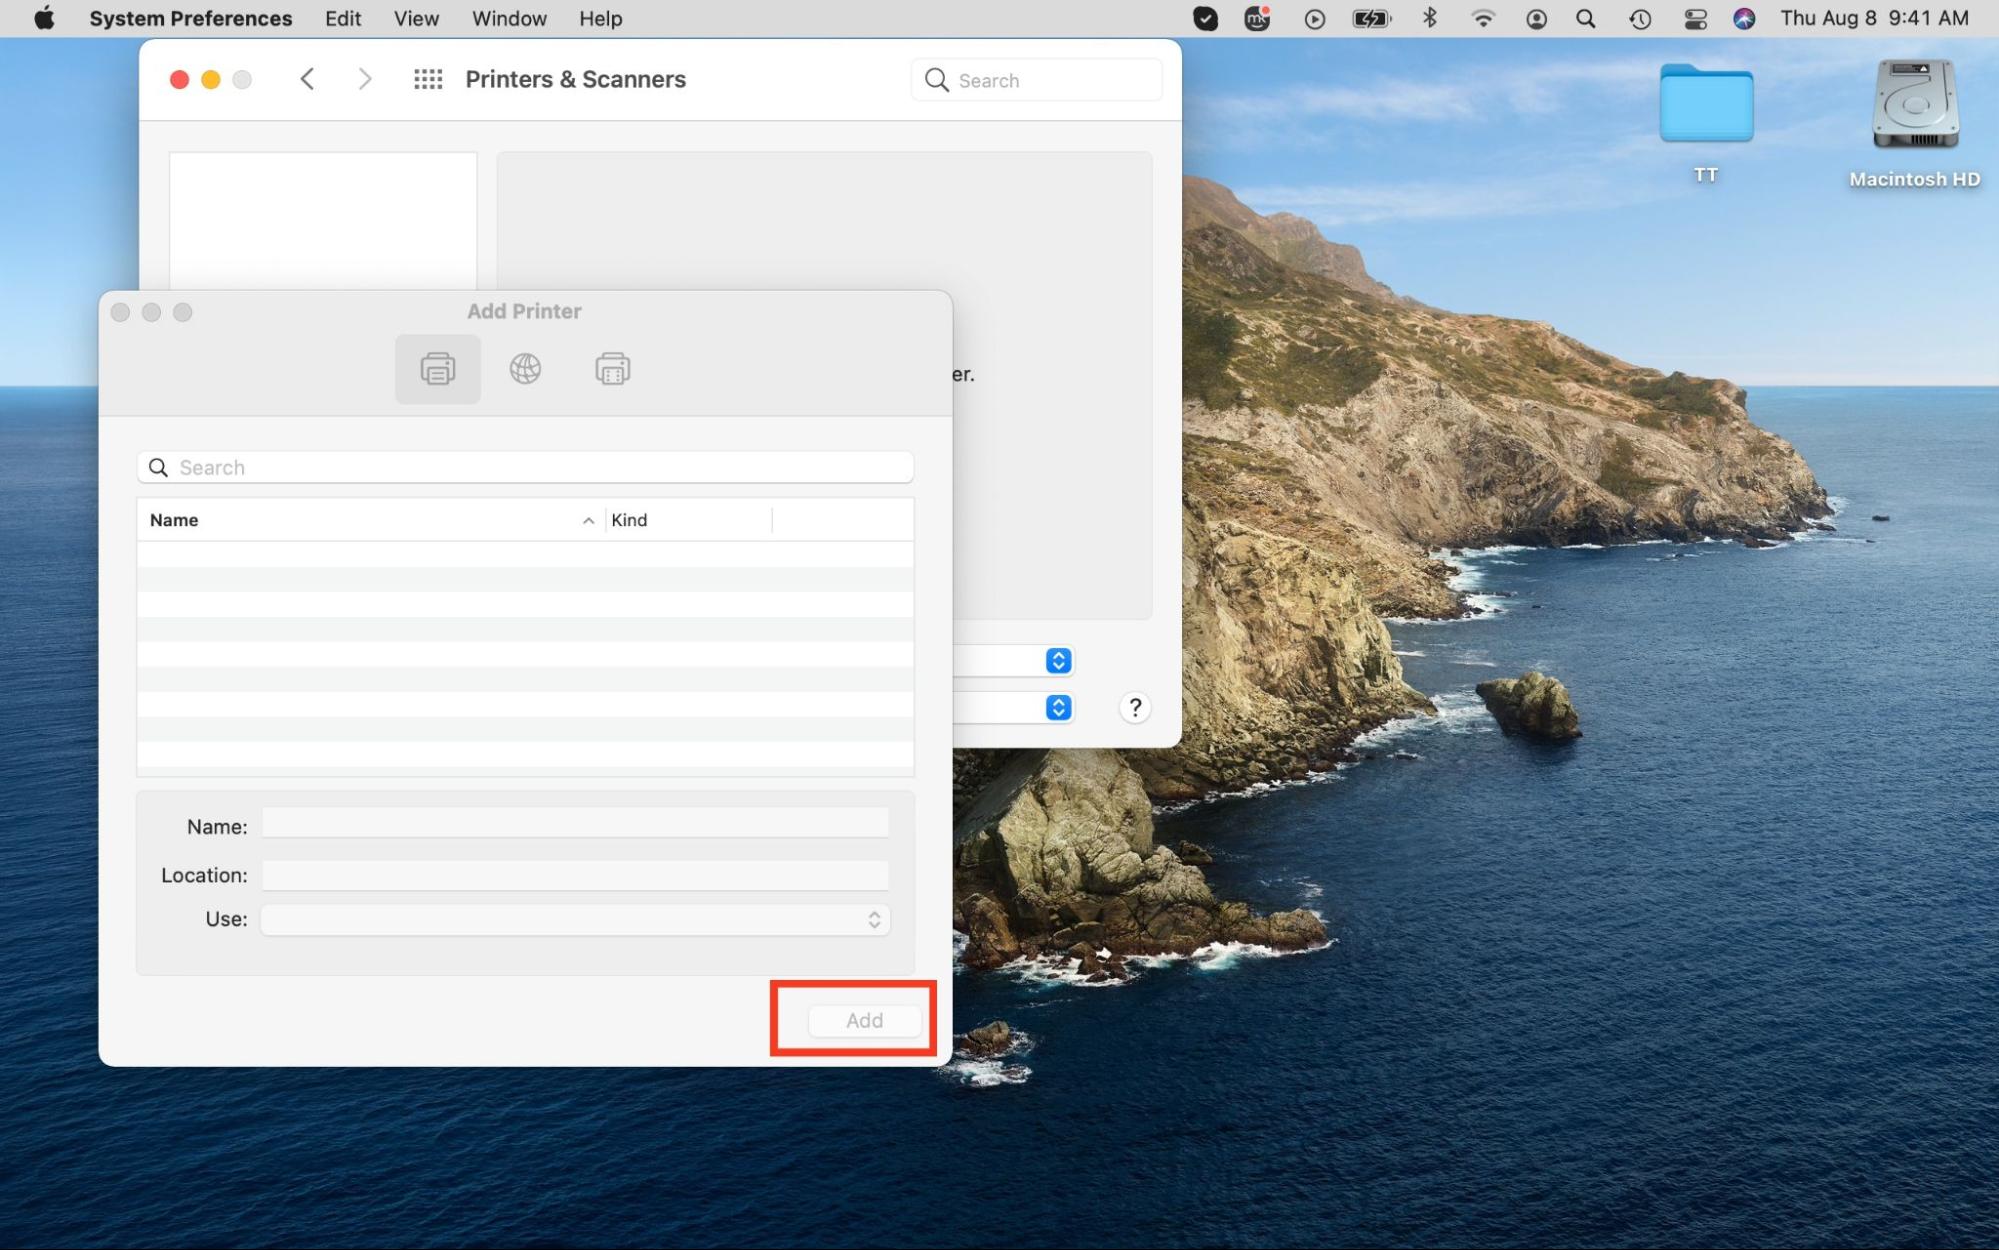
- Click the plus (+) icon in the lower-left corner of the sidebar to add a new printer, select your printer from the list, and hit the Add button in the lower-right corner of the window.
Important: Sometimes, for the initial connection, you need to attach the printer to your Mac with a USB cable. Then you can use the setup assistant to connect the printer to a Wi-Fi network. Further, you’ll be able to conduct printing sessions wirelessly.
2. Connect a printer to a MacBook with USB
Connecting a printer to your device with a USB is as simple as plugging it in. Follow our guide to do it:
- Switch on your printer and check for errors.
- Connect the USB cable to your computer.
- You may be prompted to download the printer manufacturer’s software. If you are, ensure you download and install it as indicated.
Note from our experts:
Ensure you’ve booted your Mac properly so that it can recognize your USB printer. USB printers can drain a lot of energy from your computer. To make sure that your Mac’s battery serves well, ensure you use a multiport cable on your Mac. This is also necessary if your Mac has a single USB-C port.
Additionally, we recommend you to connect the printer first and only then attach it to a USB-C cable and a power source.
Also, make sure that your operating system is up-to-date before you connect a USB printer. To check if there are any software updates available, go to the Apple menu > About This Mac > Software Update. As a MacBook owner, you should prioritize regular software updates anyway as part of your macOS maintenance. You can update the relevant apps in the App Store—the Updates section is located in the sidebar on the left. If all updates are in place, the printer should connect automatically as soon as you plug it in.
If you encounter a connection problem, you might need to download additional macOS drivers for the particular model of your device. The best place to look for them is on the device manufacturer’s website. Normally, if some drivers are missing, you’ll see a pop-up notification with the link where you can download them.
3. Add network printer to Mac
If you're using HP Jetdirect, AirPrint, or Internet Printing Protocol (IPP), you can connect a network printer as an IP printer. Connect the printer to Wi-Fi like so:
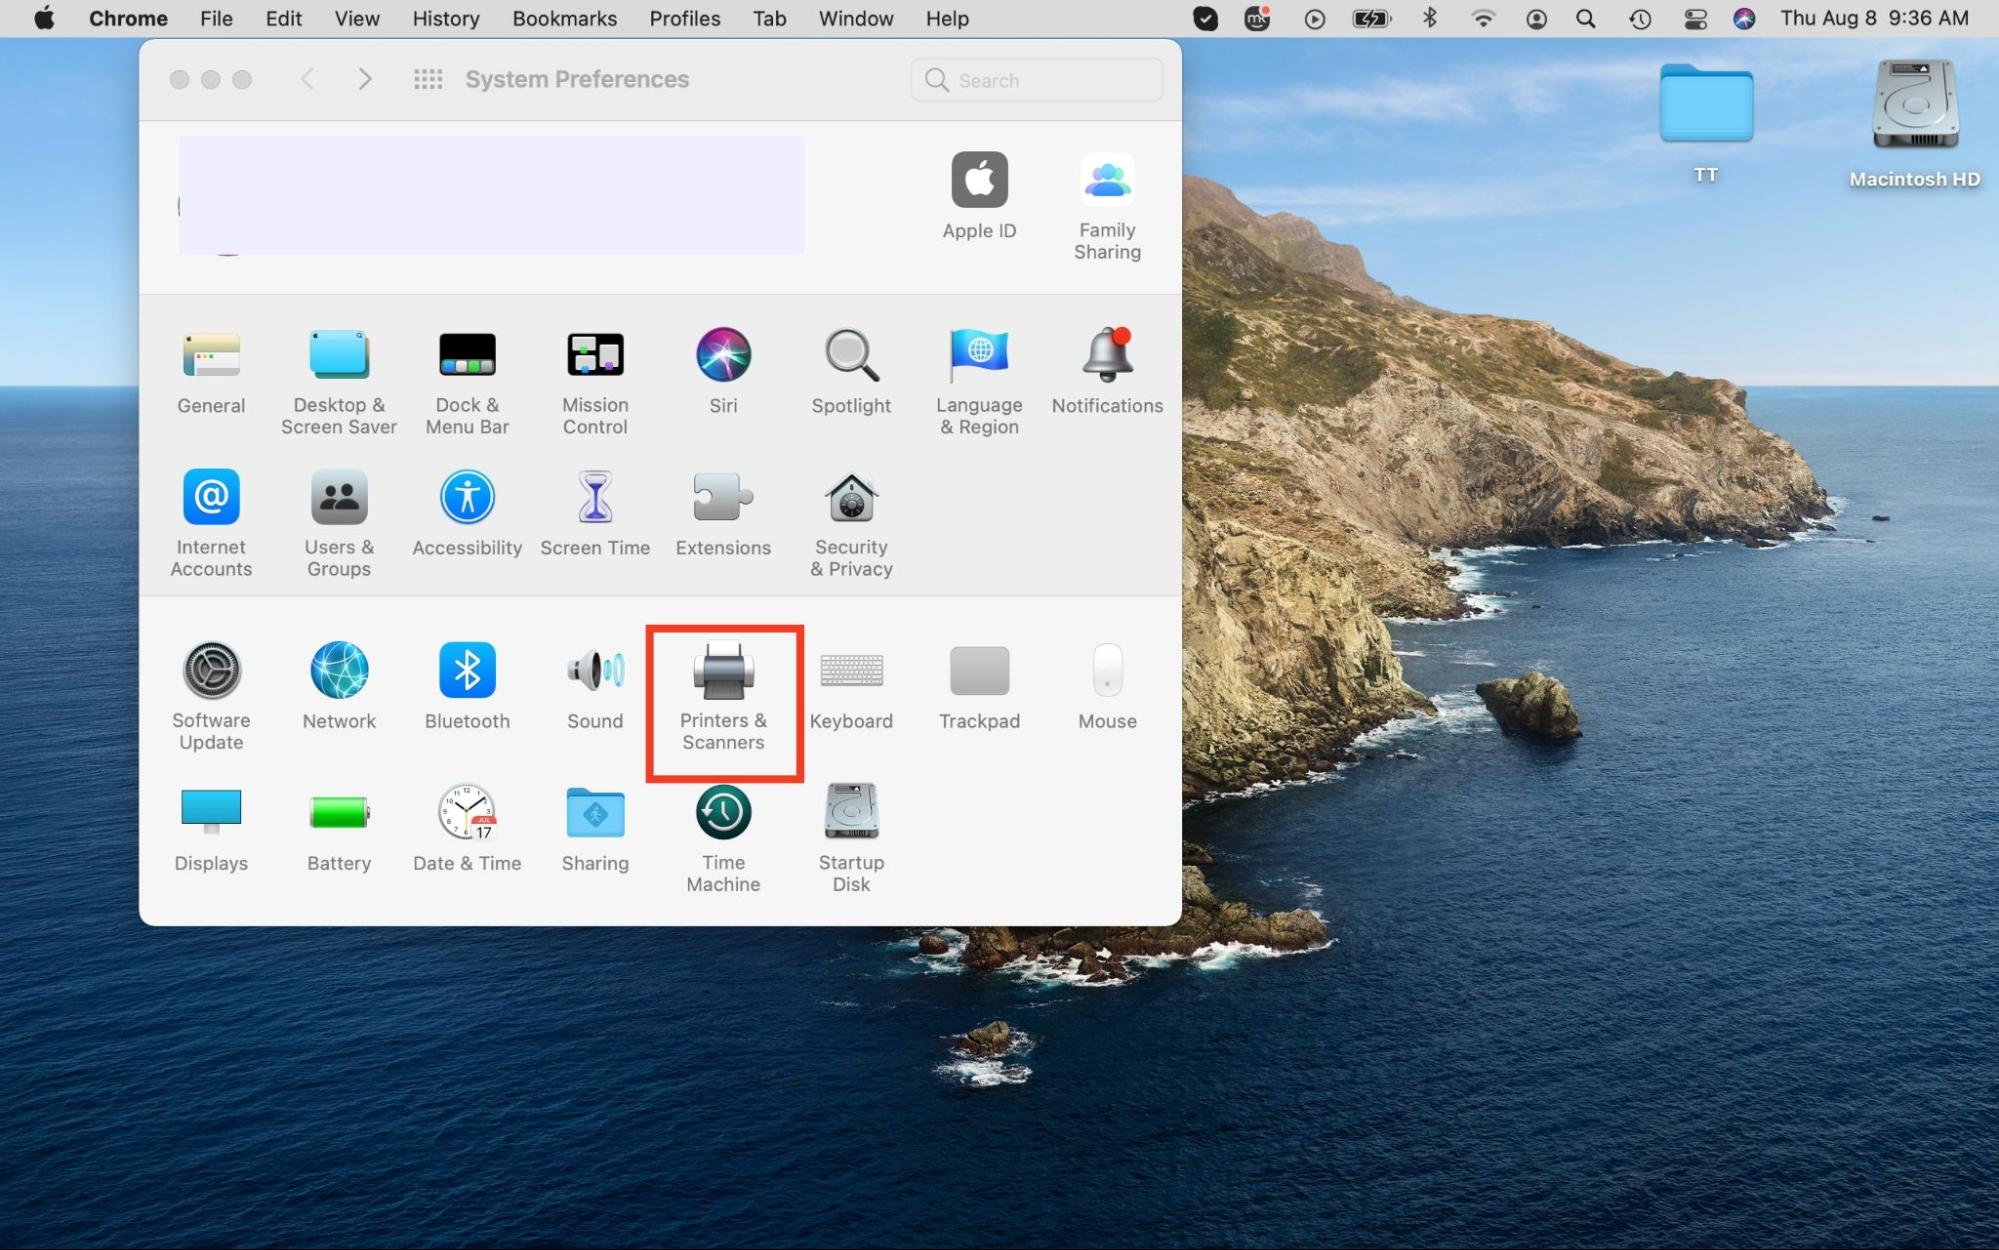
- Go to Apple menu > System Preferences > Printers & Scanners.
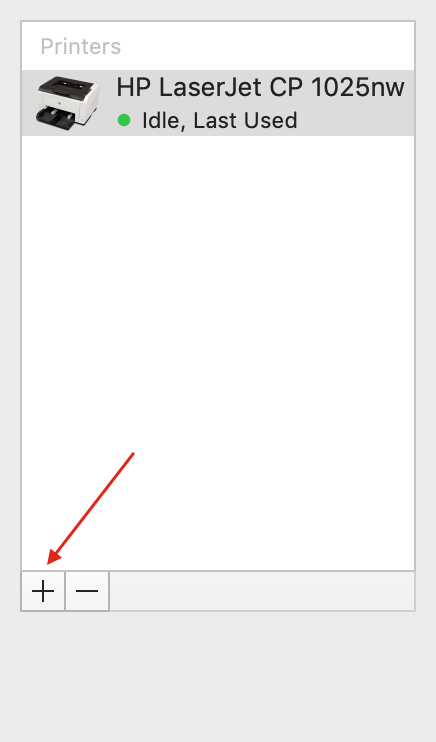
- Under the list of printers on the left, click on the plus (+) button.
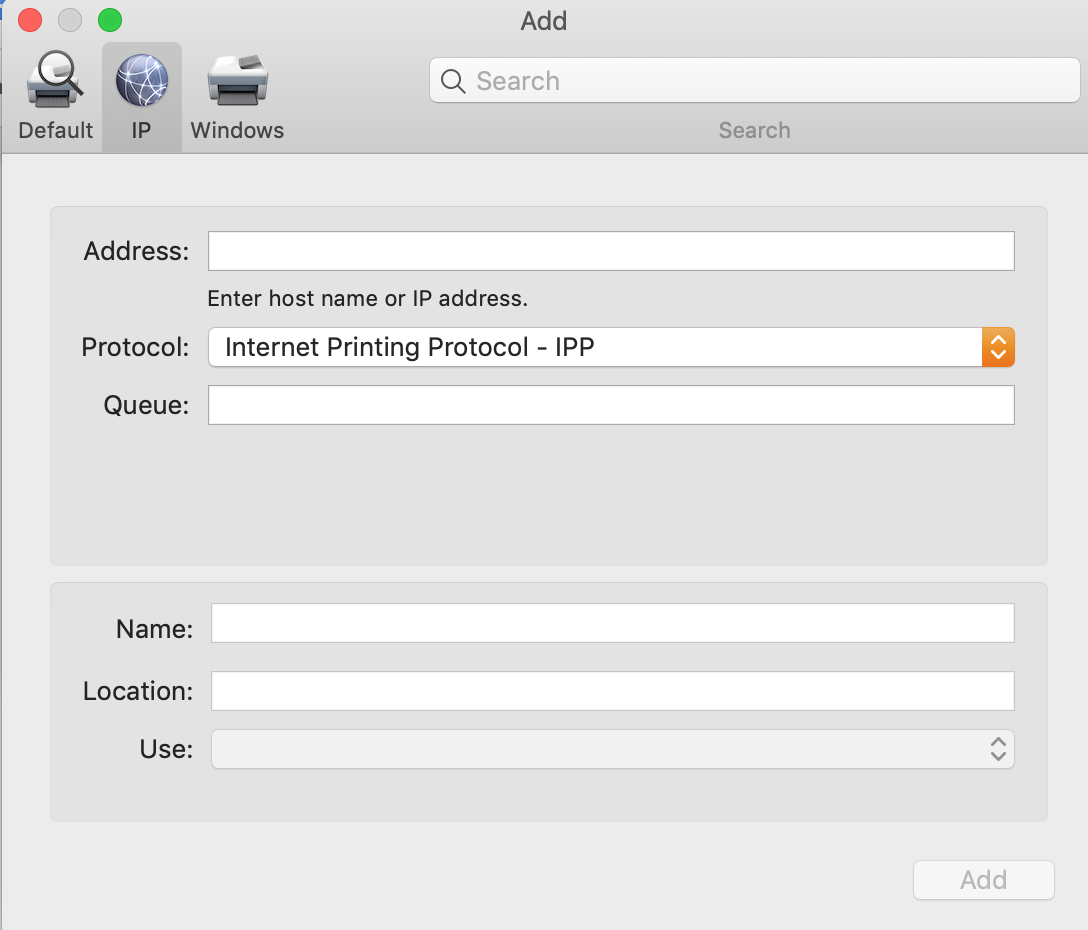
- Switch to the IP tab and enter the IP address (see how to find it below), the name of the printer and the host, the protocol that the printer is using, its queue among other printers, and approximate location. This is essential for correct printer identification.
4. Connect Bluetooth printer to MacBook
You can print documents via Bluetooth if you use a USB Bluetooth adapter or if your laptop has Bluetooth wireless technology built into it. Here’s how to connect a printer to a Mac with Bluetooth:
- Make sure that your printer has Bluetooth connection.
- Turn on Bluetooth on your Mac—you can find the Bluetooth button in the menu at the top of the screen.
- Prepare your printer for work and turn it on.
- On a Mac, go to the Apple Menu > System Preferences > Printers & Scanners.
- Click on the plus (+) sign underneath the list of devices on the left.
- In the Default tab, select your printing device from the list of devices, and click Add. You may be prompted to download new software. If you are, ensure you download and install it.
Hint from the MacKeeper team: If the printer is not displayed on the list, it’s likely that the drivers for this printer were not automatically installed via Bluetooth. In this case, you need to get them manually and then repeat the steps required to add a Bluetooth printer.
5. Add a printer to Mac via IP address
If the network printer you want to use doesn’t appear on the list of printers in System Preferences, you can add it as an IP printer. Before you do, ensure it supports the Internet Printing Protocol (IPP), Line Printer Daemon (LPD), AirPrint, or HP Jetdirect (Socket) printing protocol. Here’s how to connect a printer to your Mac using an IP address:
- Open the Apple menu > System Preferences > Printers & Scanners.
- In the sidebar on the left, you’ll see all the devices connected to your Mac, if any. Click the plus (+) icon to add a new printer directly below, select the IP tab (it’s the one in the middle at the top of the window), and enter your printer’s details in the space provided. Not sure what the terminology means? Use the table on the Apple website as a guide.
How to set up a printer on a Mac
Setting up a printer on a MacBook device is a straightforward process. Follow the simple instructions below to get started:
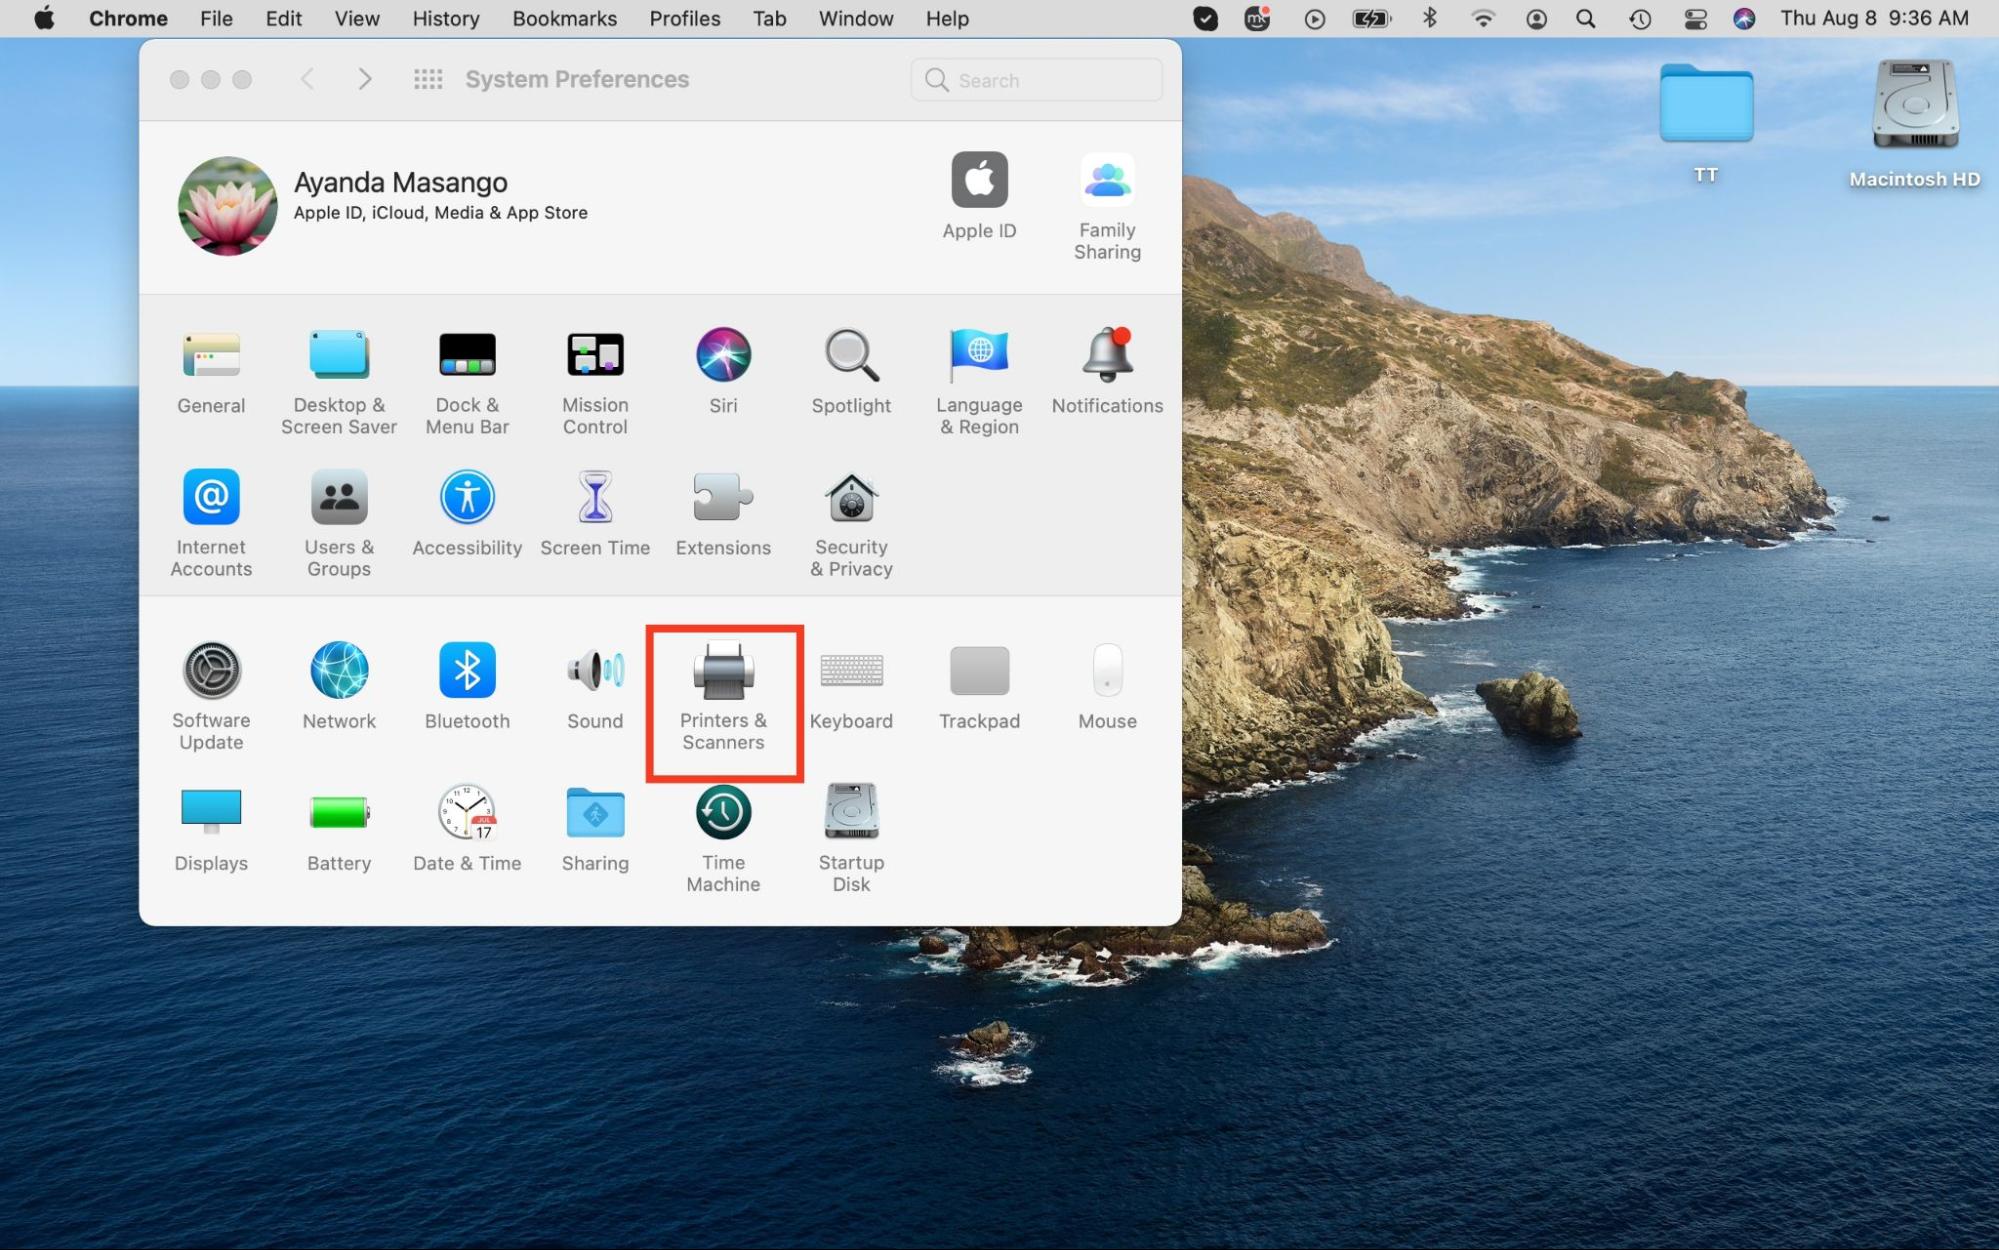
- Select the Printers & Scanners option in System Preferences.
- Hit the plus (+) icon to add the printer, wait for the printer to appear on the list, and click the Add button in the lower-right corner of the window when it does.
Free up storage for your printer’s software
Printers are making a comeback as the remote work model increasingly gains popularity. You may be one of the thousands of workers who have invested in a new home printer or dusted off your old one and for good reason. Using a home printer allows you to save time, money, and trips to the office or internet café. Fortunately, connecting your printer to your Mac is easy—use the tips in our guide to do it effortlessly.
If you run into any issues setting up your printer, don’t worry. MacKeeper’s Premium Services feature is here to help. Use it to connect with technical experts who are experienced in solving printer-related issues and more. Simply describe your problem in the chat box, and a MacKeeper expert will respond soon and help you get your printer up and running again.


