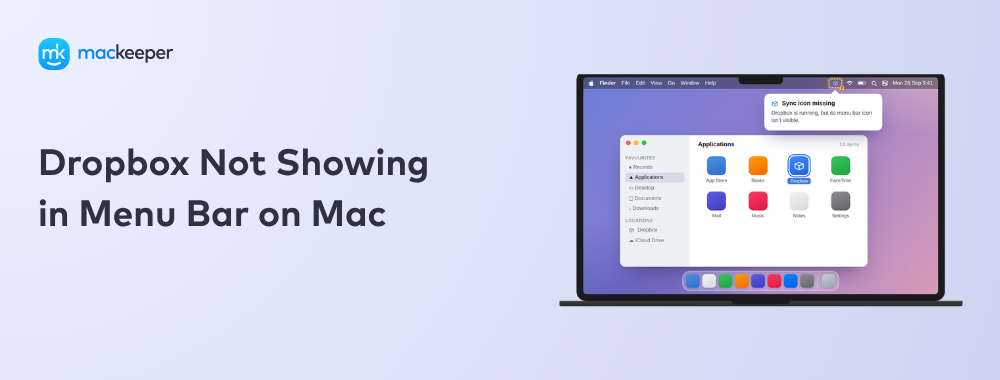
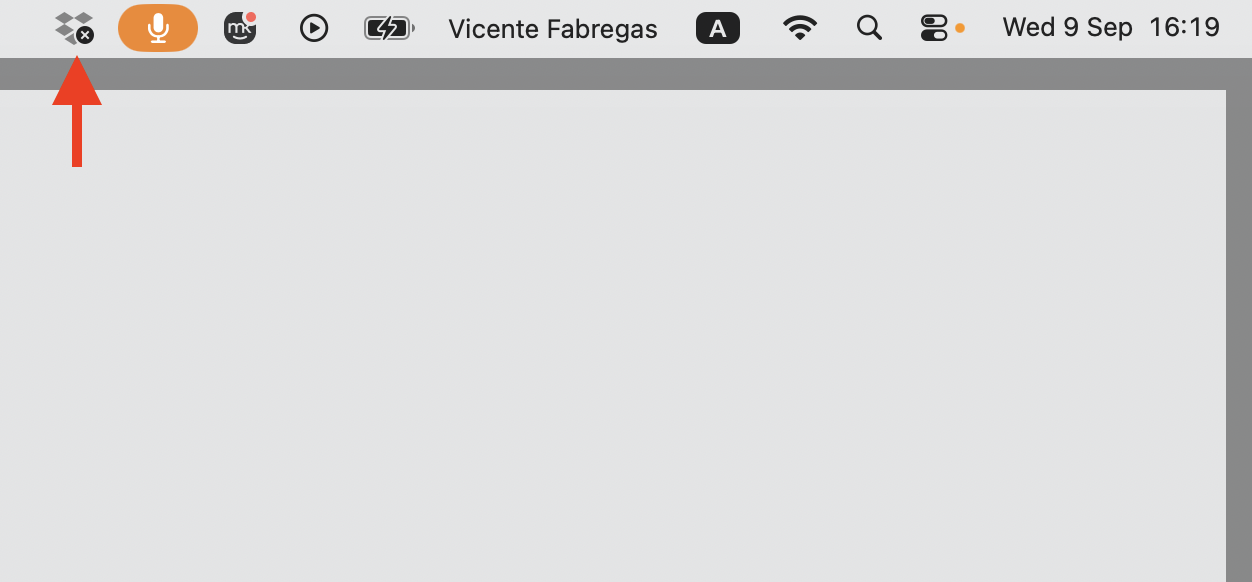
Is Dropbox not showing in the menu bar on Mac, and you’re not sure if your files are still syncing? MacKeeper’s Premium Services connect you with a real expert who’ll walk you through the fix, step by step. Get personalized help and bring that missing icon back—just reach out below.
Why is Dropbox not showing in the menu bar on Mac?
The menu bar icon is your quick window into Dropbox—it shows sync status, recent files, and settings. When it goes missing, it usually means something stopped Dropbox from displaying it. Icons can disappear for a handful of reasons, and the good news is that the cause is almost always simple to pin down.
From our observations, here are the most common reasons the icon disappears:
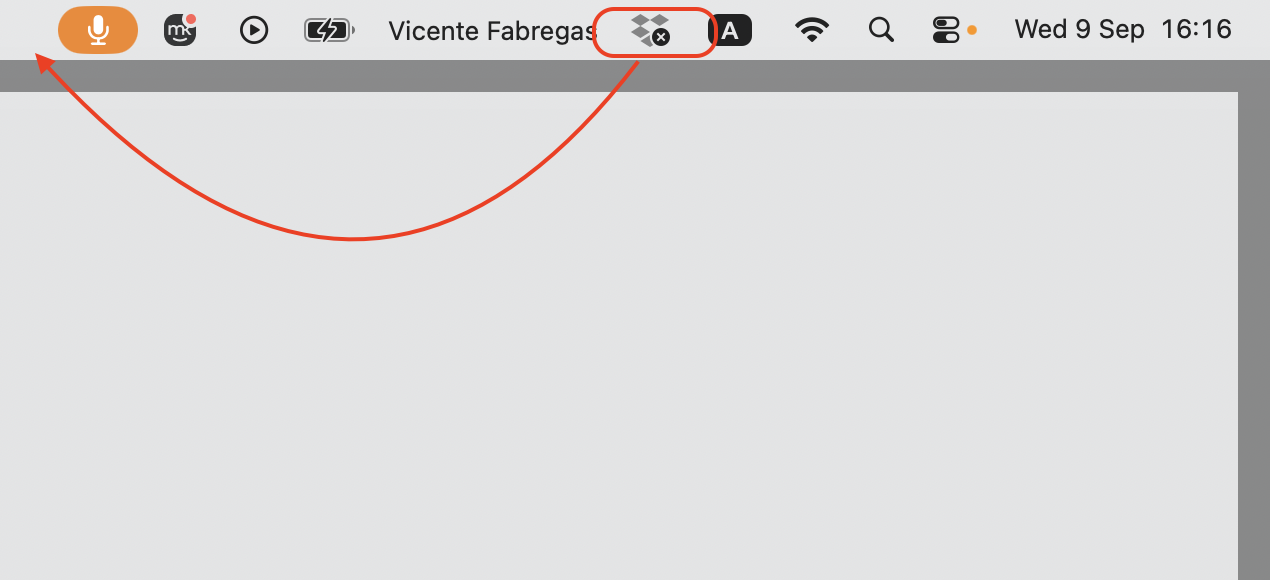
The Dropbox desktop app isn’t running
Your menu bar is too crowded and has pushed the icon out of view
macOS hides icons because of limited space or a display notch
Dropbox crashed quietly in the background
The app is waiting for the permissions it needs to run
The trouble started right after a Dropbox or macOS update
Seeing the Dropbox icon not in the menu bar on Mac after an update is one of the most common reports. And if your whole menu bar disappeared on Mac and not just the Dropbox icon, the cause may be system-wide rather than tied to Dropbox, much like when the entire menu bar disappeared.
Is Dropbox menu bar icon hidden or missing?
Before trying anything, let’s figure out what’s actually happening. A Dropbox icon is missing from the menu bar. Mac setups usually fall into one of two camps—the app isn’t running at all, or it’s running quietly in the background while its icon stays hidden.
Here’s a quick way to tell the difference. Open a Dropbox folder in Finder and add or edit a file. If it still syncs, Dropbox is alive and well, so the issue is menu bar visibility rather than the app itself. If nothing syncs, Dropbox likely isn’t running.
macOS can also hide icons in other locations to keep things tidy, and we get to control how it does this—learning to hide icons on Mac desktop gives us a clearer sense of how our Mac manages what’s displayed.
How to fix Dropbox not showing in the menu bar on Mac?
Here, we’ll walk you through the main ways to bring the Dropbox icon back to your Mac menu bar. Unlike the Windows taskbar, the Mac menu bar sits along the top of your screen, and the good news is that none of these methods need Terminal—they’re all point-and-click.
A note from our experts:
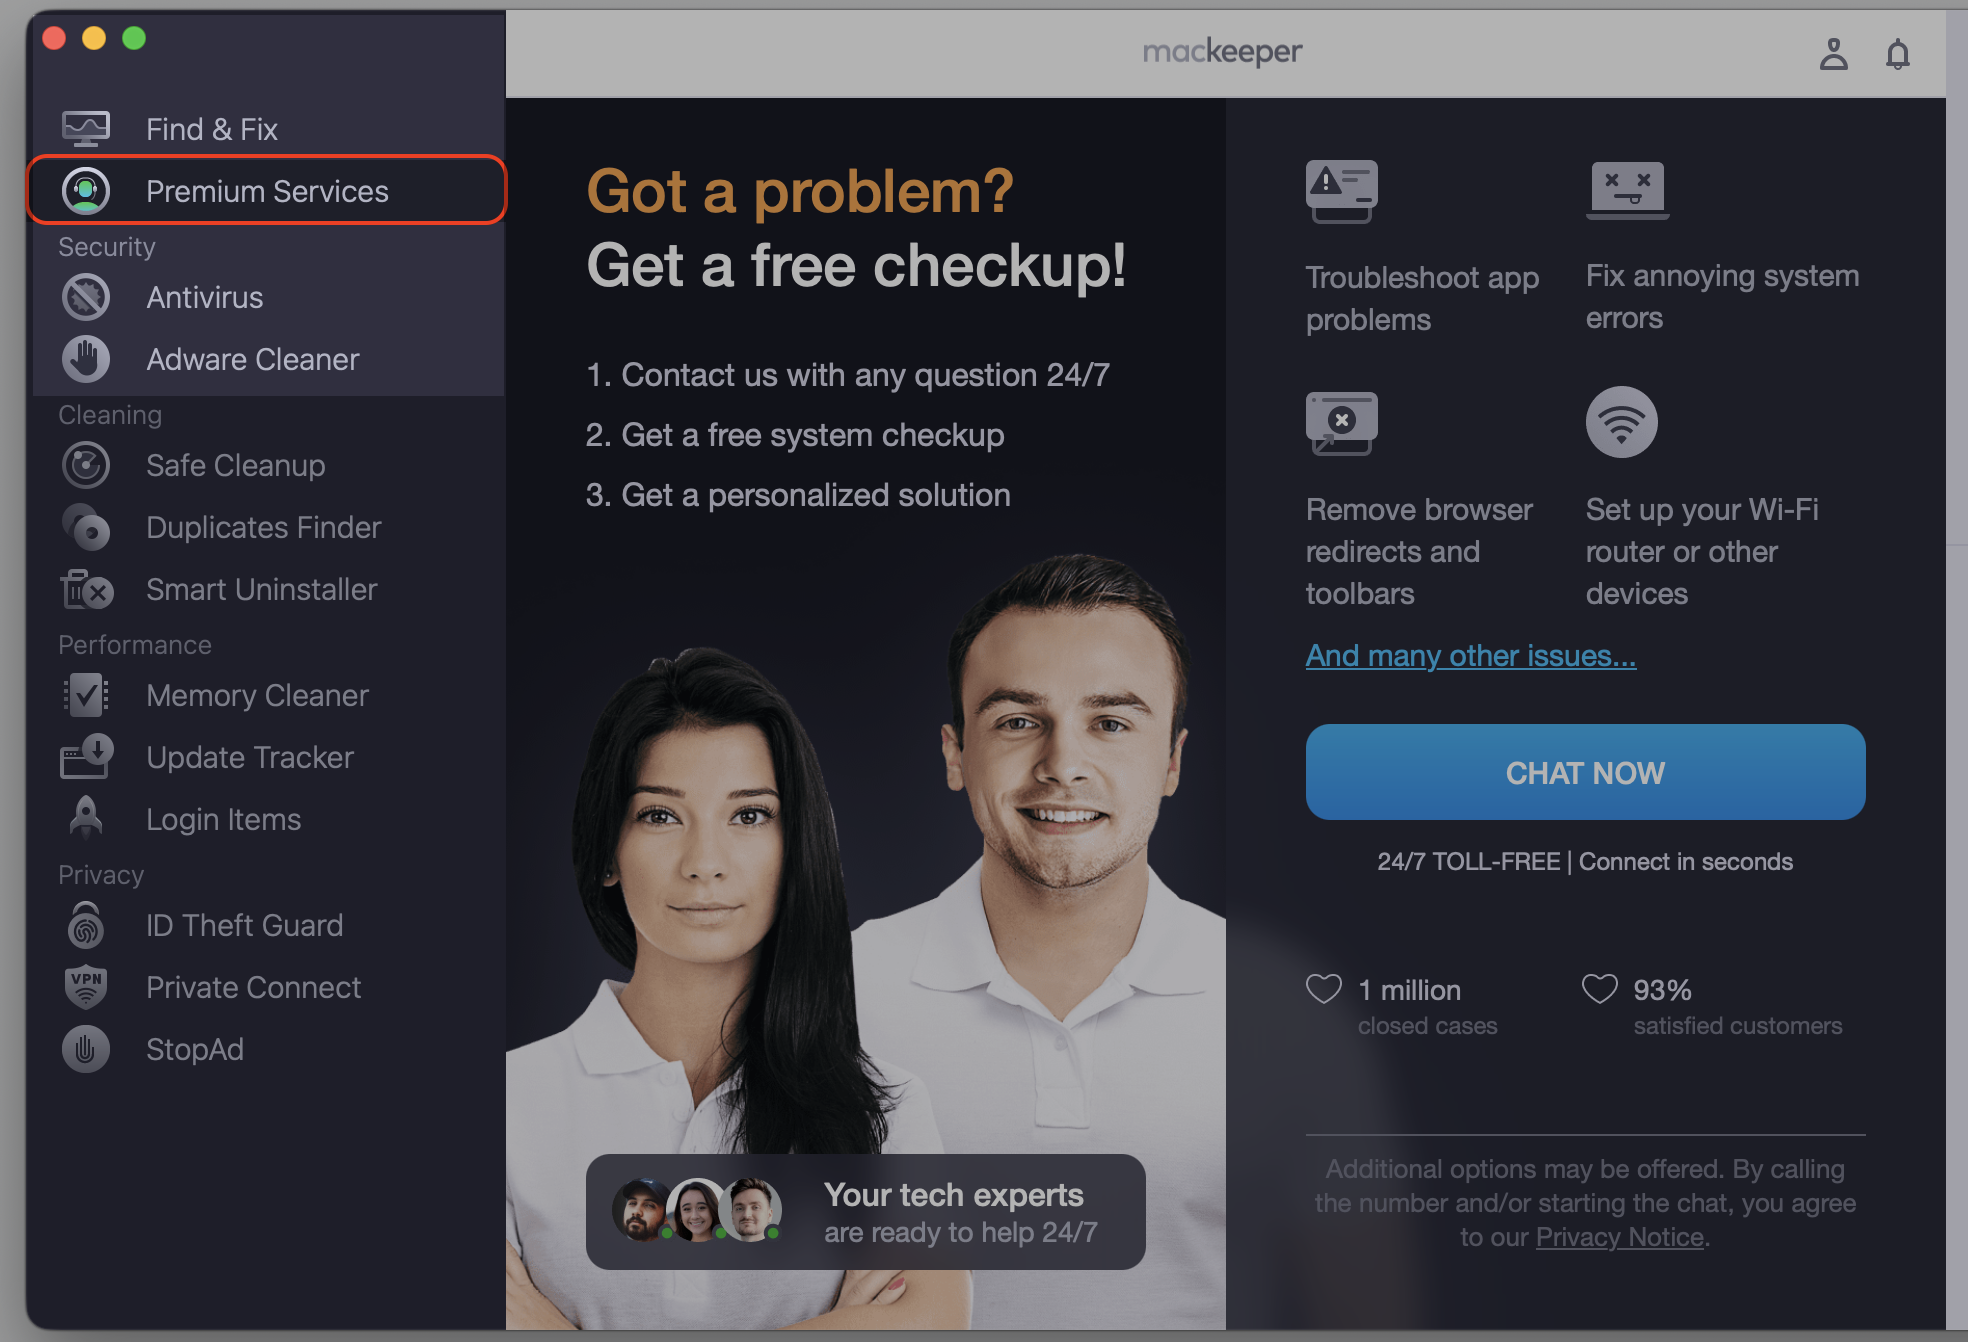
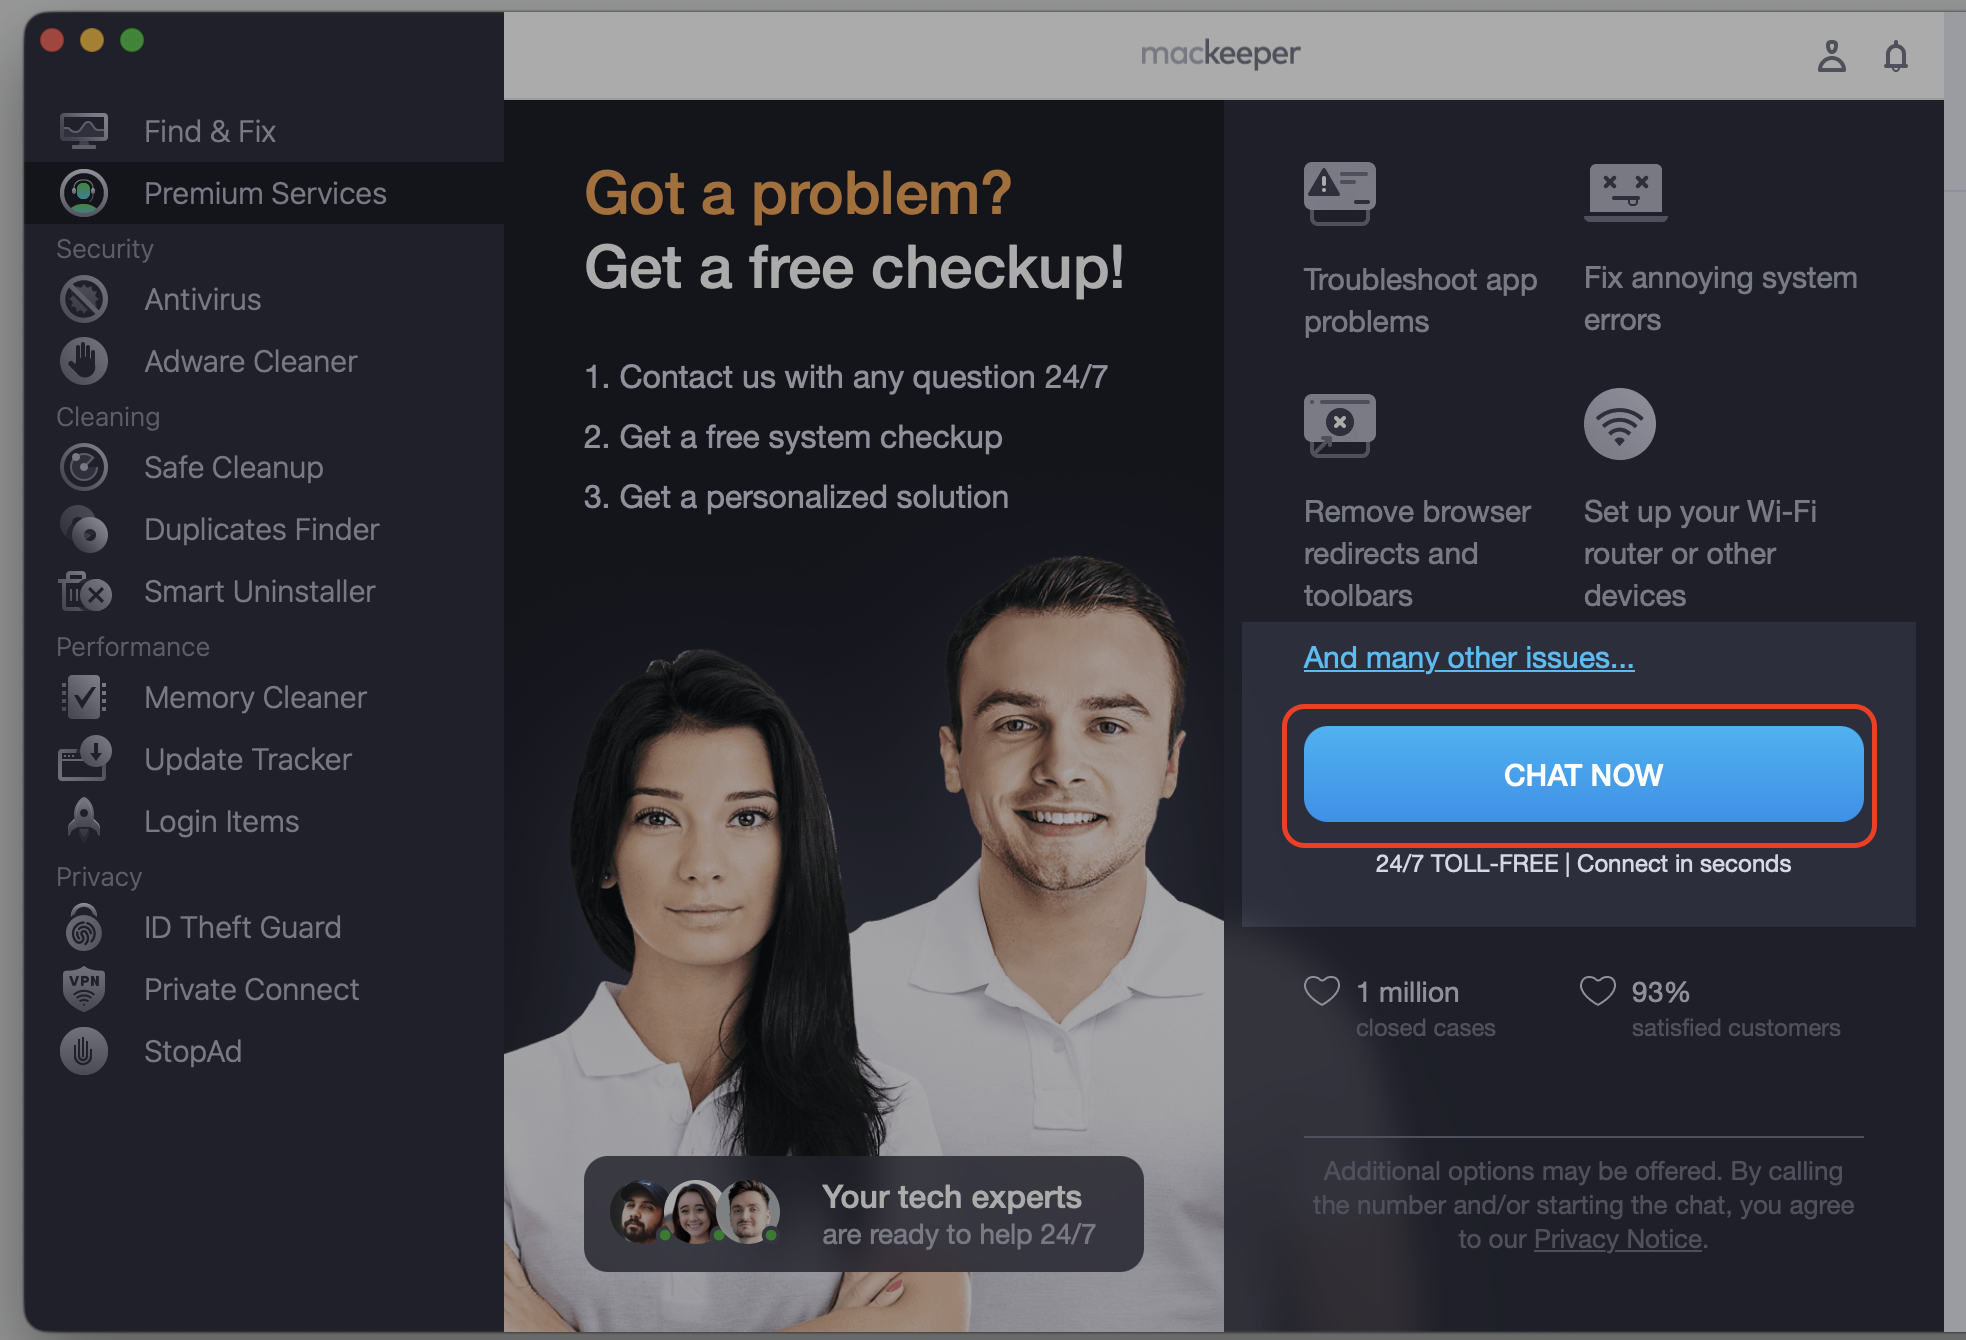
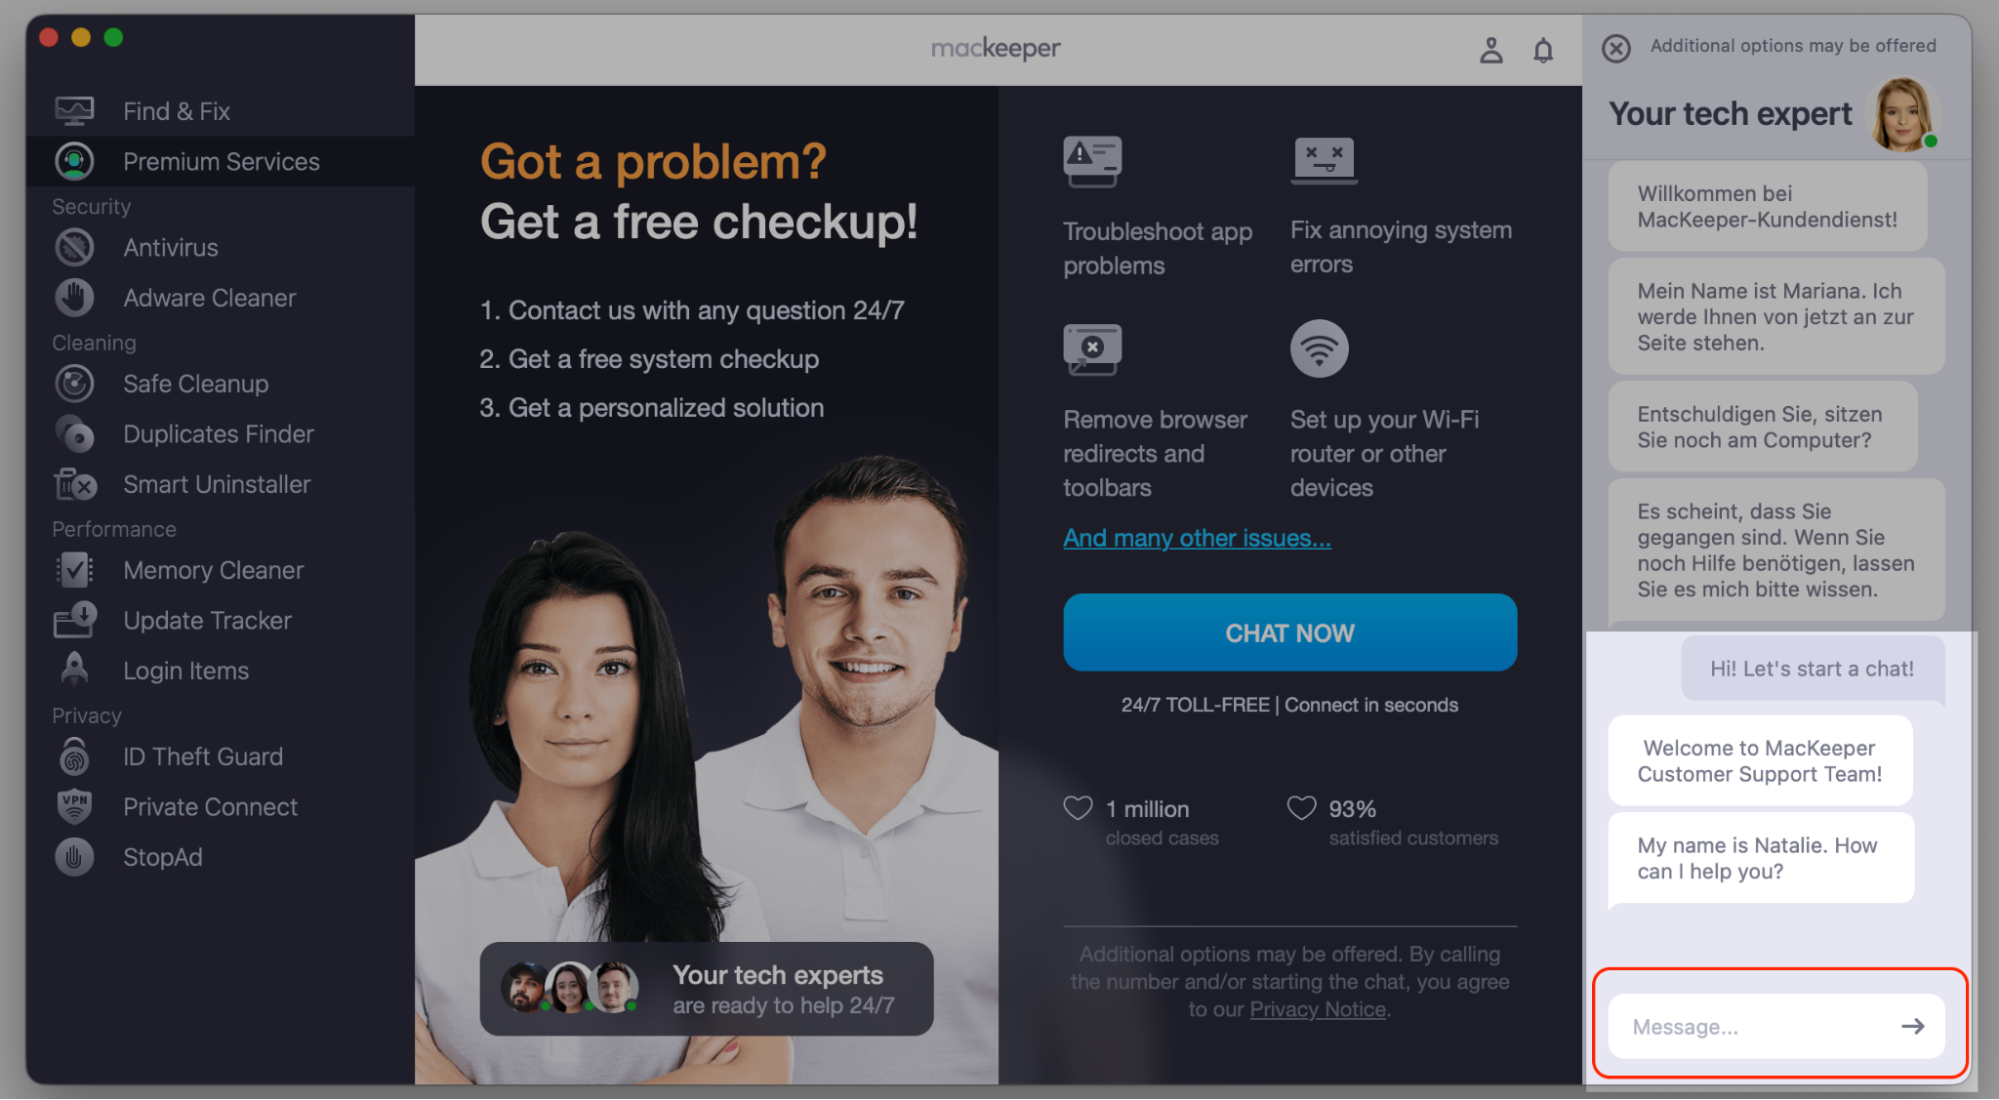
If you’re dealing with Dropbox not appearing in the menu bar on Mac and cracking your head over why, we suggest starting with the quickest option—getting help from our support team. MacKeeper’s Premium Services are created with you in mind of you, as we’re here 24/7 to resolve your Mac-related issues.
Follow our team’s recommendations to solve your Mac problem.
Step 1. Go to MacKeeper and choose Premium Services Step 2. Click Chat NowStep 3. Type in your message to reach our support team
1. Relaunch Dropbox
The icon only appears when the Dropbox desktop app is active, so let’s reopen it first. This alone brings the icon back more often than not.
Here’s how to relaunch it.
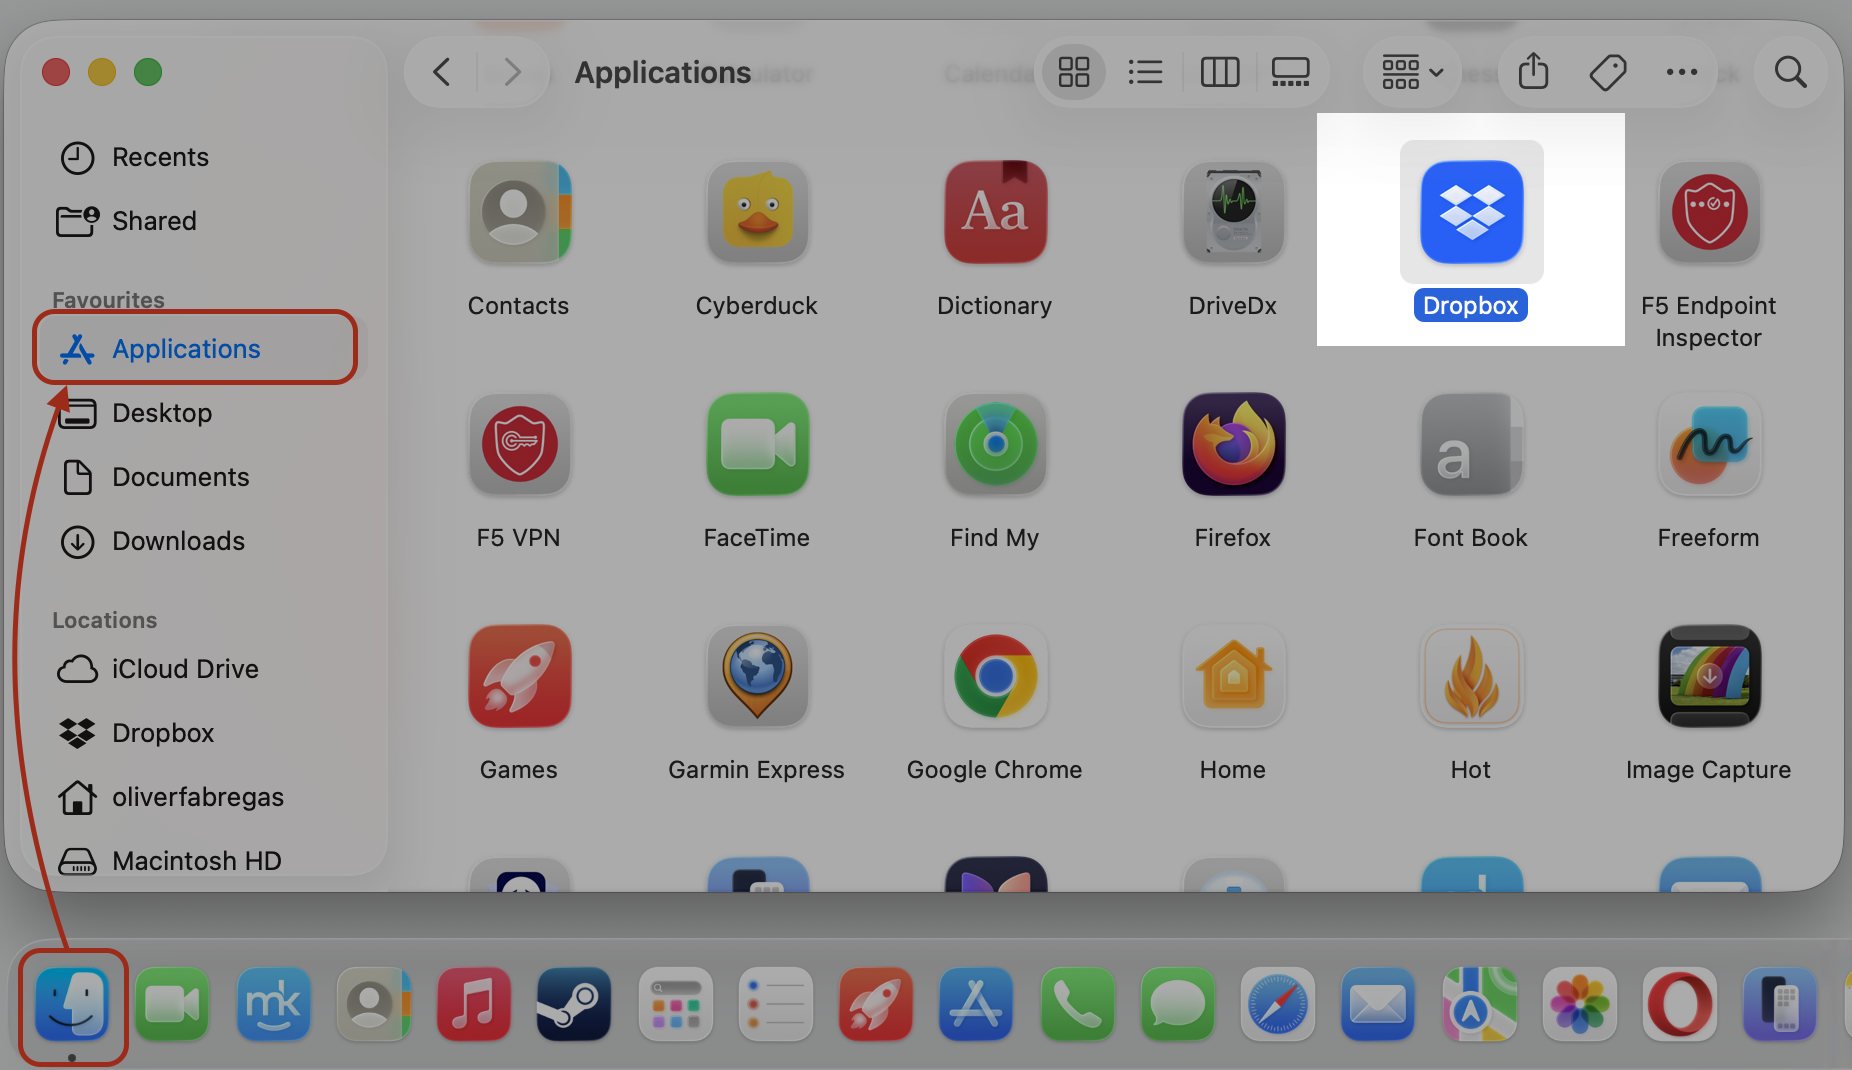
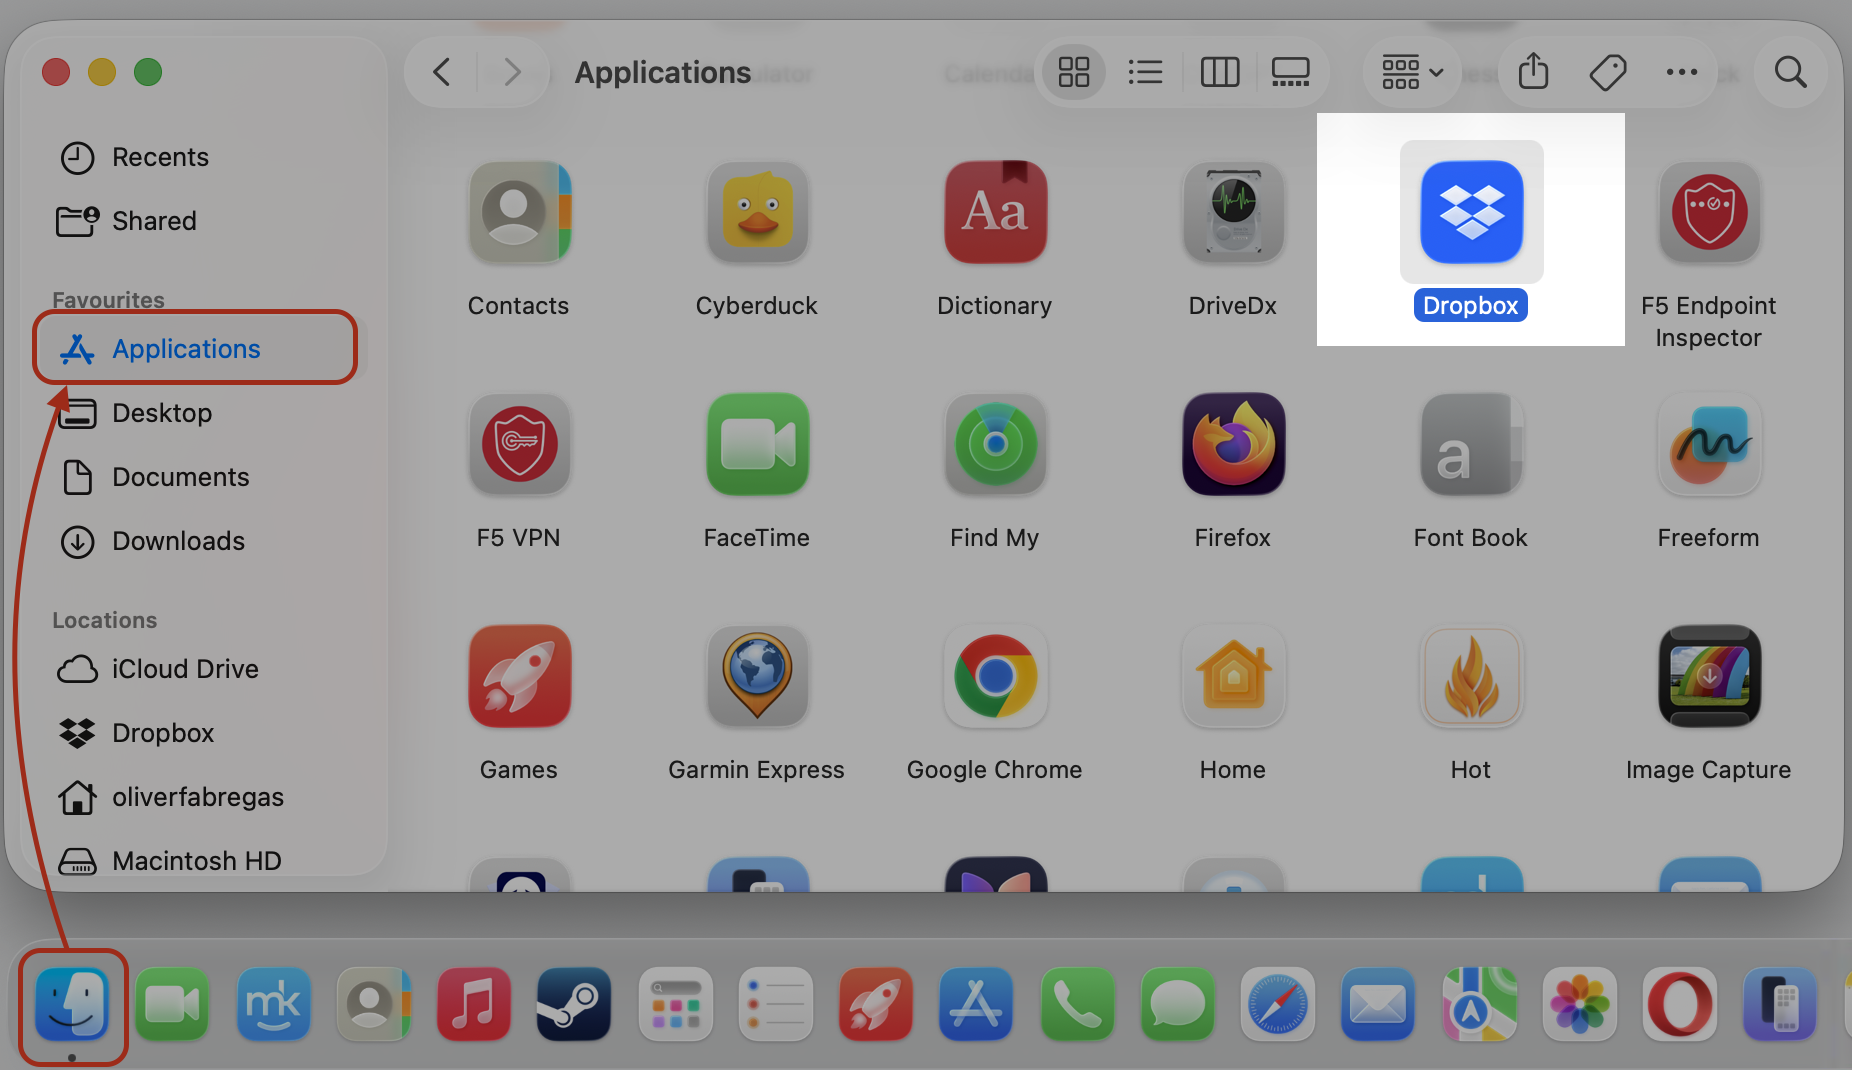
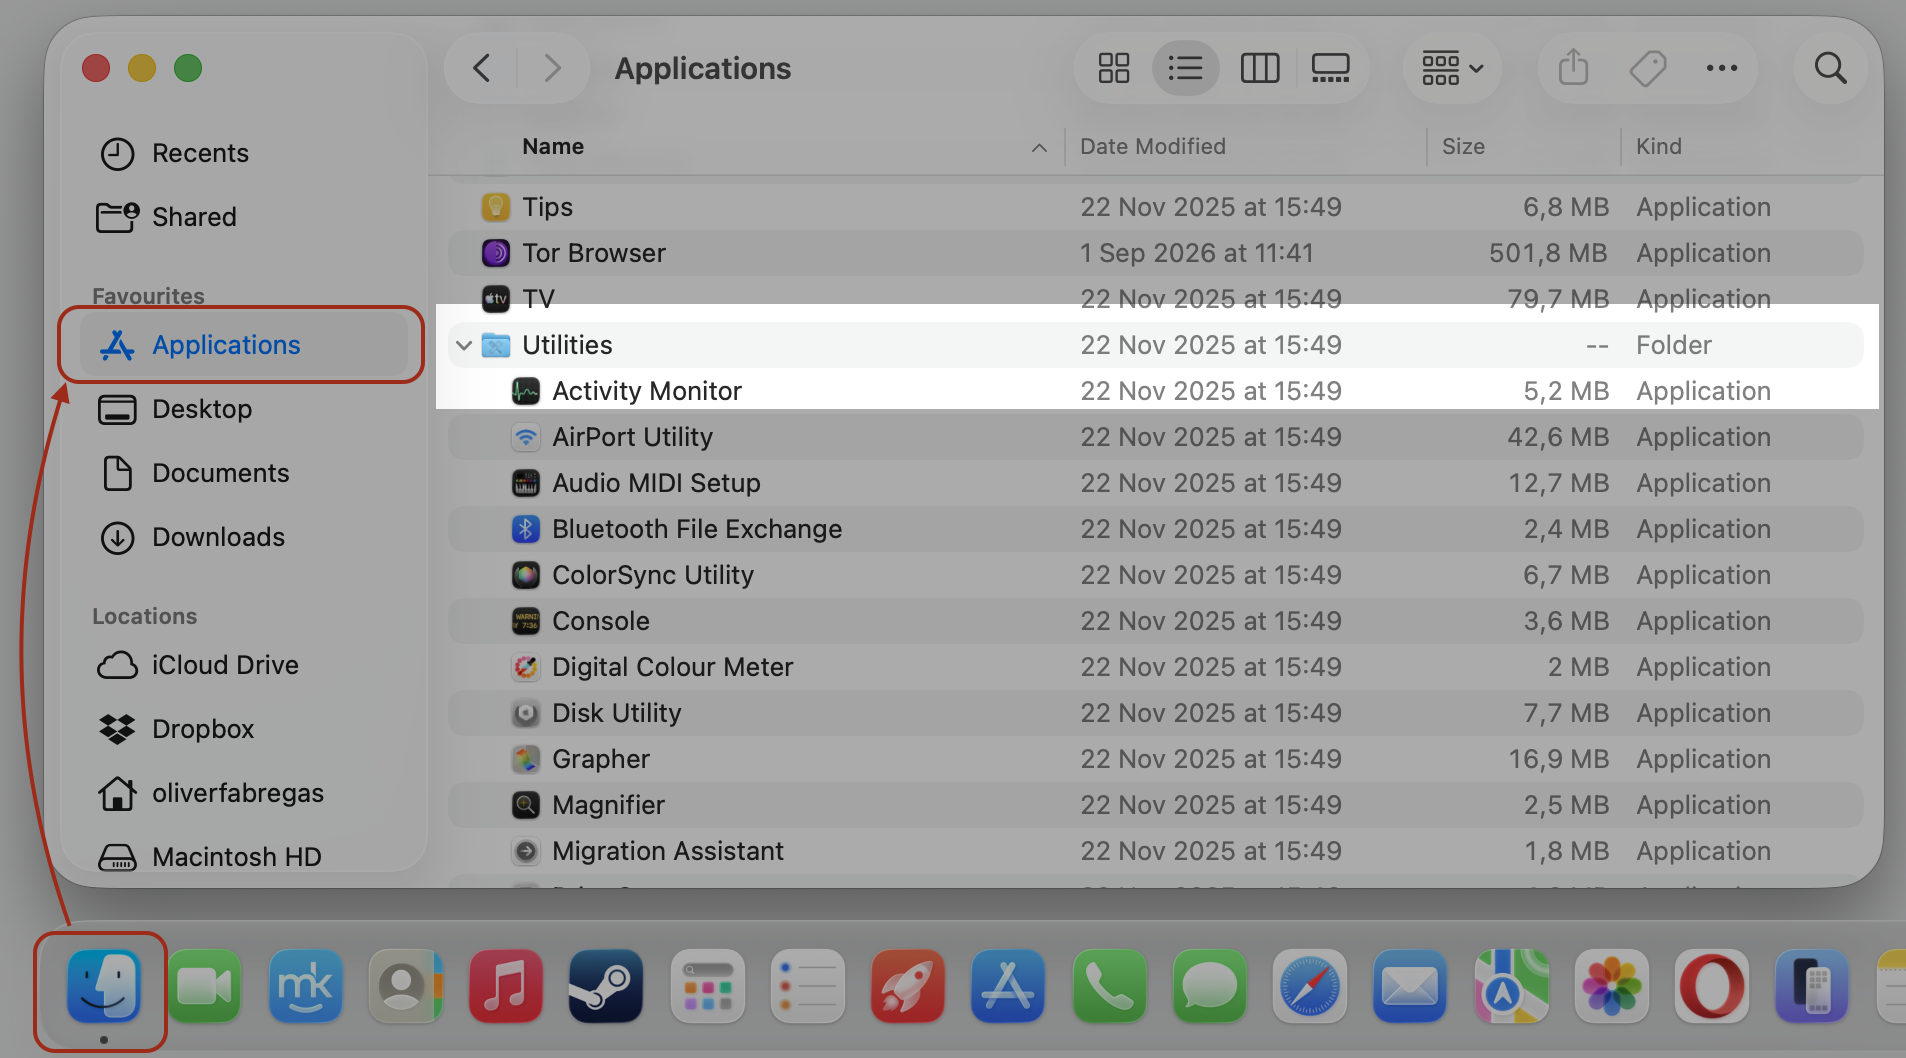
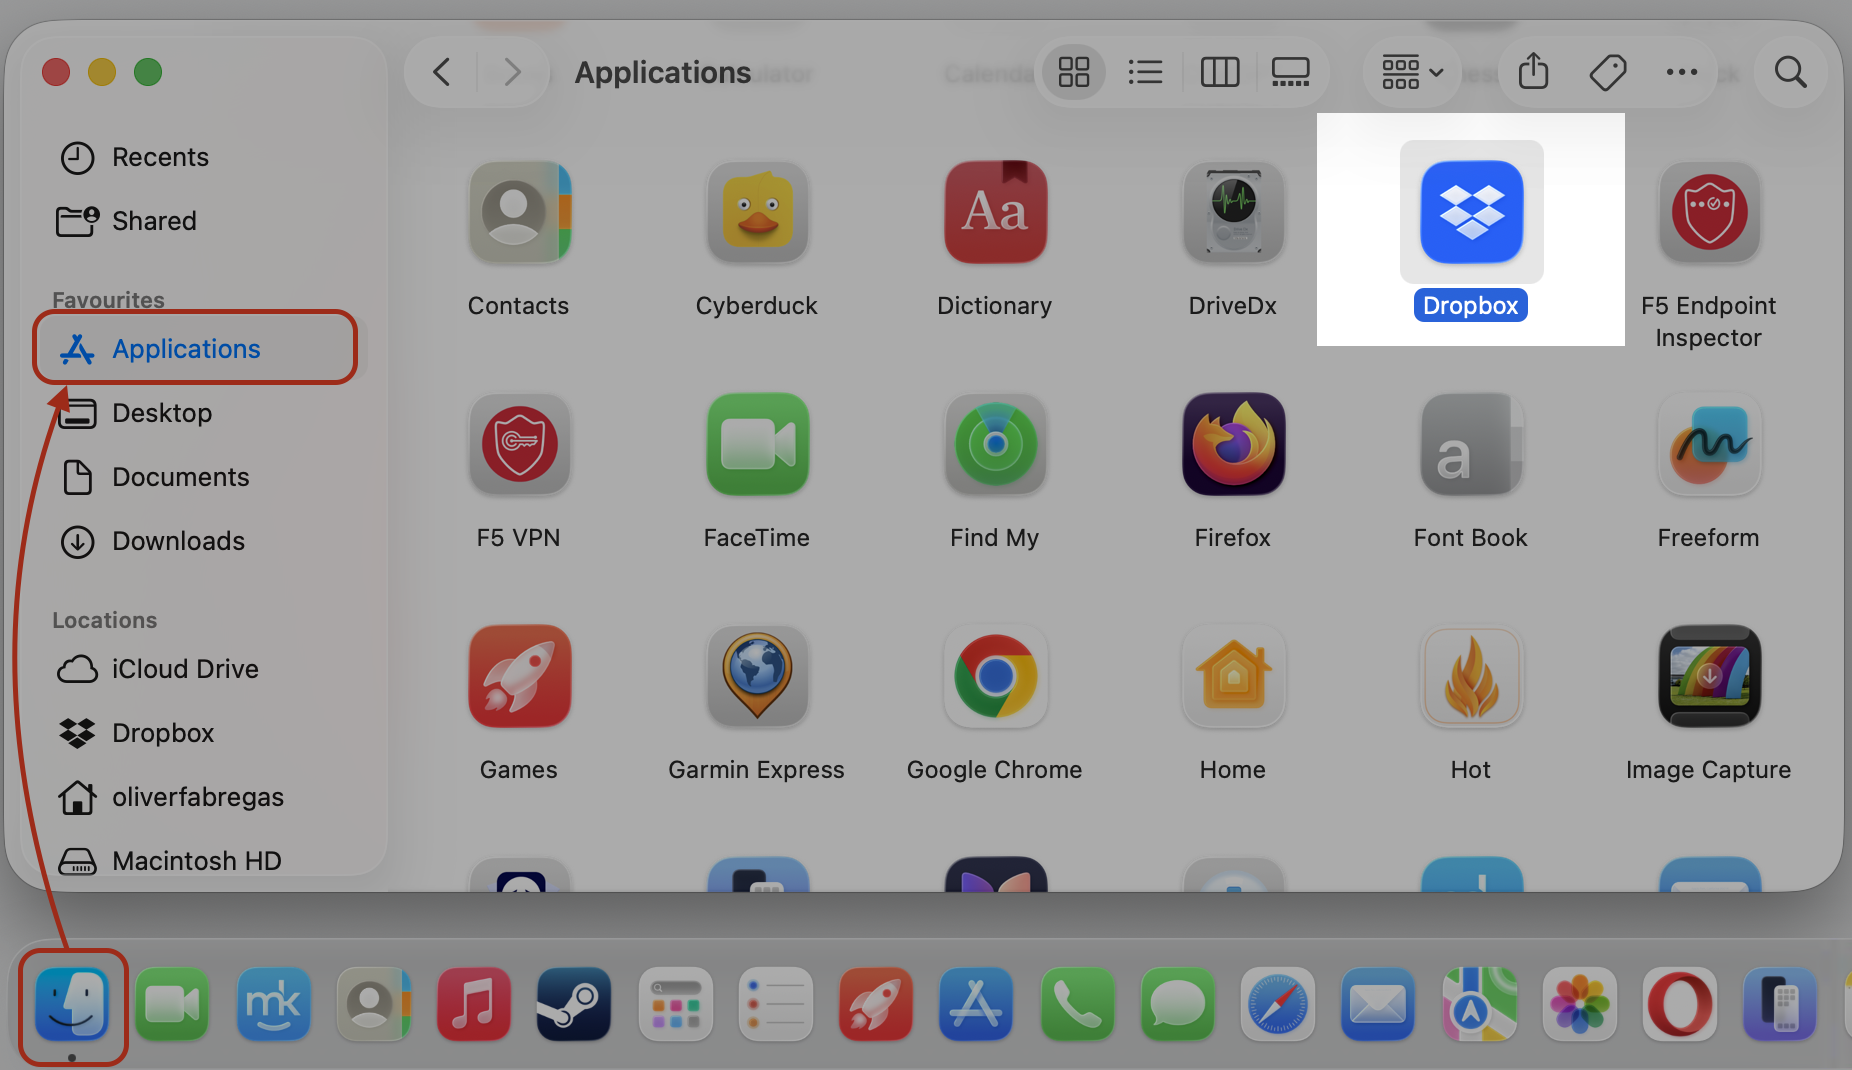
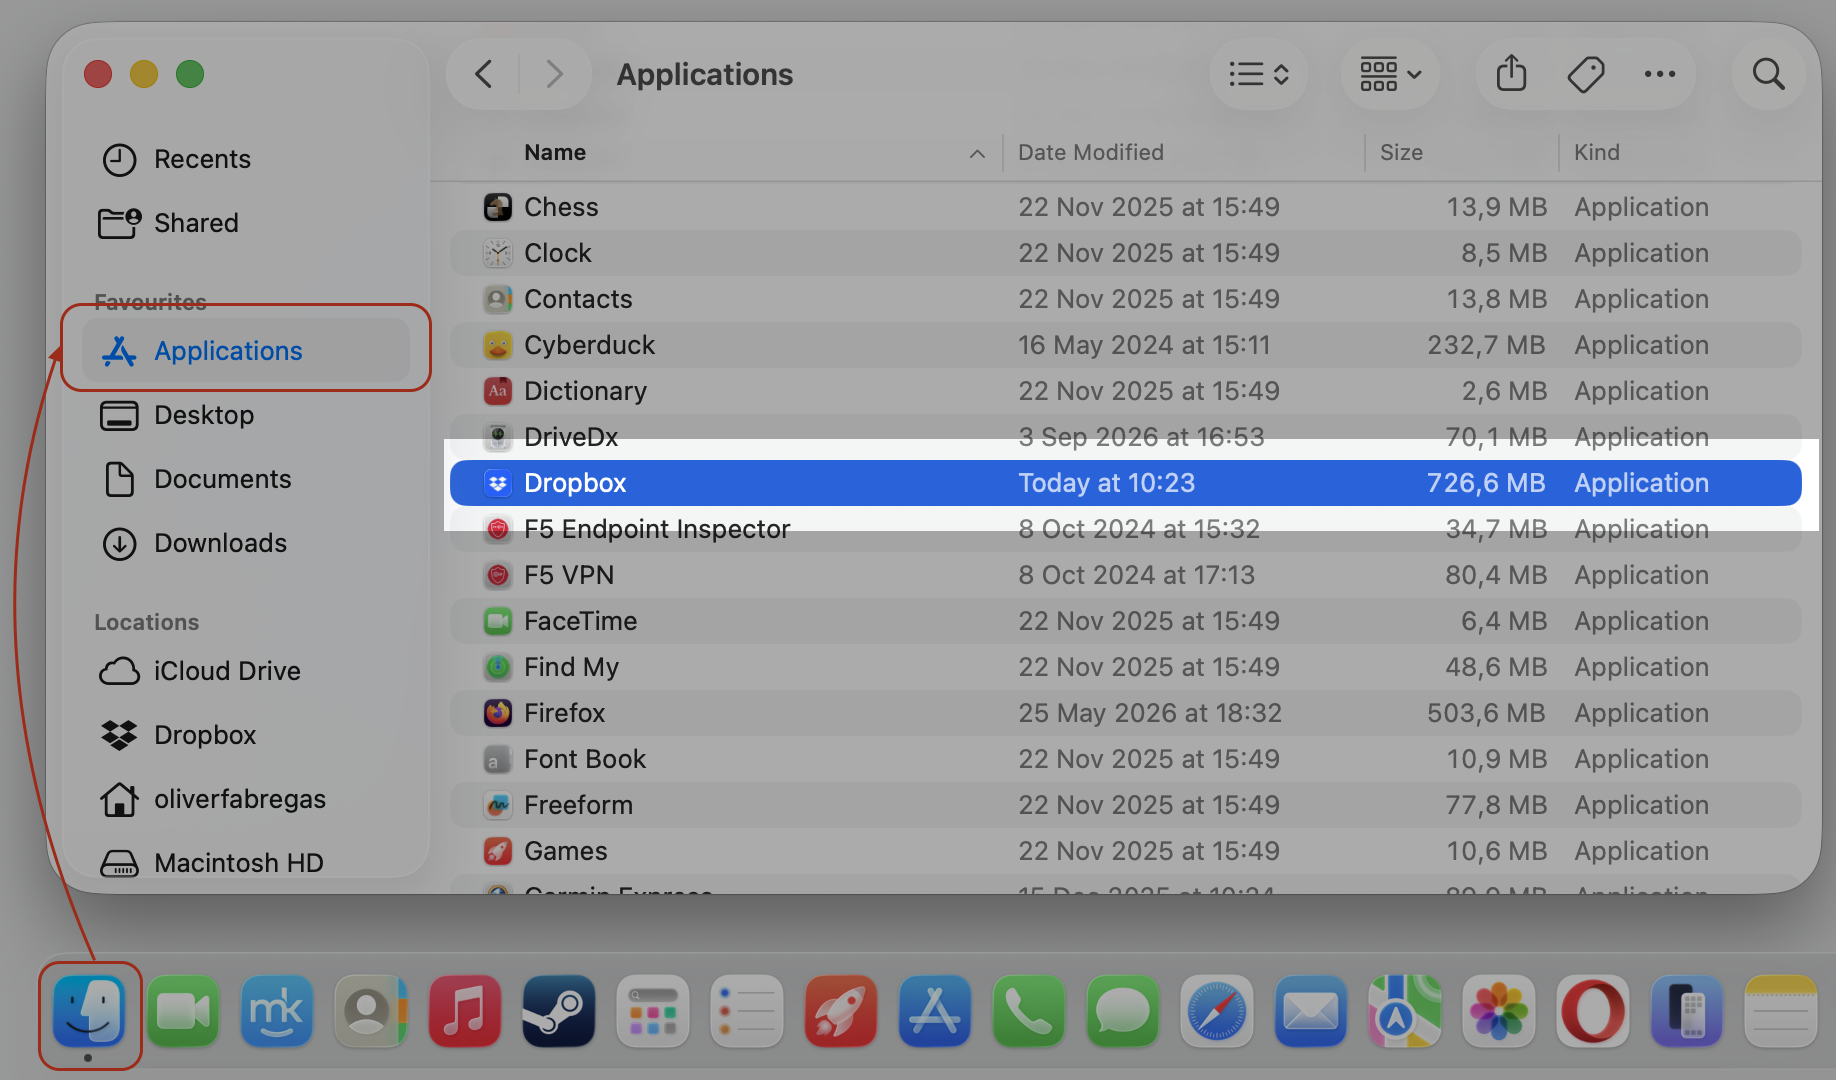
Open Finder, then click Applications in the sidebar.
Double-click Dropbox to launch the app.
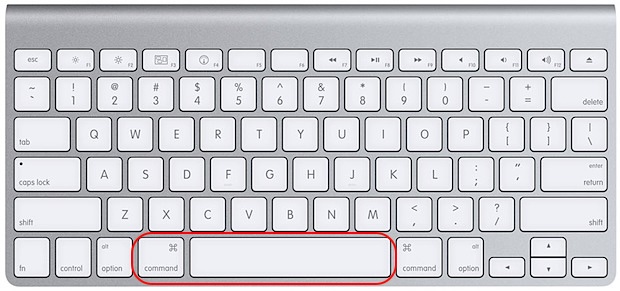
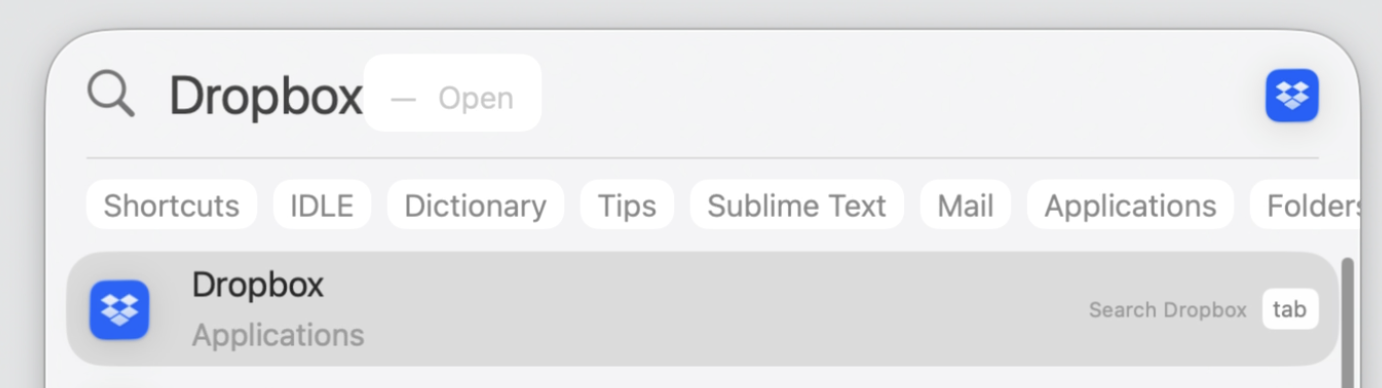
Prefer Spotlight? Press Command + Space, type Dropbox, and press Return.
Give it a few seconds, and the icon should reappear in your menu bar.
Step 1. Go to Finder > Applications > DropboxOr Press Command+SpaceStep 2. Type “Dropbox” and hit Enter
2. Restart your Mac
In our experience, a simple restart clears temporary macOS or Dropbox glitches that keep the icon from showing. If you’ve ever wondered what does restarting a MacBook do, it refreshes background processes and frees up memory—often enough to bring the icon back.
Let’s restart together:
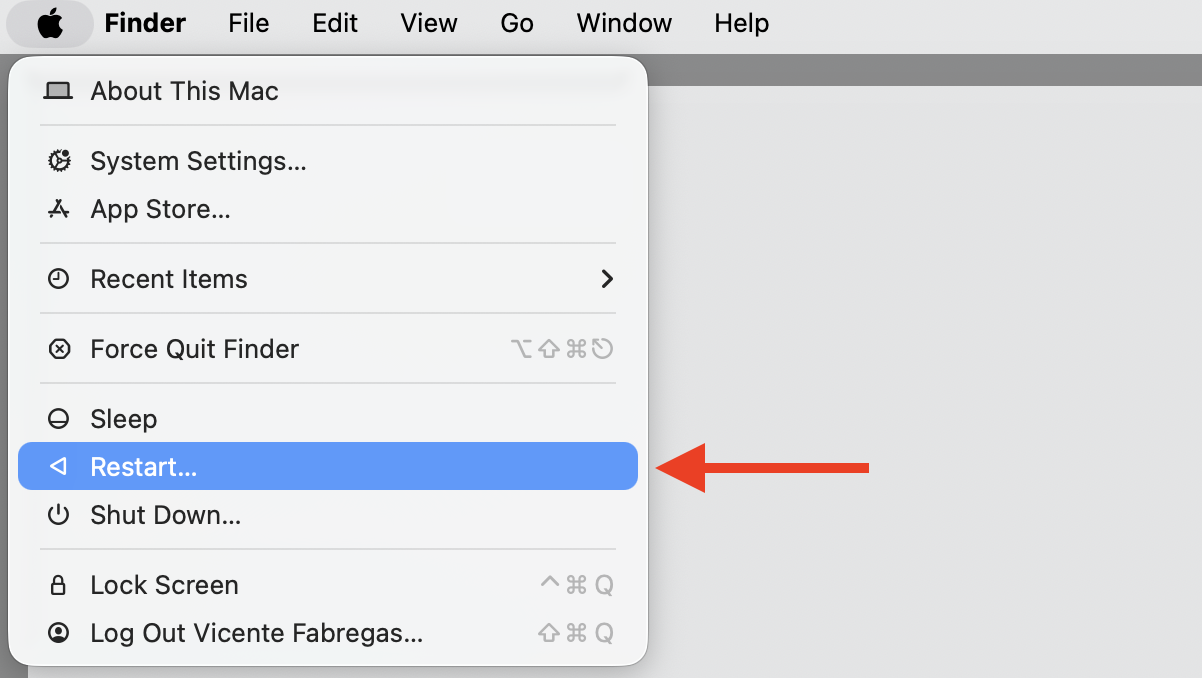
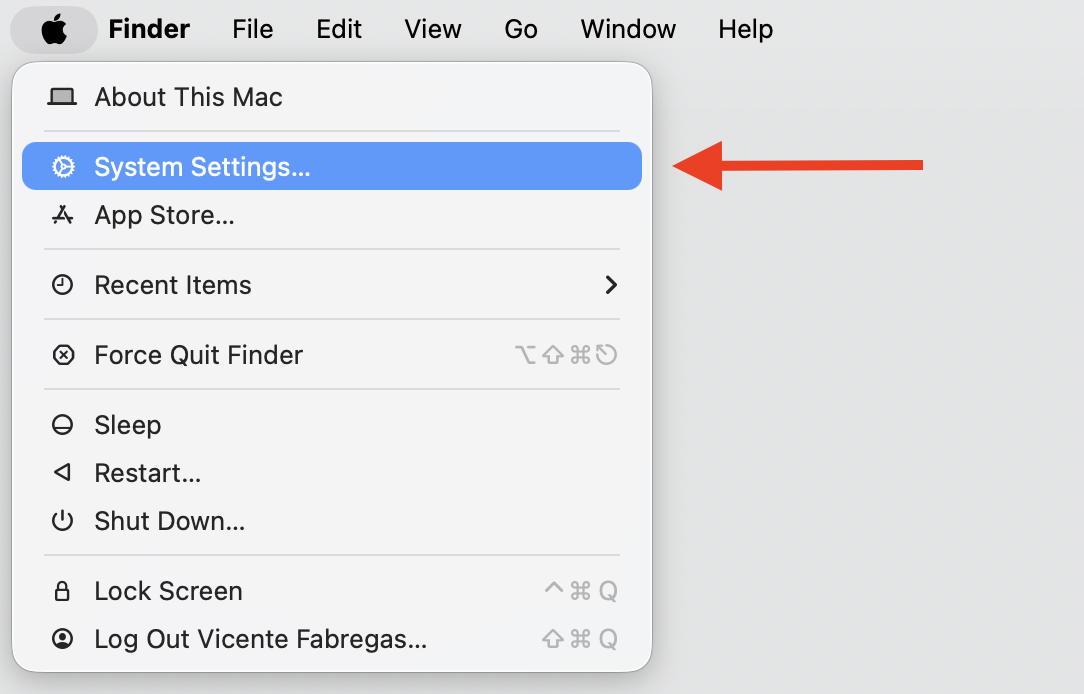
Click the Apple menu in the top-left corner.
Select Restart.
When your Mac boots back up, open Dropbox again if it doesn’t launch on its own.
Step 1. Go to Apple Logo and Restart MacStep 2. After restart, relaunch Dropbox from Finder > Applications
3. Free up space in menu bar
Too many icons can push Dropbox out of view, especially on a MacBook with a notch. You can customize menu bar layouts to make room, and once we learn to customize the menu bar on Mac, important icons like Dropbox stay in sight.
Try this to free up space on your Mac:
Quit any menu bar apps you don’t need right now.
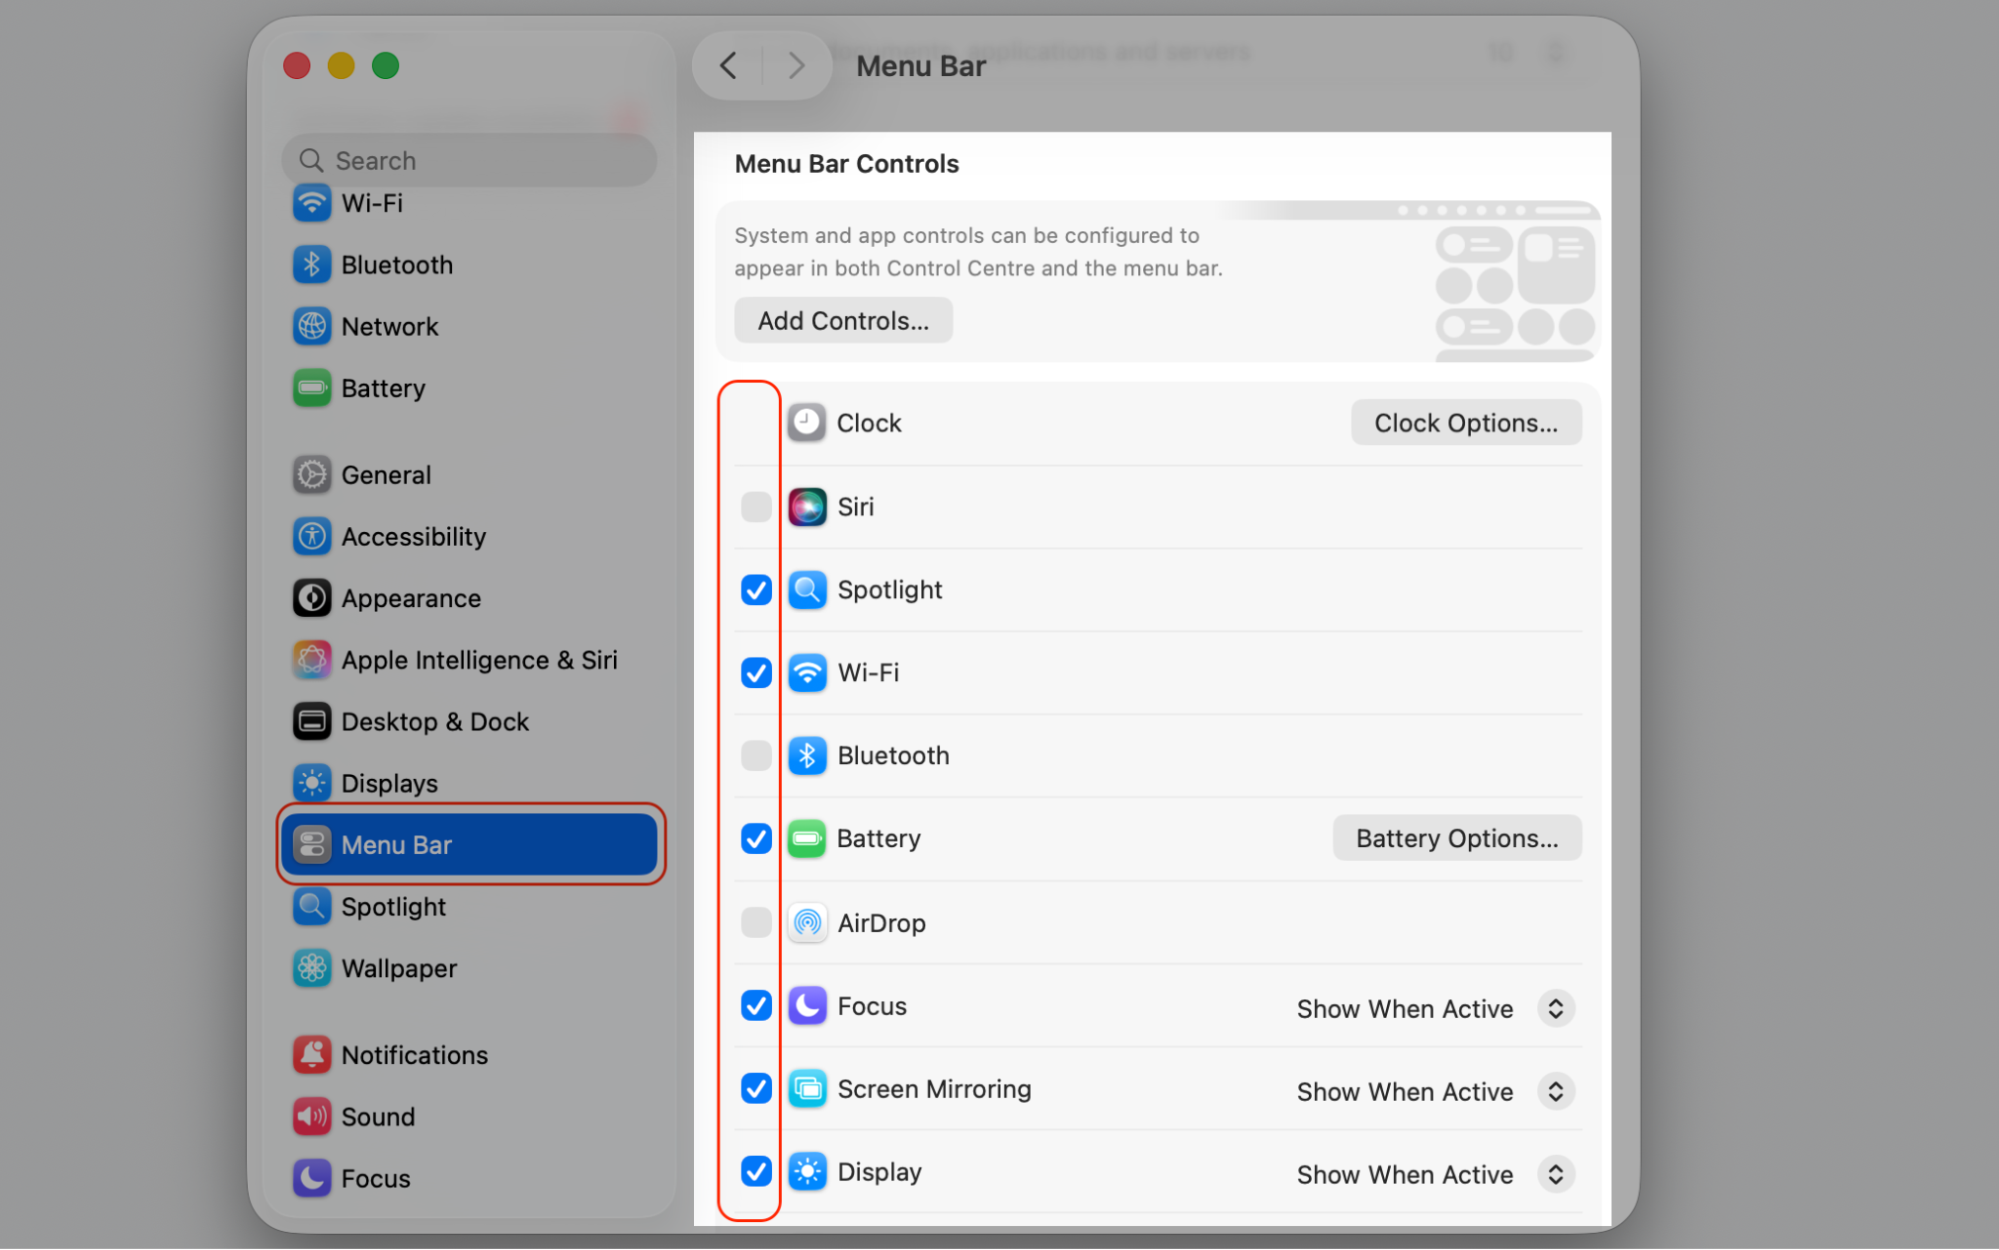
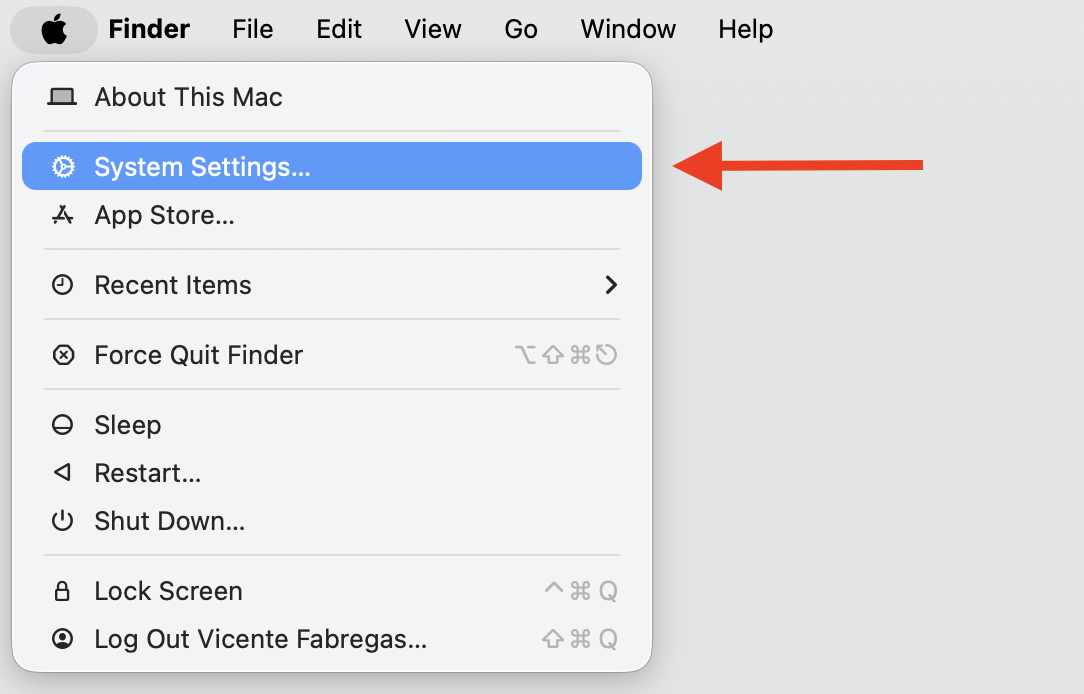
Open System Settings, then click Menu Bar.
Set less-used items, like Bluetooth or Sound, to Don’t Show in Menu Bar.
Step 1. Go to Apple Menu > System SettingsStep 2. Uncheck less-used items, like Bluetooth or Sound, to Don’t Show in Menu Bar
4. Rearrange menu bar icons
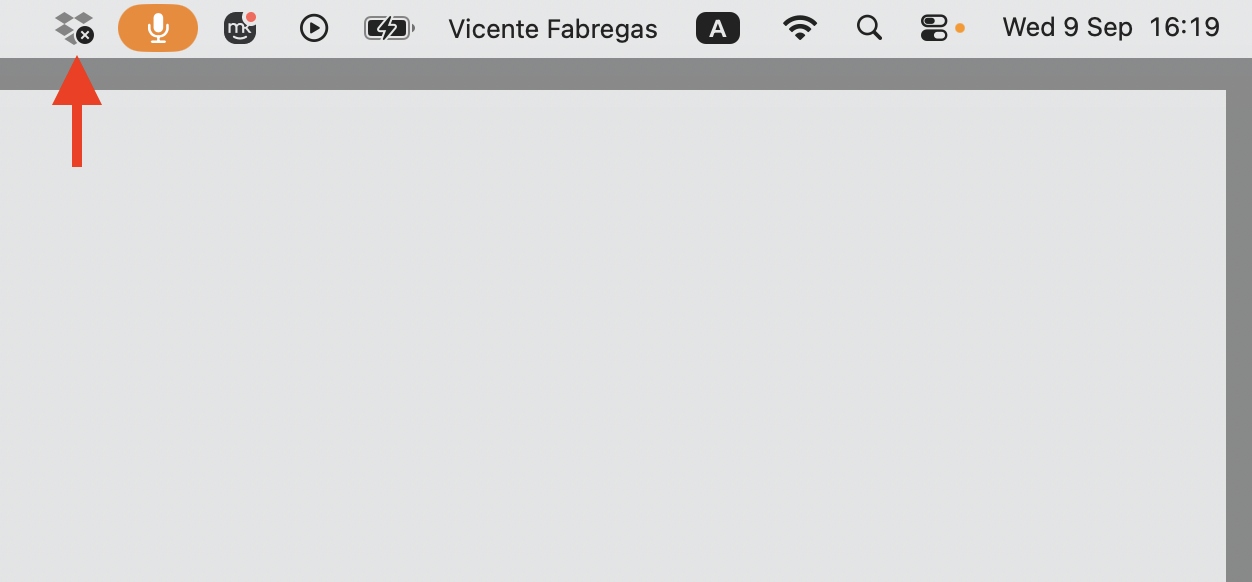
Sometimes the icon is simply in an awkward spot. We can hold Command and drag icons to reorder them, and when we move Dropbox closer to the right side, it’s easier to keep in view.
Below, we’ll help you to tidy up the order:
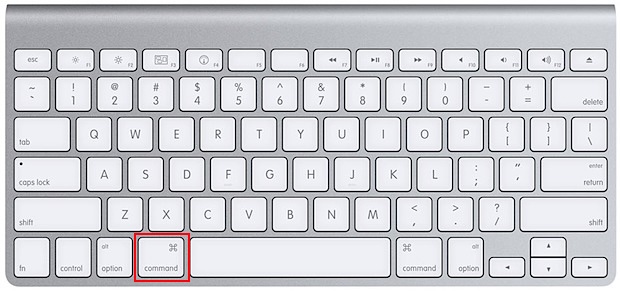
Press and hold the Command key.
Click and drag the Dropbox icon, or any other, to a new position.
Release the icon once it sits where you want it.
Step 1. Hold the Command keyStep 2. Reorder Dropbox from the menu barStep 3. Check the result
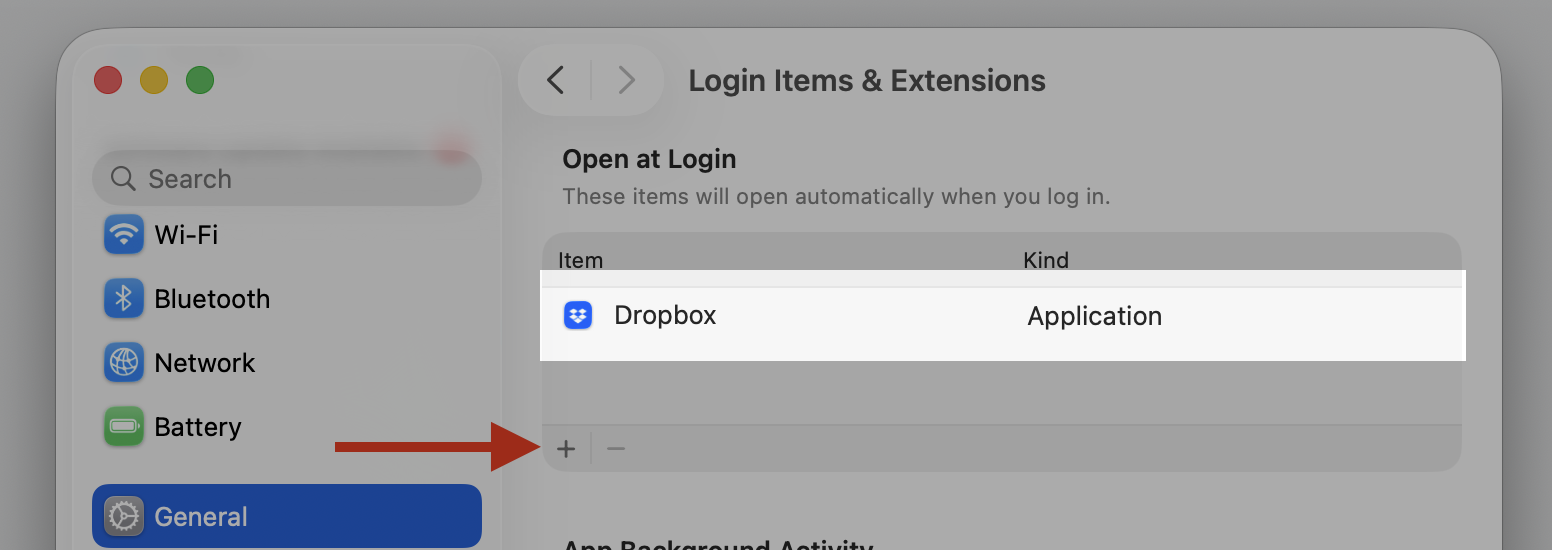
5. Make sure Dropbox opens at login
If Dropbox doesn’t launch with macOS, the icon will be missing every time you restart. Adding it to our login items enables Dropbox to start automatically, so the icon’s there from the moment we sign in.
Let’s add it to your login items:
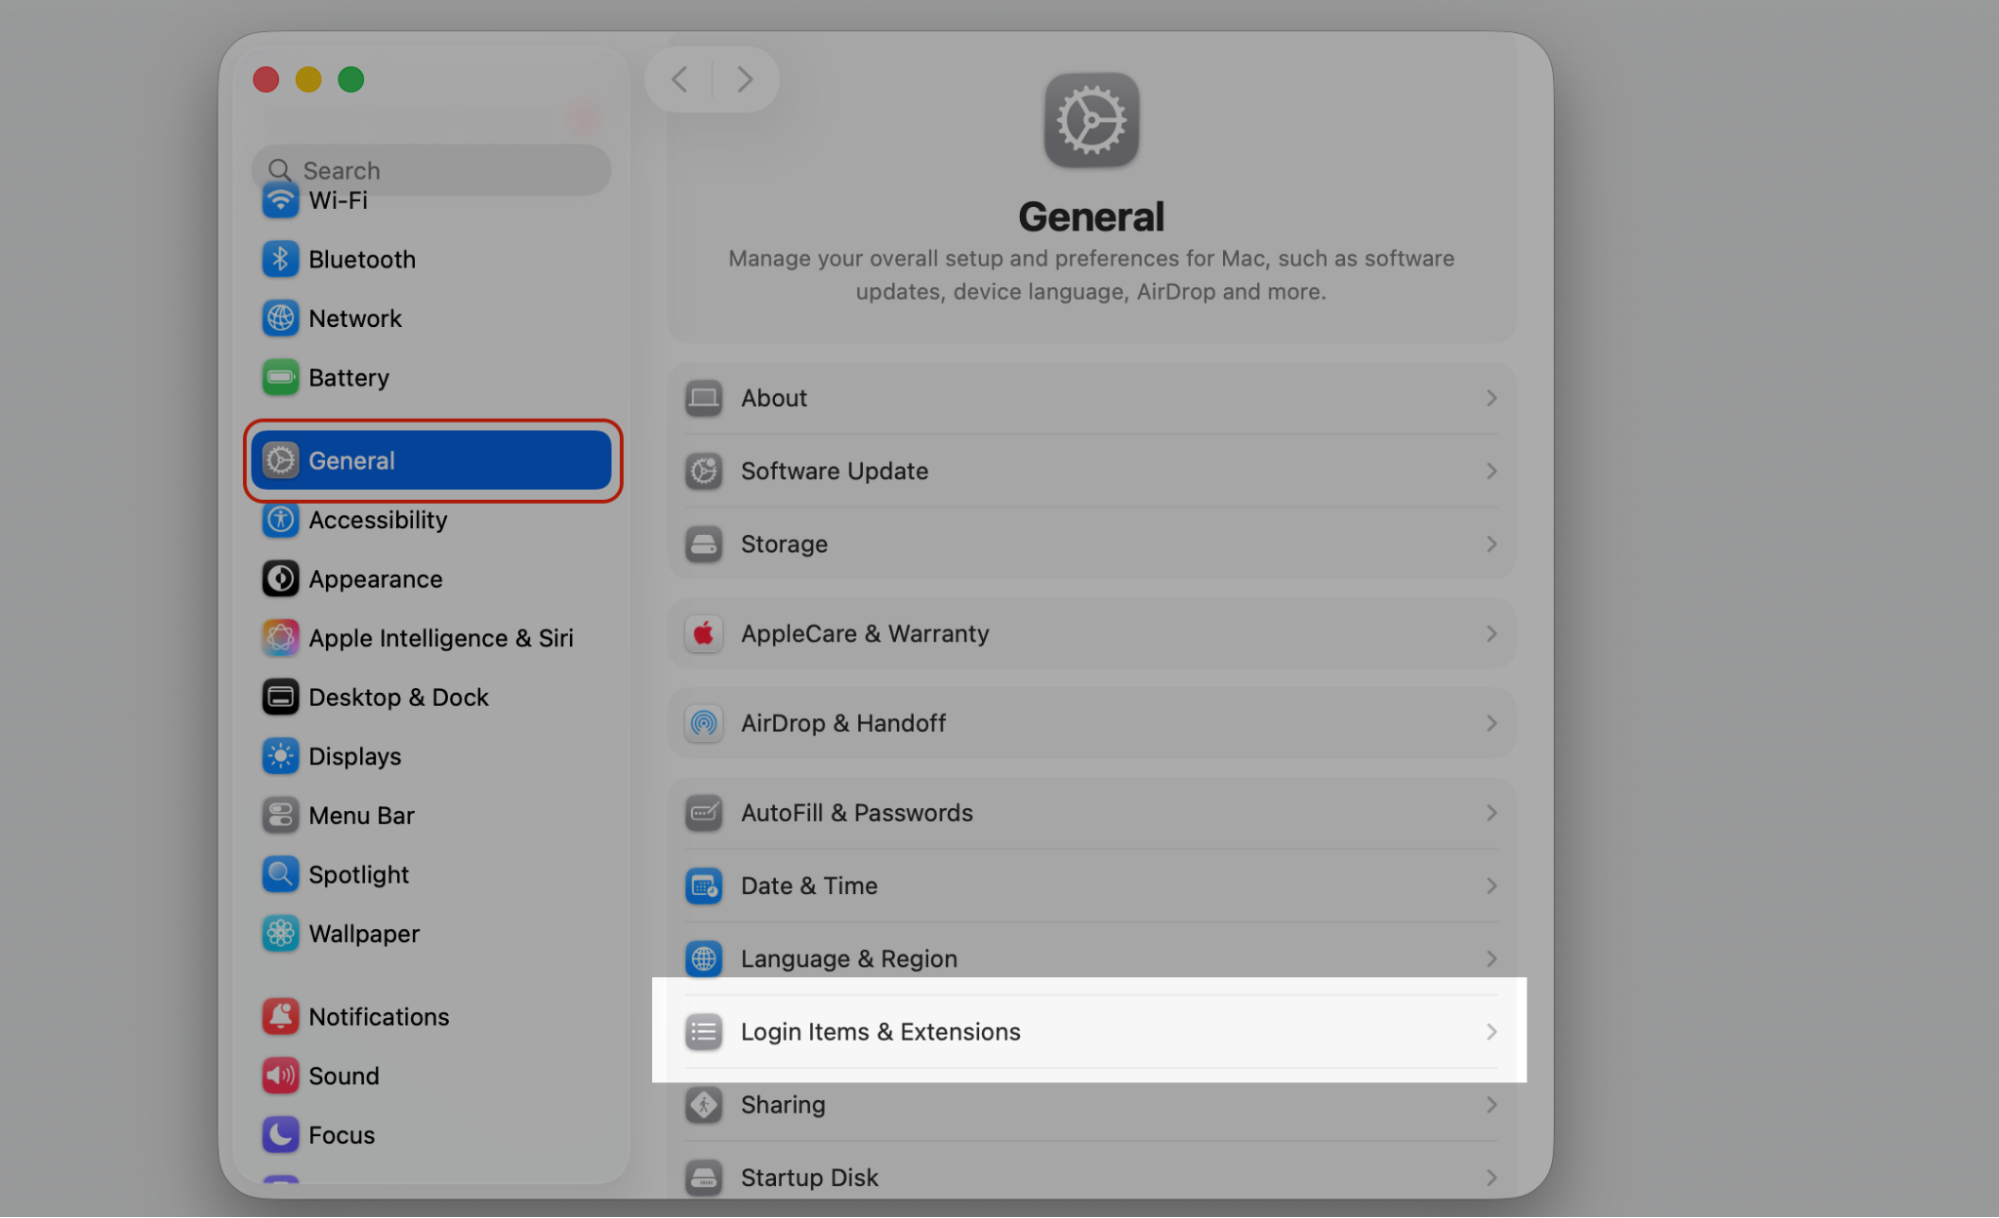
Open System Settings, then click General.
Select Login Items & Extensions.
Under Open at Login, click the plus button and add Dropbox.
Step 1. Go to Apple Menu > System SettingsStep 2. Select Login Items and Extensions form General SectionStep 3. Click the plus button and add Dropbox
6. Check whether Dropbox is stuck in background
Dropbox can keep running even when its icon is nowhere to be seen. In that case, we’ll want to close background app processes and start fresh. Activity Monitor is where we close background app on Mac, and it only takes us a moment.
Follow along to reset it:
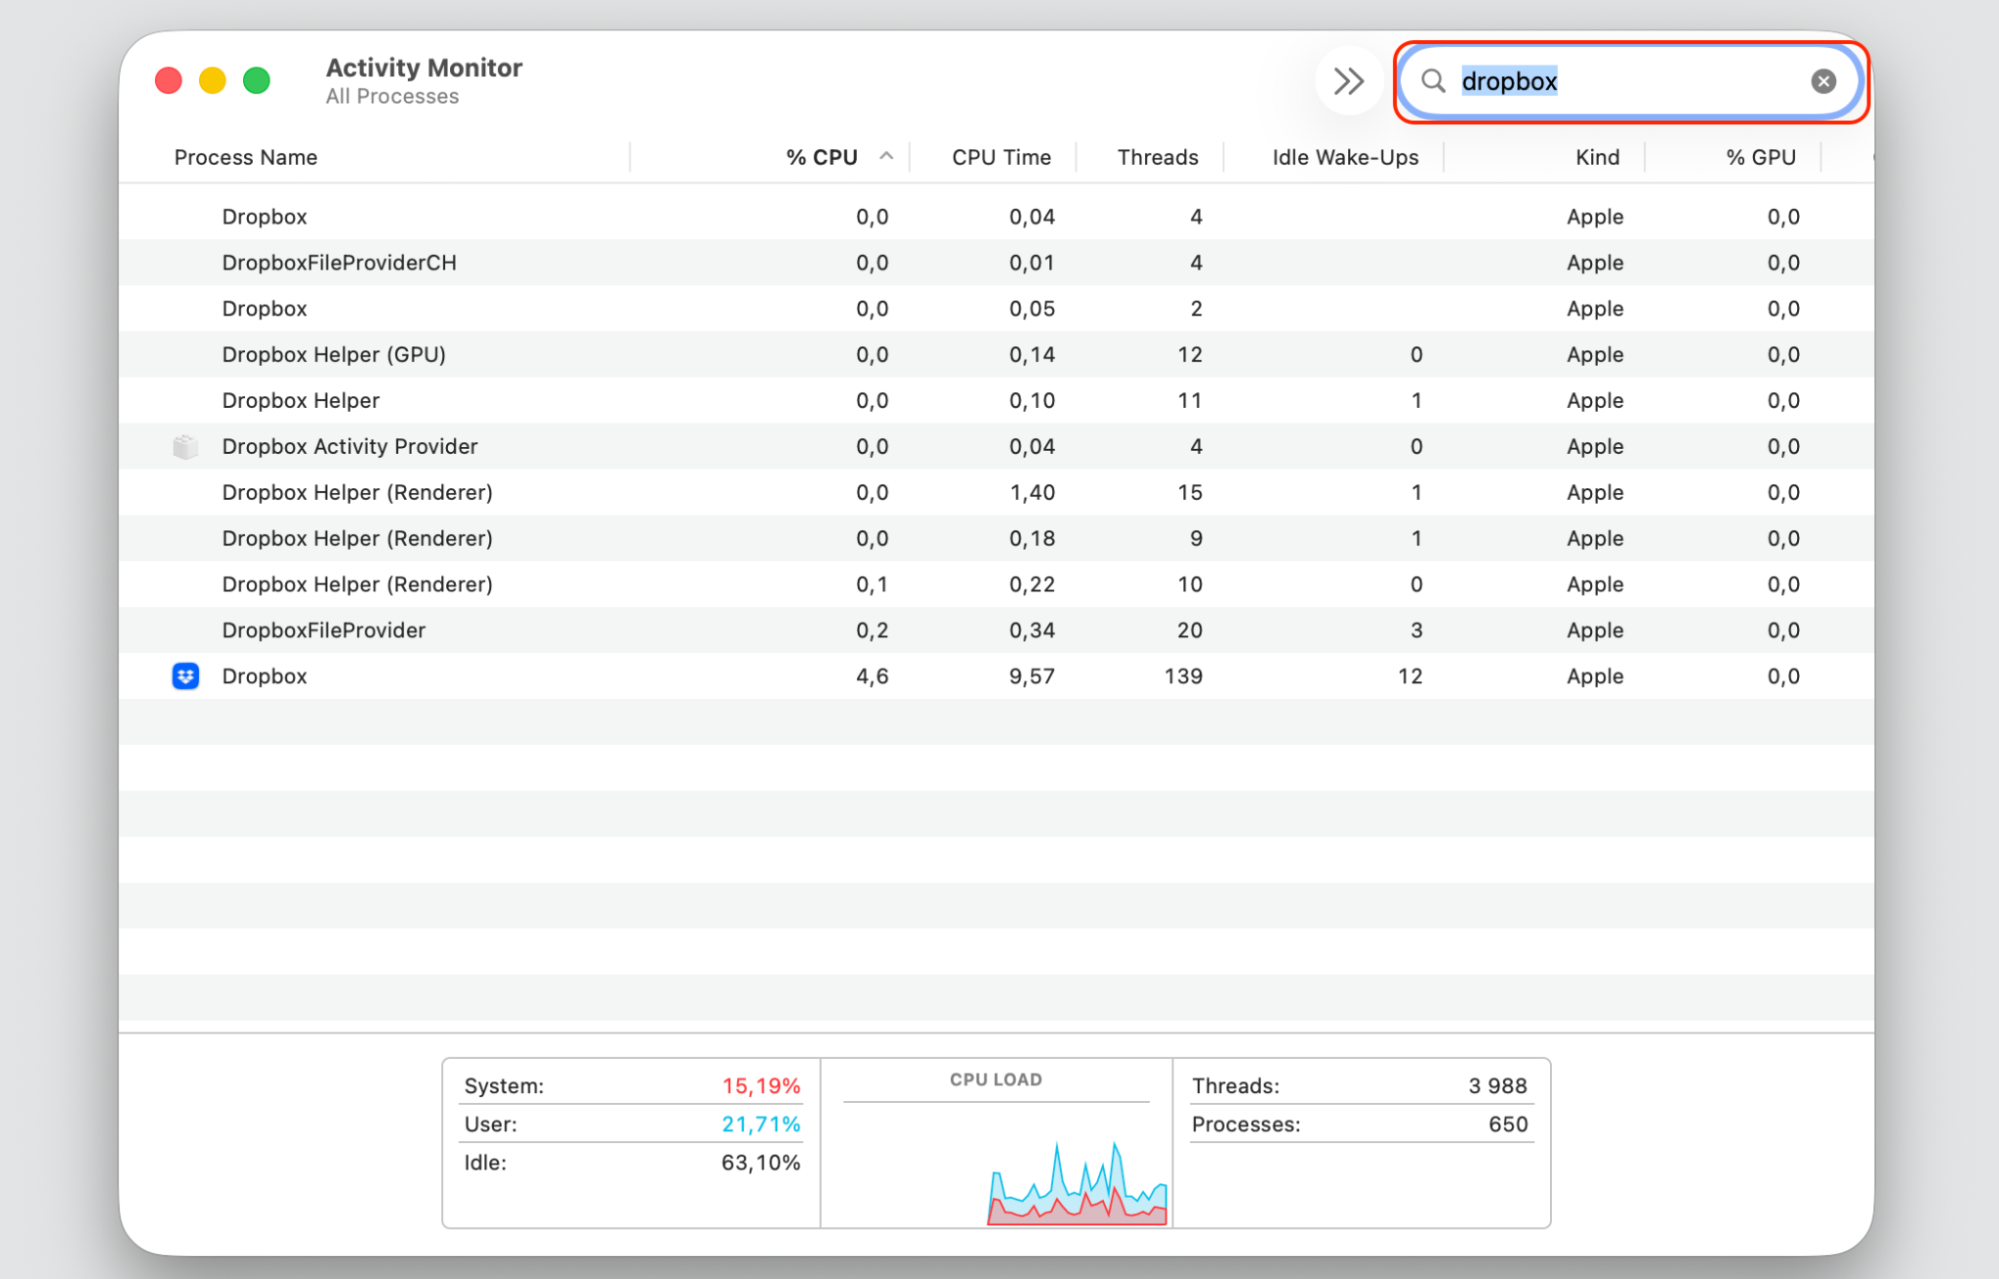
Open Activity Monitor from Applications > Utilities.
Type Dropbox in the search field to find its processes.
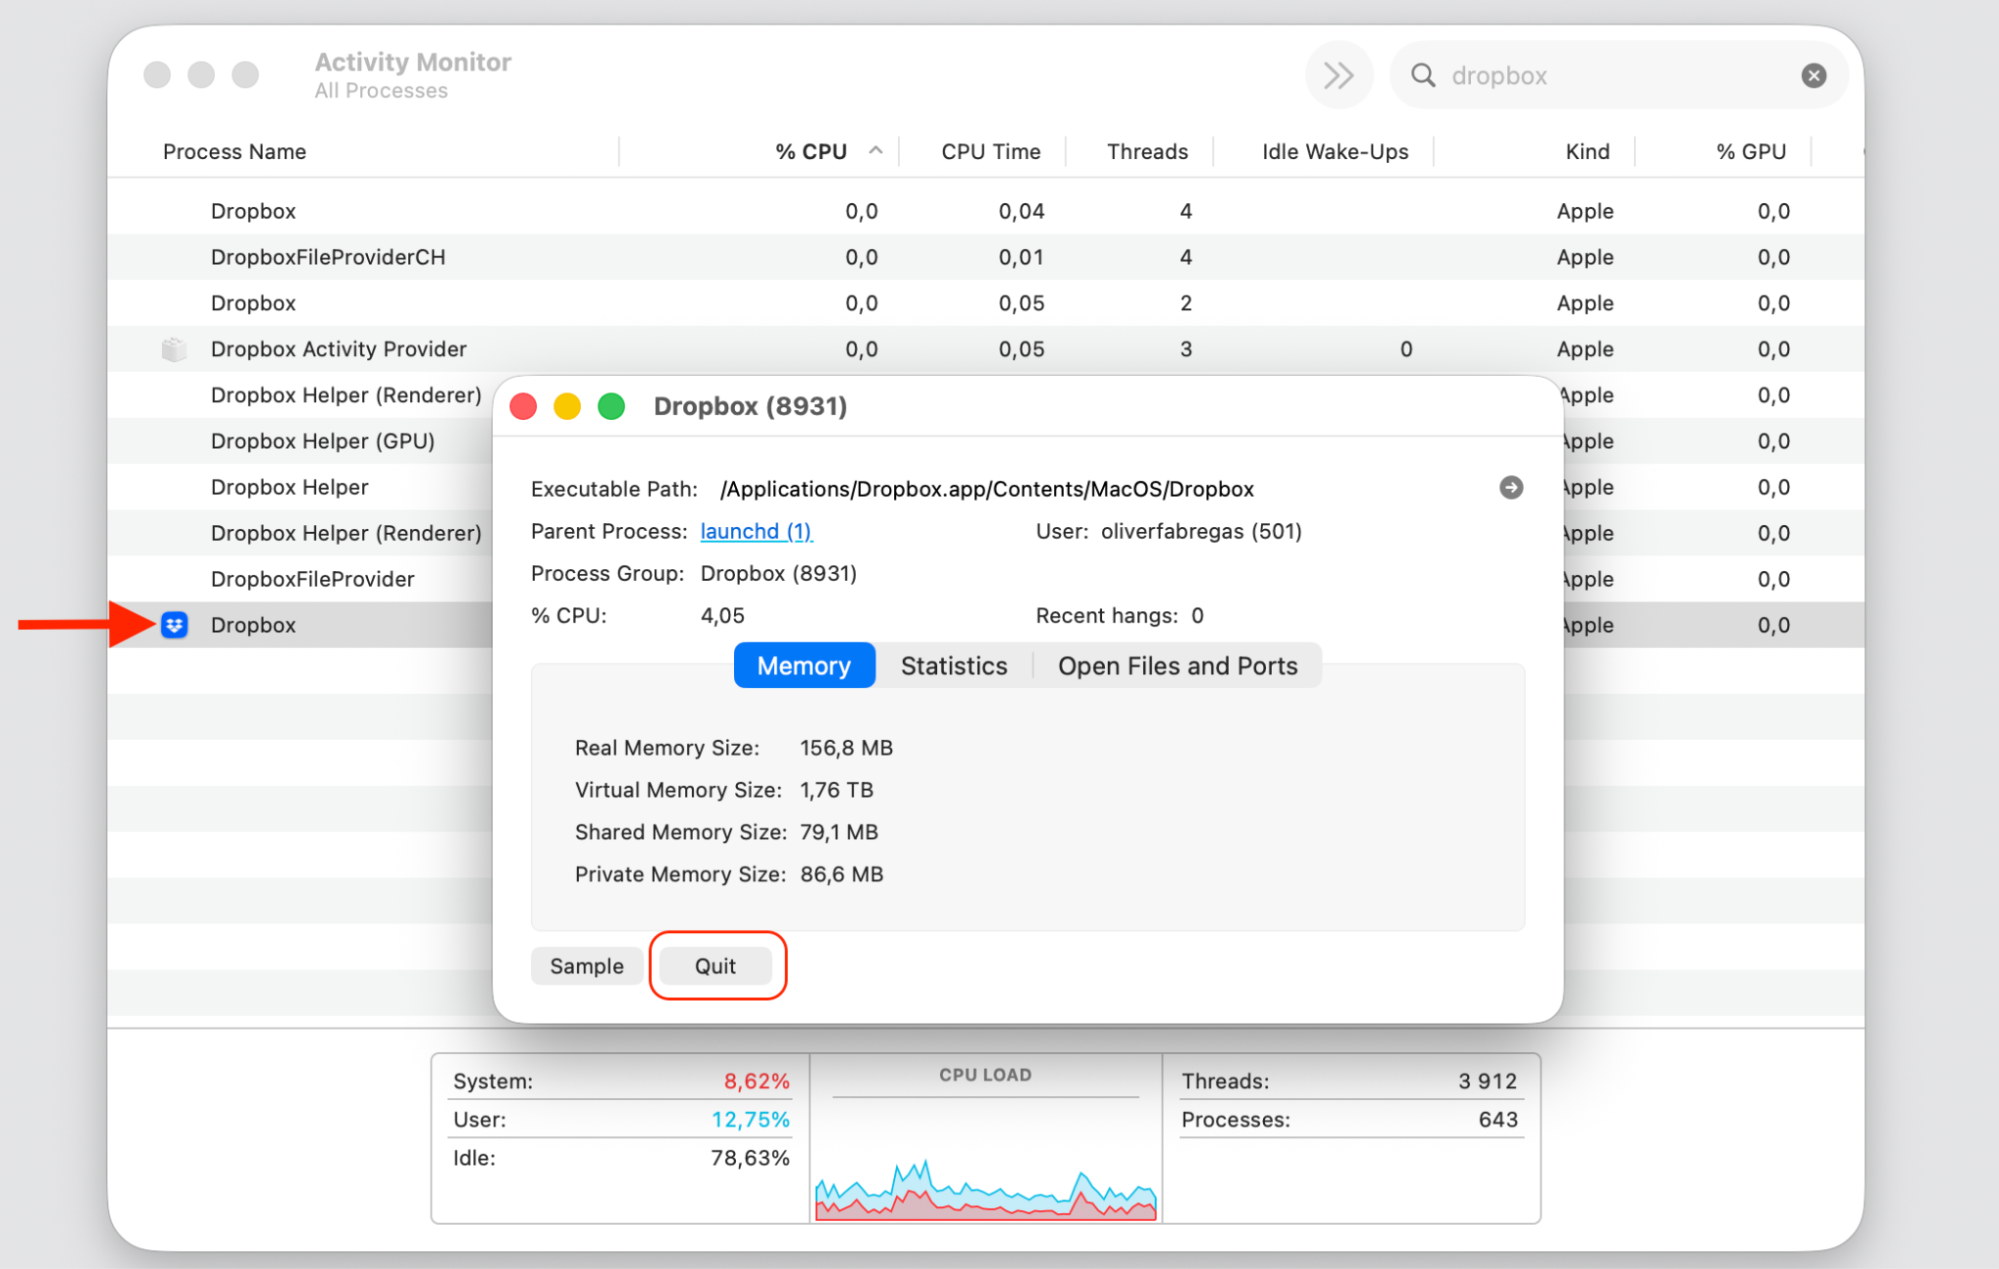
Select Dropbox app by double-clicking and quit the app.
Step 1. Go to Finder > Applications > Utilities > Activity MonitorStep 2. Type “Dropbox” in search windowStep 3. Select Dropbox app by double-clicking and quit the app
7. Update Dropbox
An outdated Dropbox version can cause menu bar trouble, especially after macOS updates. Grabbing the latest version from Dropbox often sorts this out for us, since newer versions are built to work with current macOS releases.
Give this a go with our prompts:
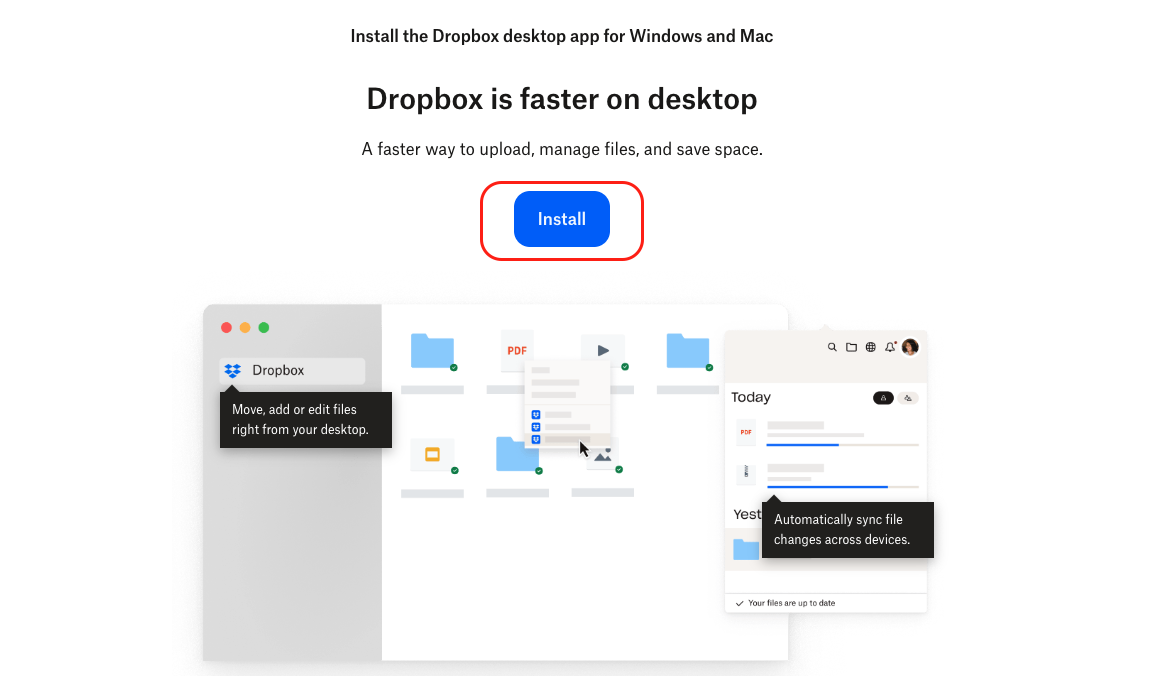
Visit the official Dropbox website and download the latest version.
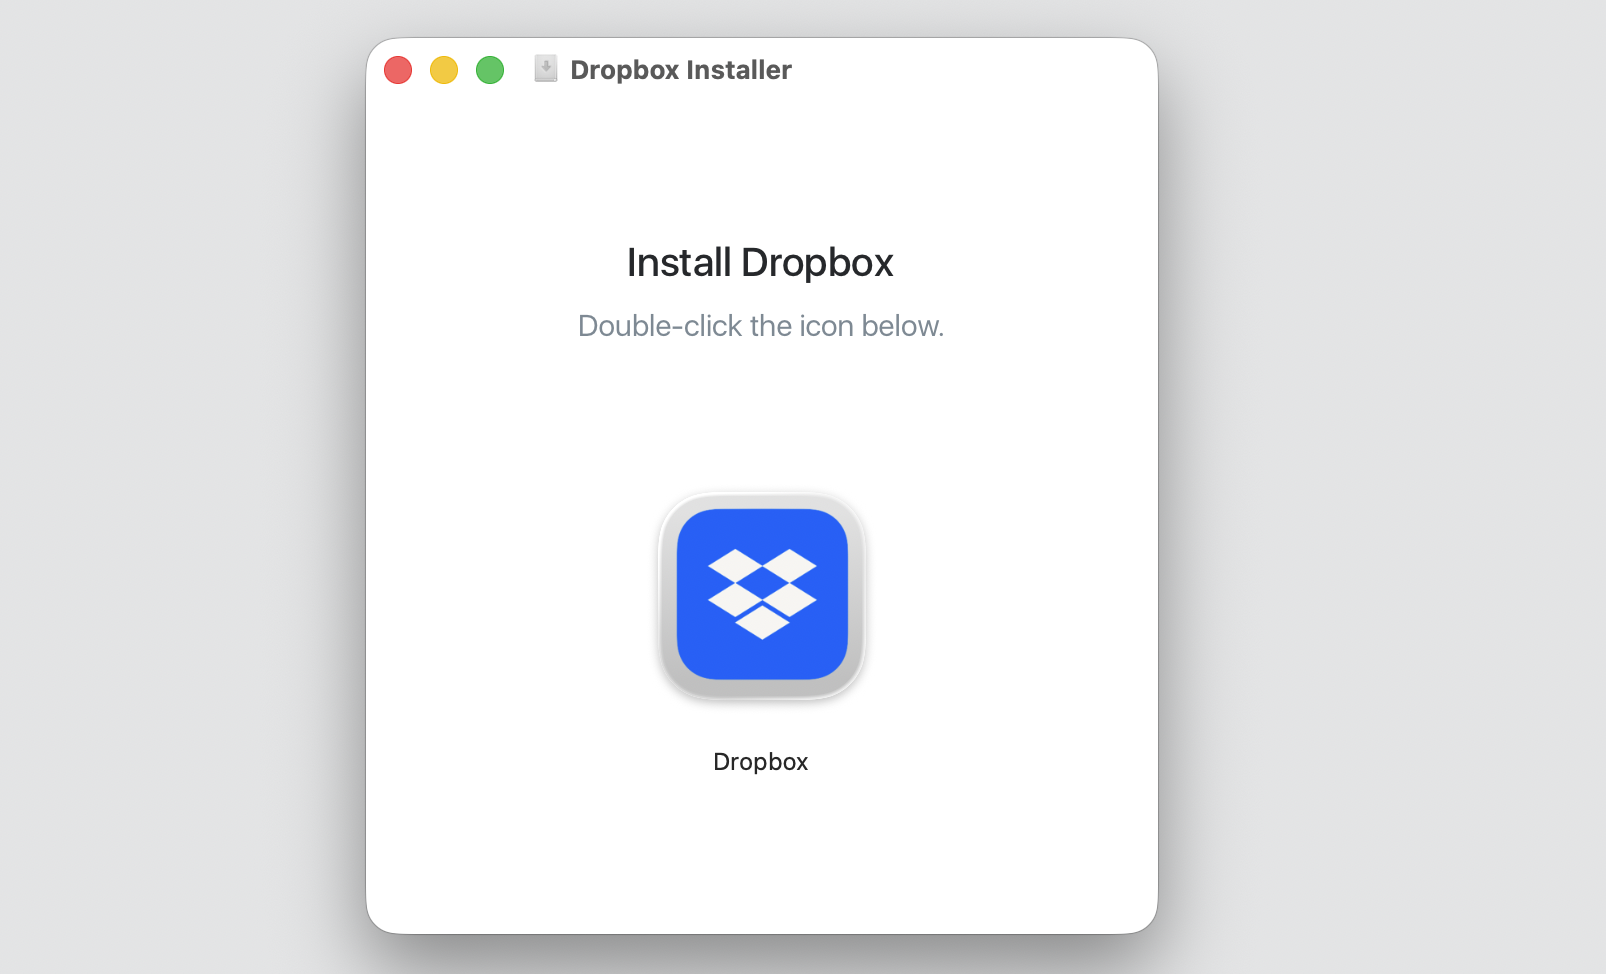
Open the downloaded file, often named Dropboxinstaller.dmg, to install it.
Launch Dropbox and check whether the icon returns.
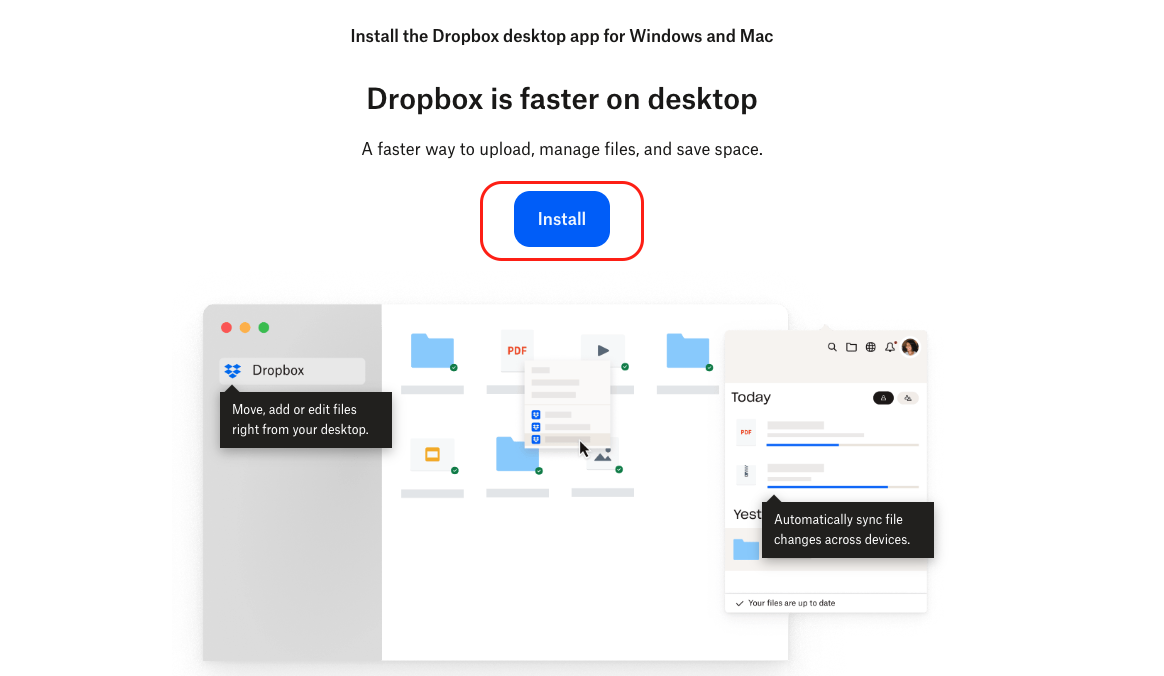
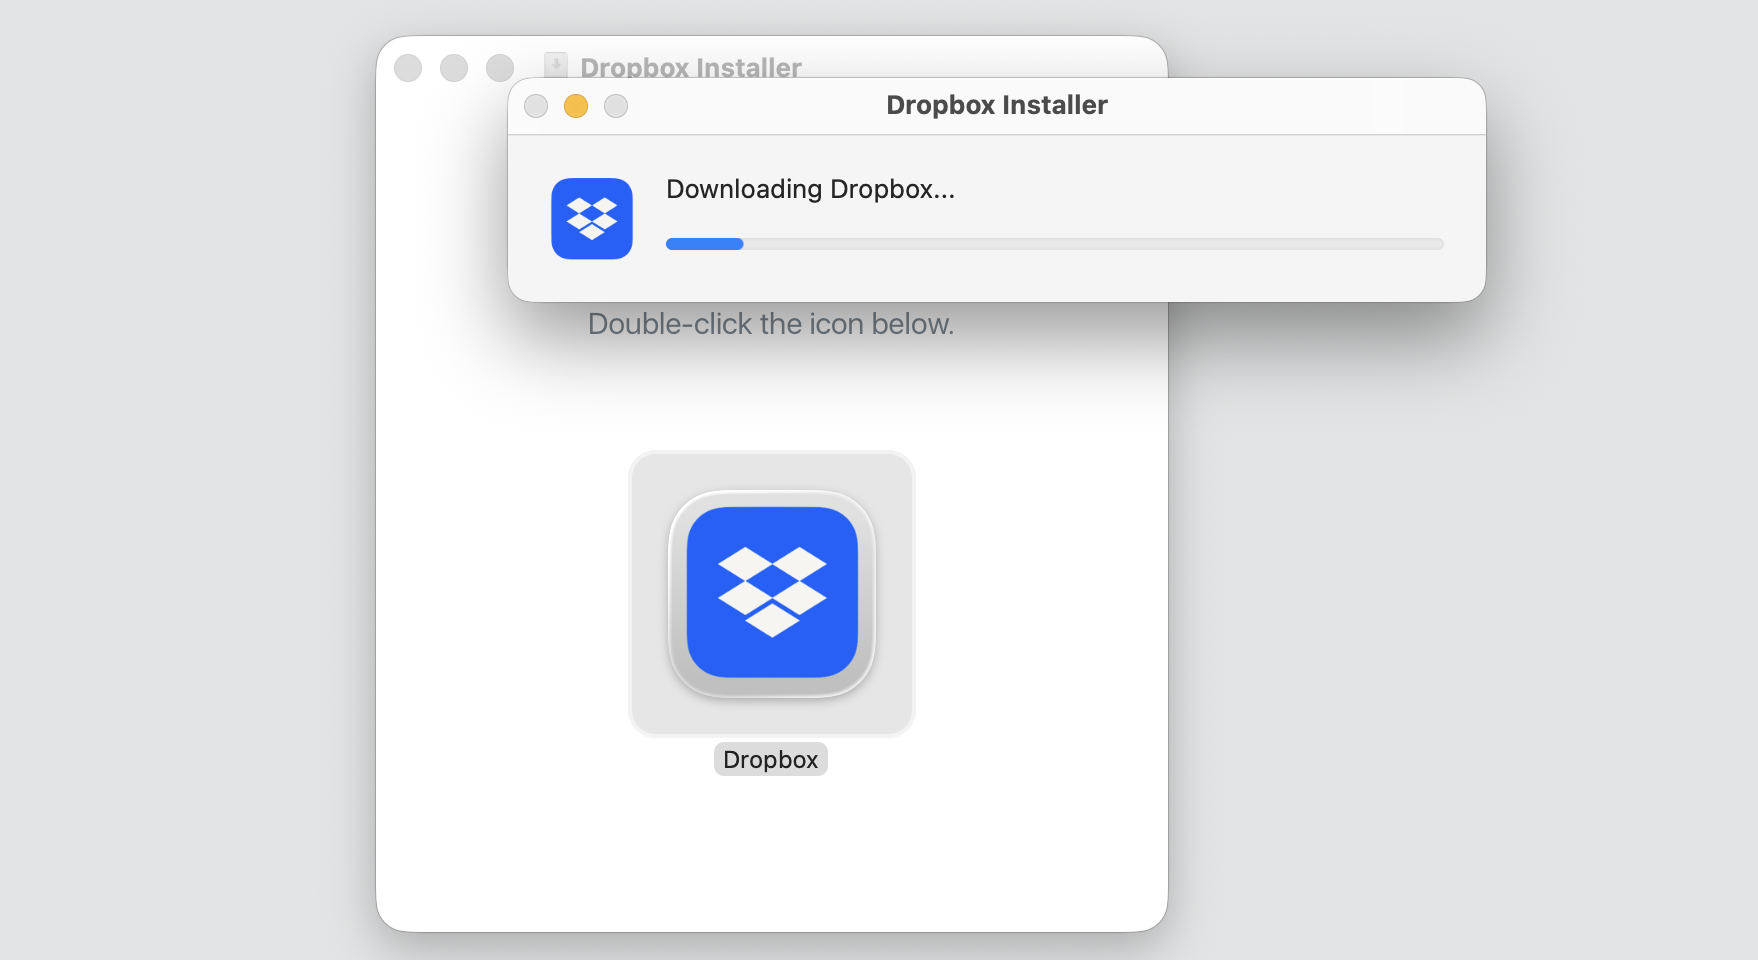
Step 1. Visit the official Dropbox website and download the latest versionStep 2. Open the Dropbox installerStep 3. Wait until the installation process is completeStep 4. Launch Dropbox from Finder > ApplicationsStep 5. Check the result
8. Update macOS
macOS bugs or compatibility hiccups can affect menu bar icons, too. If the issue began after a system change, let’s take a moment to update Mac operating system versions to the latest release.
Let’s run a quick update check together:
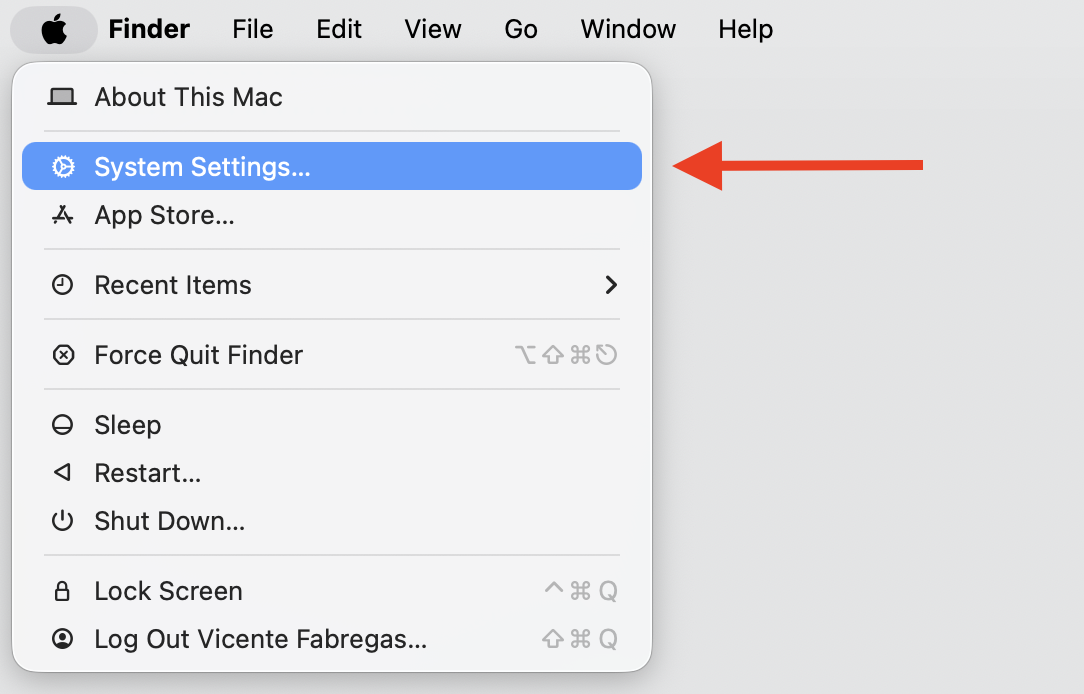
Open System Settings, then click General.
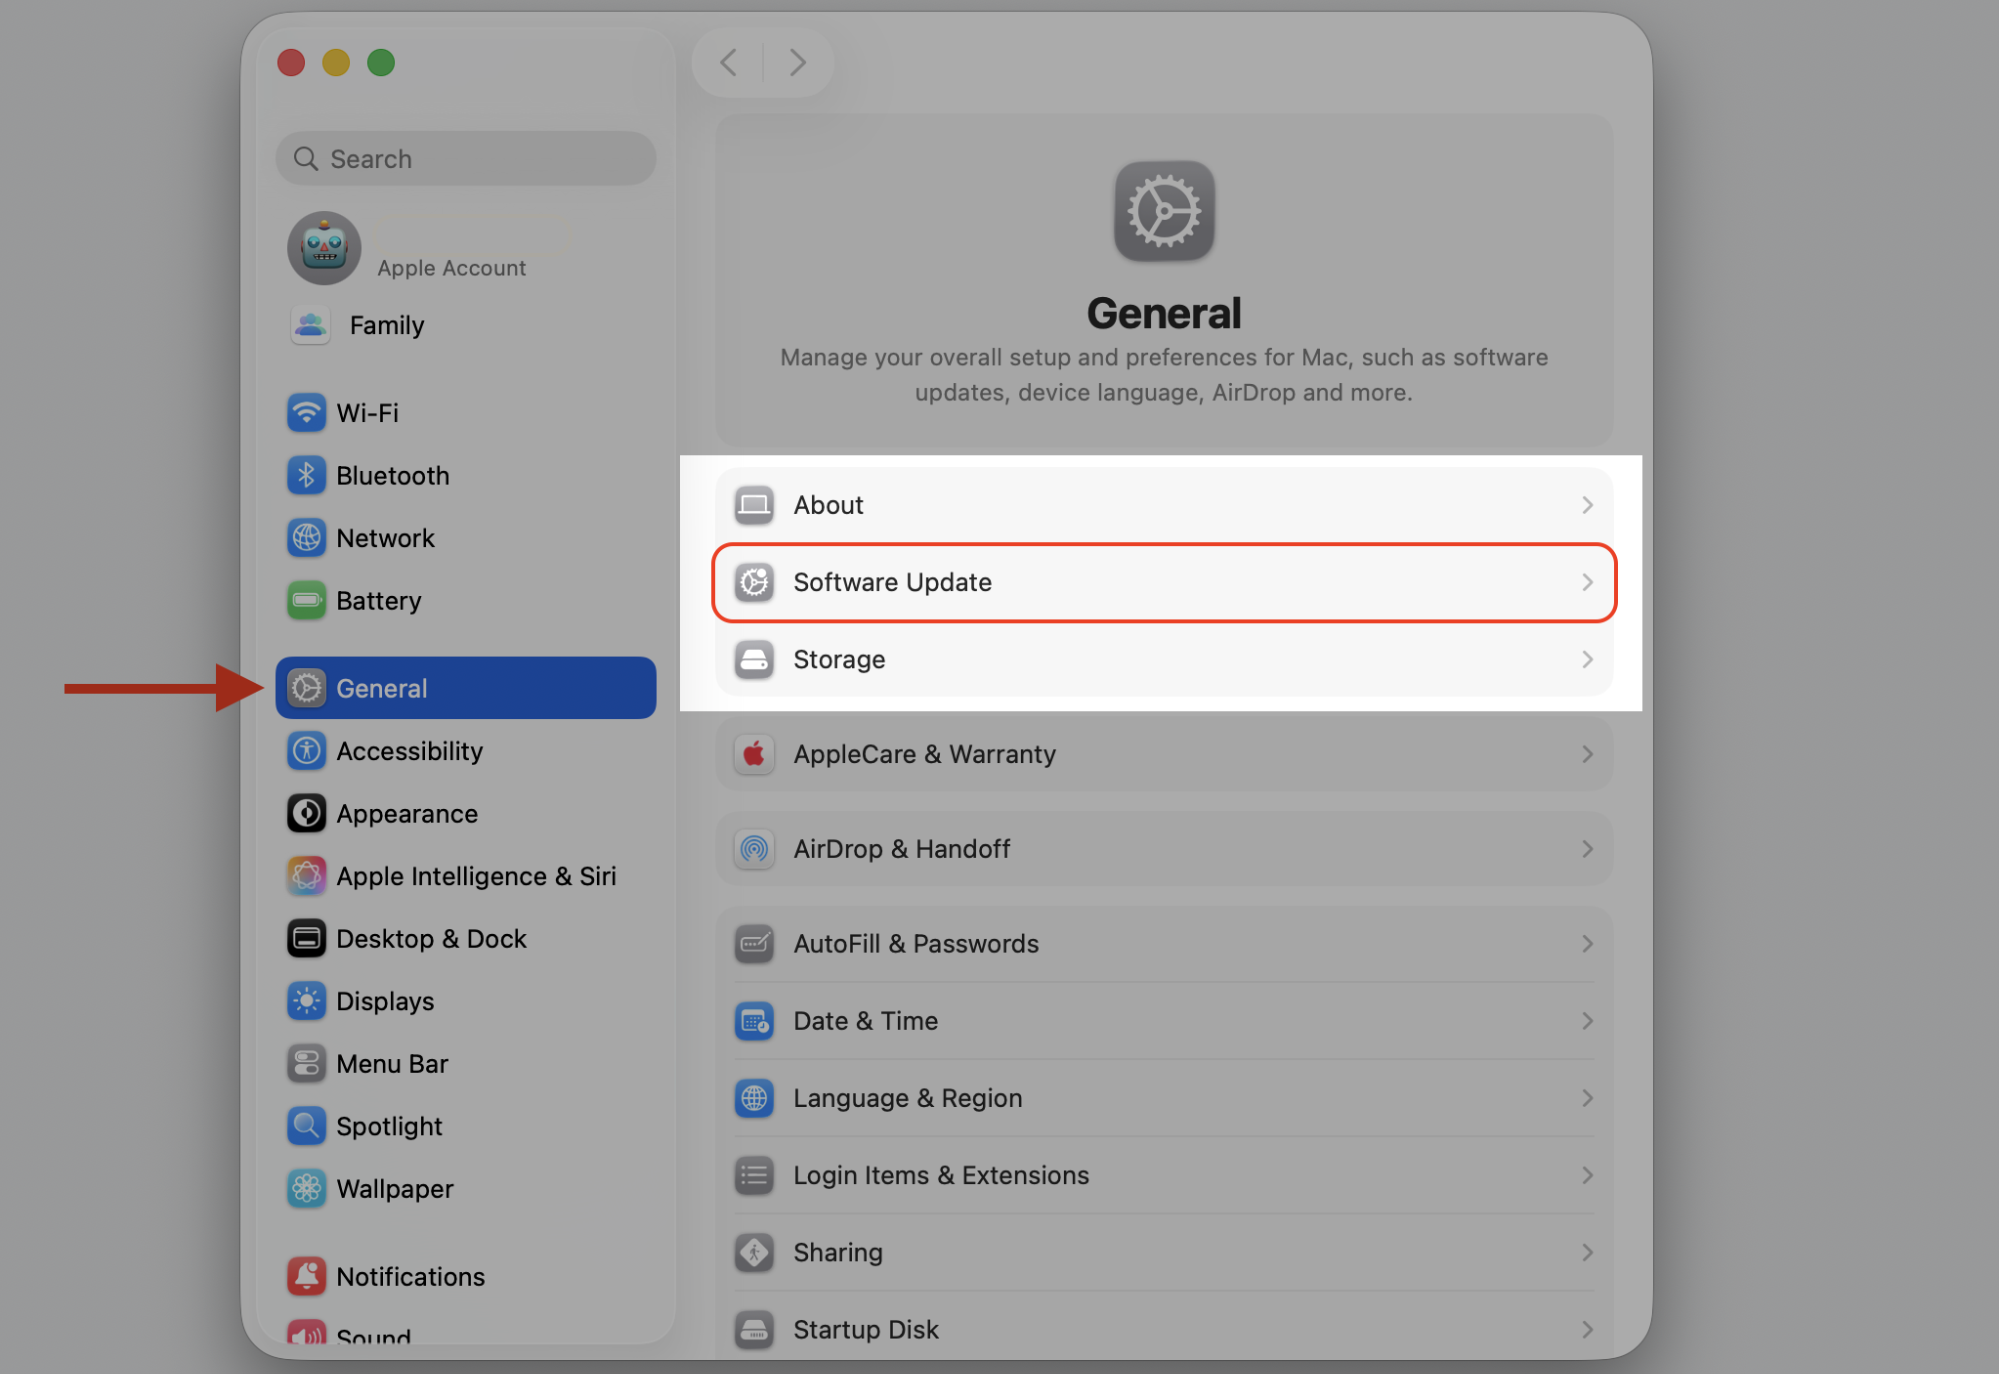
Click Software Update and wait for your Mac to check.
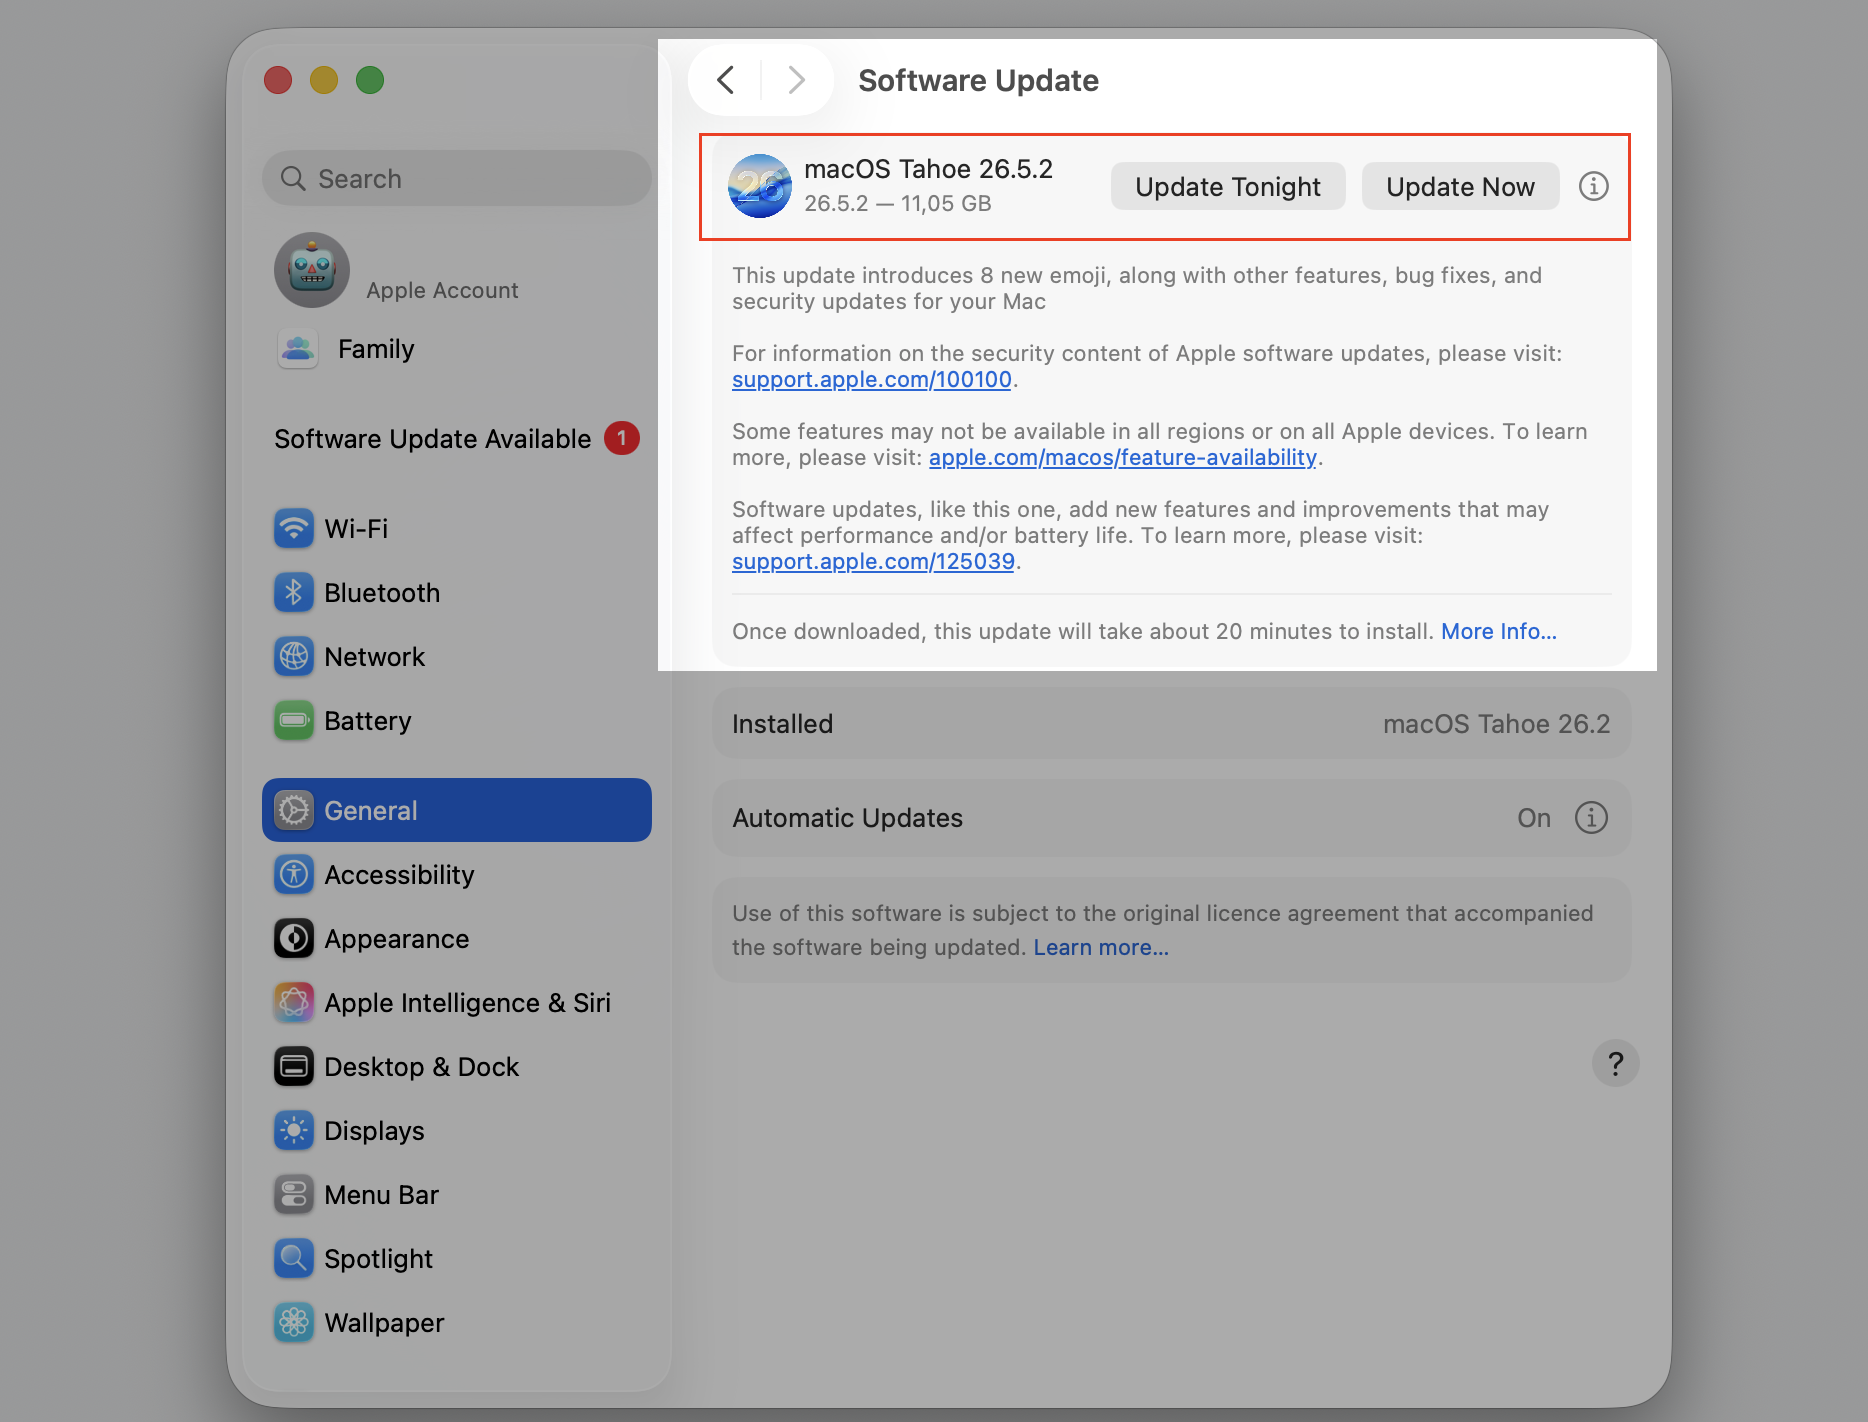
If an update is available, click Update Now and follow the prompts.
Step 1. Go to Apple Logo > System SettingsStep 2. Select Software Update from General sectionStep 3. Select the Update Now option
9. Check Dropbox permissions
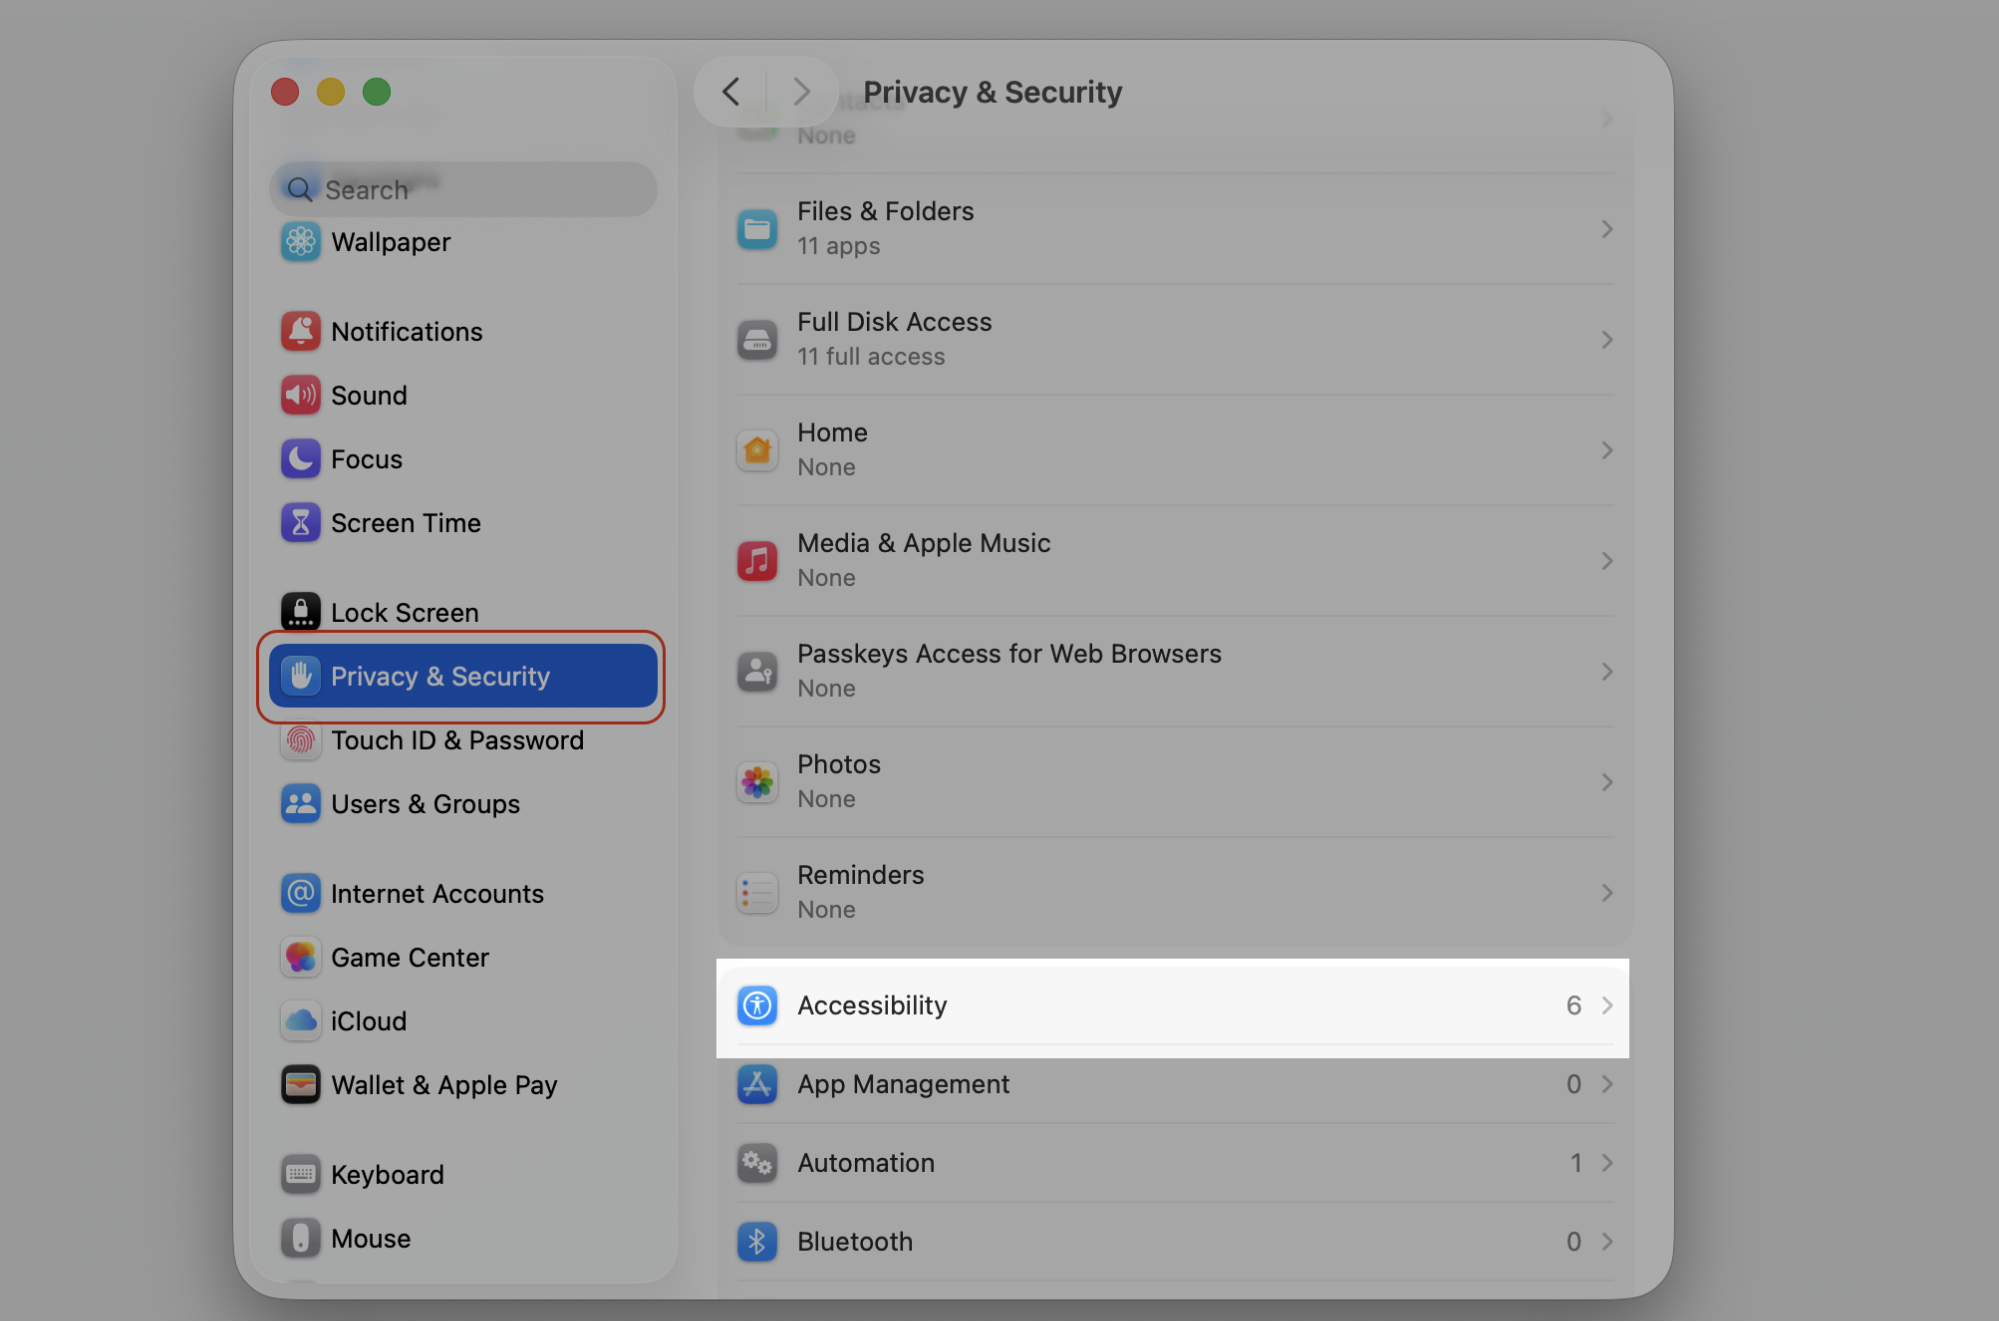
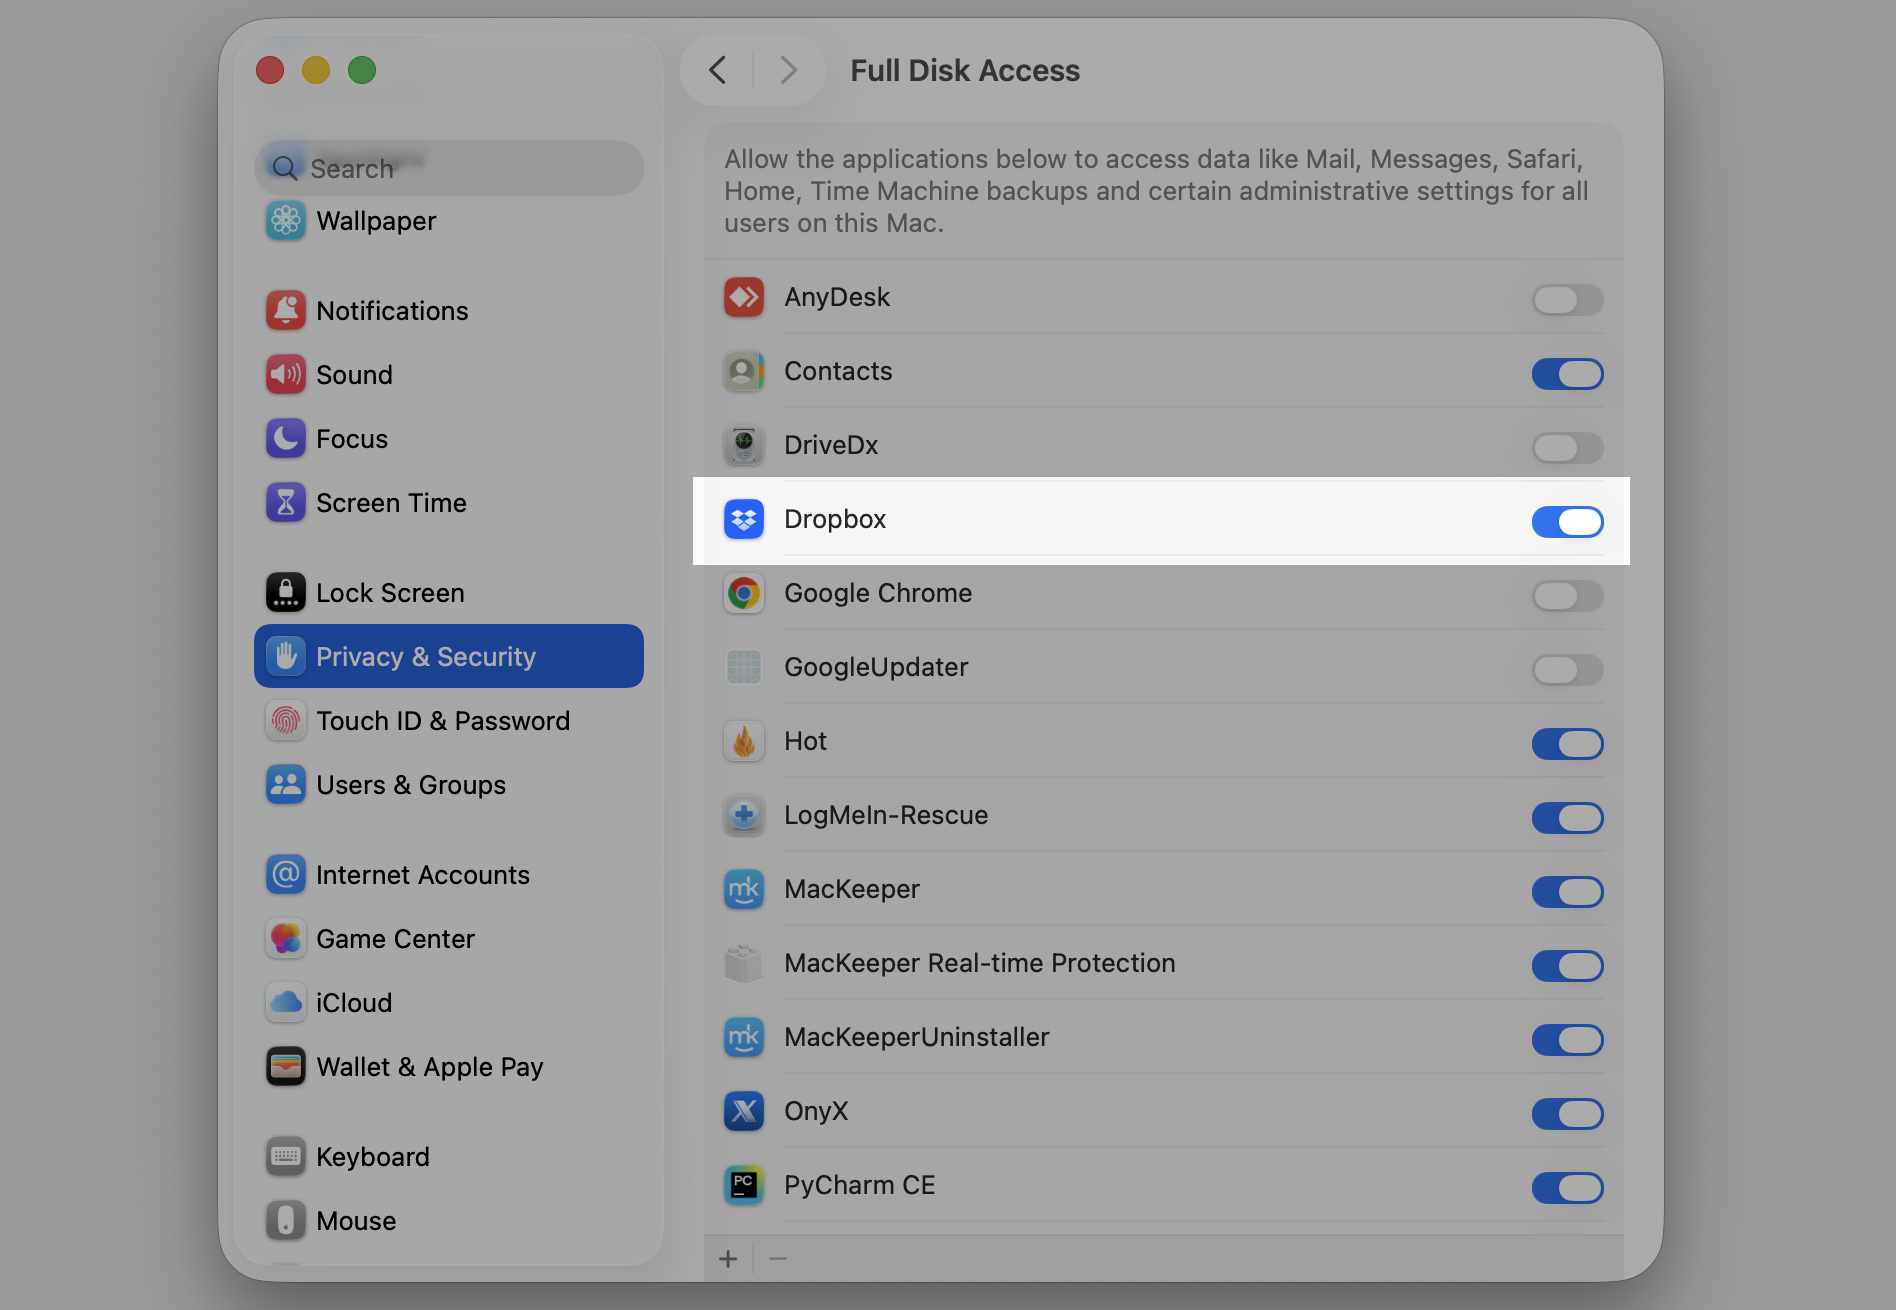
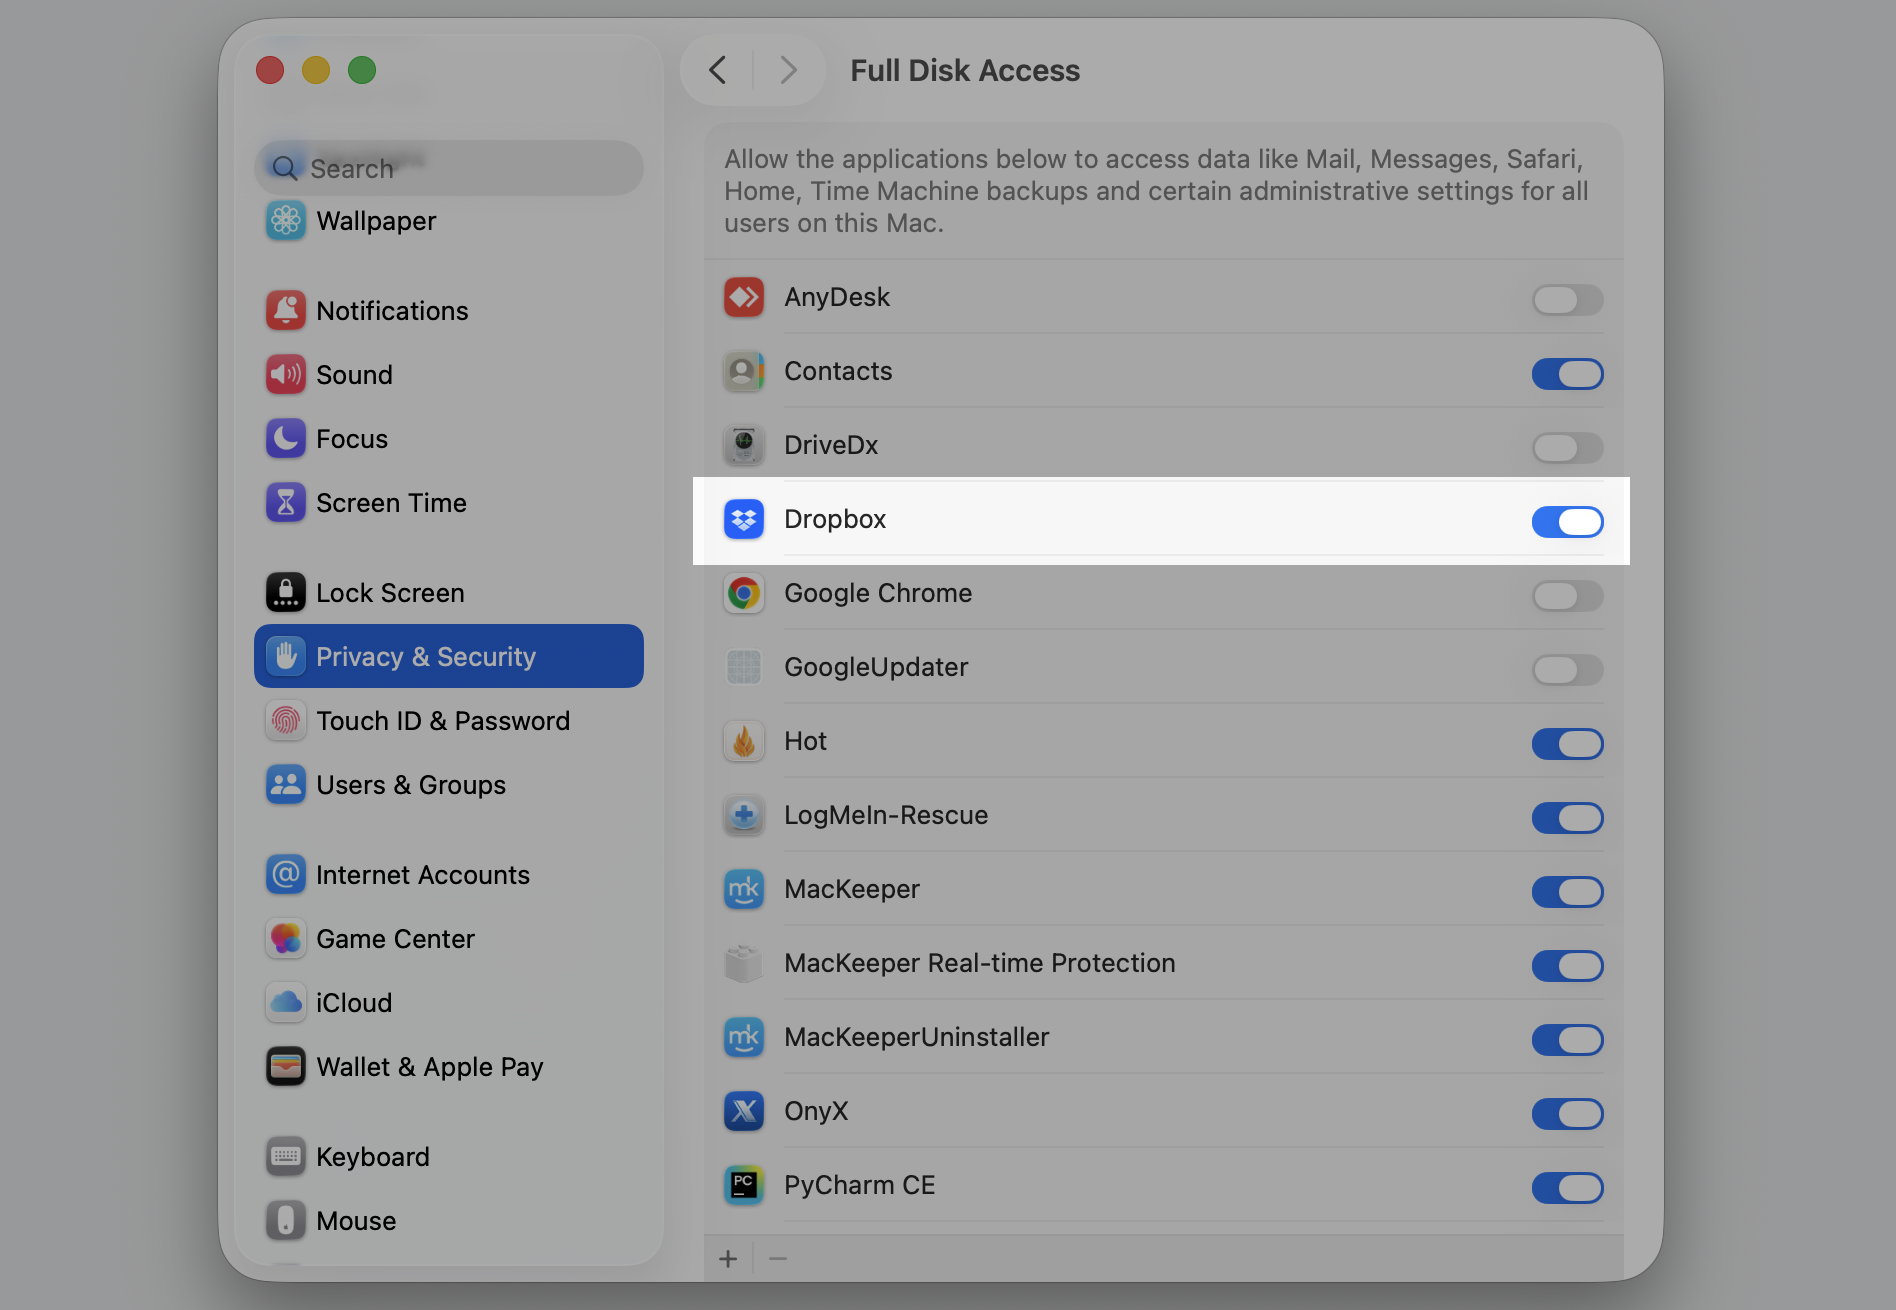
Dropbox needs certain permissions for Finder integration, file access, accessibility, and background activity. If it’s missing one, the icon may not appear, so let’s allow full access where macOS asks. When we open Dropbox, we just follow any permission prompts that pop up.
Review those permissions with our help:
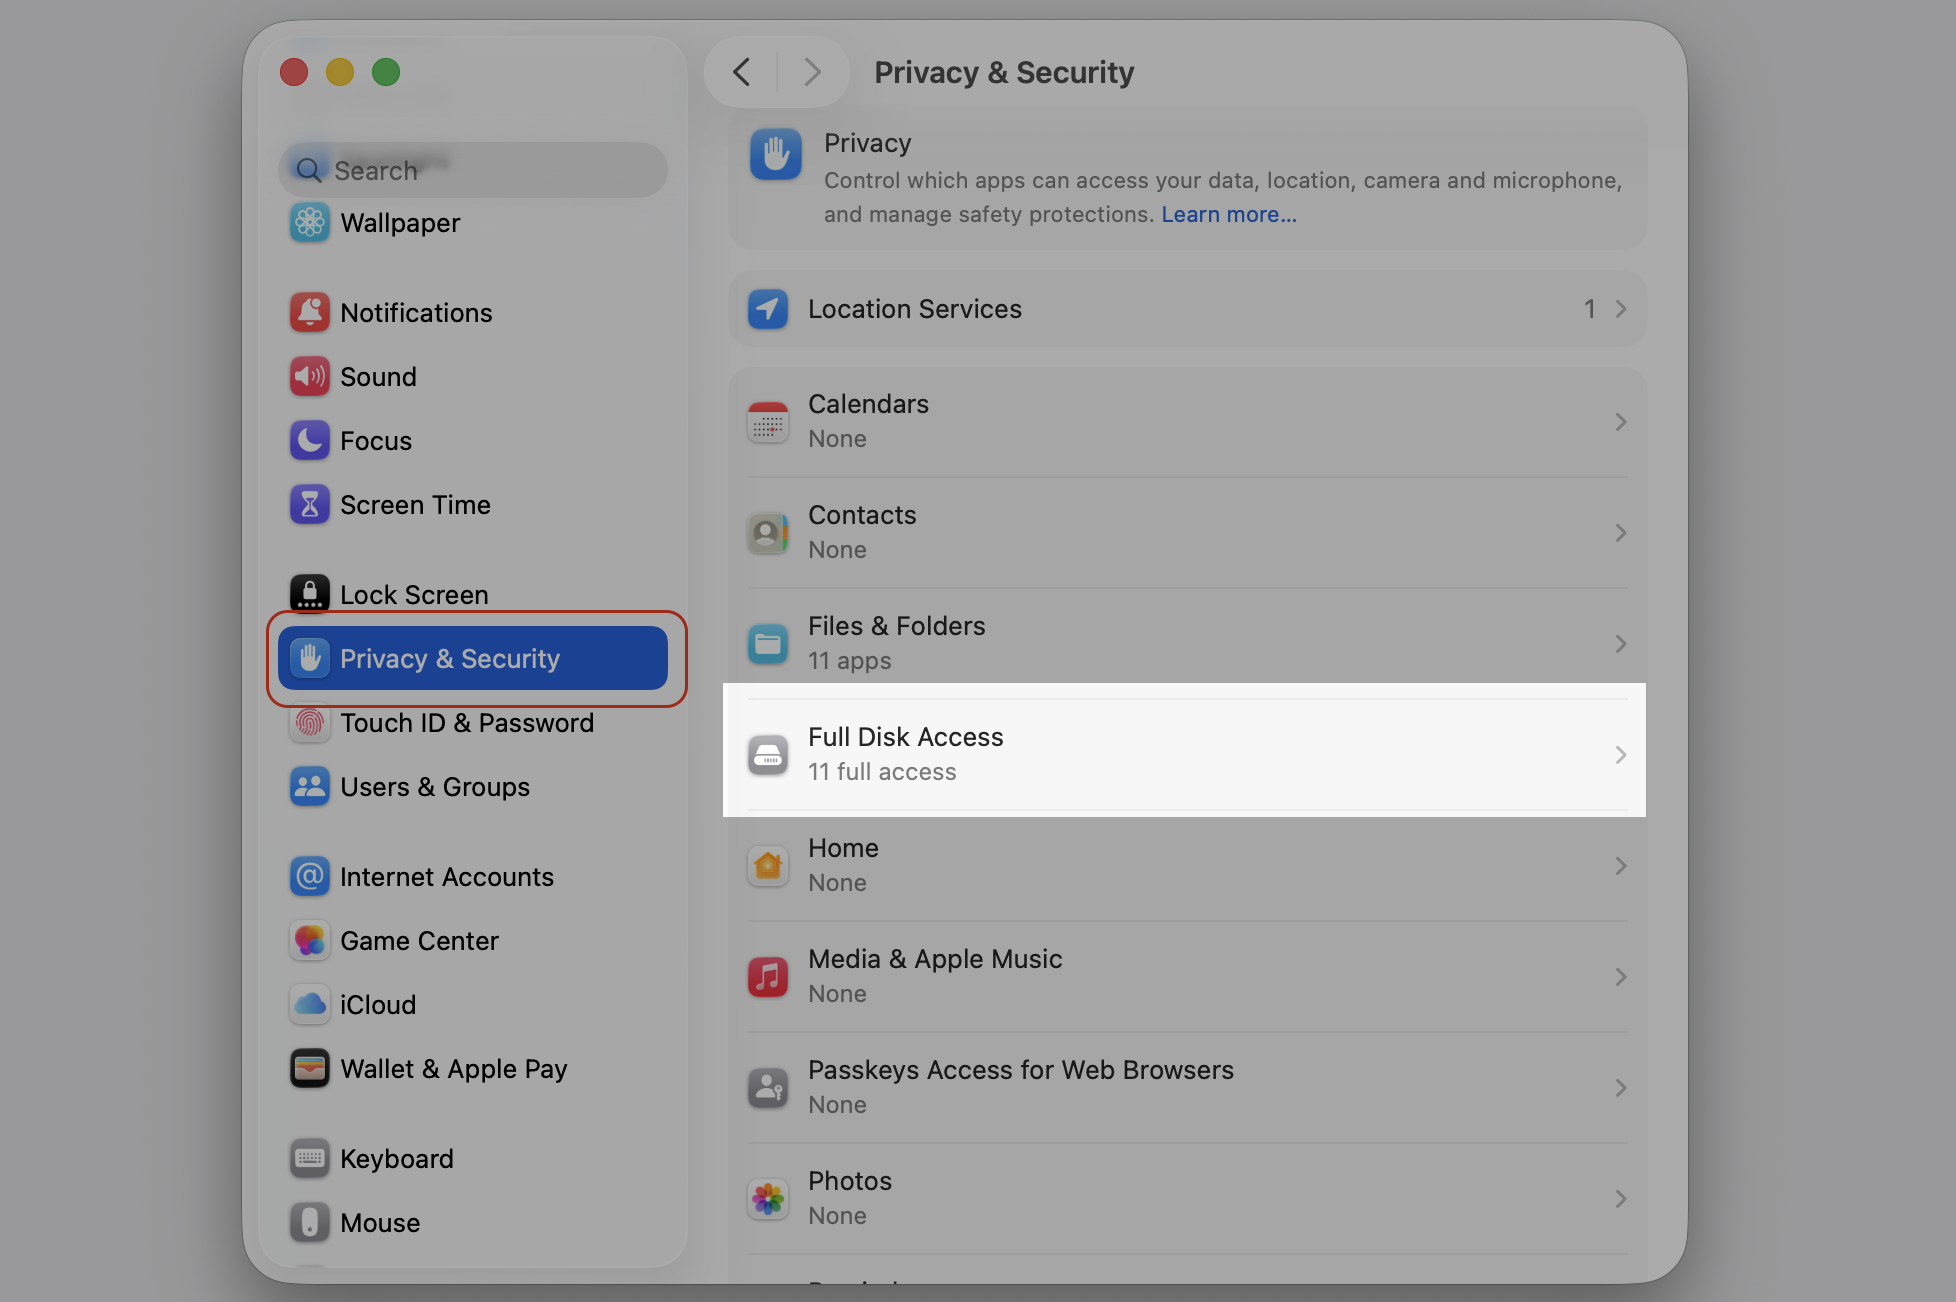
Open System Settings, then click Privacy & Security.
Review sections like Full Disk Access and Accessibility.
Select Dropbox in each list so it has the access it needs.
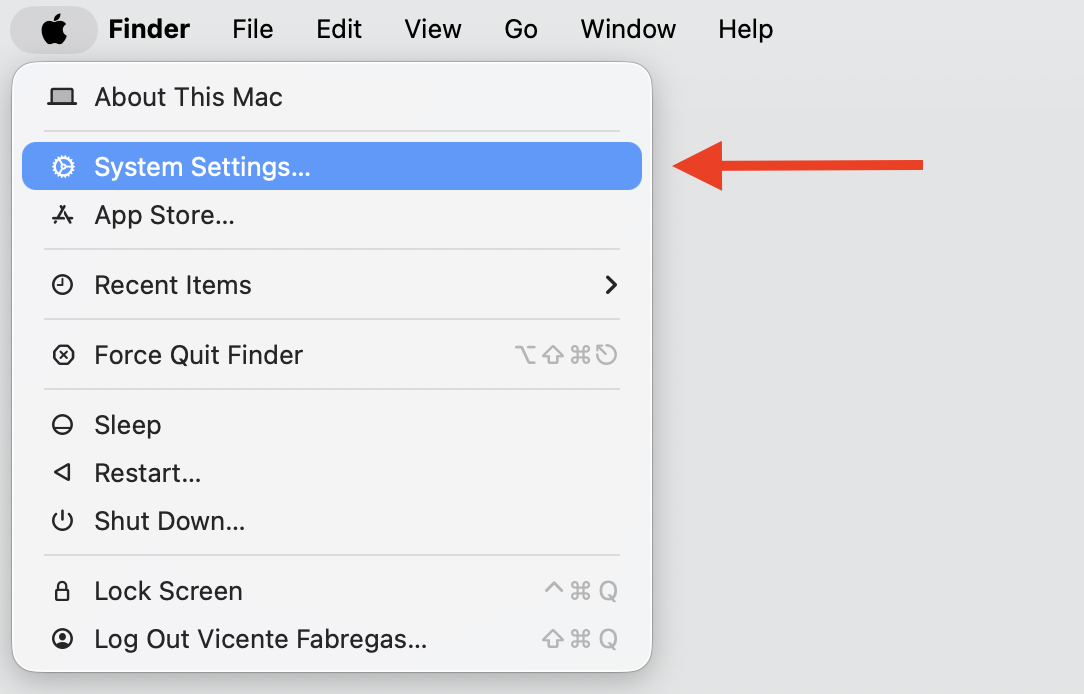
Step 1. Go to Apple Menu > System SettingsStep 2. Go to Privacy & Security > AccessibilityStep 3. Turn on the toggle switch for DropboxStep 4. Go to Privacy & Security > Full Disk AccessStep 5. Turn on the toggle switch for Dropbox
10. Check third-party menu bar manager apps
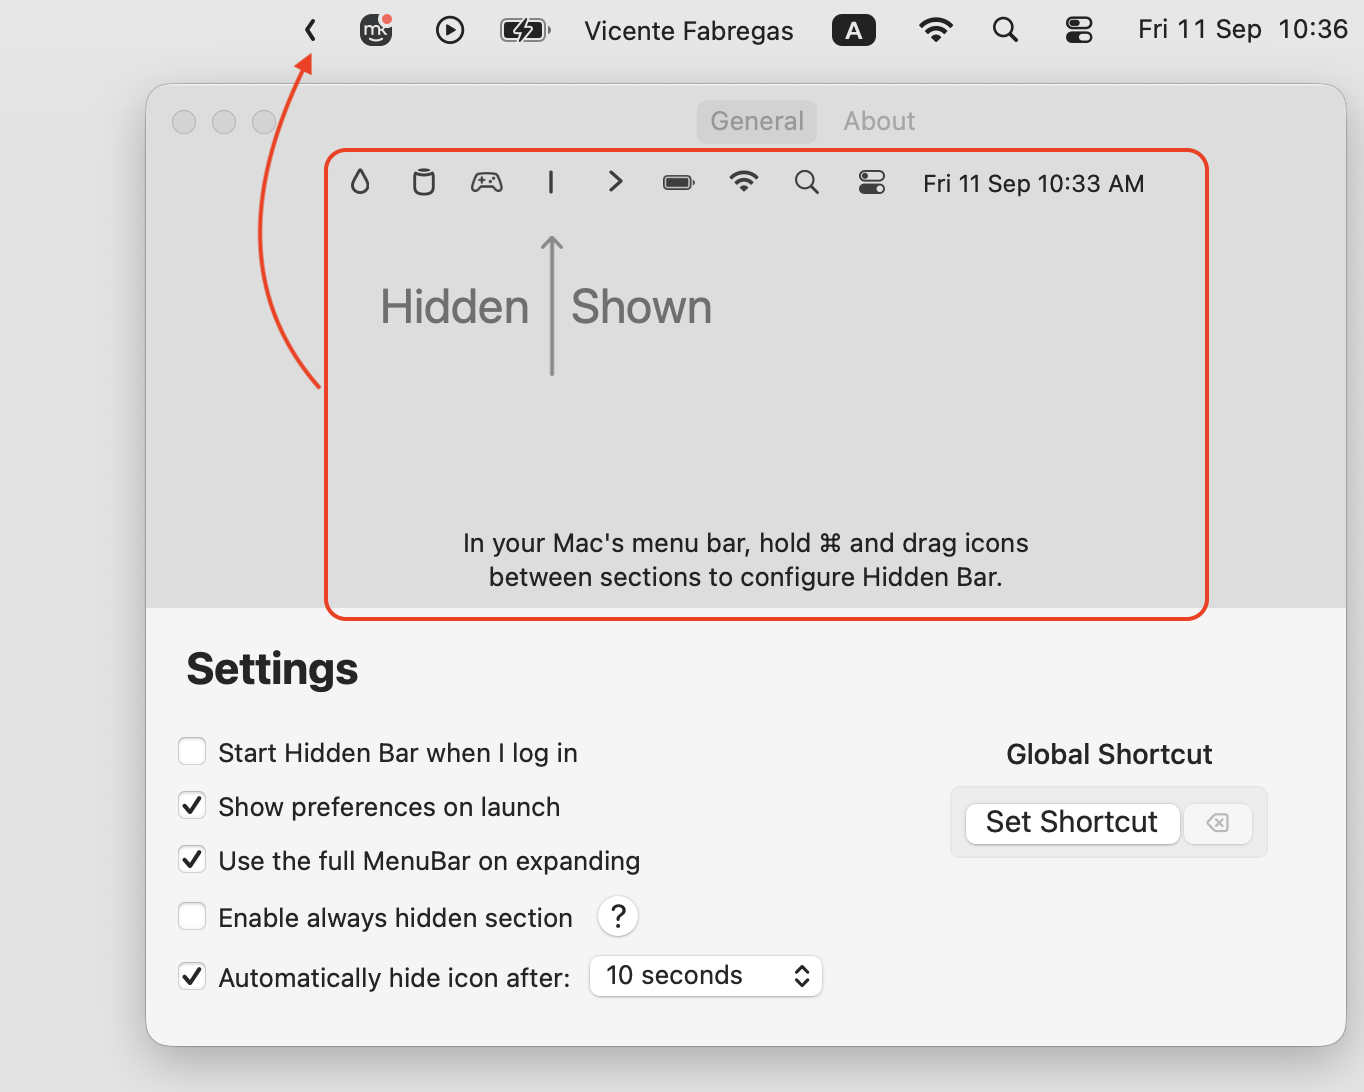
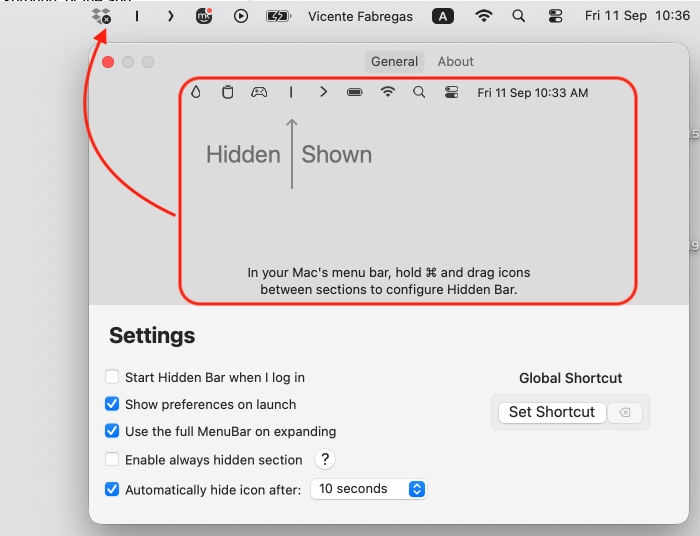
Apps like Bartender or Hidden Bar are built to tuck icons away, and they may be hiding Dropbox without us realizing. Before we assume Dropbox is broken, let’s check these tools.
Take a quick look below:
Open your menu bar manager app, such as Bartender or Hidden Bar.
Look for Dropbox in its list of hidden or managed icons.
Move Dropbox to the visible area of your menu bar.
Step 1. Open the app you use and check settingsStep 2. Unhide the Dropbox
11. Reinstall Dropbox
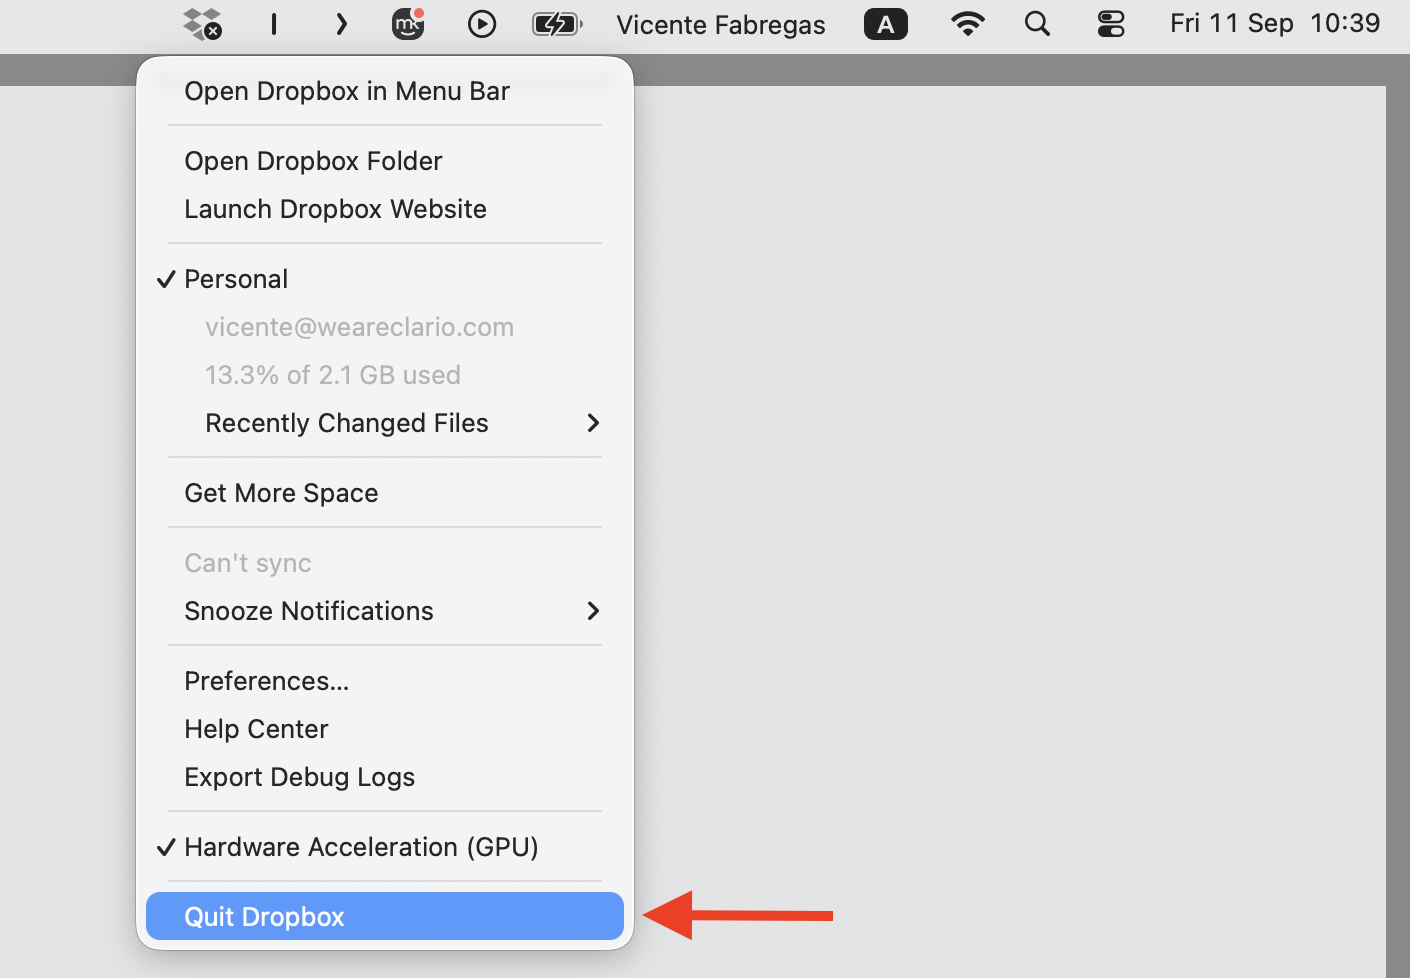
If the icon still won’t return, the app may be corrupted, and a clean reinstall usually does the trick. We quit Dropbox fully first, then uninstall Dropbox before installing the latest version—a careful delete of Dropbox from Mac removes leftover files that can cause trouble.
Here’s the clean way to do it:
Quit Dropbox completely from the menu bar or Activity Monitor.
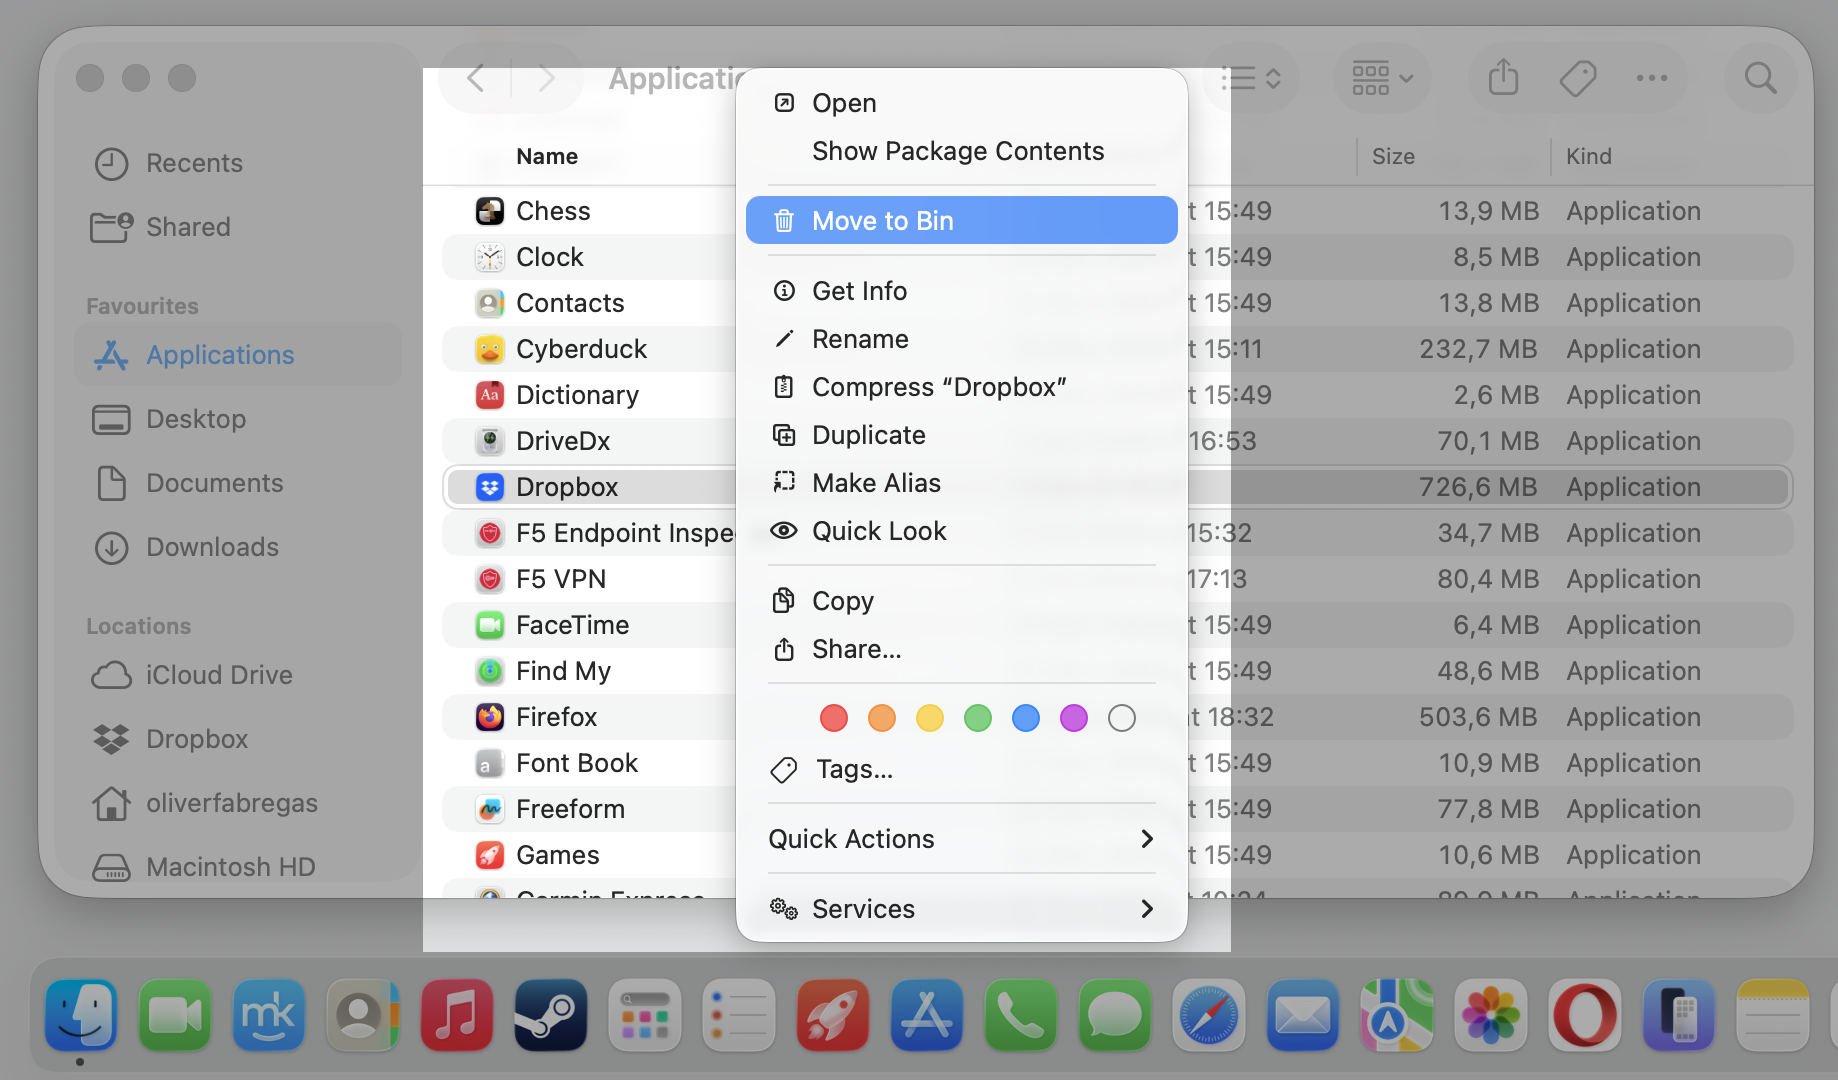
Move the Dropbox app from Applications to the Bin, then empty it.
Download and install the latest version from the official Dropbox website.
Step 1. Quit the Dropbox App from the menu barStep 2. Go to Finder > Applications > DropboxStep 3. Move to the Bin with Control-clickStep 4. Visit the official Dropbox website and download the latest version
A bonus tip from our team:
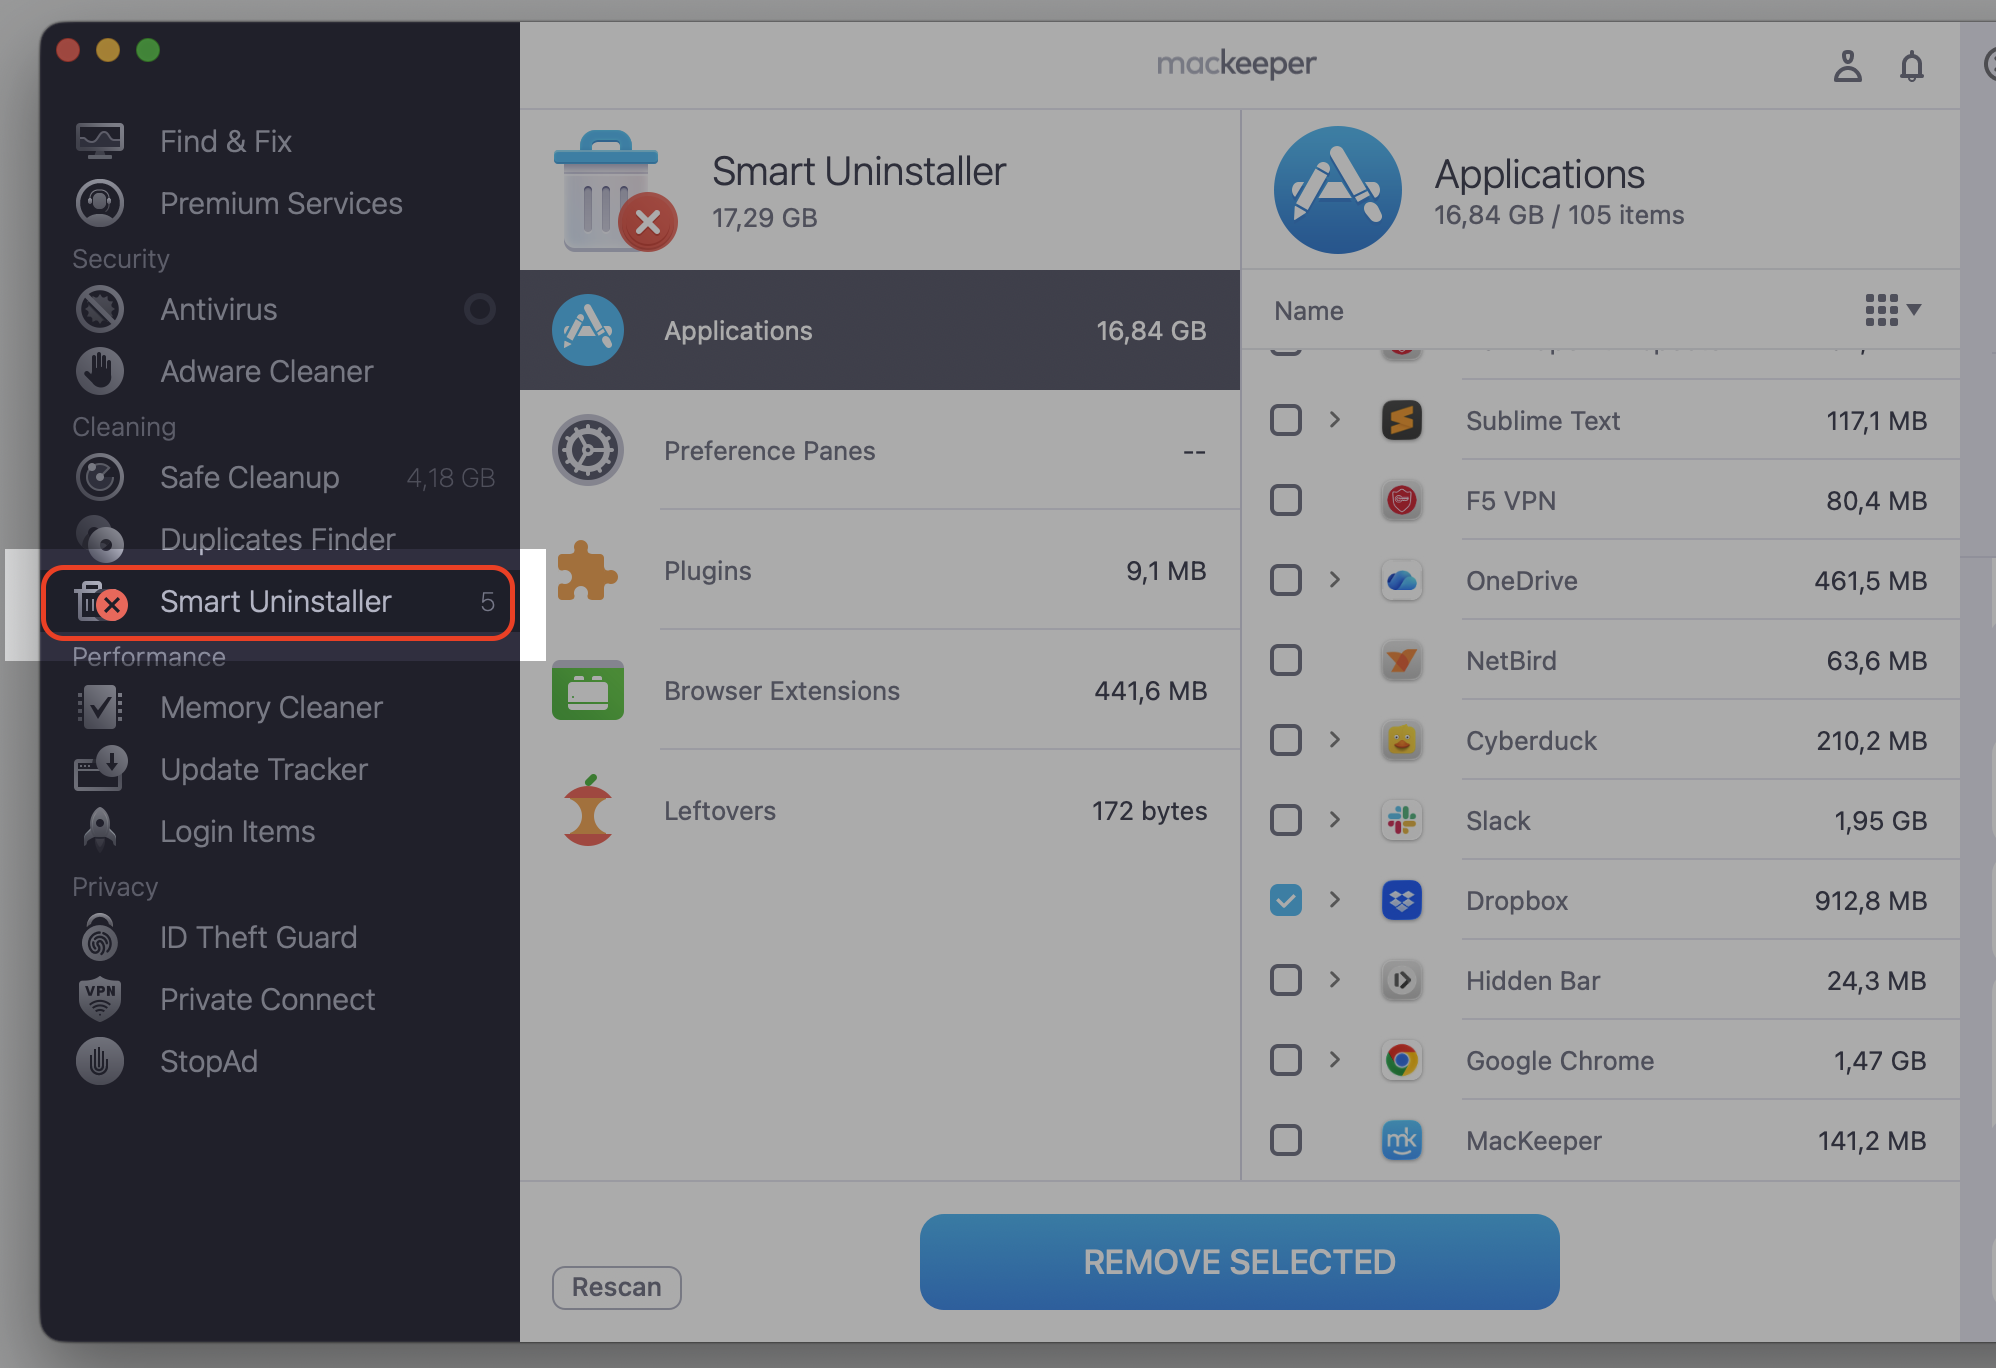
A tool like MacKeeper’s Smart Uninstaller can clear Dropbox’s leftover files for you, so nothing lingers behind before you reinstall. Give it a try to make your cleanup full and safe.
MacKeeper’s Smart Uninstaller can clear Dropbox’s leftover files for you
Conclusion
Dropbox usually disappears from the Mac menu bar because the app isn’t running, the menu bar is full, macOS hides icons near the notch, Dropbox is stuck in the background, or the app needs an update or reinstall.
Still stuck with Dropbox not showing in the menu bar on Mac? MacKeeper’s Premium Services pair you with an expert who’ll solve it with you—reach out today.
We respect your privacy and
use cookies
for the best site experience.
Privacy Preferences Center
We use cookies along with other tools to give you the best possible experience while using the
MacKeeper website. Cookies are small text files that help the website load faster. The cookies we
use don’t contain any type of personal data meaning they never store information such as your
location, email address, or IP address.
Help us improve how you interact with our website by accepting the use of cookies. You can change
your privacy settings whenever you like.
Manage consent
All cookies
These cookies are strictly necessary for enabling basic website functionality (including page
navigation, form submission, language detection, post commenting), downloading and purchasing
software. The website might malfunction without these cookies.