Sending iMessages from your Mac is easy — unless something goes wrong and it stops working. If your iPhone messages are not showing up correctly on your desktop or laptop computer, don’t panic. There are a number of troubleshooting steps you can take to get iMessage to work again on your Mac.
Before we start
Solving some Mac problems may come down to the possibility of malware on your computer. To give your Mac a deep clean, while freeing up available disk space in the process, consider downloading MacKeeper.
Try the following methods to fix iMessage on your Mac:
- Restarting your Mac
- Checking that iMessage is enabled
- Making sure your internet connection is working
- Making sure it’s not a problem with Apple
- Checking macOS is up to date
- Checking time and date
- Deleting Messages cache
Restart your Mac
Your first port of call if you find iMessages are not delivering on Mac is also the simplest. Restarting your Mac may be enough to clean out the cobwebs and get iMessage working again. A restart will wipe away current software states, including any tricky misbehaving code. That could be enough to get iMessage to work on Mac again.
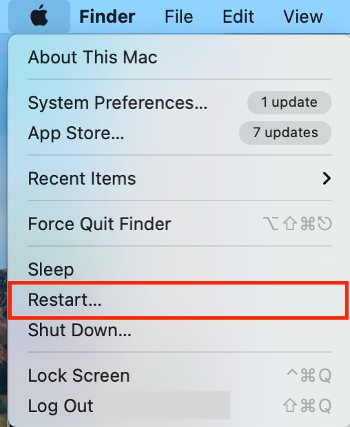
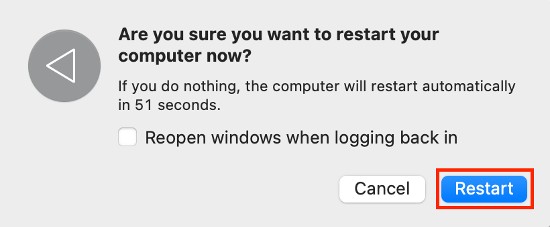
To restart your Mac:
- Click on the Apple menu, featuring the Apple logo, that can be found in the top left of the Mac display
- Click Restart to carry out the reboot process
- Once macOS has booted up again, open the iMessage app and attempt to send another message
Ensure that iMessage is enabled
It’s possible that there is no error with iMessage, but simply that you have not configured it to receive messages on your Mac.
To enable iMessage:
- Open Messages app on your Mac
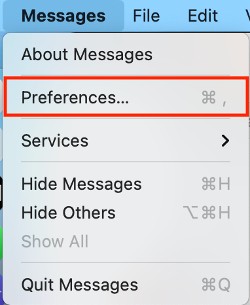
- Click on the Messages menu, found on the top left of the screen next to the Apple logo
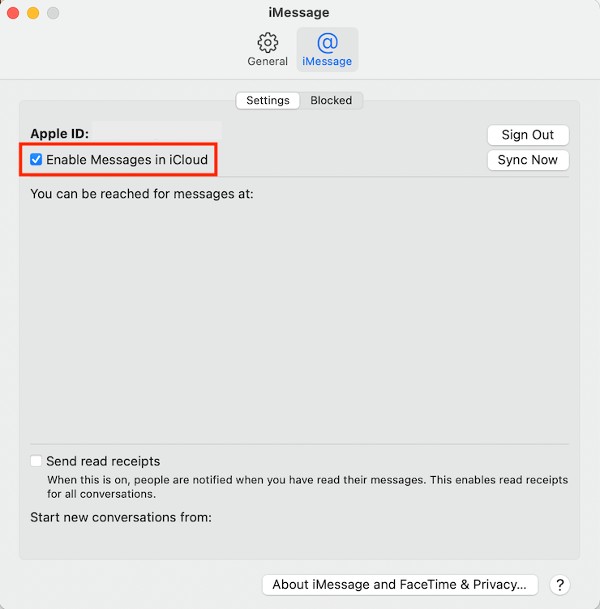
- Open preferences, and select the iMessage tab
- Check that the Enable Messages box is checked and that the listed Apple ID is correct
- If everything appears correct, you might try signing out and then back in again
Make sure that your internet connection is working
Unlike an iPhone and some iPad models, your Mac does not have a cellular network it uses to send and receive iMessages. If you’re having trouble receiving iMessages on your Mac, there’s a chance that it is a broader internet connection problem, rather than a specific iMessage issue. The easiest way to check you have a working internet connection is to open Safari, or another web browser of your choice, and try opening a webpage.
Make sure that it is a problem with your Mac, and not with Apple
Apple’s services and software tend to be pretty reliable. But there’s still a chance that the problem is with Apple, not with yourself. For starters, make sure that iMessage is currently running, error-free, in your location. Visit the Apple System Status webpage, and ensure that the circle next to iMessage is green, indicating that it is working correctly. If it is not, consider waiting a short time or contacting Apple.
An alternative problem could involve a macOS bug that stops iMessage working correctly. Googling to see if any other upgraders using the same macOS version have experienced the same problem may answer your question.
If there is a bug involving iMessage, you may want to wait until Apple issues a bug fix (which the company is typically pretty rapid at doing when there’s a problem) or, if it’s urgent, downgrading to an earlier version of macOS where possible.
Ensure that macOS is up to date
If you are running an older version of macOS, this could affect the reliability of iMessage.
To update to the latest macOS operating system version, follow these steps:
- Select System Preferences from the Apple menu
- Click Software Update to check for any available updates
- If updates are available, click the Update Now button to carry out the installation
Make sure that you have entered the time and date correctly
Your Mac should automatically select the correct time and date when you carry out your initial Mac setup. However, if for some reason this information is incorrectly entered, it could stop iMessage from working correctly.
(It can also lead to problems whereby your iMessages show up out of order in the app so that conversations appear jumbled.)
To correct time and date, take the following steps:
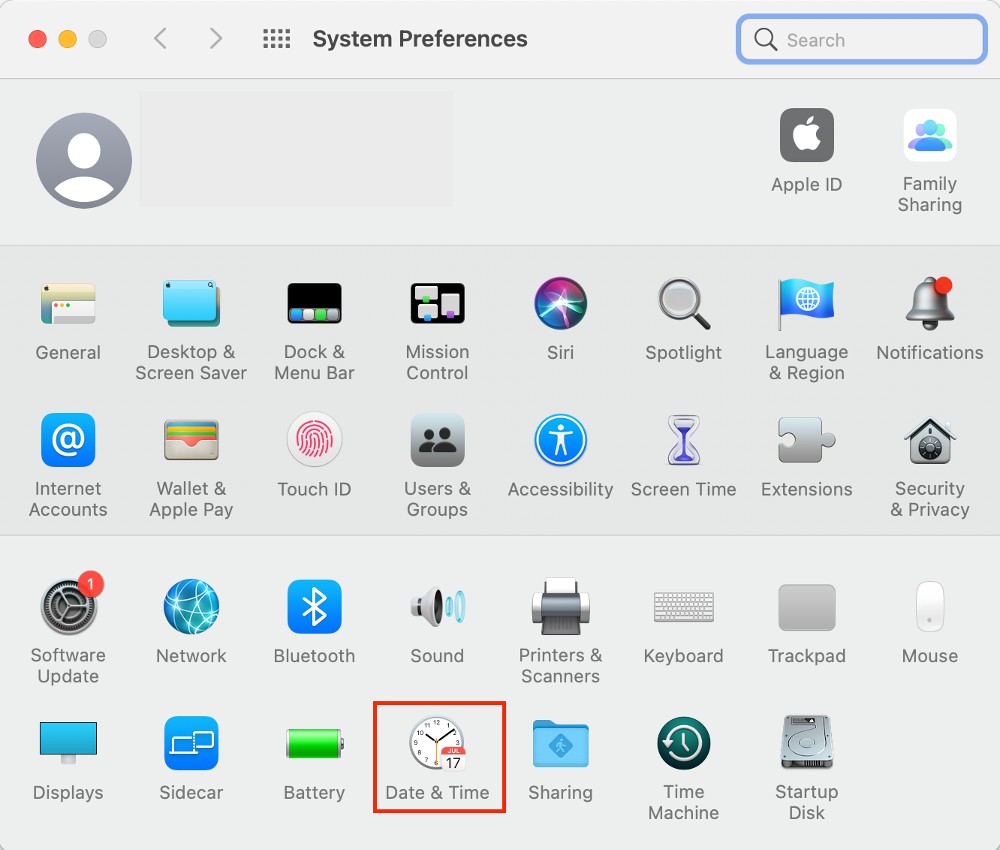
- Select System Preferences from the App menu
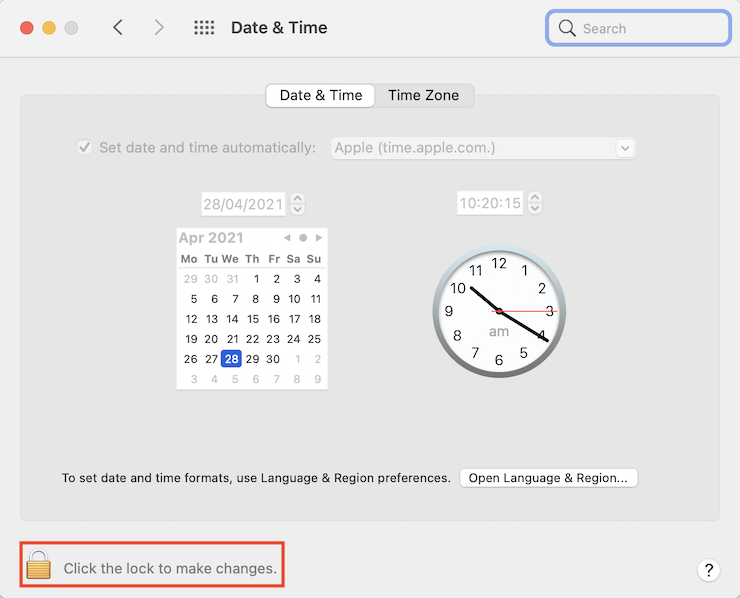
- Click Date & Time, then set the date and time automatically or manually. You may have to click the padlock icon in order to make changes
Try deleting the Messages cache
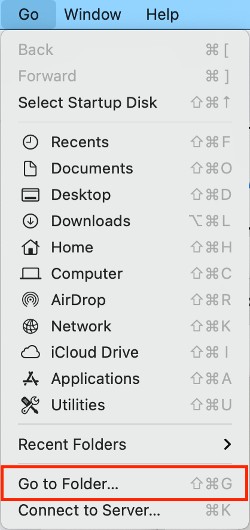
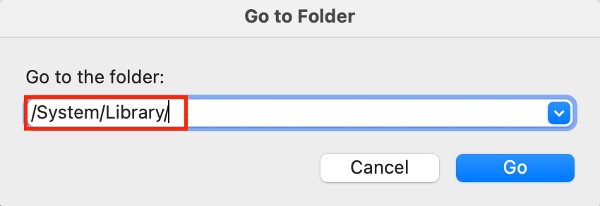
To remove any leftover login data to return Messages to a clean slate, start by logging out of Messages and iCloud. After this, delete the folder titled “System/Library/Messages.” If you want to preserve cached messages just in case, consider copying the folder to your desktop or elsewhere.
Losing the ability to send iMessages on your Mac can be a headache. But by following the steps laid out here, you can correct the problem, and get back to messaging from the comfort of your keyboard.
Read more:


