In this article you will find the following:
Webcams have become an everyday part of life in recent times. You use them when working from home. You use them when you’re talking to friends and family. But your Mac camera has stopped working, even after you’ve flipped it, reversed it, disconnected it, and reconnected it again, which can be a major hassle. Luckily, it’s usually a problem that’s easily fixed—both for built-in and external cameras.
Before you start
Sometimes, problems with your Mac’s camera can be caused by common Mac issues. These can be system-related, performance-related, and even security-related. Unless you know the ins and outs of Mac devices, chances are you don’t know the root of your Mac camera’s difficulties.
In cases like this, your best bet is to rope in software that gets the job done on your behalf. MacKeeper’s Find & Fix tool does what it says it’ll do—it finds issues on your Mac and fixes them safely at the click of a button. This removes any guesswork and the potential for making mistakes on your part and allows you to enjoy an optimized computer instead.
Here’s how to use MacKeeper’s Find & Fix feature:
- Download MacKeeper, then select Find & Fix.
- Click Start Full Scan and follow MacKeeper’s progress on the screen.
- Once the scan is completed, MacKeeper will show you the improvements it recommends based on what it found. Review it and click Fix Items Safely.
That’s not all MacKeeper can do—see for yourself. You get one free fix, so give it a whirl.
Why is your MacBook camera not working?
Your Mac’s camera should work seamlessly on all apps. However, you may experience issues with it, like when FaceTime isn’t working on Mac, but there are several reasons why this could be the case. Sometimes, it’s silly, like forgetting to enable camera access for some apps. And, believe it or not, sometimes, you may have forgotten to remove the tape from your Mac’s camera. But the answer isn’t always so simple.
Your MacBook camera may not be working for the following reasons:
- Your software is outdated.
- There could be a physical problem with your external Mac camera connections.
- Your Mac has hardware issues.
- Other apps are using the camera at the same time you’re trying to access it.
- Your Mac’s camera settings aren’t customized.
- Your Mac contains viruses and malware that are causing the camera to glitch.
- You’ve set Screen Time limits for your Mac’s camera usage and are using the camera outside the set times.
- You haven’t permitted some apps to use the camera.
How to test the Mac camera
So, the fact is, your Zoom camera isn’t working on Mac. How do you know whether the issue lies with that specific app or the camera itself? The answer is to test your Mac’s camera to identify whether it’s the problem.
To test your webcam on macOS:
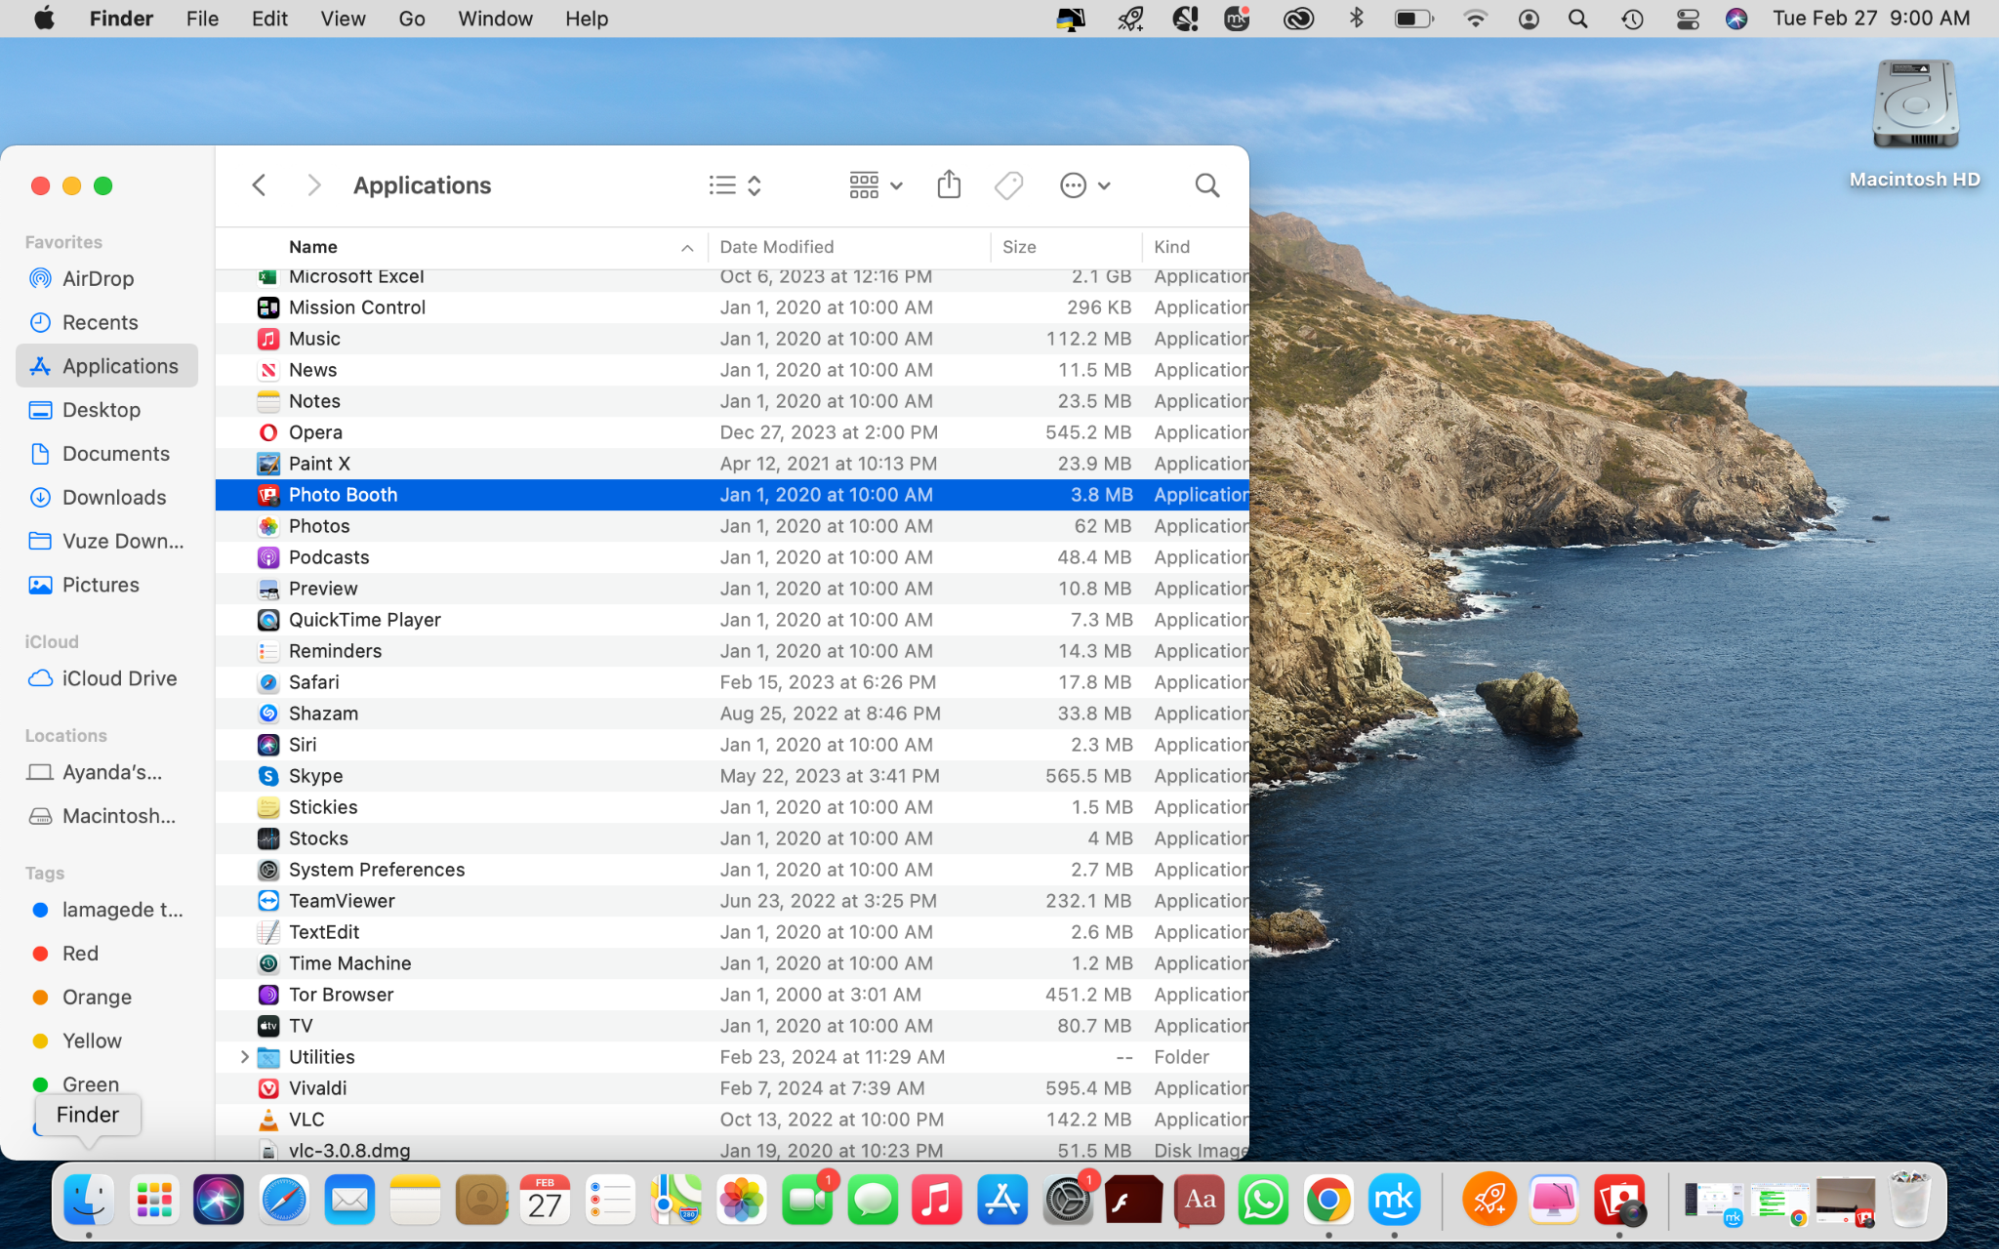
- Select Finder in the Dock and click on Applications > Photo Booth. This will bring up your webcam’s feed.
- Alternatively, bring up Spotlight search: press the command + space bar keys, enter Photo Booth in the search bar, and select it from the results.
Note from our experts:
You can also test your camera using free online testing websites, like Webcammictest.com, Webcamtests.com, and more. These sites give you standard information about your webcam, including frame rate, default resolution, and more.
The downside, however, is the privacy risks associated with testing your camera through these avenues. You may be recorded. Moreover, the site you use could collect your data and potentially sell it to advertisers. If you care about your privacy, you may want to avoid web-based tests.
How to fix the Mac camera
The camera issues you’re facing can usually be fixed. We’re confident that one or more of the solutions listed below will get your macOS camera up and running again, so follow all the steps carefully.
We’ve provided 13 fixes for a troublesome Mac camera:
- Check camera permissions
- Check external Mac camera connections
- Start the camera via Terminal
- Make sure you’re connected to the internet
- Check the apps using the camera at the same time
- Quit other apps that may be using the camera
- Restart your Mac in safe mode
- Customize your Mac camera settings
- Reset your Mac’s SMC
- Run the Apple hardware test
- Reset your Mac’s NVRAM
- Check your macOS updates
- Scan your Mac for malware
1. Check camera permissions
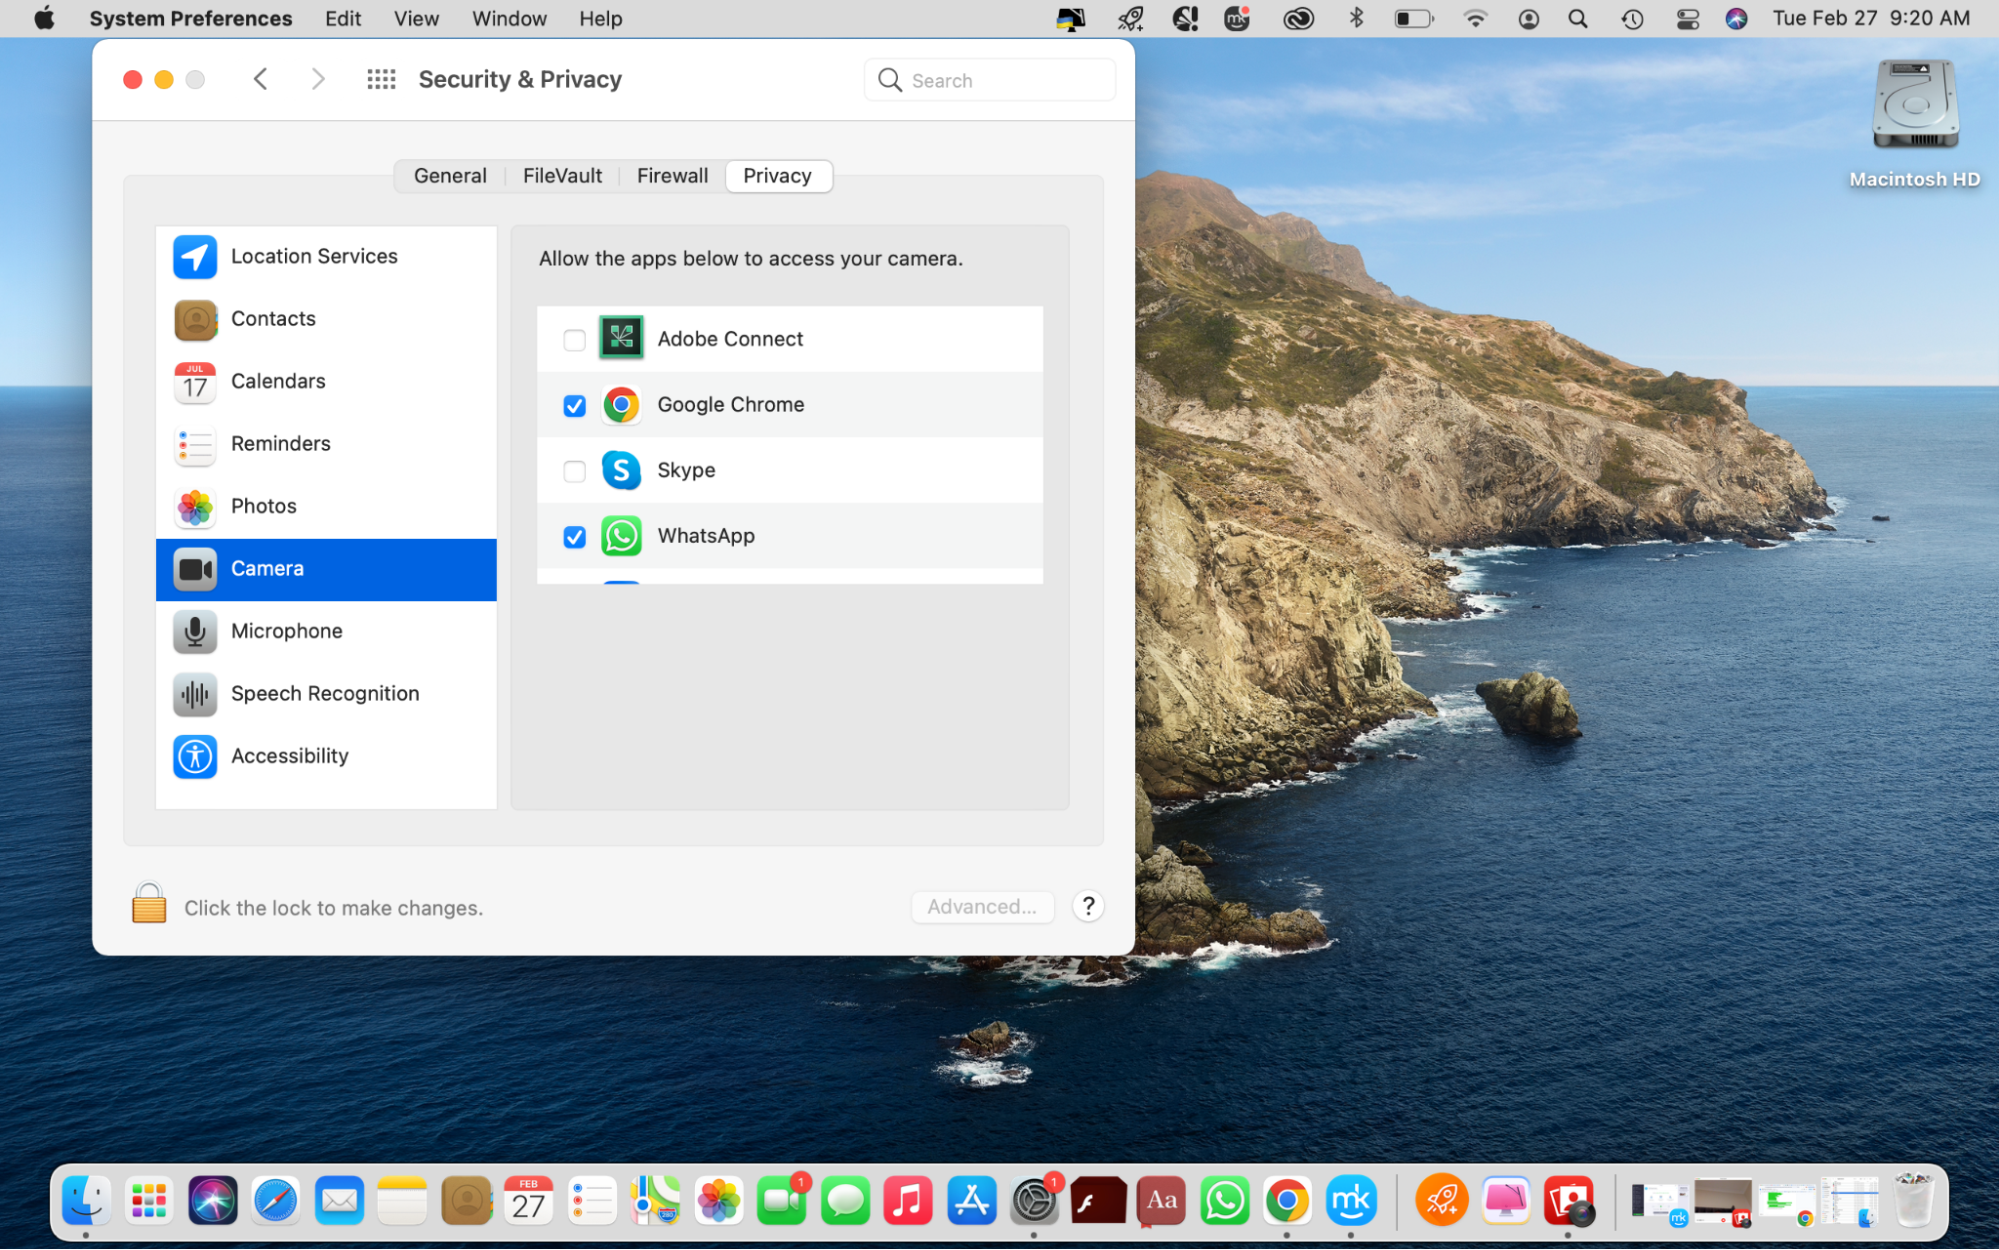
Perhaps you haven’t set permissions for the app you’re using to access your Mac’s camera. In that case, you must grant that app permission by following these steps:
- Click on the Apple menu > System Preferences > Security & Privacy > Privacy > Camera on the left of the screen.
- Check the box next to the app you want to grant permission to use the camera.
2. Check external Mac camera connections
If you have an external camera connected to your Mac, there might be a physical problem with that connection. There are a few things you should check.
To check an external Mac webcam connection:
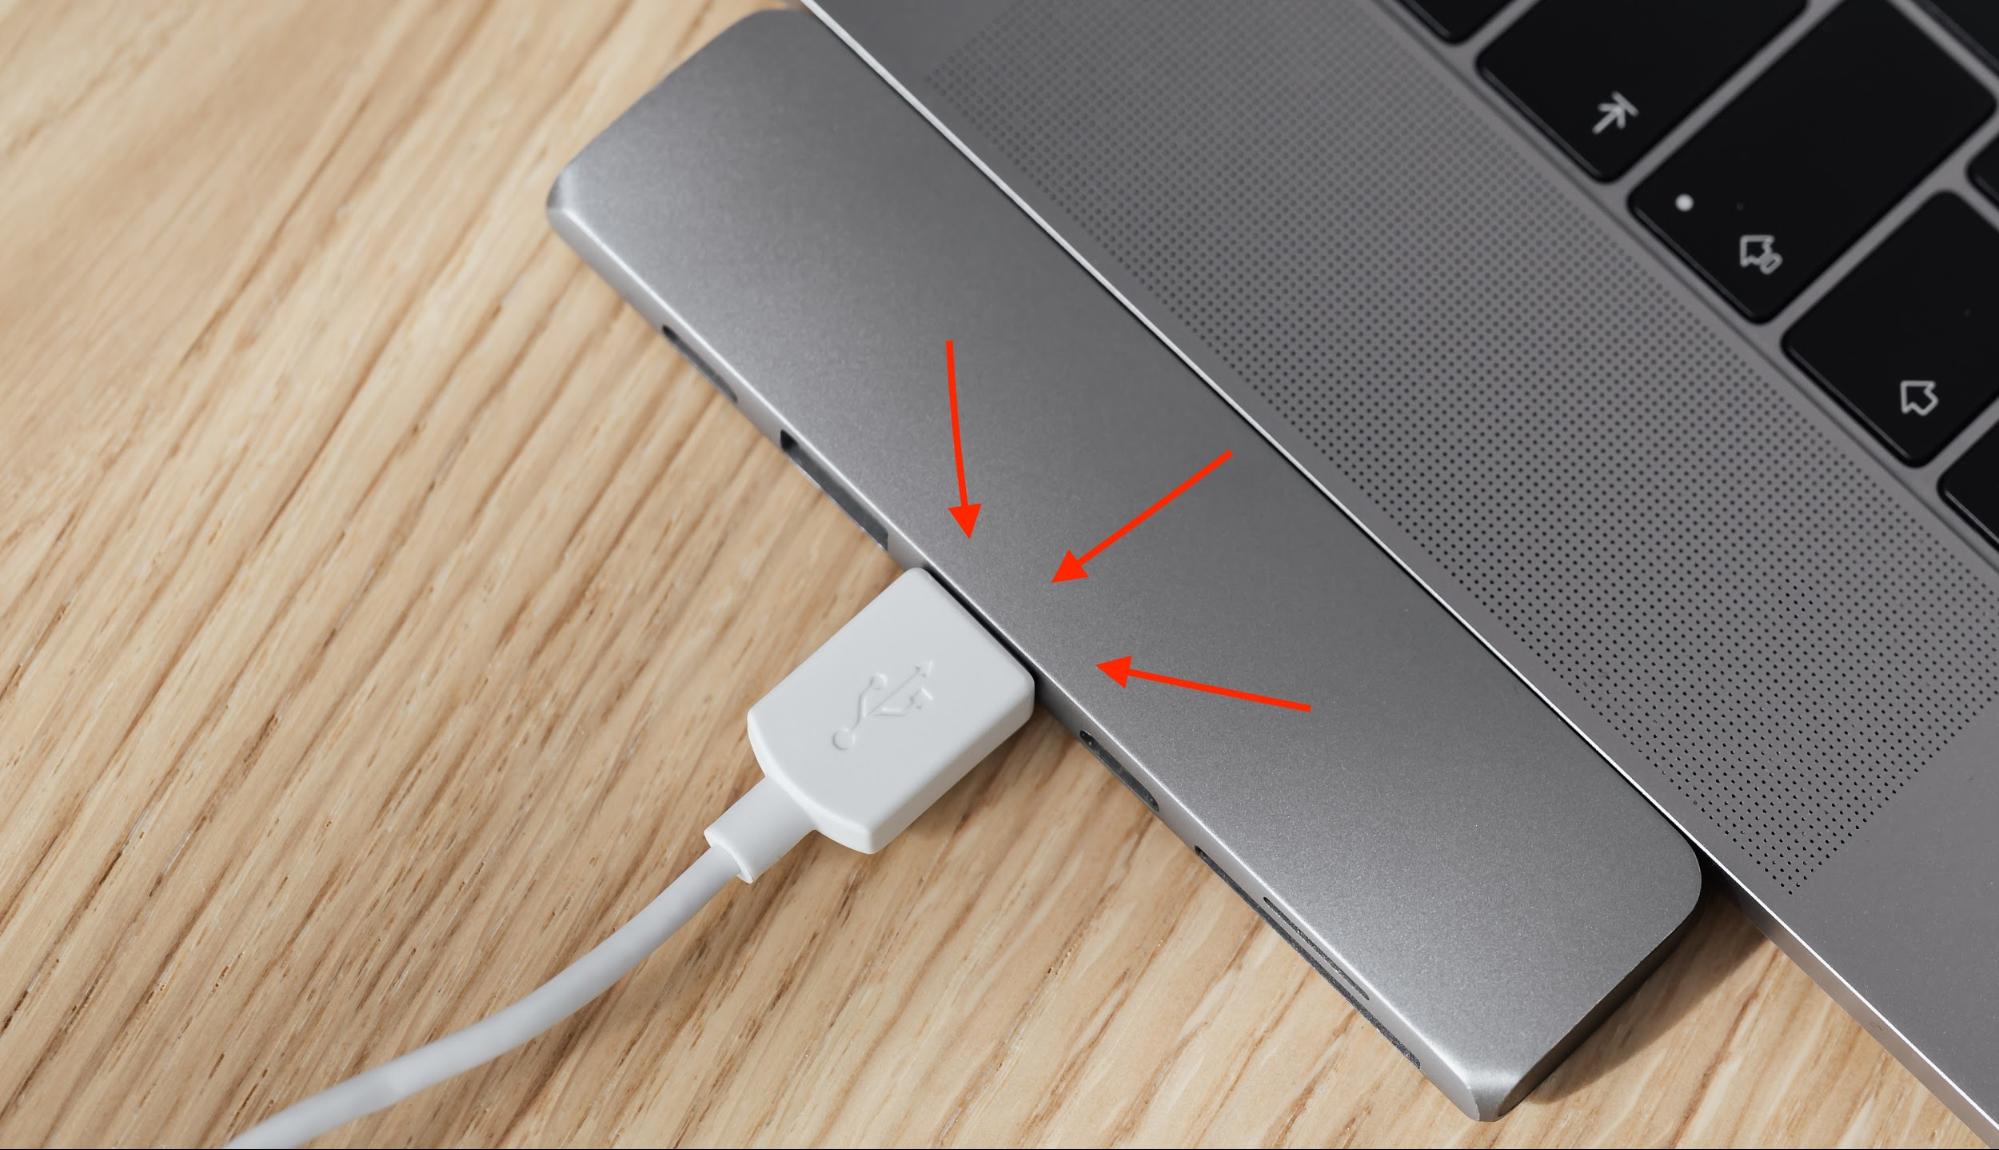
- Make sure the cable and the port are clean and not covered with dust—these can interfere with the connection.
- Make sure the cable fits tightly when you insert it.
- If your Mac camera isn’t instantly recognized, try plugging it into a different port.
- If you’re using a non-Apple camera, check that you have all the relevant software installed.
3. Start the camera via Terminal
Cameras on Apple devices like MacBook Pros, MacBook Airs, and iMacs can’t usually be turned on manually. It just happens automatically when you open an application that uses the webcam—like FaceTime or Photo Booth, for example. But if that doesn’t happen, you might be able to restart your Mac camera manually via Terminal.
How to use Terminal to restart your Mac camera:
- To open Terminal, go to Applications > Utilities > Terminal in Finder.
- Type in the command sudo killall VDCAssistant and press Enter. This command force quits all applications that use the camera and resets it.
- Enter your password in the pop-up window and open the app you want to use again—the camera should now be working.


4. Make sure you’re connected to the internet
It seems obvious, but problems with poor quality in video calls might just be down to your internet connection. If it’s bad enough, your software might completely lose the connection to your Mac camera. When that happens, you need to work out a way to speed up your internet connection. Common fixes include reconnecting to Wi-Fi, restarting your router, and using an Ethernet connection.

5. Check the apps using the camera at the same time
Having multiple apps use the camera at the same time could be the reason you’re experiencing camera issues. Check which apps are using your Mac’s camera at the same time, and consider only granting permission to the app you want to use at the time. To do this, follow the steps in the Check camera permissions section.
6. Quit other apps that may be using the camera
Only one app at a time can use your Mac’s camera. If you try to use it with multiple apps simultaneously, you’ll be denied permission. Sometimes, though, it’s not always obvious what’s using your camera. With Apple’s own iSight cameras, you’ll see a green light on it to tell you it’s in use, but that’s the only clue it will give you. Quit the apps you aren’t using, like FaceTime and WhatsApp.
How to check what’s using your Mac camera:
- Look in the Dock for any apps that you know might potentially use it—things like Skype, FaceTime, PhotoBooth, or your browser.
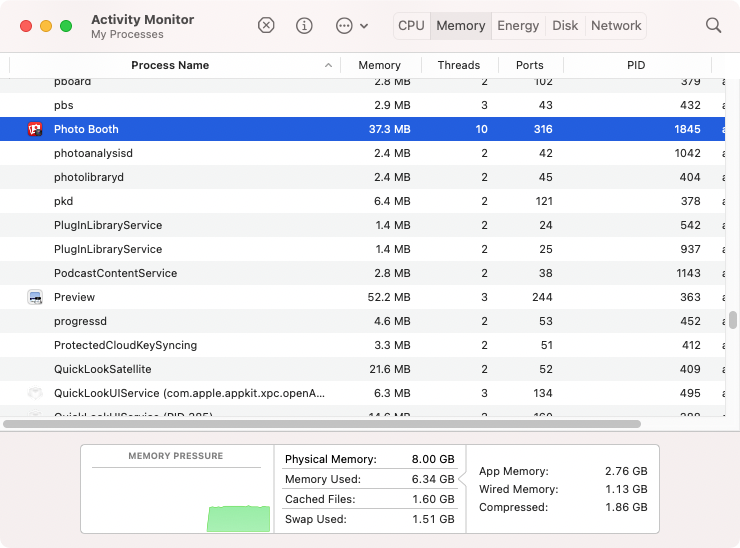
- Open the Activity Monitor app from Applications > Utilities > Activity Monitor.
- In the Dock and in Activity Monitor, quit any apps that might be using your Mac camera.
7. Restart your Mac in safe mode
Sometimes, just restarting your Mac is enough to fix problems with its camera. That can close down apps that are controlling it in the background, stopping you from using it elsewhere. But if that doesn’t work, you can also restart your Mac in safe mode.
To launch your Mac in safe mode:
- Restart your Mac and hold Shift as it’s booting.
- When the login screen appears, you should see Safe Boot written in the top-right corner.
Hint from our team:
In safe mode, your Mac will start up with only the essential apps and processes it needs to run. If the camera works in safe mode, then your problem is likely caused by third-party software. To get it fixed, read our full guide to safe mode for Macs.
The process is different for Macs that use Apple’s new M1 processors. So, here’s how to start an M1 Mac in safe mode:
- Turn off your Mac.
- Hold down the power button until you see startup options.
- Select your Mac’s startup drive.
- Hold Shift, and then select Continue in Safe Mode.
- Let go of the Shift key, and your Mac will log into safe mode.
8. Customize your Mac camera settings
Unfortunately, you can’t tweak your camera settings on a Mac. However, there are changes you can make to your environment to improve the quality of your video. The obvious change is ensuring you’re in an area with sufficient lighting. Another easy fix is wiping your Mac camera with a clean cloth to avoid foggy video.
9. Reset your Mac’s SMC
The System Management Controller controls the low-level functions of your Mac, like the cooling fans and batteries. It also regulates the built-in iSight cameras in iMacs and MacBooks. If your camera isn’t working, it could be fixed by resetting the SMC.
To reset the SMC in early Macs, do this:
- Make sure your laptop is connected to a power source and shut it down.
- When your Mac is completely off, wait a few seconds, then hold the Shift + Control + Option + Power buttons until it reboots.
- Continue holding down the keys for another 10 seconds, then release them and restart your device.
If you own a newer Mac with a T2 security chip (2018 and later), the process is a bit different:
- Shut down your Mac.
- When it’s fully off, hold the power button for 10 seconds.
- Release the power button and, after a while, turn your Mac back on.
- Shut down your Mac again.
- Hold down the Shift + Control + Option keys for seven seconds.
- After seven seconds, add the power button to the combination and hold for a further seven seconds.
- Release all the keys and, after a few seconds, turn your Mac back on.
Heads-up from our experts: Silicon MacBooks don’t require any special steps to reset the SMC. If you own a Mac with Apple Silicon, simply restart it by clicking on the Apple menu and selecting Restart.
10. Run the Apple hardware test
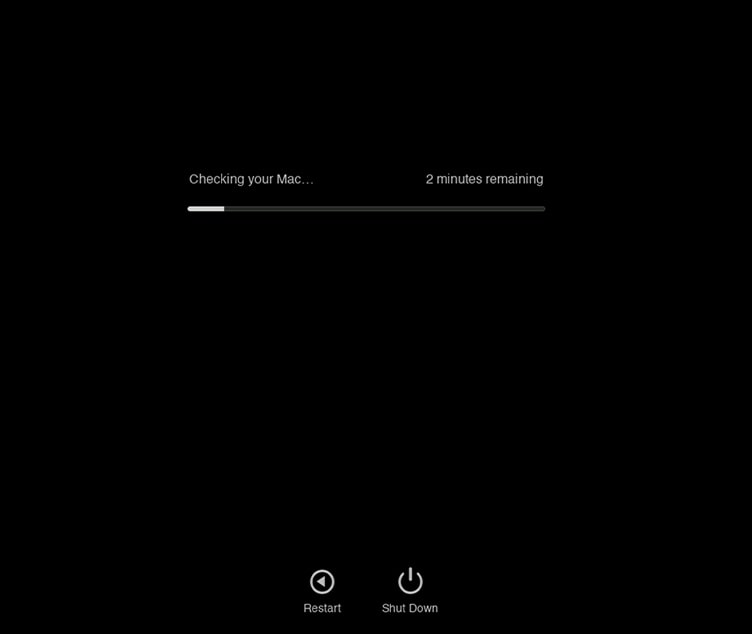
If your Mac camera’s hardware is damaged, you may be able to detect that with the built-in Apple Diagnostics tool. This enables an accurate self-diagnosis of any internal hardware issues with your Mac. Note, in pre-2012 Macs, it’s called the Apple Hardware Test, and it runs slightly differently.
To run Apple Diagnostics, do this:
- Disconnect any devices such as headphones, disks, Ethernet cables, and so on, then restart your Mac.
- On an Apple Silicon Mac, continue to hold the power button until your Mac turns on and loads startup options, then release the power button. Hold down the Command + D keys on your keyboard.
- On an Intel Mac, hold the D key while it’s booting and wait for a screen offering you different language options.
- Select your preferred language, and wait for the automatic completion of the test.
- Look out for the following codes to identify an issue with the camera: NDC001, NDC003, NDC004, NDC005, and NDC006.
- If you see a code like that, take your Mac to a service center to see what support is available.
11. Reset your Mac’s NVRAM
Non-volatile random access memory (NVRAM) stores local settings such as audio volume and kernel panic information. It’s why your volume stays the same when you restart your computer. NVRAM also stores some camera settings, so resetting it can help when your MacBook camera isn’t connected.
How to reset NVRAM on a Mac:
- Shut down your Mac.
- Turn it back on, and while it’s booting, hold Option + Command + P + R.
- After about 20 seconds, you’ll hear two startup sounds. Release the keys after the second one.
- On Macs with a T2 security chip, release the keys after you see the Apple logo appear for the second time.
12. Check your macOS updates
Software updates can be something of a double-edged sword. On the one hand, not updating macOS can lead to problems. But on the other hand, those very same updates can be what caused those issues in the first place. And that includes problems with your Mac’s webcam.
To check the available macOS updates:
- To update macOS, go to System Preferences, and select Software Update. If an upgrade is available, you’ll see a corresponding button.
- To check for any updates available for applications, go to the App Store and click on Updates in the sidebar on the left. Anything that needs upgrading will display a prompting button.
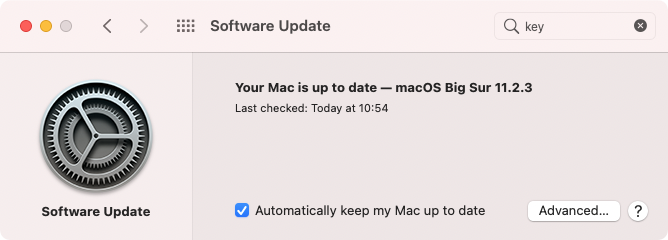
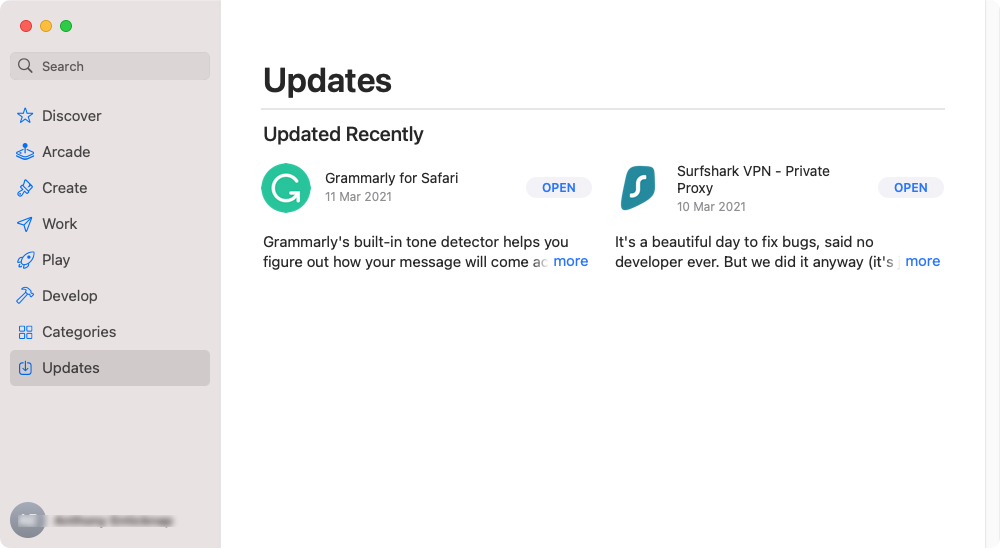
Updating your Mac’s operating system is crucial, mainly for security reasons. But you might also run into problems when an app is updated and no longer runs on older versions of macOS. And it works the other way, too: if you update macOS, you might need to update your apps as well. The bottom line is that you should keep all apps and macOS up-to-date to make sure the camera works smoothly.
After updating your macOS, try to record a video on Mac to see if the issue was fixed.
13. Scan your Mac for malware
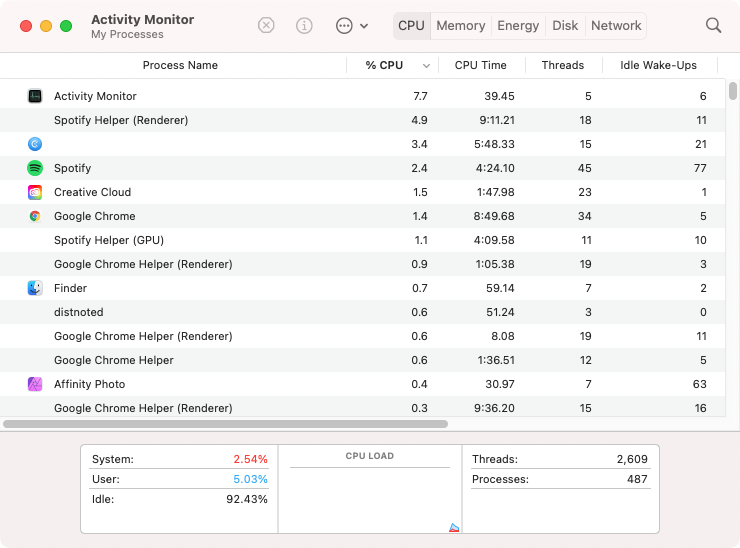
If nothing fixes your Mac camera, you might have a malware infection. Malware can deliberately disable your camera, but it might also happen as an unintended side effect. Either way, it’s not something you want. You can start checking your Mac for malware with Activity Monitor:
- Look in the macOS Activity Monitor, and see if there’s anything there using your Mac’s memory or processor heavily. If there is, and you don’t recognize it, it could be malware.
- Google anything that looks suspicious to see what it is. Then, quit the process ASAP.
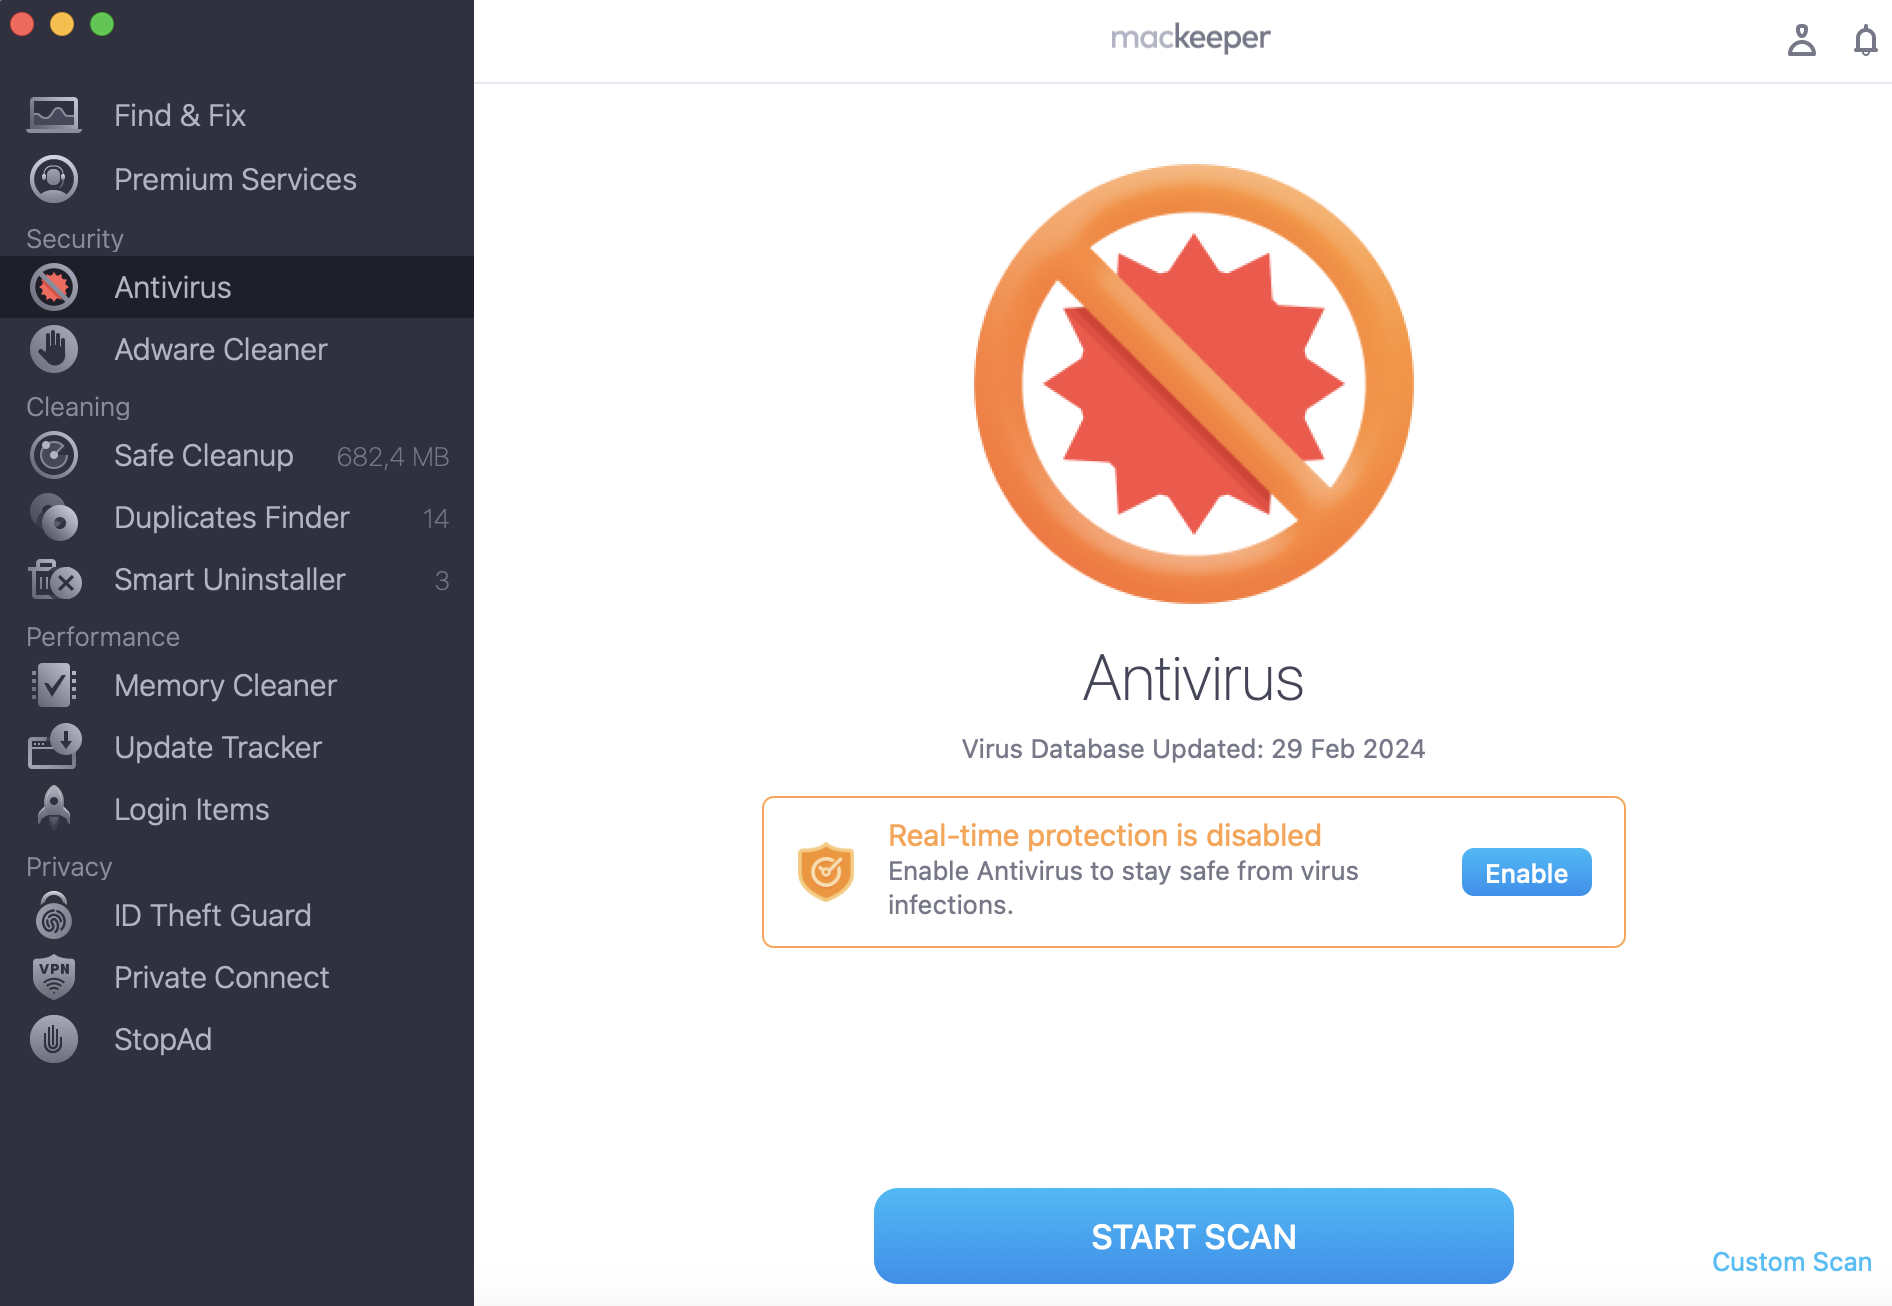
Unfortunately, stopping malicious processes in the Activity Monitor isn’t enough. They’ll just start up again. And deleting the source file probably won’t work either. When malware gets into your Mac, it can spread throughout the whole system, getting itself into places that are hard to find. Here’s where MacKeeper’s Antivirus comes into place, seeking out all files associated with malware and removing them from your Mac:
- After you’ve downloaded and installed the app, open it on your Mac.
- Choose Antivirus on the left side of the app.
- Click on Start Scan to thoroughly check your Apple device for malicious hazards, and if any of them are found, proceed to delete them.
Fix the camera on MacBook
Mac camera issues like your camera not turning up on Mac can sometimes be attributed to a simple oversight on your part, like forgetting to grant an app permission to use your Mac’s camera. In other cases, they can be caused by system-related issues. Whatever the case may be, your Mac’s camera problems can usually be fixed through troubleshooting. Rely on our tips above to fix an external camera not showing up on Mac and other camera-related issues.
Also, use MacKeeper’s Find & Fix tool to quickly and easily find issues to fix on your Mac. It allows you to fix various problems in just one click, which saves you time and effort and secures your Mac.
FAQs
Why is your MacBook camera quality so bad?
Firstly, the MacBook camera is best for video calls and video conferences, not for filming videos. If you’re looking to produce high-quality videos, a professional camera is your best option. Some content creators start by using their iPhone cameras to record video content, depending on the iPhone they use, until they can afford a professional camera. It depends on your budget and what your goals are.
Secondly, your camera quality might be poor due to your camera being dirty. Wiping it with a clean cloth should improve it.
Lastly, using the Mac camera in a suitable environment, like a well-lit room, can also improve how you appear on it.
Why isn't your Mac camera working on FaceTime?
There are several possible reasons why your MacBook camera isn’t working on FaceTime. Perhaps the FaceTime app isn’t compatible with your device, or it’s not up-to-date. Maybe macOS is outdated. This is possible when you haven’t set it to update automatically.
Sometimes, your Mac camera isn’t working on FaceTime because your internet connection is slow. Additionally, the camera may not be working because you’ve mistakenly entered the incorrect Apple ID information on your Mac.
How much does it cost to fix a MacBook camera?
There’s no single or universal cost to fixing a Mac camera. Apple Authorized Service Providers set their own fees, so you must take your Mac to the nearest one to get a quote.
Why is the camera not connected to Mac?
If your MacBook camera isn’t detected or isn’t connected to your Mac, it may be because the app you want to use doesn’t have permission to use the camera. Another possible reason is that Screen Time limits are preventing the app from using the camera. Besides, it’s possible that your device has picked up that an app you previously used is still using the camera.


