When your Mac won’t boot, won’t charge, or fails an update halfway through, you may be facing firmware corruption that ordinary recovery can’t touch. To put Mac in DFU mode, connect it to a host Mac with a USB-C data cable, then use a specific power-and-key sequence so Apple Configurator can reinstall the firmware. If you’d rather not troubleshoot alone, MacKeeper’s Premium Services connects you with real Mac experts.
DFU stands for Device Firmware Update, and it’s the lowest-level state your Mac can enter. From our experience, it’s best understood as a last resort: unlike other startup options, DFU bypasses macOS entirely and talks directly to the security chip—the T2 on Intel machines, or the Apple silicon SoC on M-series models. That lets a second Mac rewrite firmware that would otherwise be unreachable.
It’s worth being clear about how this differs from recovery mode on Mac, which boots a working recovery system from your drive. DFU shows nothing at all—the screen stays black by design.
You’d typically need it in these situations:
A failed macOS update. An interrupted install or security update can leave firmware in a broken state.
A Mac that won’t boot. If recovery options don’t load at all, DFU may be the only route left.
Charging or power faults. Because the security chip handles power management, a restore can reset those settings.
Hardware repairs. After replacing internal components such as an SSD, a firmware restore is usually required.
How to prepare Mac for DFU mode?
Preparation matters more here than with any other Mac procedure, because a restore that fails partway can leave you worse off than when you started. As our tests show, most failures trace back to the wrong cable or the wrong port rather than a genuine hardware fault.
Get these four things right first:
A host Mac. You need a second Mac running a current macOS version with Apple Configurator installed from the App Store, plus at least 50 GB free and a stable internet connection.
The right cable. Use a USB-C cable that supports both power and data. Older Thunderbolt 3 cables often fail to carry the DFU signal, so a Thunderbolt 4 or quality USB-C data cable is the safer choice.
The correct port. This differs by model, and using the wrong one is the most common reason nothing appears on the host.
Stable power. Keep the target Mac connected to power throughout, since a voltage drop mid-restore triggers a connection error.
Before you go this far, we’d suggest you run diagnostics on your Mac to rule out a simpler hardware fault, because a DFU restore erases data and can’t be undone.
How to put Mac in DFU mode?
The exact sequence to enter DFU mode Mac depends on whether you have an Apple silicon or Intel machine, and whether it’s a laptop or a desktop. In every case the target Mac’s screen stays black, so the only confirmation you’ll get is a DFU icon appearing in Apple Configurator on the host.
A note from our experts:
A DFU restore is an unforgiving procedure—it erases your drive, and a failed attempt can turn one problem into a harder one. Before you spend an afternoon on key combinations and error codes, it’s worth letting someone experienced look at it first. MacKeeper’s Premium Services puts you in touch with technicians who troubleshoot Mac issues daily and can tell you quickly whether DFU is even the right call. MacKeeper is Apple-notarized and offers performance monitoring, so you get expert help alongside tools that keep your machine healthy afterwards.
Type in your message and let our team know what you need.
Choose Premium Services from the left sidebar of the app and click Chat Now to open the support window
1. Enter DFU mode on Apple Silicon
On M1, M2, M3, and M4 machines, the timing is what trips people up. We’d recommend counting the seconds out loud, because releasing the keys too early or too late simply boots the Mac normally instead.
1.1. Laptops
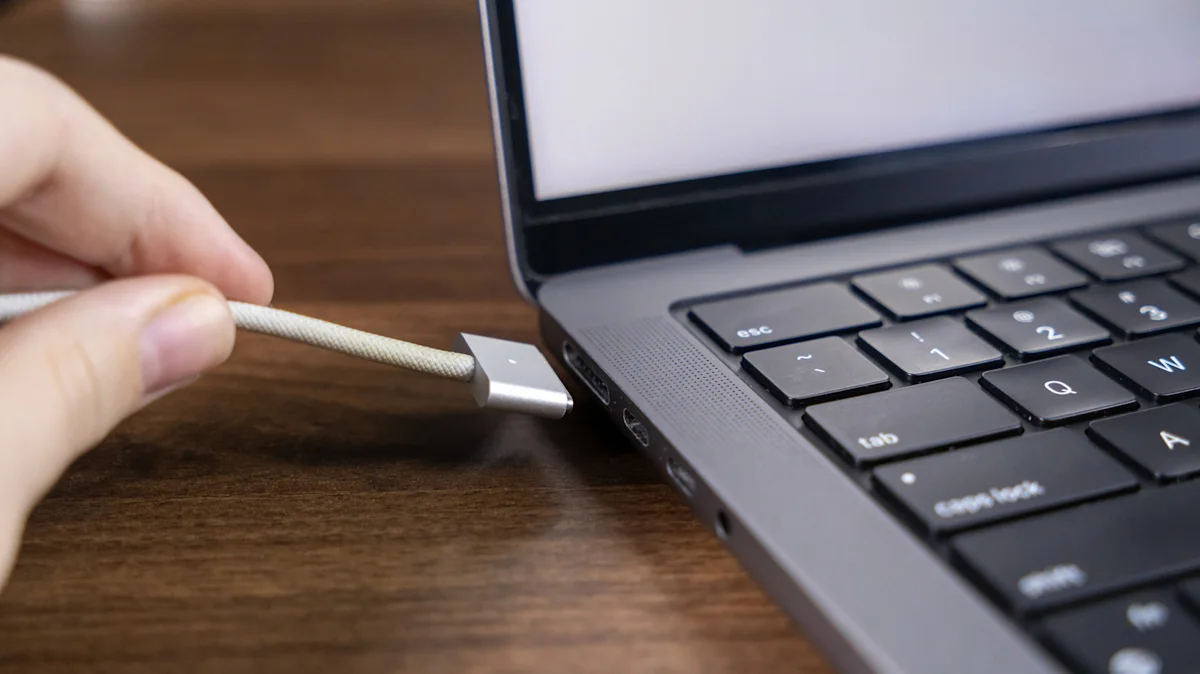
For a MacBook Air or Pro, plug the cable into the left-side port closest to the screen. Note this is the opposite side from what Intel machines use, which catches out plenty of people who’ve done this before.
Time the key sequence carefully:
Shut down the target MacBook completely and connect the cable to your host Mac.
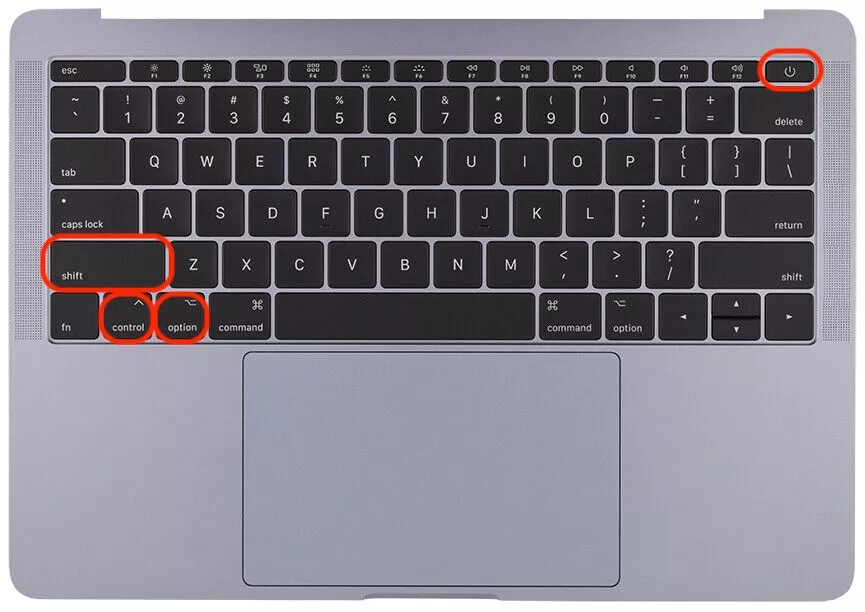
Hold Power + Right Shift + Left Control + Left Option together for 10 seconds.
Release every key except Power, then keep holding it for another 8 seconds.
Watch the host until the DFU icon appears in Apple Configurator, then release.
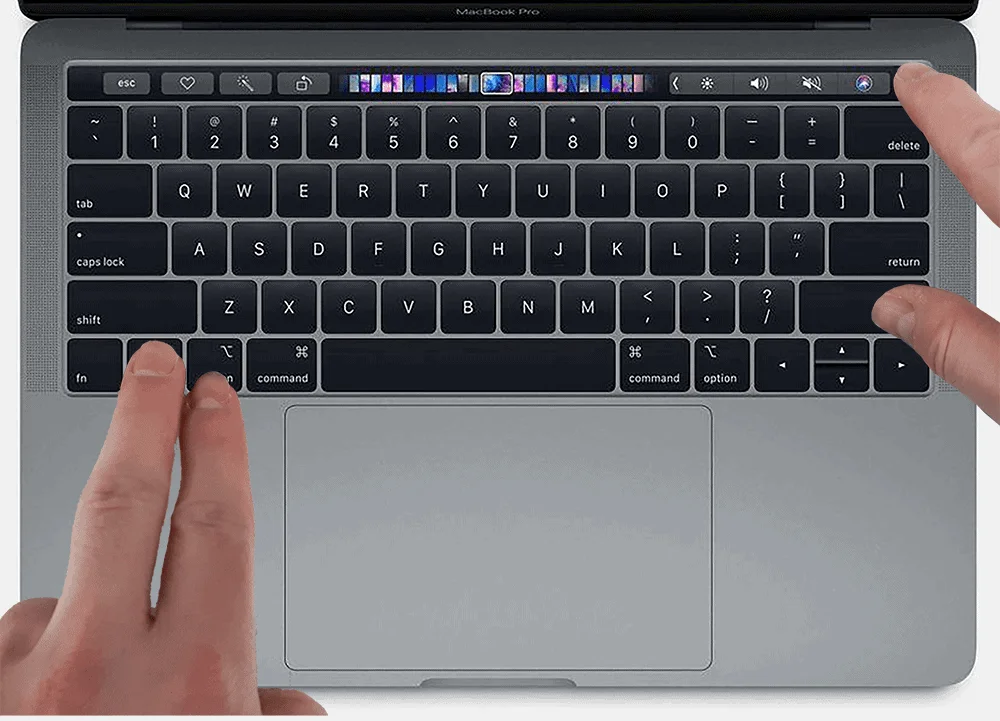
Hold Power with Right Shift, Left Control, and Left Option for 10 seconds, then hold Power alone
1.2. Desktops
Desktops use the power cable itself as the trigger, so you won’t touch the keyboard at all. On a Mac mini use the port nearest the Ethernet jack, on an iMac the port nearest the magnetic power connector, and on a Mac Studio the front port closest to the left edge.
Trigger it using the power cable:
Disconnect the power cord and wait at least 10 seconds.
Plug the data cable into the correct port and connect it to your host Mac.
Press and hold the Power button, then reconnect power while still holding.
Keep holding for about 3–5 seconds until the status light blinks amber and the DFU icon appears.
Hold the Power button while reconnecting the power cable until the status light blinks amber
2. Put Intel Mac in DFU mode
Intel Macs made from 2018 onward carry the Apple T2 chip, and they use a shorter key sequence with a different port. Here the cable goes into the left-side port closest to the trackpad, not the screen.
Use this sequence on T2 machines:
Shut the Mac down by holding Power for 5 seconds.
Connect the data cable to the left port closest to the trackpad.
Press Power briefly, then hold Right Shift + Left Option + Left Control + Power for about 3 seconds.
Release all keys and check the host for the DFU icon.
An extra hint from our team:
If your machine is unresponsive rather than fully off, our guide on how to quit system settings when frozen can help you shut down cleanly first.
On an Intel Mac, hold Right Shift, Left Option, Left Control, and Power for about three seconds
How to restore Mac in DFU mode?
Once the DFU icon shows up, you have two options, and choosing correctly matters enormously. A DFU restore erases the drive and reinstalls everything, while a revive only repairs the firmware and recovery system, leaving your files intact.
Choose between them like this:
Try to revive first. Use it whenever your data still matters and the fault looks like corrupted firmware after a failed update. It’s non-destructive, so there’s little downside to attempting it.
Use restore when revive fails. Choose it if revive doesn’t work, the drive itself is damaged, or you’ve replaced internal hardware. Everything on the disk will be erased.
Run the process as follows:
Select the DFU icon in Apple Configurator on your host Mac.
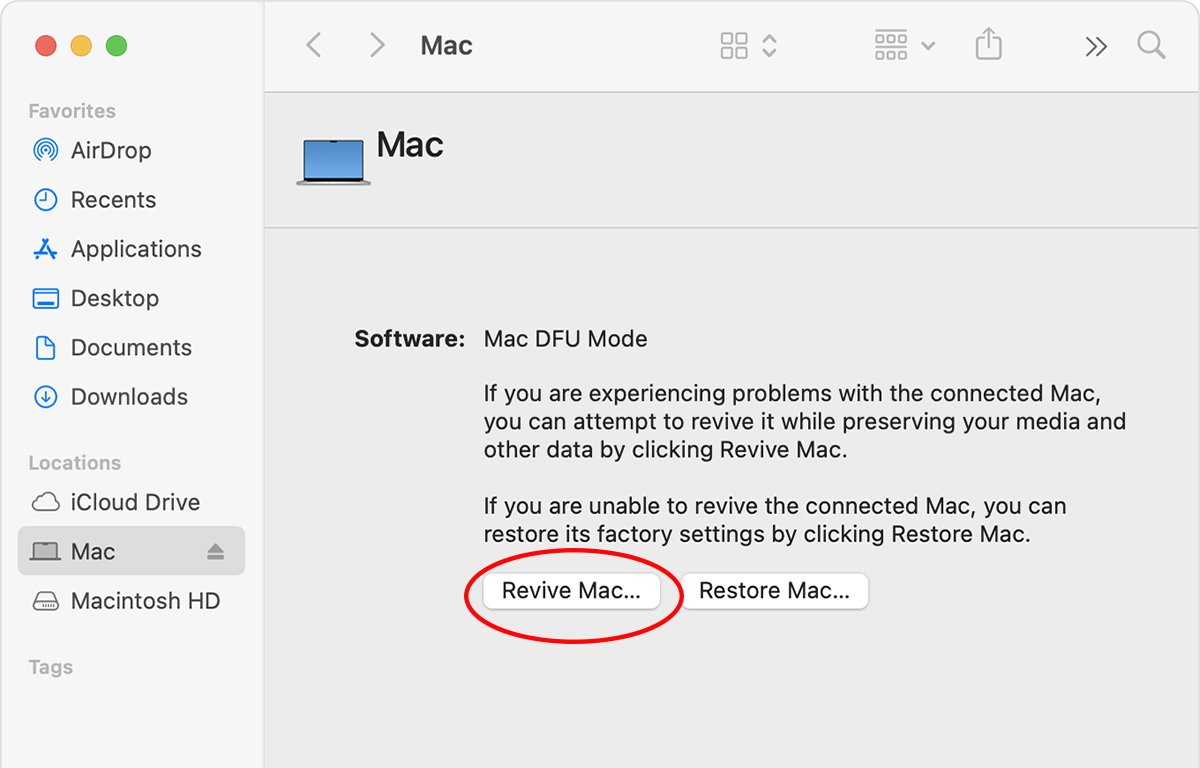
Click Actions > Advanced > Revive Device to repair firmware without erasing data.
If revive fails, choose Actions > Restore instead, then confirm the warning.
Leave both Macs connected and powered until the target reboots to the setup assistant.
One thing we advise to check beforehand:
A firmware password can block the process entirely, so it’s worth learning how to turn off firmware password on Mac before you begin.
In Apple Configurator, choose Actions, then Advanced, then Revive Device to repair the firmware
Best Practices for Mac Stability
Preventing the need for DFU mode is always easier than performing a restore. To ensure your Mac remains stable, keep your firmware and macOS updated, which often includes critical security patches. Regularly monitoring system health helps catch issues early.
Consider the following steps to maintain a healthy system:
Keep automatic updates enabled for macOS to avoid corrupted install states.
Use trusted diagnostic tools regularly to monitor battery and disk health.
Avoid force-quitting system processes unless necessary.
Ensure your Mac is connected to a reliable power source during any major software installation.
Conclusion
Working with DFU mode Mac is genuinely a last resort, but it’s the one tool that can bring back a machine that nothing else will touch. Prepare properly with the right cable and port, learn the sequence for your specific model, and always attempt a revive before a restore so you keep your files wherever possible.
If the process feels daunting, you don’t have to face it alone. MacKeeper is a macOS utility software developed by Clario Tech and trusted by millions of users, and its Premium Services team can walk you through the safest option for your Mac—then help you keep it running smoothly once you’re back up and running.
We respect your privacy and
use cookies
for the best site experience.
Privacy Preferences Center
We use cookies along with other tools to give you the best possible experience while using the
MacKeeper website. Cookies are small text files that help the website load faster. The cookies we
use don’t contain any type of personal data meaning they never store information such as your
location, email address, or IP address.
Help us improve how you interact with our website by accepting the use of cookies. You can change
your privacy settings whenever you like.
Manage consent
All cookies
These cookies are strictly necessary for enabling basic website functionality (including page
navigation, form submission, language detection, post commenting), downloading and purchasing
software. The website might malfunction without these cookies.