A single 4K clip can swallow gigabytes of storage and refuse to send by email, which makes moving your footage anywhere a genuine headache. To compress a MOV file on Mac, open the video in QuickTime Player, choose File > Export As, and pick a lower resolution such as 1080p or 720p. If your drive is already full, MacKeeper’s Safe Cleanup clears out caches, logs, and junk files so you have room to work.
MOV is Apple’s native video container, developed for QuickTime and used across macOS and iOS. From our experience, it’s the format you’ll meet most often on a Mac, because everything from your iPhone camera to Final Cut Pro saves to it by default. The trade-off is size: MOV files frequently use high-quality codecs like ProRes that preserve detail beautifully but produce enormous files.
You’ll also end up with MOV files whenever you record video on Mac using built-in tools, which is why they tend to accumulate faster than you’d expect.
It helps to know what’s actually inside the file. A MOV acts as a container holding separate tracks for video, audio, and sometimes subtitles or timecode, all wrapped together. The codec used inside that container is what really determines the size, which is why two MOV files of identical length can differ wildly—one might be a compact H.264 clip, the other a ProRes master many times larger.
Can you compress a MOV file?
Yes, and in most cases you should. Compressing re-encodes your footage at a lower resolution or bitrate, which can cut file size dramatically—exporting a 4K clip at 1080p typically saves 60–75%. As our tests show, the visual difference is barely noticeable on a phone or laptop screen, while the storage savings are substantial.
Here’s why we’d recommend it:
Free up storage. Large MOV files are often the single biggest drain on your disk space.
Share more easily. Smaller files slip past email attachment limits and upload far faster.
Speed up your workflow. Compressed clips transfer, sync, and back up in a fraction of the time.
The same principles apply if you want to compress a video on Mac in any other format, so the habits you build here carry over.
How to reduce MOV file size on Mac?
There are several ways to reduce MOV file size on Mac, ranging from a two-click zip to a full re-encode. We’ll cover four methods below, and the right one depends on whether you care more about convenience, quality, or squeezing out every last megabyte.
Before you begin, it’s worth taking a moment to check Mac storage so you know exactly how much space you’re working with and where your largest video files are hiding.
One habit we’d strongly recommend: always keep the original file until you’ve watched the compressed version through. Compression is destructive, meaning the detail removed during export can’t be recovered afterward. Export a copy, check it looks right on the screen where it’ll actually be viewed, and only then delete the source.
A note from our experts:
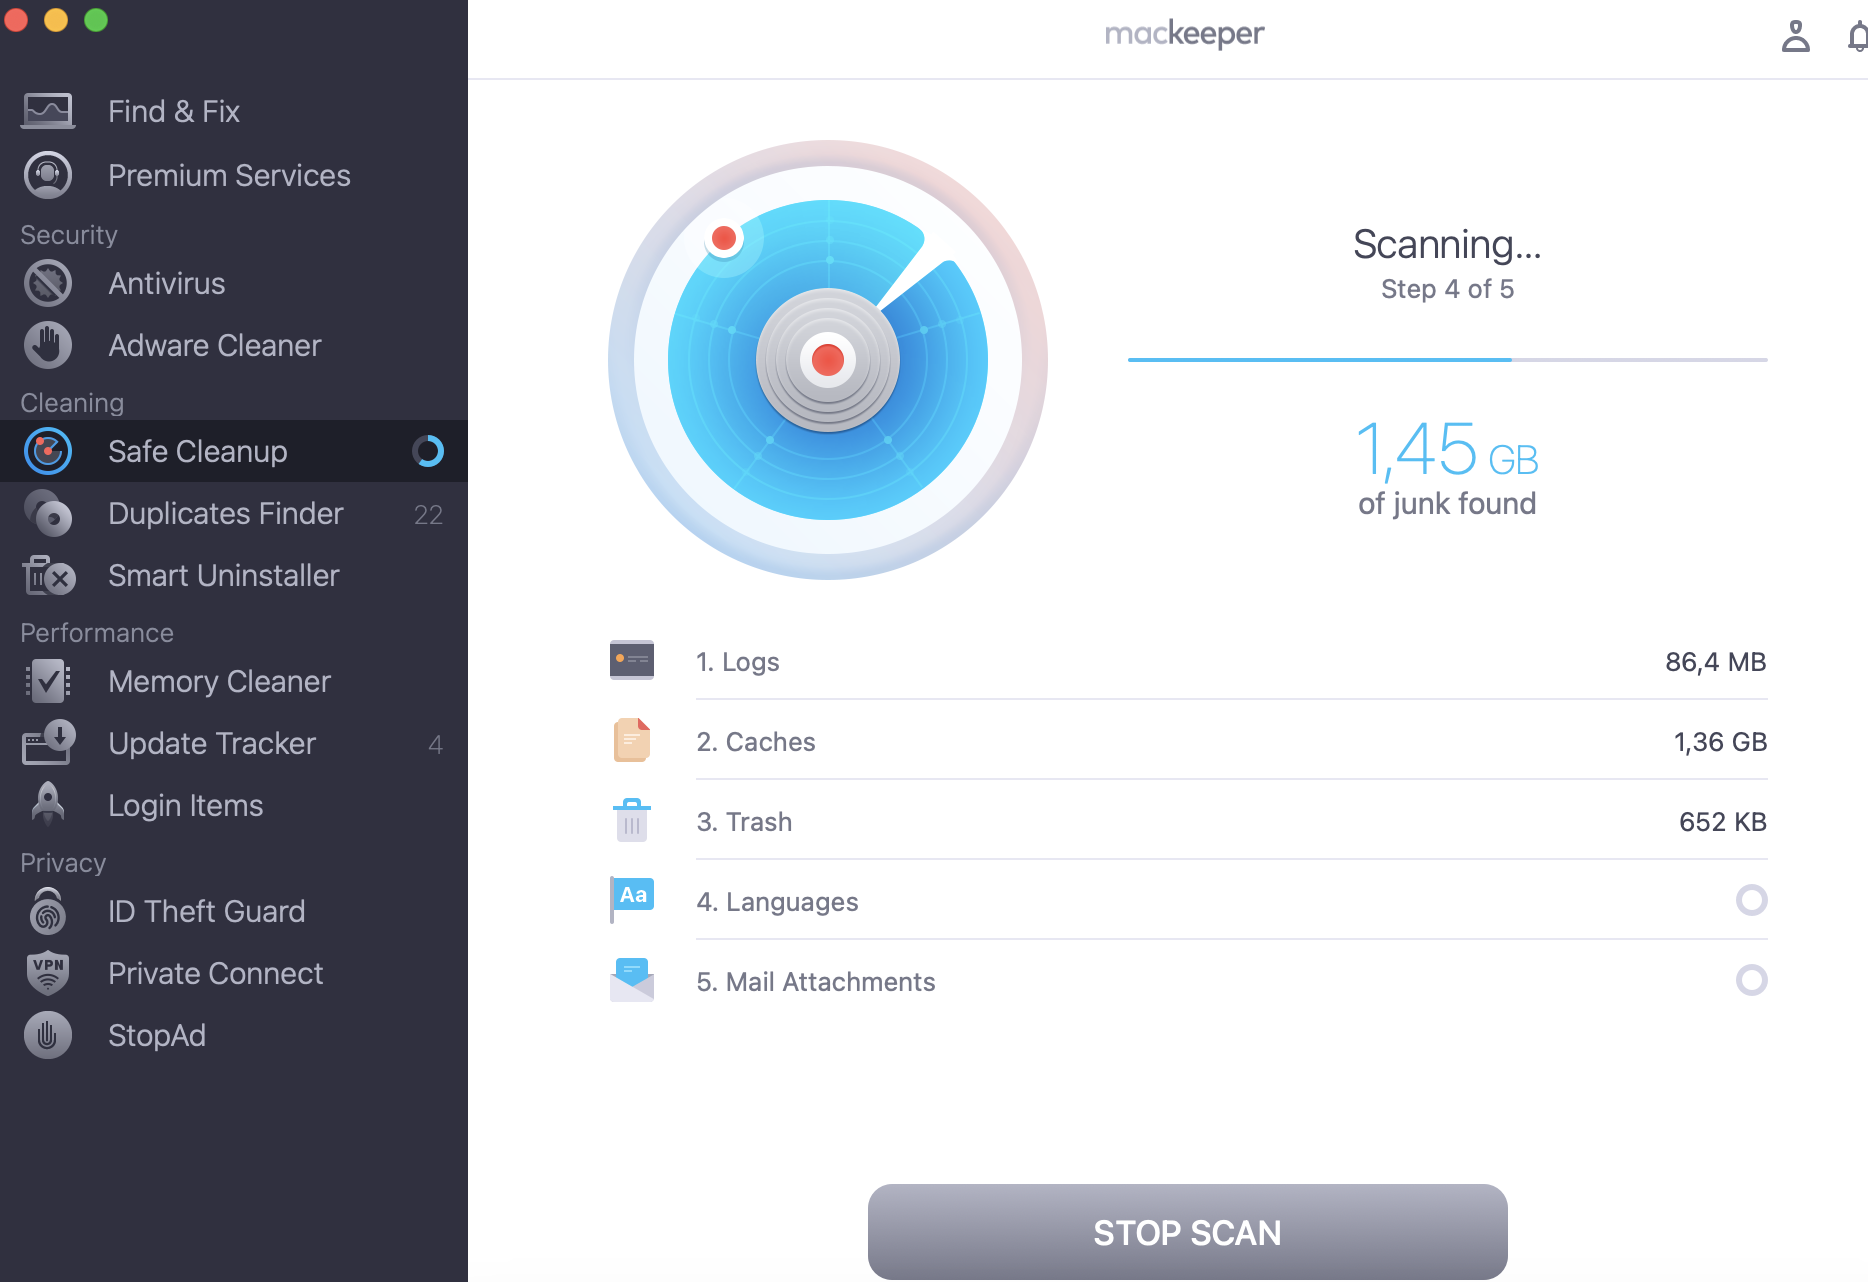
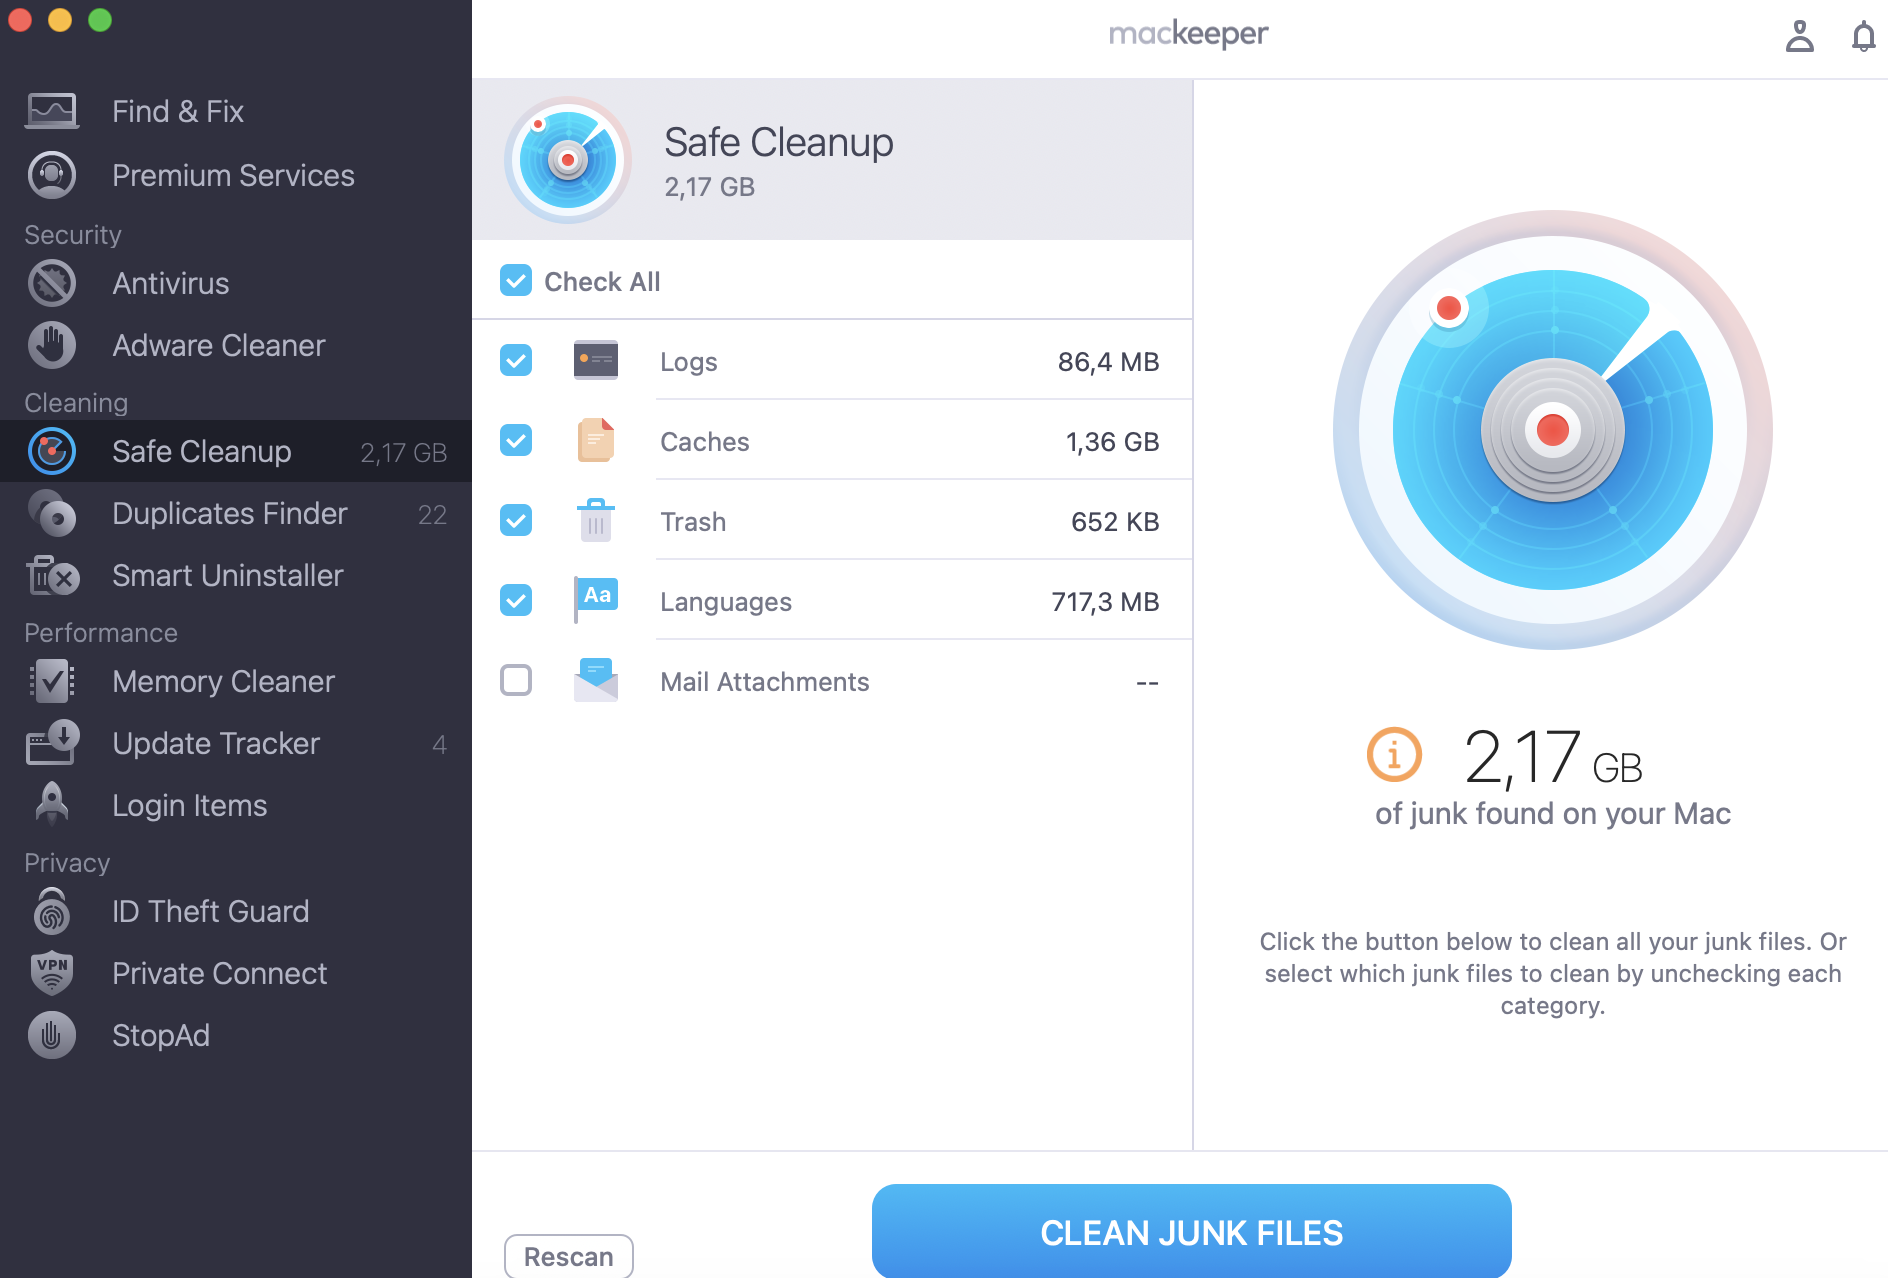
Before you start compressing footage you actually want to keep, ask yourself whether the space problem is really the video’s fault. In our experience, a Mac accumulates gigabytes of caches, logs, and forgotten duplicates that serve no purpose at all. Clearing those first is a basic healthy habit that often frees enough room to leave your originals untouched, and it makes your Mac feel noticeably smoother and speedier before any backup or export. MacKeeper is a leading solution in Mac optimization and cybersecurity, and it offers real-time antivirus protection alongside its cleanup tools.
Review the detected files, then click Clean Junk Files to remove them.
Step 1. Open MacKeeper, go to Safe Cleanup, and hit Start Scan Step 2. Review the results, select unnecessary files, and click on Clean Junk Files
1. Shrink using Finder
The quickest option needs no extra software at all. Zipping the file in Finder wraps it in a compressed archive without touching the video itself, so your quality stays perfectly intact. We’d note the savings are modest on already-compressed footage, but it’s ideal when quality matters more than size.
Zip it in a couple of clicks:
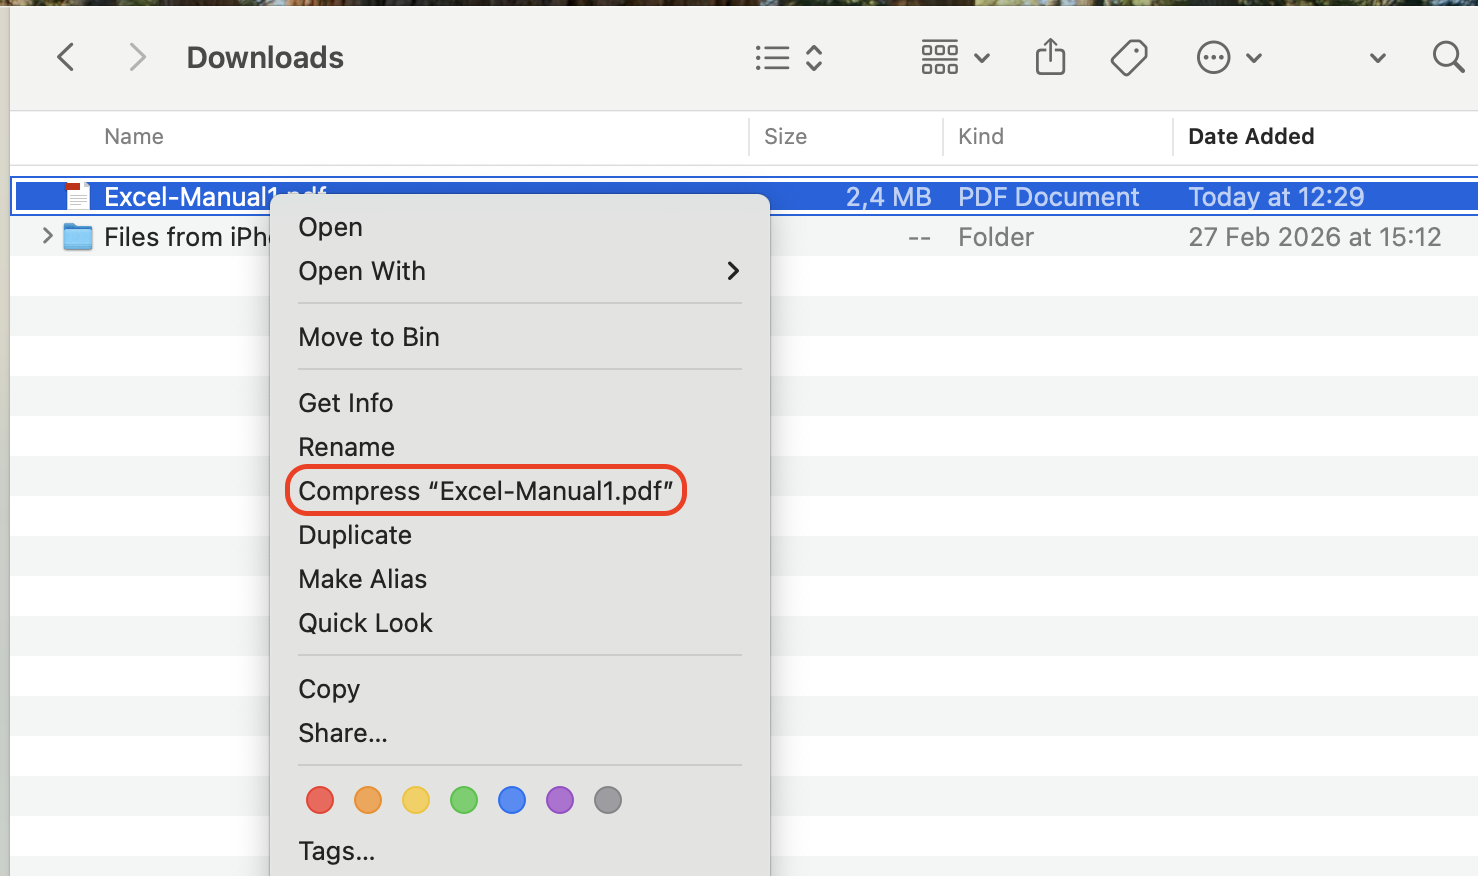
Open Finder and locate the MOV file you want to shrink.
Right-click or сontrol-click the file to open the shortcut menu.
Select Compress from the menu.
Find the new .zip archive that appears in the same folder.
In Finder, right-click your MOV file and select Compress to create a zipped archive
2. Compress MOV files with third-party software
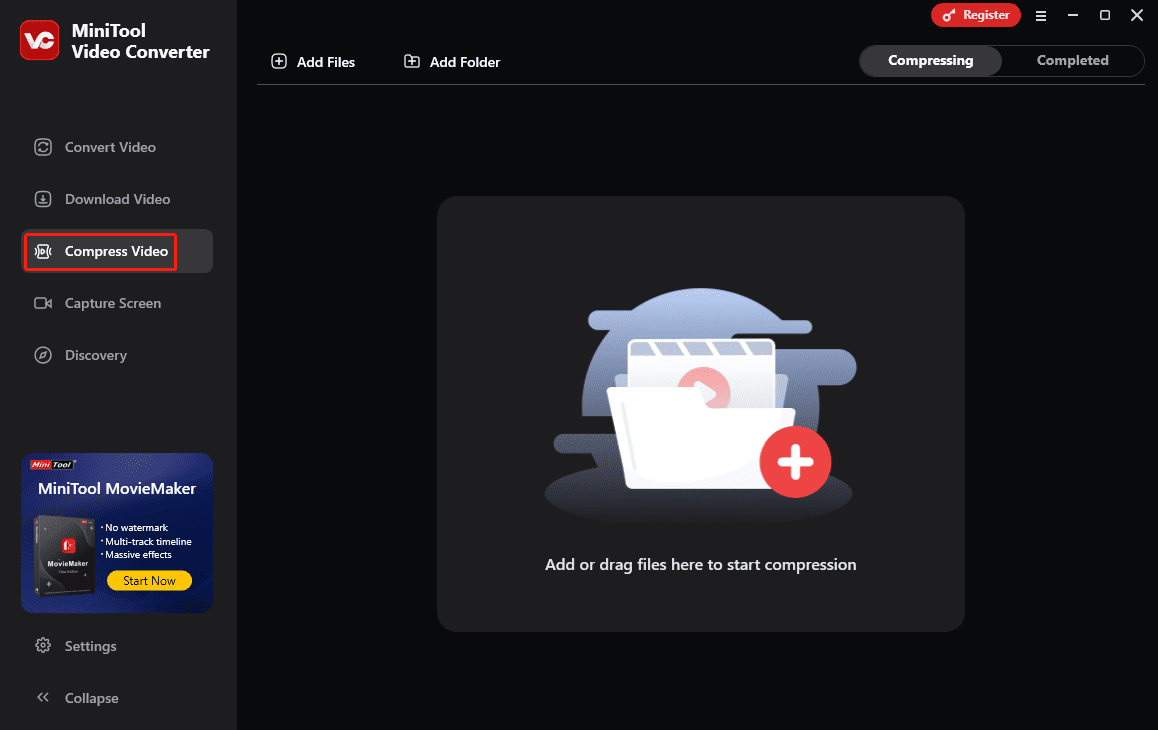
When you need real control over the output, a dedicated compressor earns its place. Tools like TinyFast and HandBrake let you set compression levels and resize footage, and the offline ones keep your videos private by processing everything locally on your device.
Set it up as follows:
Download and install your chosen compressor, then open it from your Applications folder.
Drag your MOV file into the app window so it detects the video automatically.
Adjust the compression level and enable resizing if you want a lower resolution.
Export the compressed file and drag it back into Finder to save it.
Drag your MOV file into the compressor, set your compression level, then export the smaller video
3. Convert to MP4
Switching containers is one of the most effective ways to shrink MOV file size without a visible drop in quality. MP4 uses more efficient compression than MOV, and from what we can tell, the swap alone typically trims 20–30% off the file while playing on virtually any device.
Convert your footage this way:
Open the MOV file in QuickTime Player without pressing play.
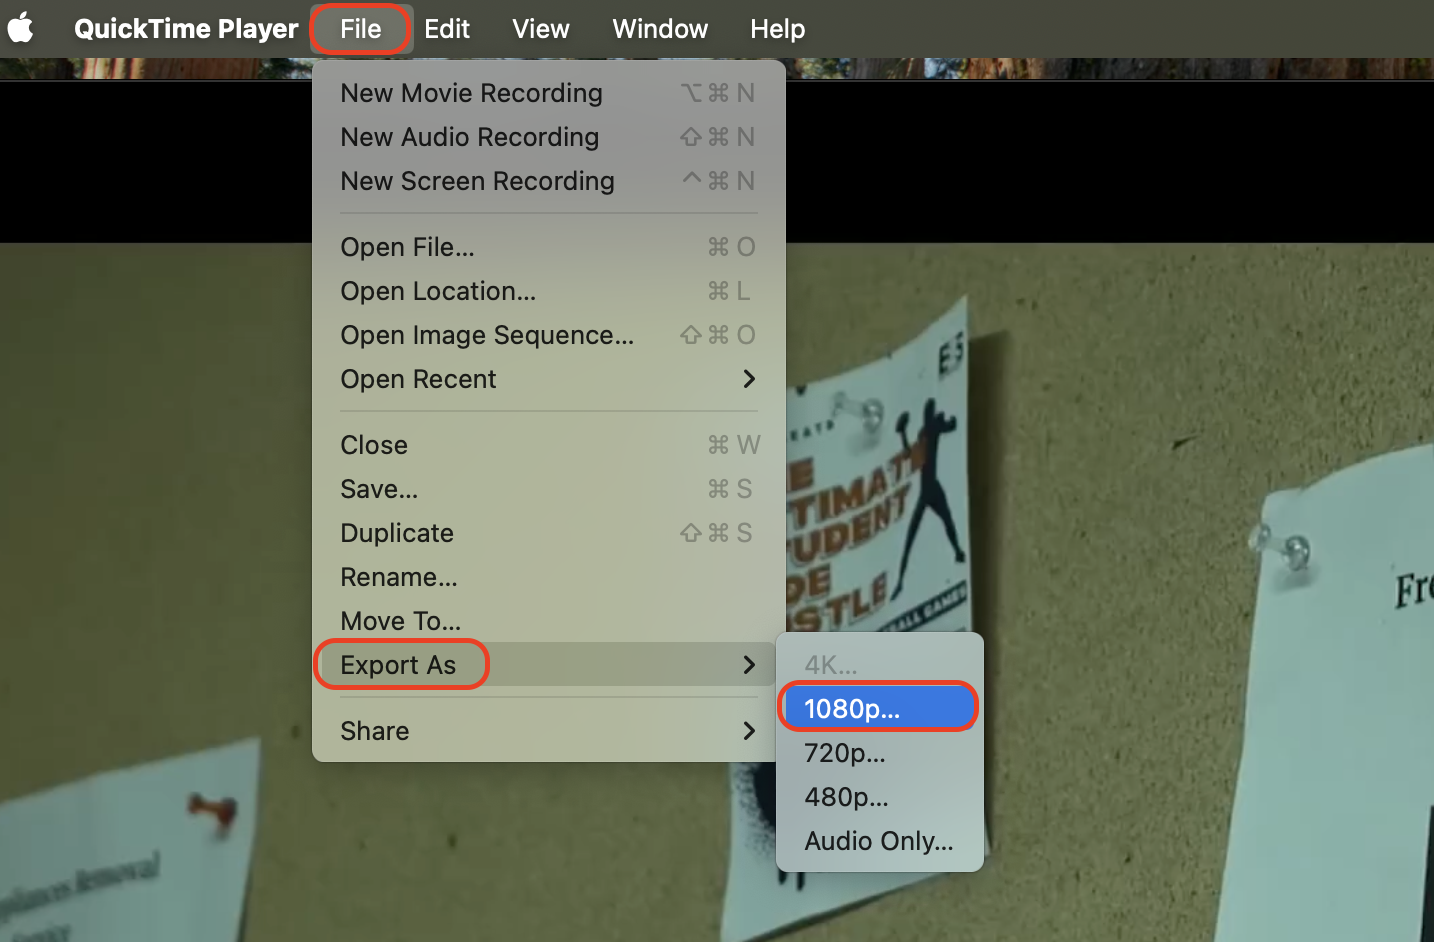
Click File in the menu bar and choose Export As.
Pick a resolution such as 1080p or 720p, which exports using the efficient H.264 codec.
Name the file, choose a destination folder, and click Save.
An extra help from us:
For a fuller walkthrough of the options available, our guide on how to convert MOV to MP4 on Mac covers the alternatives in detail.
Open your MOV in QuickTime Player, choose File then Export As, and select a lower resolution
4. Reduce frame rate
Frame rate is the setting most people overlook, yet halving it from 60fps to 30fps roughly halves the data your video carries. We’d only suggest this for talking-head clips, screen recordings, and presentations, since fast-moving action needs those extra frames to look smooth.
Adjust the frame rate in iMovie:
Open iMovie, click Create New, and import your MOV file.
Drag the video onto the timeline to add it to your project.
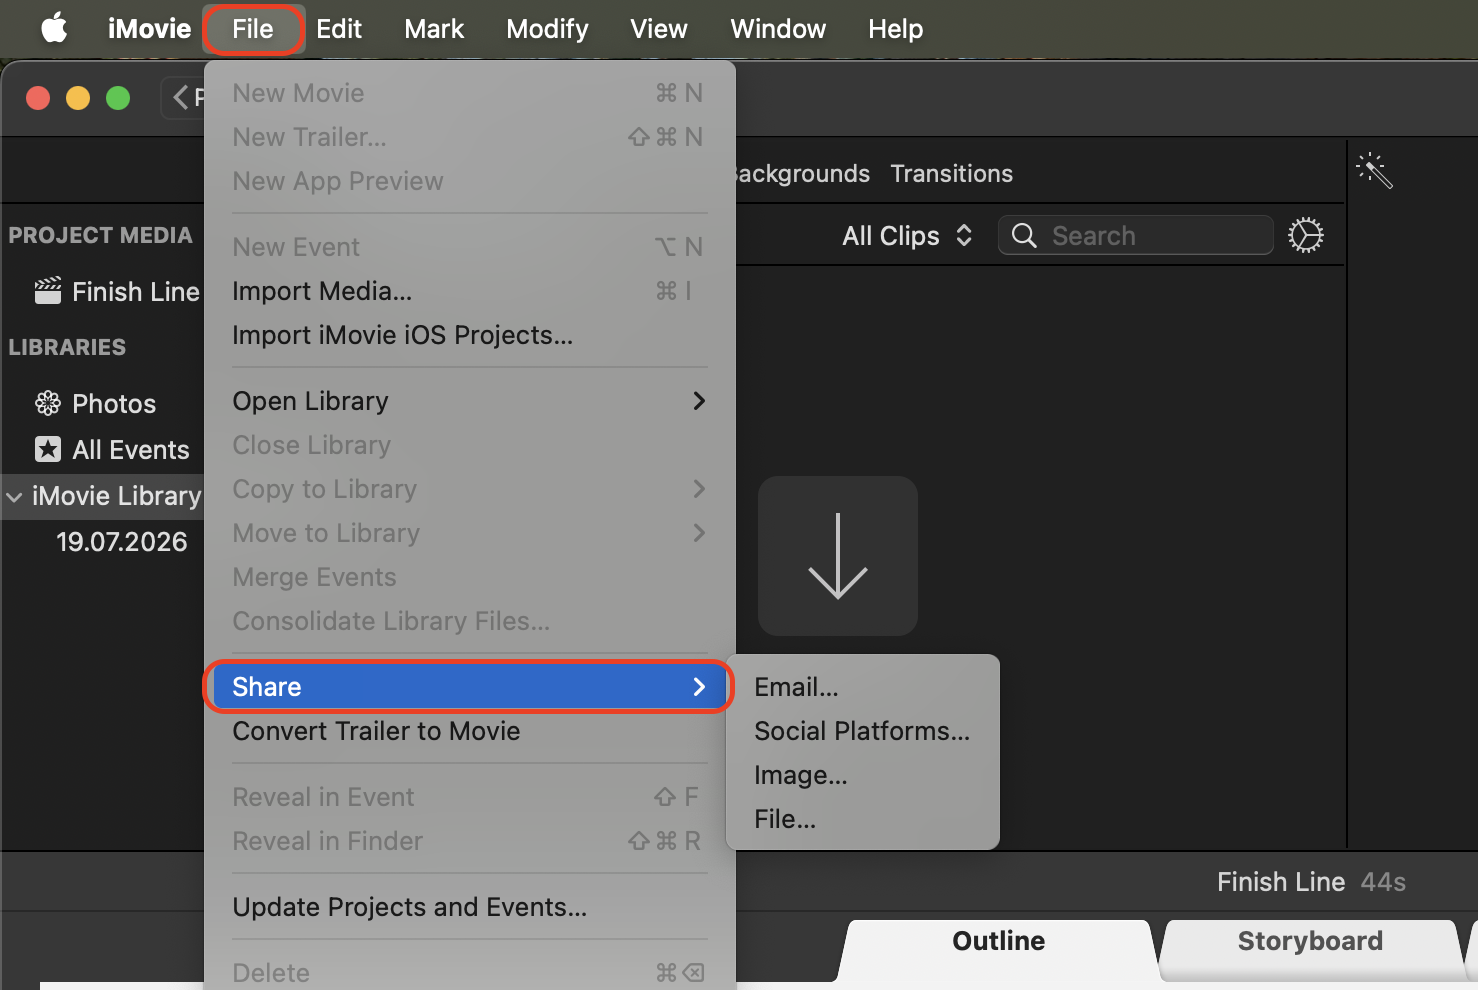
Click File in the menu bar, then choose Share > File.
Lower the Resolution and Quality settings, checking the estimated size shown below the thumbnail, then click Next and Save.
In iMovie, choose File then Share then File, and lower the resolution and quality settings
Best practices for managing your video library
When you work with high-resolution files, a disorganized folder structure often leads to lost assets and duplicated efforts.
Consider these simple habits to keep your Mac running efficiently:
Use descriptive naming conventions. Rename your files immediately after importing, including the date and project name.
Create a clear folder structure. Keep raw footage separate from your edited exports.
Delete unused clips early. Remove unusable or accidental footage before you start editing to save space.
Maintain a consistent backup schedule. Use tools like Time Machine to ensure your valuable work is never lost.
Conclusion
Whether you need to resize MOV video on MacBook for a quick email or archive a whole shoot, you have four solid options: zip it in Finder to preserve quality, use dedicated software for fine control, export to MP4 in QuickTime Player, or trim the frame rate in iMovie. Start with the least destructive method and only compress harder if you still need the space.
And if storage is the real problem, compressing your videos isn’t always the answer. MacKeeper, developed by Clario Tech and optimized for macOS, includes Safe Cleanup to clear the caches, logs, and duplicates quietly filling your drive—so you can keep your footage in full quality and still have room to spare.
We respect your privacy and
use cookies
for the best site experience.
Privacy Preferences Center
We use cookies along with other tools to give you the best possible experience while using the
MacKeeper website. Cookies are small text files that help the website load faster. The cookies we
use don’t contain any type of personal data meaning they never store information such as your
location, email address, or IP address.
Help us improve how you interact with our website by accepting the use of cookies. You can change
your privacy settings whenever you like.
Manage consent
All cookies
These cookies are strictly necessary for enabling basic website functionality (including page
navigation, form submission, language detection, post commenting), downloading and purchasing
software. The website might malfunction without these cookies.