To move files on your Mac efficiently, follow these steps:
- Open Finder.
- Select the files you wish to move.
- Drag and drop the selected files to your desired location.
With this straightforward method, you'll easily manage your files on a Mac using Finder.
Over time, Mac users often find their desktops and folders cluttered with a myriad of files—from work documents to personal photos. This can lead to wasted time searching for specific items, decreased productivity, and even slower computer performance. In this regard, a disorganized MacBook isn't just an eyesore—it's a hindrance to a smooth workflow.
The key to a smooth Mac lies in effective file management. After understanding how to move and categorize files efficiently, you can reclaim your digital space and boost your productivity.
If you feel overwhelmed by the chaos and are unsure how to organize files on Mac, our new guide will offer step-by-step instructions and expert tips.
Before we start
It's important to address one common culprit of clutter—duplicate files. These redundant copies take up precious storage but also add to the confusion. That's where MacKeeper’s Duplicates Finder comes into play. As an essential preparation tool, it helps you safely identify and remove these duplicates.
Here’s how to use MacKeeper’s Duplicates Finder:
- Download MacKeeper.
- Launch the app after installation.
- Select Duplicates Finder from the left pane.
- Click Start Scan and wait till the end of scanning.
- Choose Remove Selected.
In this article you will find the following:
1. Move files and folders using copy-paste
Ever found file management on your Mac a bit tricky? No worries—here's a quick way to do it using keyboard shortcuts:
- Click on the file you wish to move.
- Press Command + C to copy the file.
- Go to the desired destination using Finder.
- Press Command + Option + V to move the file.
Besides, reorganizing your files becomes a breeze when you use Finder's copy and paste. If you're looking for a straightforward shortcut to move files on Mac, you're in the right place.
Follow these easy steps for the copy-paste method:
- Open Finder from the Dock.
- Navigate to the file you want to move.
- Right-click on the file and select Copy.
- Browse to the destination where you want the file.
- Right-click in a blank area and choose Paste Item.
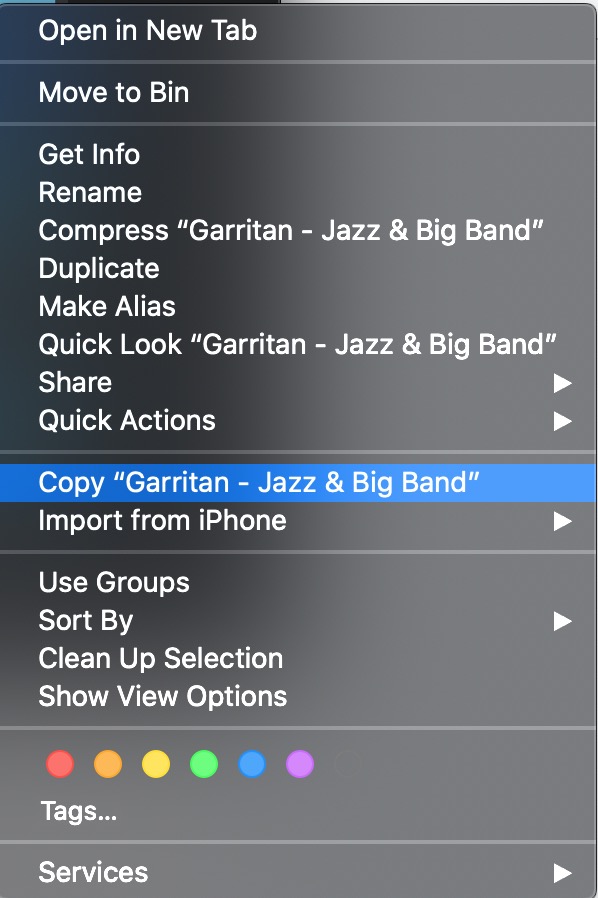
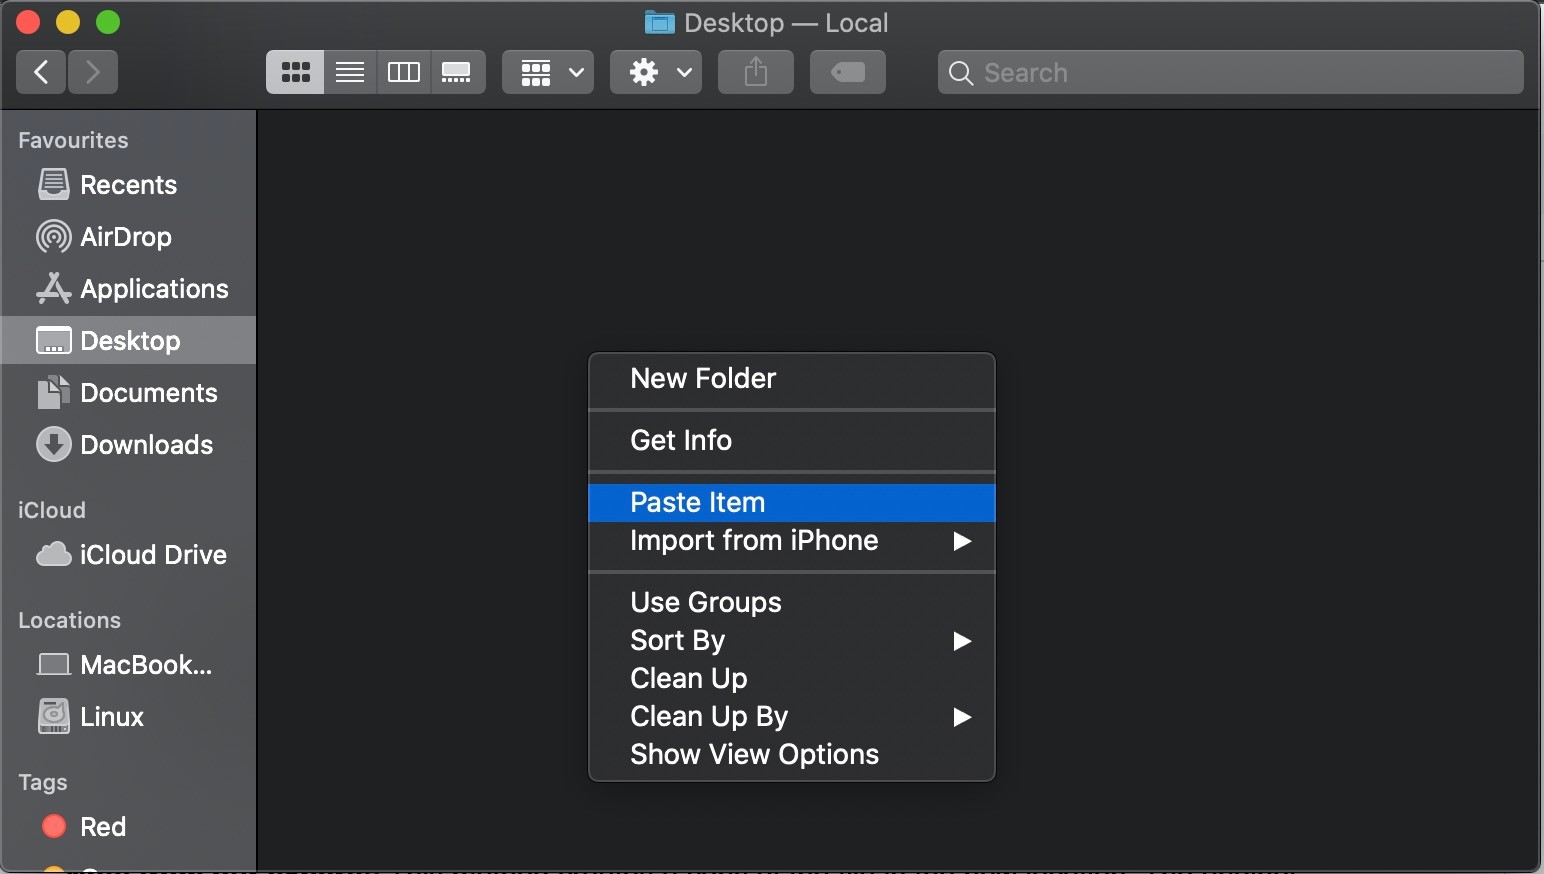
Note from our experts: This method creates a copy of the file in the new location. The original file will still be in its initial place. If you don't want duplicates, remember to delete the original or use MacKeeper’ Duplicates Finder from time to time.
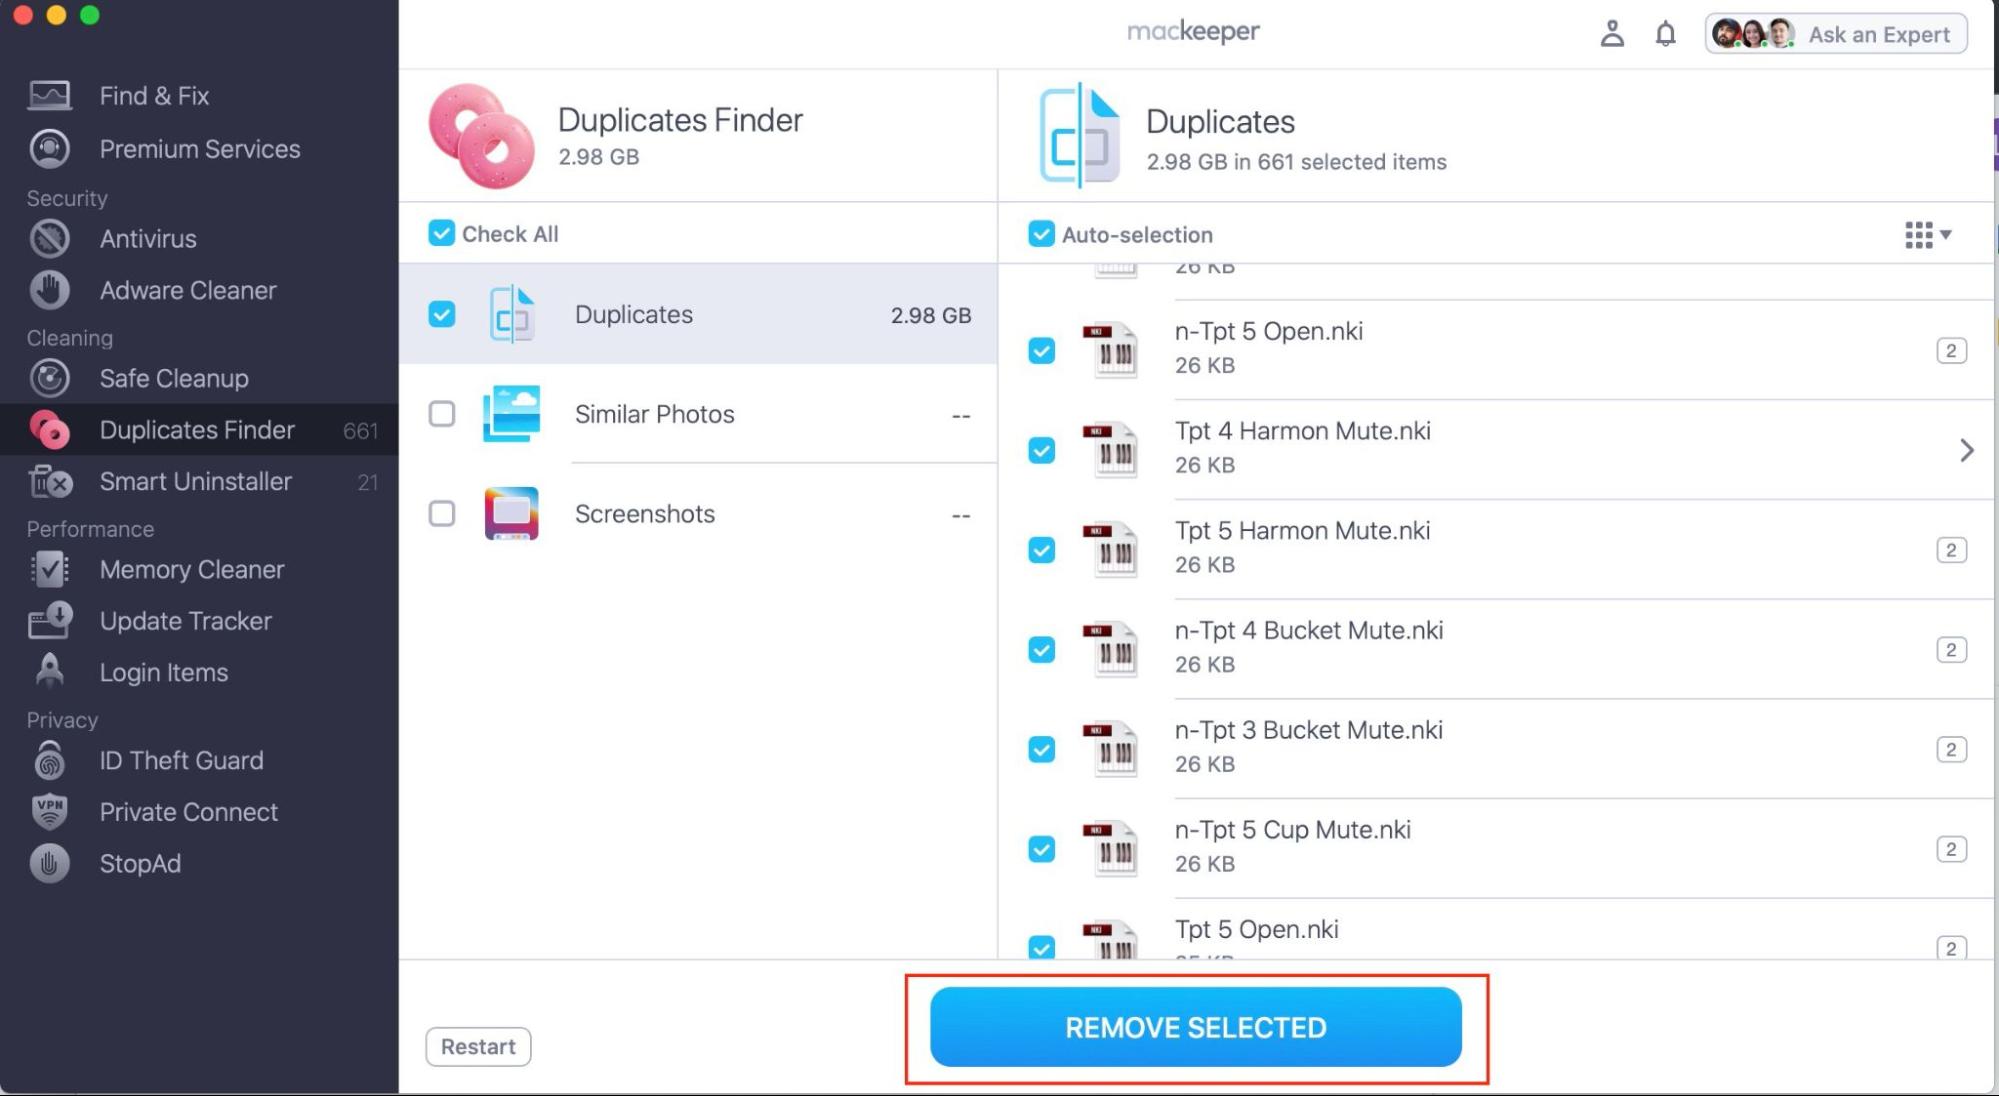
Luckily, it’s easy to remove identical files with MacKeeper’s Duplicates Finder:
- Download and launch MacKeeper.
- Select Duplicates Finder from the left pane.
- Click Start Scan.
- Tick the duplicates finder checkbox and select Remove Selected.


2. Drag and drop files and folders
Here's a nifty method to drag and drop files on your Mac:
- On your Mac, spot the item you want to move.
- Hold and glide the item to its new location.
- Should you want to duplicate the file, tap and hold the Option key while moving it.
When you move files, the drag-and-drop method on Mac stands out for its simplicity. Use our instructions to move files and folders via drag and drop:
- Open Finder from the Dock.
- Locate the file or folder you wish to relocate.
- Notice the various destinations displayed on the left side of Finder.
- Click and hold your chosen file or folder, dragging it to its new home.
- Let go to finalize the move, placing the item in its new spot.
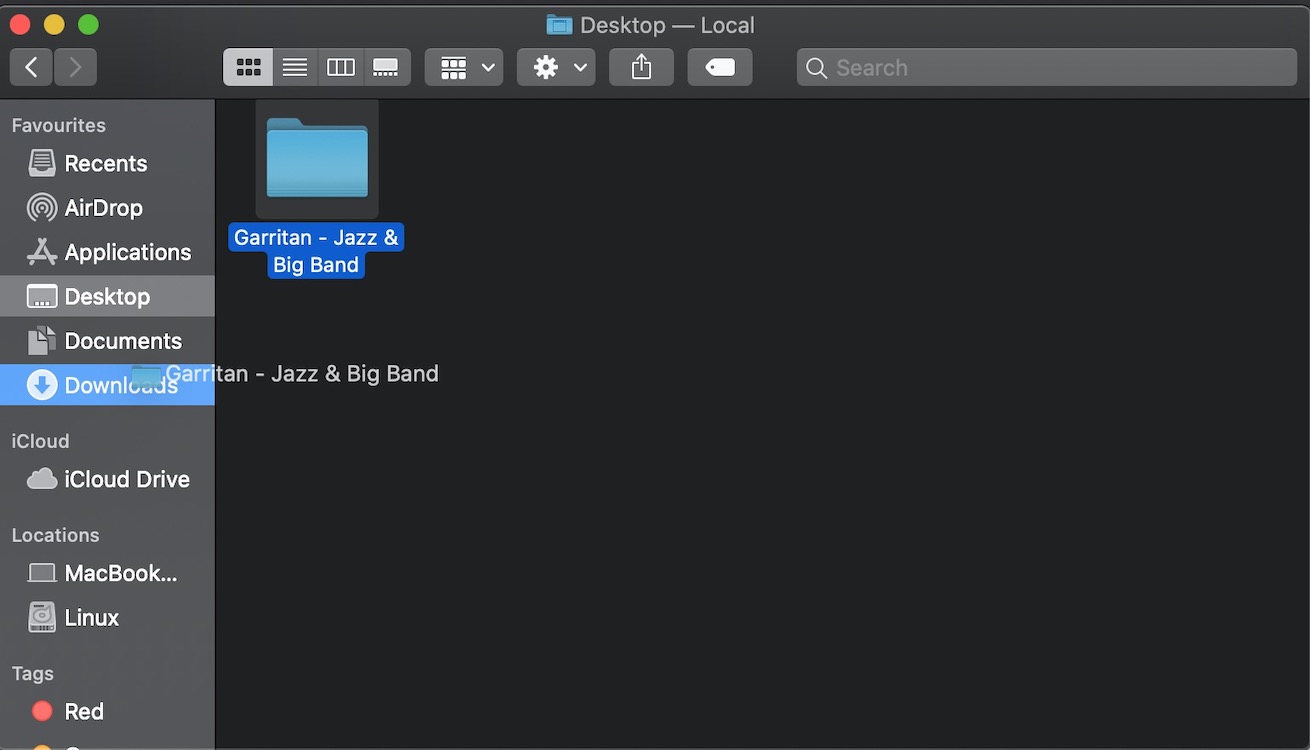
Unlike other methods, with a drag-and-drop method, you're relocating the file or folder on your MacBook, not just making a copy. This means your files stay organized without any accidental doubling up.
3. Move files around with the title bar
For those with a file already displayed in Preview, there's a nifty way to relocate it without diving into Finder. This step uses the title bar for a seamless move.
Here's the other method to relocate files using the title bar:
- Launch the desired file.
- Position your cursor over the file's name displayed in the title bar.
- An arrow icon will emerge to the right of the file name—give it a click.
- A handy menu pops up, allowing you to modify the file's destination and even its name if necessary.
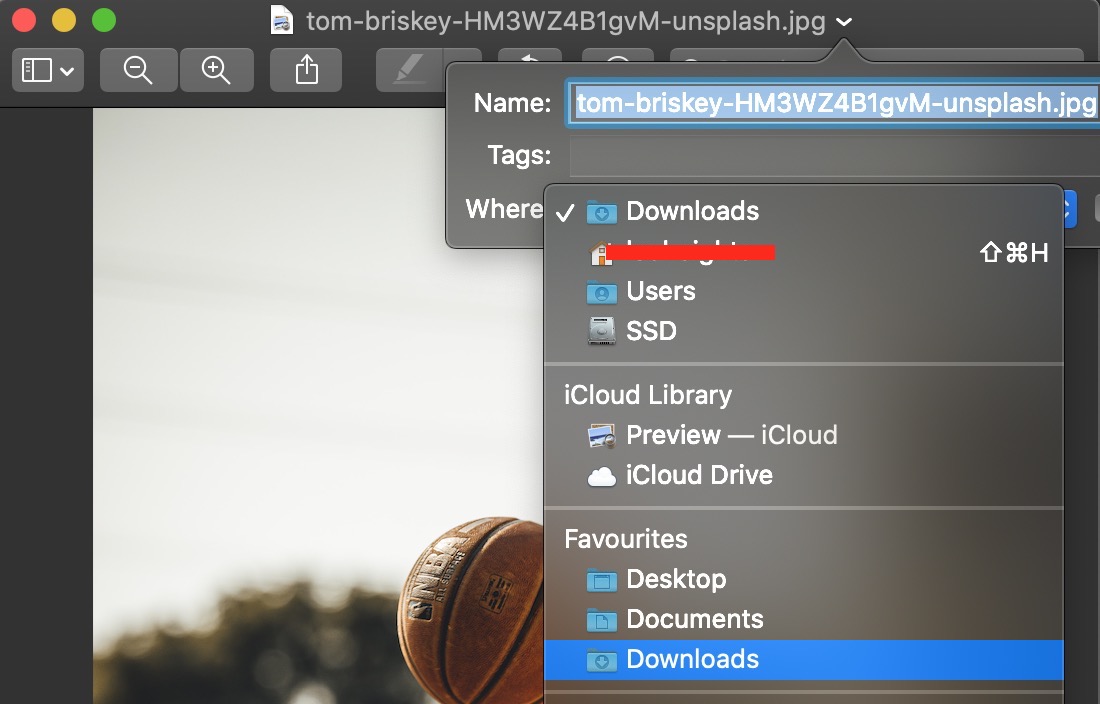
One of the best things about this method is that it doesn't involve making a copy, too. Instead, it's all about a direct transfer. That way, you're not cluttering up your space with duplicates.
4. Move files using Terminal
While Finder is the go-to for many when moving or copying files, Terminal can be a swift alternative, especially when dealing with multiple items or renaming them on the fly. In fact, to move files on Mac with Terminal is easier than you might think.
Here's how to carry files with Terminal:
- Navigate to the Finder menu.
- Head to Applications > Utilities, and finally open Terminal.
- Deploy the mv command to shift a file or directory.
Hint from our team: Want to rename while relocating? Just adjust the file name in your command. For example: mv ~/Downloads/MyFile.txt ~/Documents/Work/UpdatedFile.txt. If you input this path into Terminal, the app will transport a file from your downloads to a work directory in Documents.
How to move multiple files on Mac?
To group multiple items into a folder:
- Select and drag highlighted items to a folder. They'll move together.
- Move an entire window's contents into a folder by hovering near the window title.
- Then drag the appearing icon.
These steps make managing your Mac files a breeze. But when tidying up your device, you might also want to know how to select multiple files on Mac and move them into folders, which can be a game-changer. So, if you need more assistance on this, don’t ignore our tips.
Mac files on the move: Lessons and final tips
Today, we've shared the helpful nuances you need to mind to move files on your Mac efficiently. From using Finder's drag-and-drop to the tricks with the title bar, we've explored various methods to make the process seamless. But one key takeaway? Preparation is crucial.
Before diving into the actual moving, remember to declutter. And this isn't just about organization—it's about efficiency. MacKeeper’s Duplicates Finder is the tool for this job. By swiftly identifying and removing duplicate photos and files, it ensures you're only moving what's truly necessary.
So, as you apply what you've learned, remember to start with a clean, duplicate-free environment—it's the smart way to move.
P.S.: For even smarter work on your Mac, read our expert insights on how to free up space on Mac and catch more hints to become a professional MacBook user. Good luck!


