Is your Mac flashing a disk full Apple Music message? It usually means downloaded songs, cache, synced libraries, or old media have filled your storage. MacKeeper’s Safe Cleanup removes junk files in one click and frees space, without touching your personal files. Reclaim space with Safe Cleanup.
When Apple Music says disk full, it usually means your Mac doesn’t have enough available storage to download, sync, update, or manage media files. So what does it mean when Apple Music says disk full? The meaning is simple—the disk is too packed for the app to finish loading or saving songs. Before deleting anything, it’s smart to see how much space is left on Mac so you know what you’re working with.
Why does Apple Music say disk full?
An Apple Music disk full message can appear for several reasons. From our practice, a disk full notification on Apple Music usually traces back to one of these:
Low available storage on your Mac, sometimes just a few GB left
A large downloaded music library that keeps growing
Cache buildup from streaming and syncing over time
As you’ve already got the idea of making your Mac’s Apple Music disk full, you can also guess that the same happens while using other apps that accumulate files within the in-app storage. Deleting their cache and logs is part of sound file management, and MacKeeper’s Safe Cleanup is a helpful tool for automating this process.
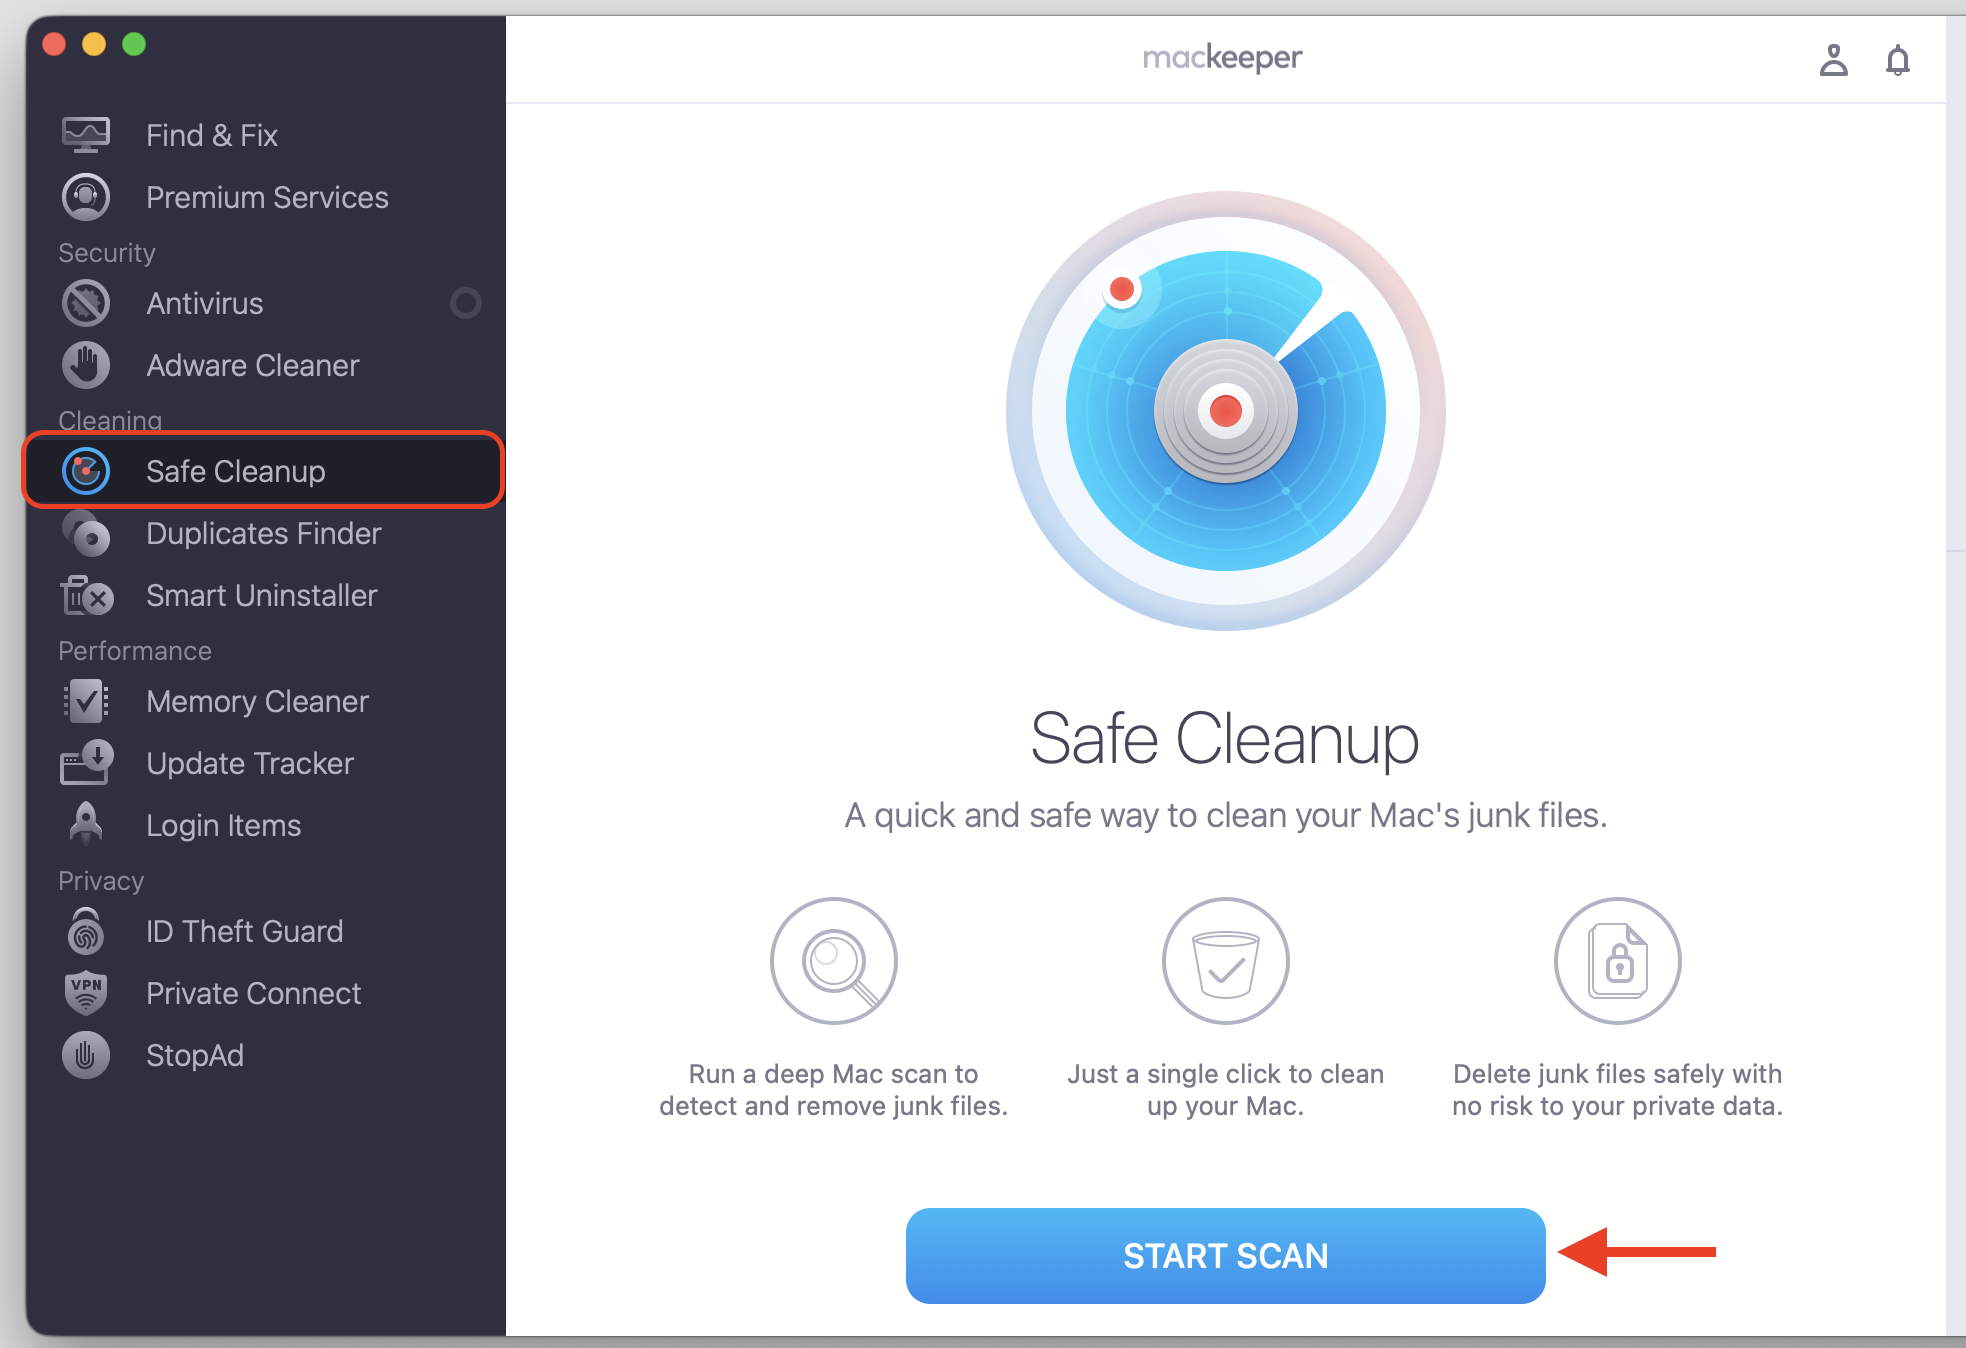
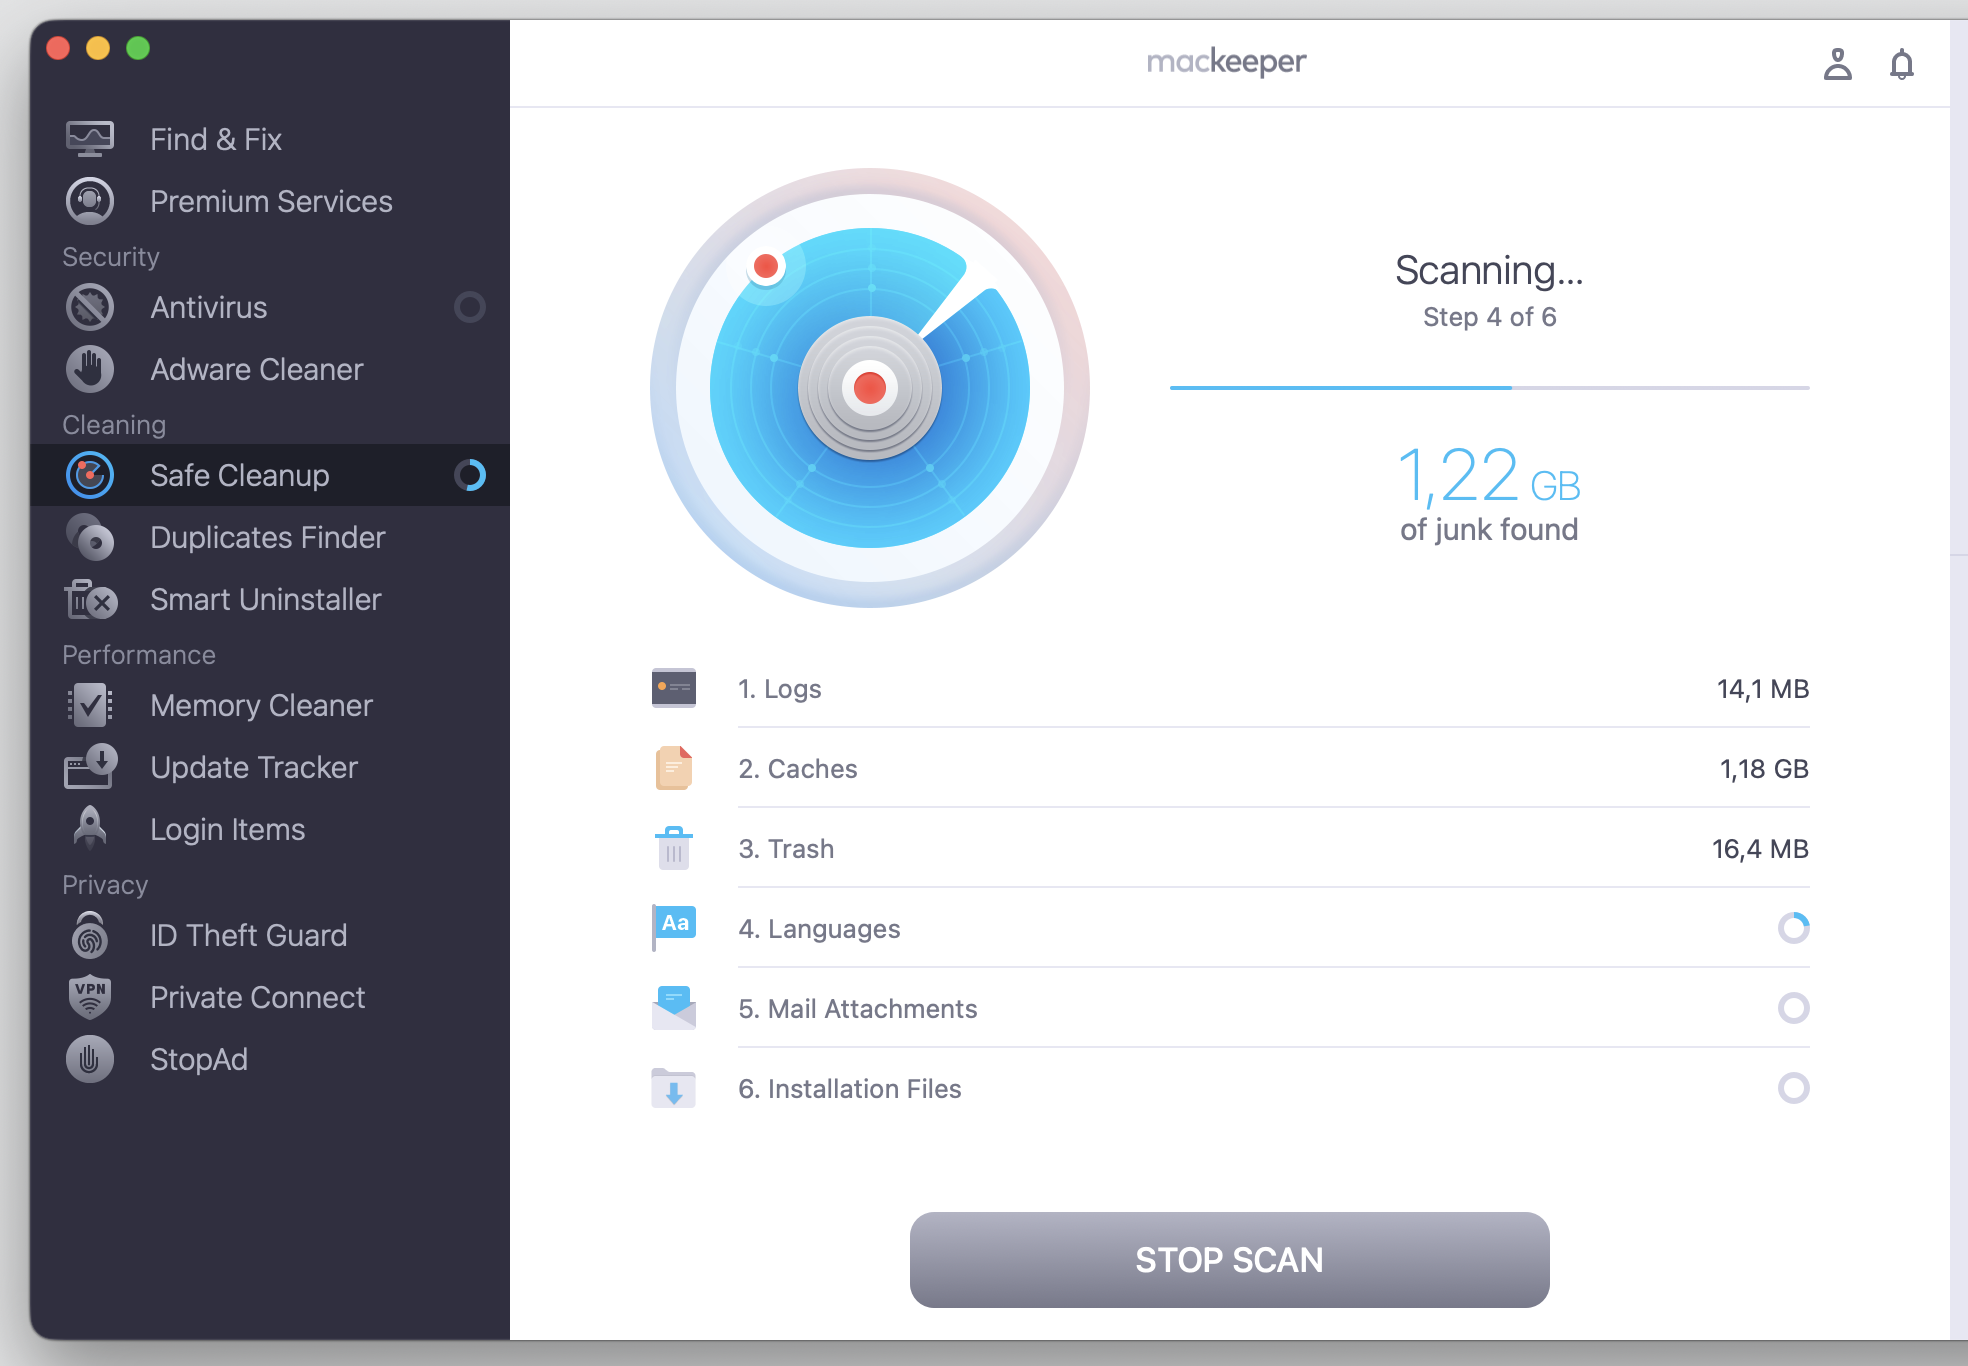
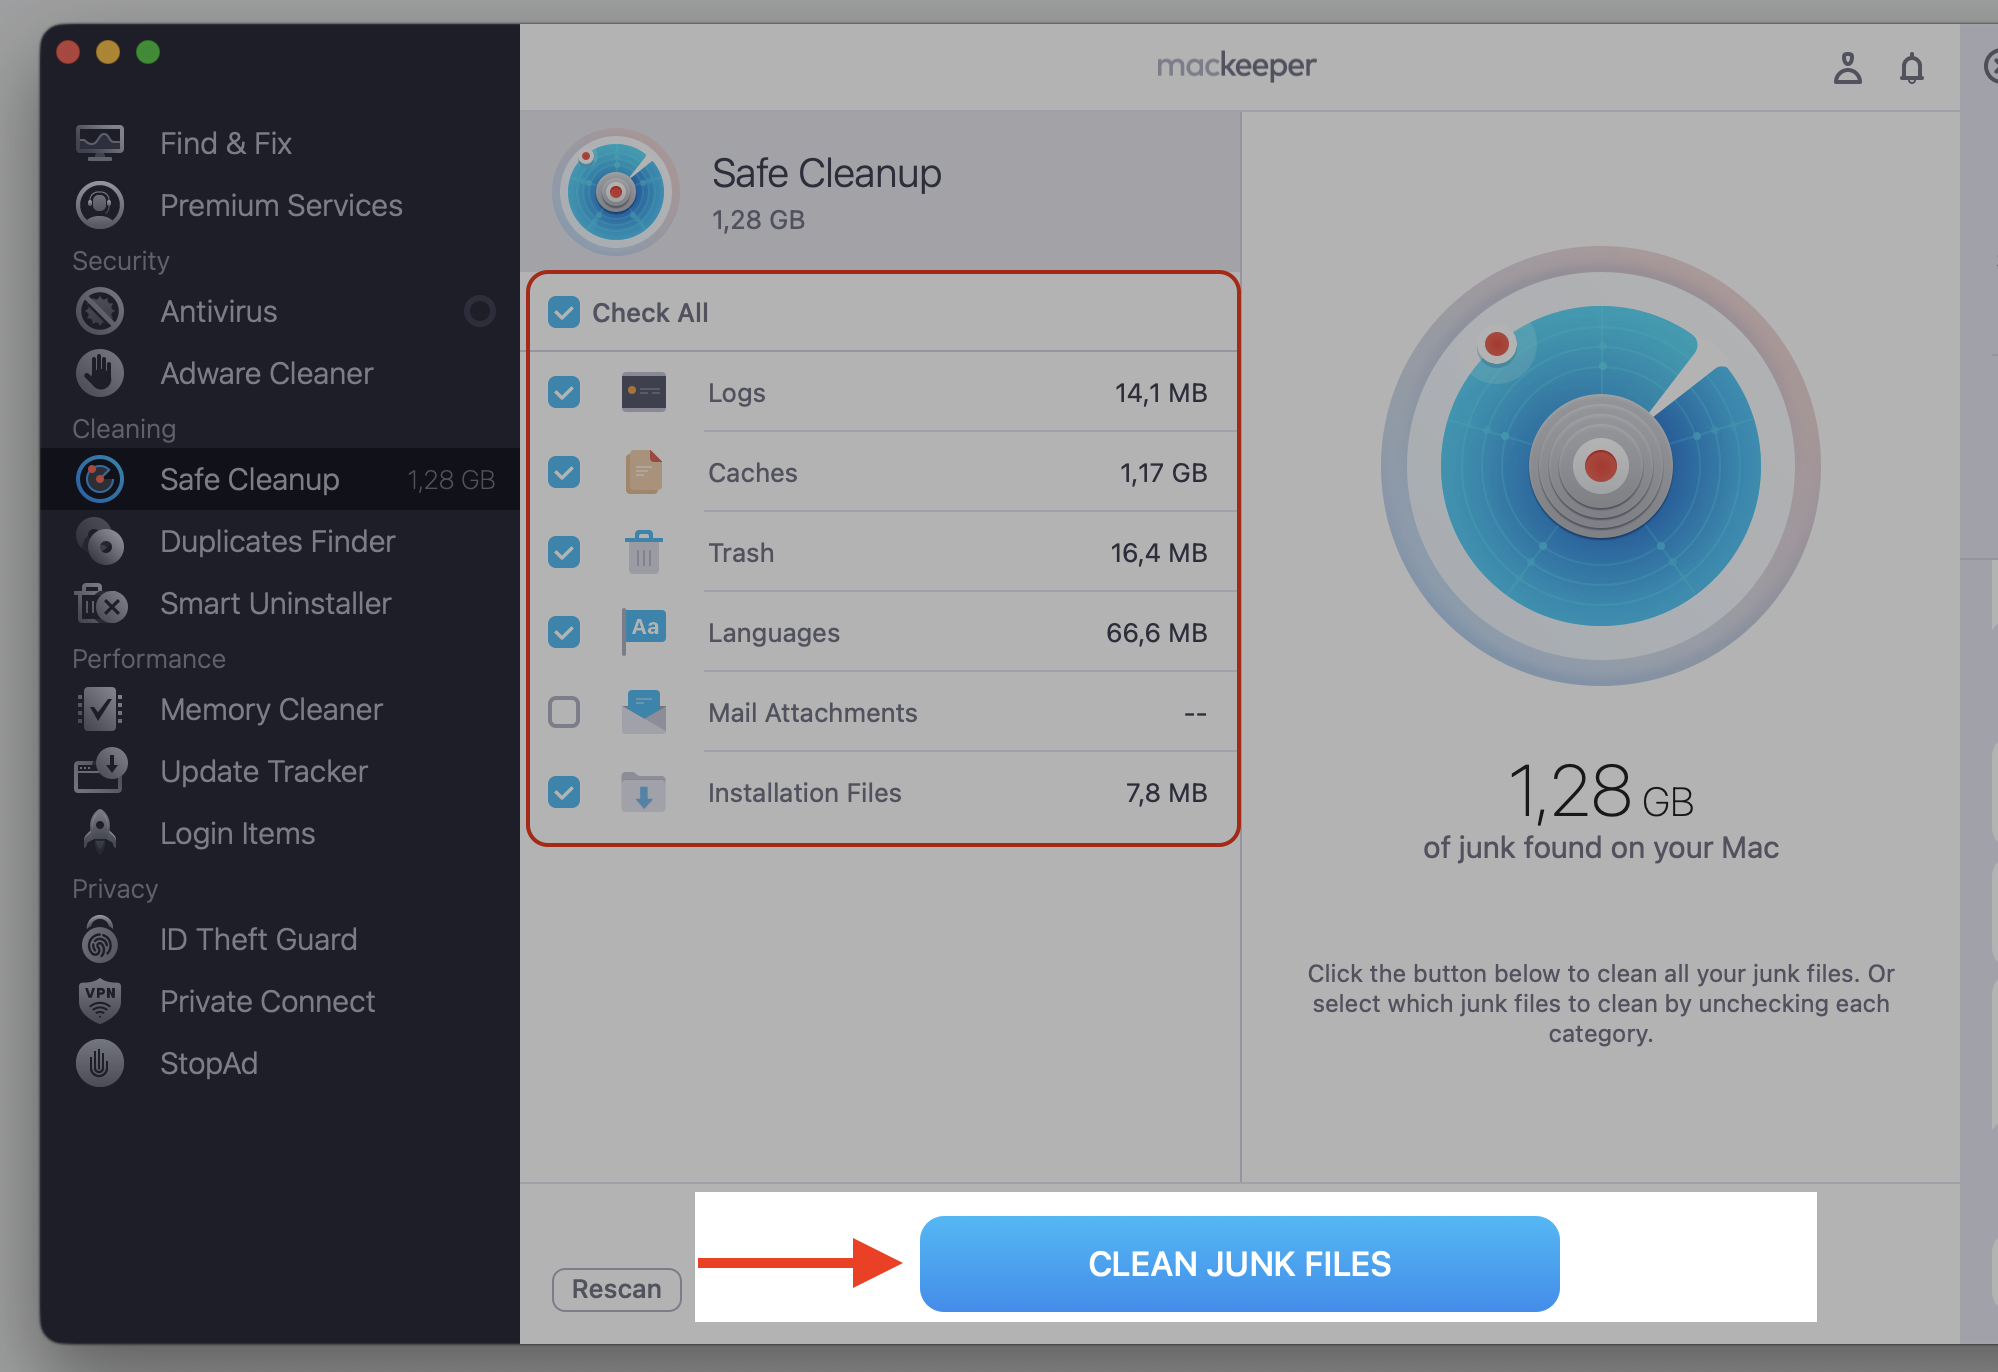
To start cleaning your Mac in an easy and safe way, do the following:
Pick the boxes you consider relevant, then confirm the deletion of all junk with the Clean Junk Files button.
Step 1. Go to MacKeeper > Safe Cleanup and Start ScanStep 2. Wait until the scan is finishedStep 3. Check the desired boxes and proceed with Clean Junk Files
How to check how much space Apple Music uses on Mac?
Before clearing files, let’s find out what’s using your storage. Music files vary in size, so the numbers can surprise you.
Let’s take a look together:
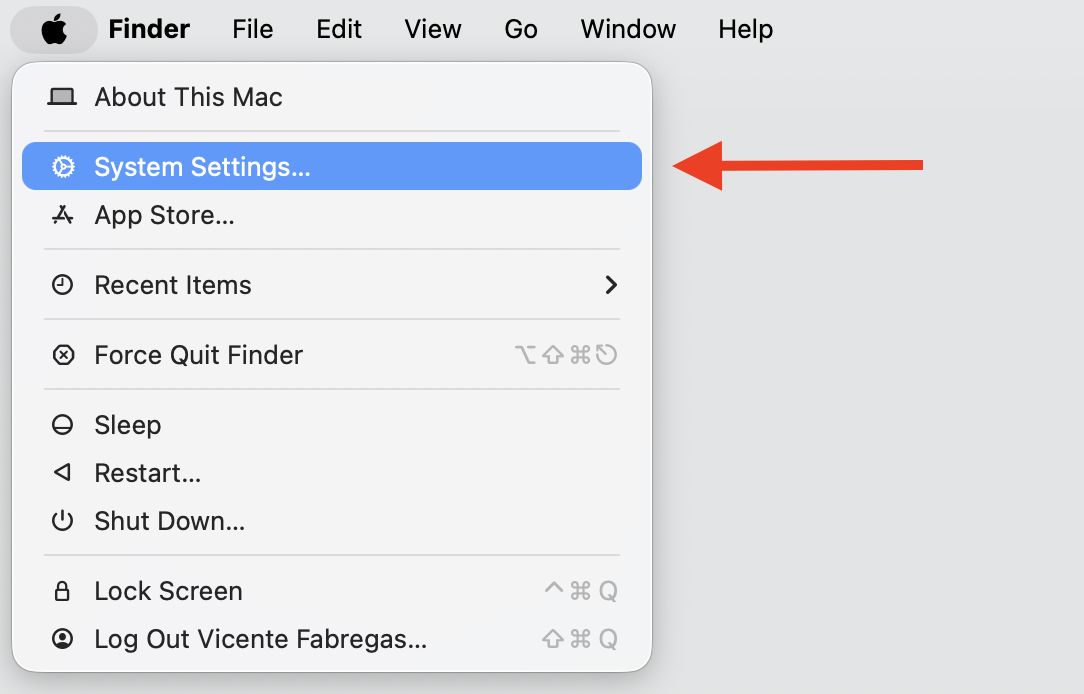
Click the Apple menu in the top-left corner, then select System Settings.
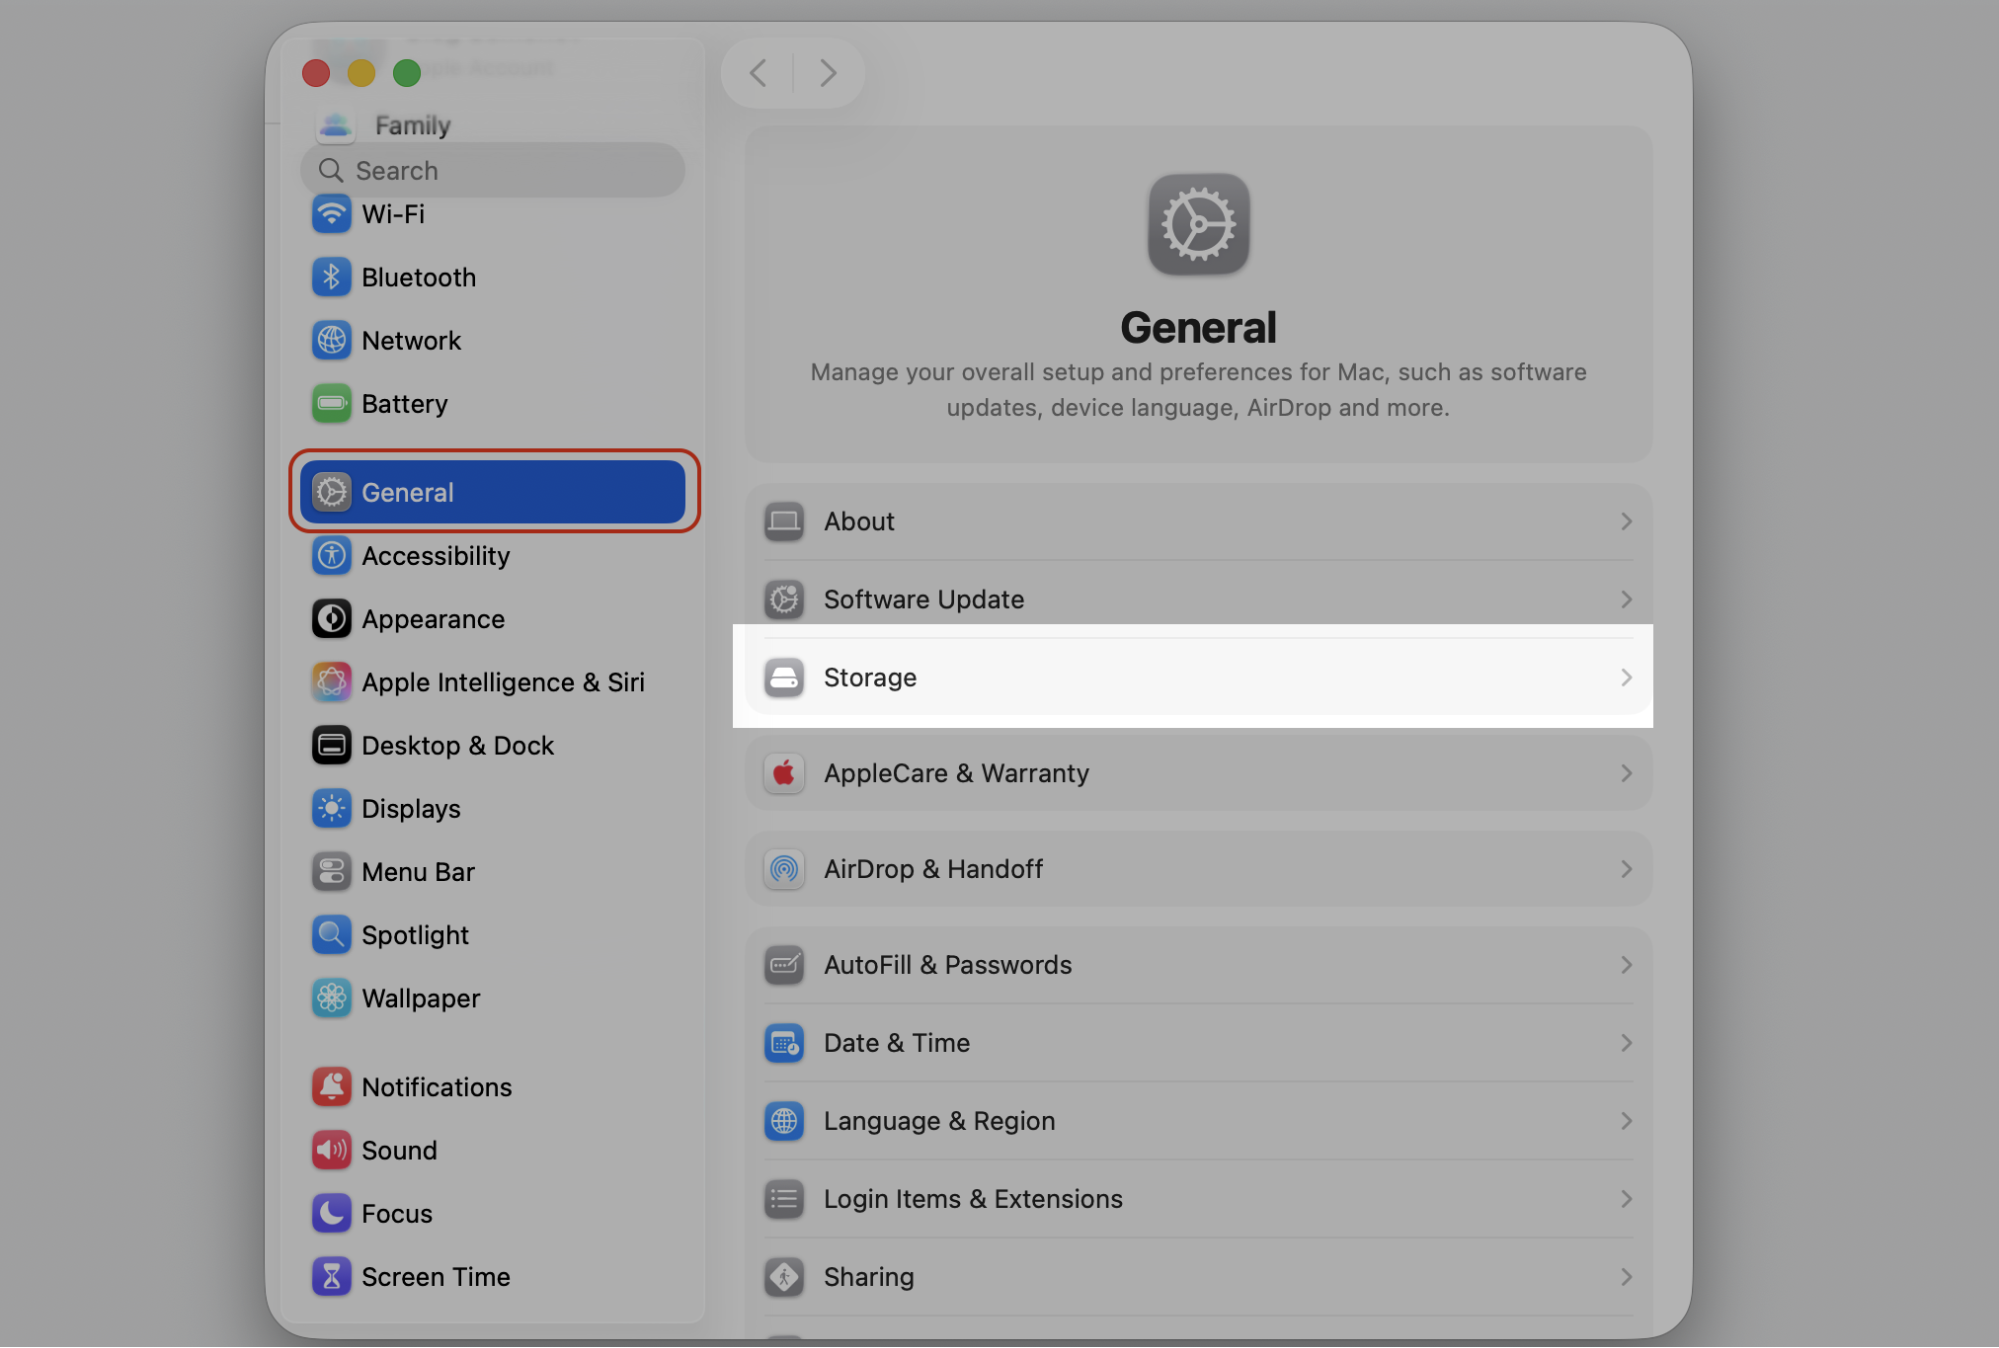
Choose General, then Storage.
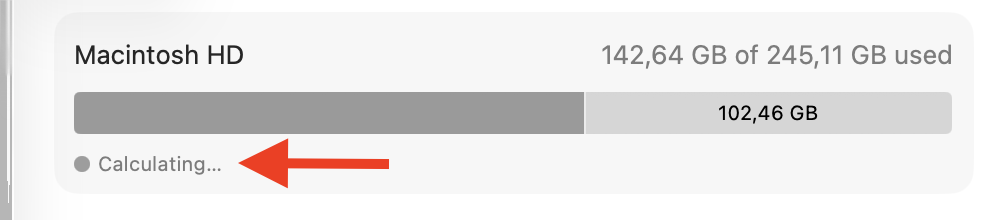
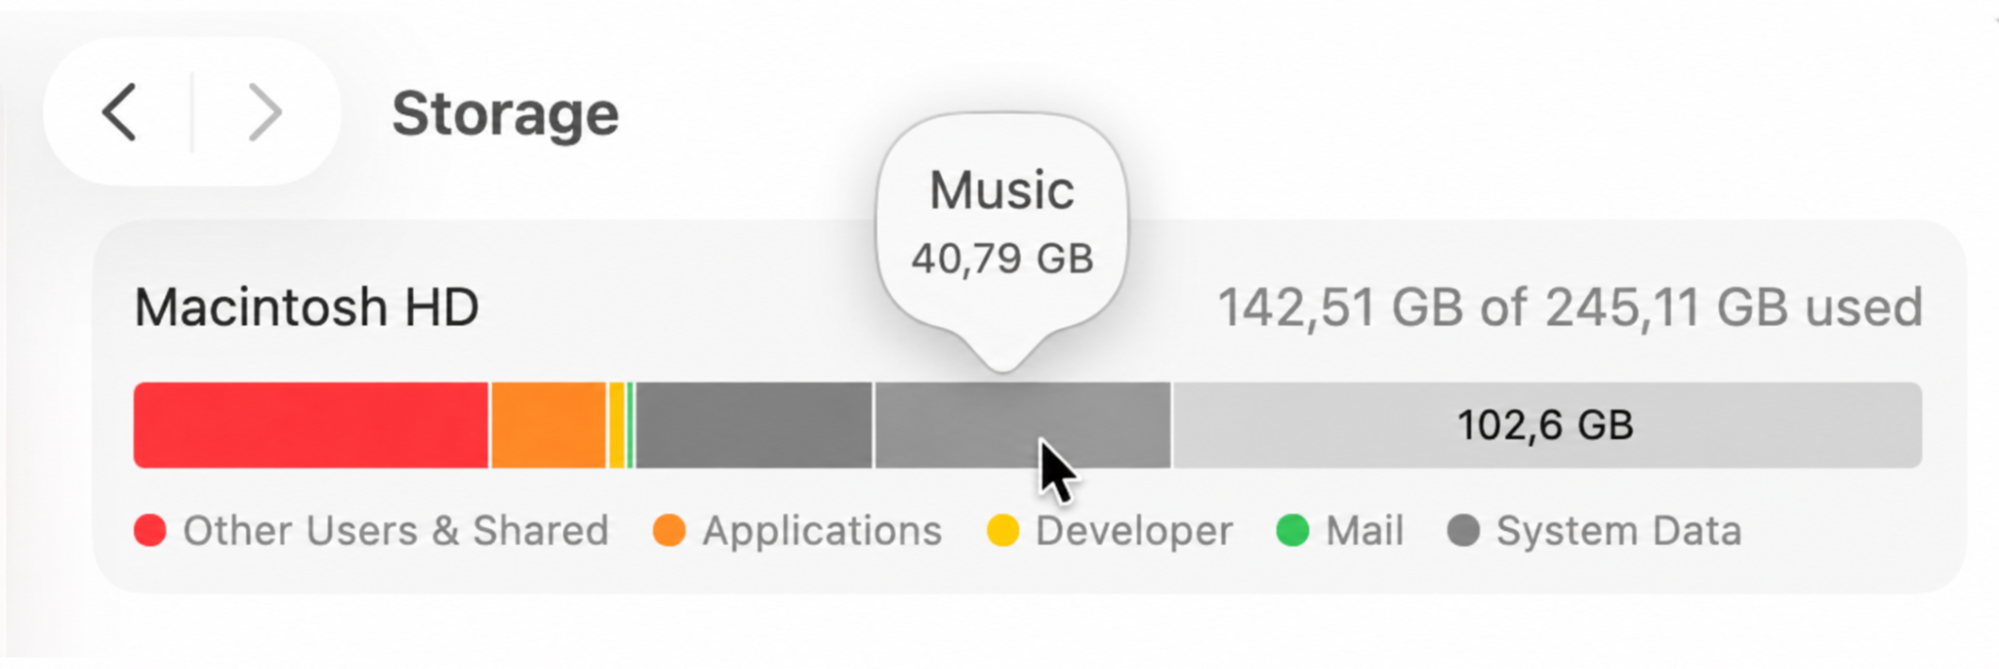
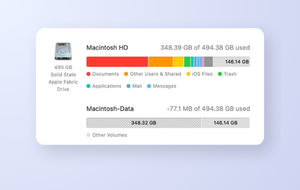
Wait for the bar to finish loading, then review categories like Music, Documents, and System Data.
Hover over the Music section to see how many GB Apple Music takes up.
Step 1. Go to Apple Logo > System SettingsStep 2. Select General from sidebar and go to Storage sectionStep 3. Wait for the bar to finish loadingStep 4. Review categories like Music, Documents, and System Data
Can you delete Apple Music files without losing your library?
Yes, and knowing the difference helps you delete the right thing. Removing a download takes the local file off your Mac but keeps the song in your library to play through streaming. Moreover, we’ve noticed that deleting a local file removes an imported track you added yourself. Removing an item from your library takes it out of your collection on every device.
In short, removing downloads frees space without shrinking your collection, while deleting library items changes what you can play offline.
How to fix disk full Apple Music issue?
An Apple Music disk full error doesn’t have to be stressful. A disk full on Apple Music message usually comes down to a few places to look. Let’s start with safe storage checks, then work through cleanup options based on whether space is used by downloads, cache, library files, or synced devices. If the app keeps stalling, our article on Apple Music not working covers related steps.
Try our methods below, starting with the quickest wins and working toward the bigger cleanups.
1. Remove downloaded Apple Music songs
Downloaded tracks and albums can take up a lot of space, yet they stay available to stream after you remove them. We’d start here, since it frees the most room fast.
It takes only a moment to remove them:
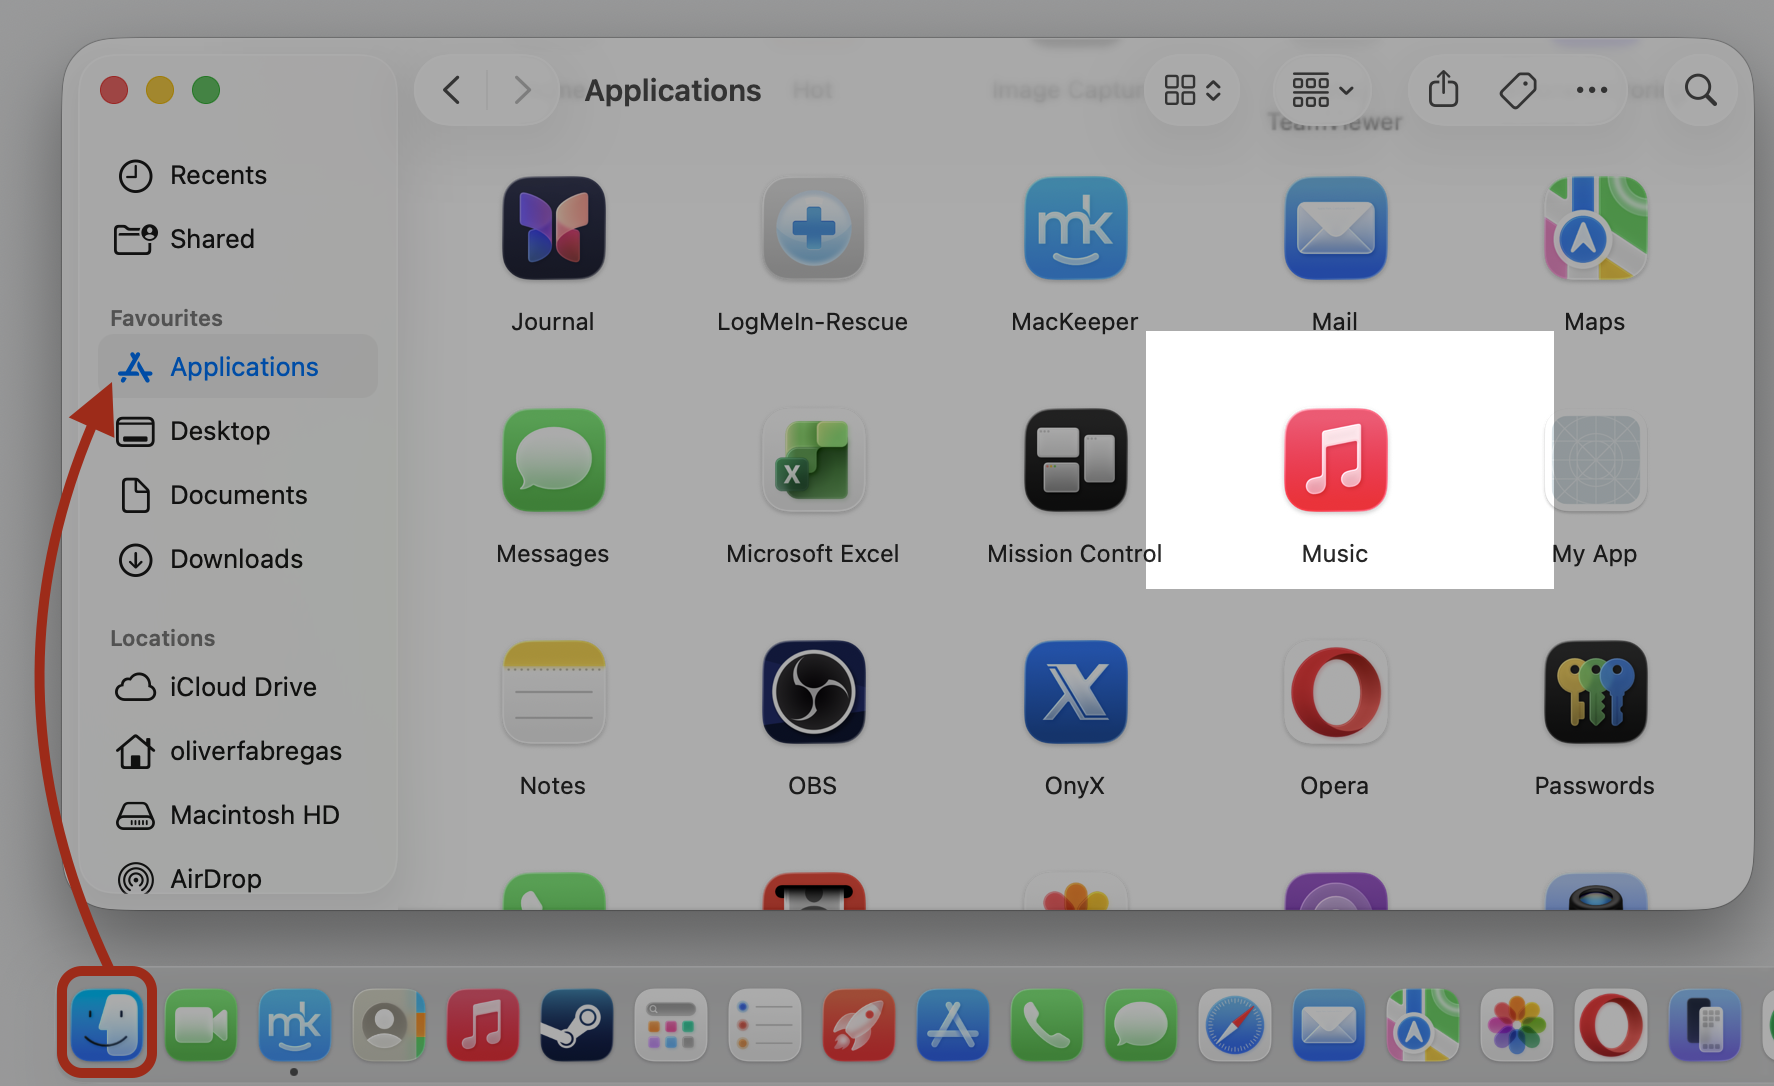
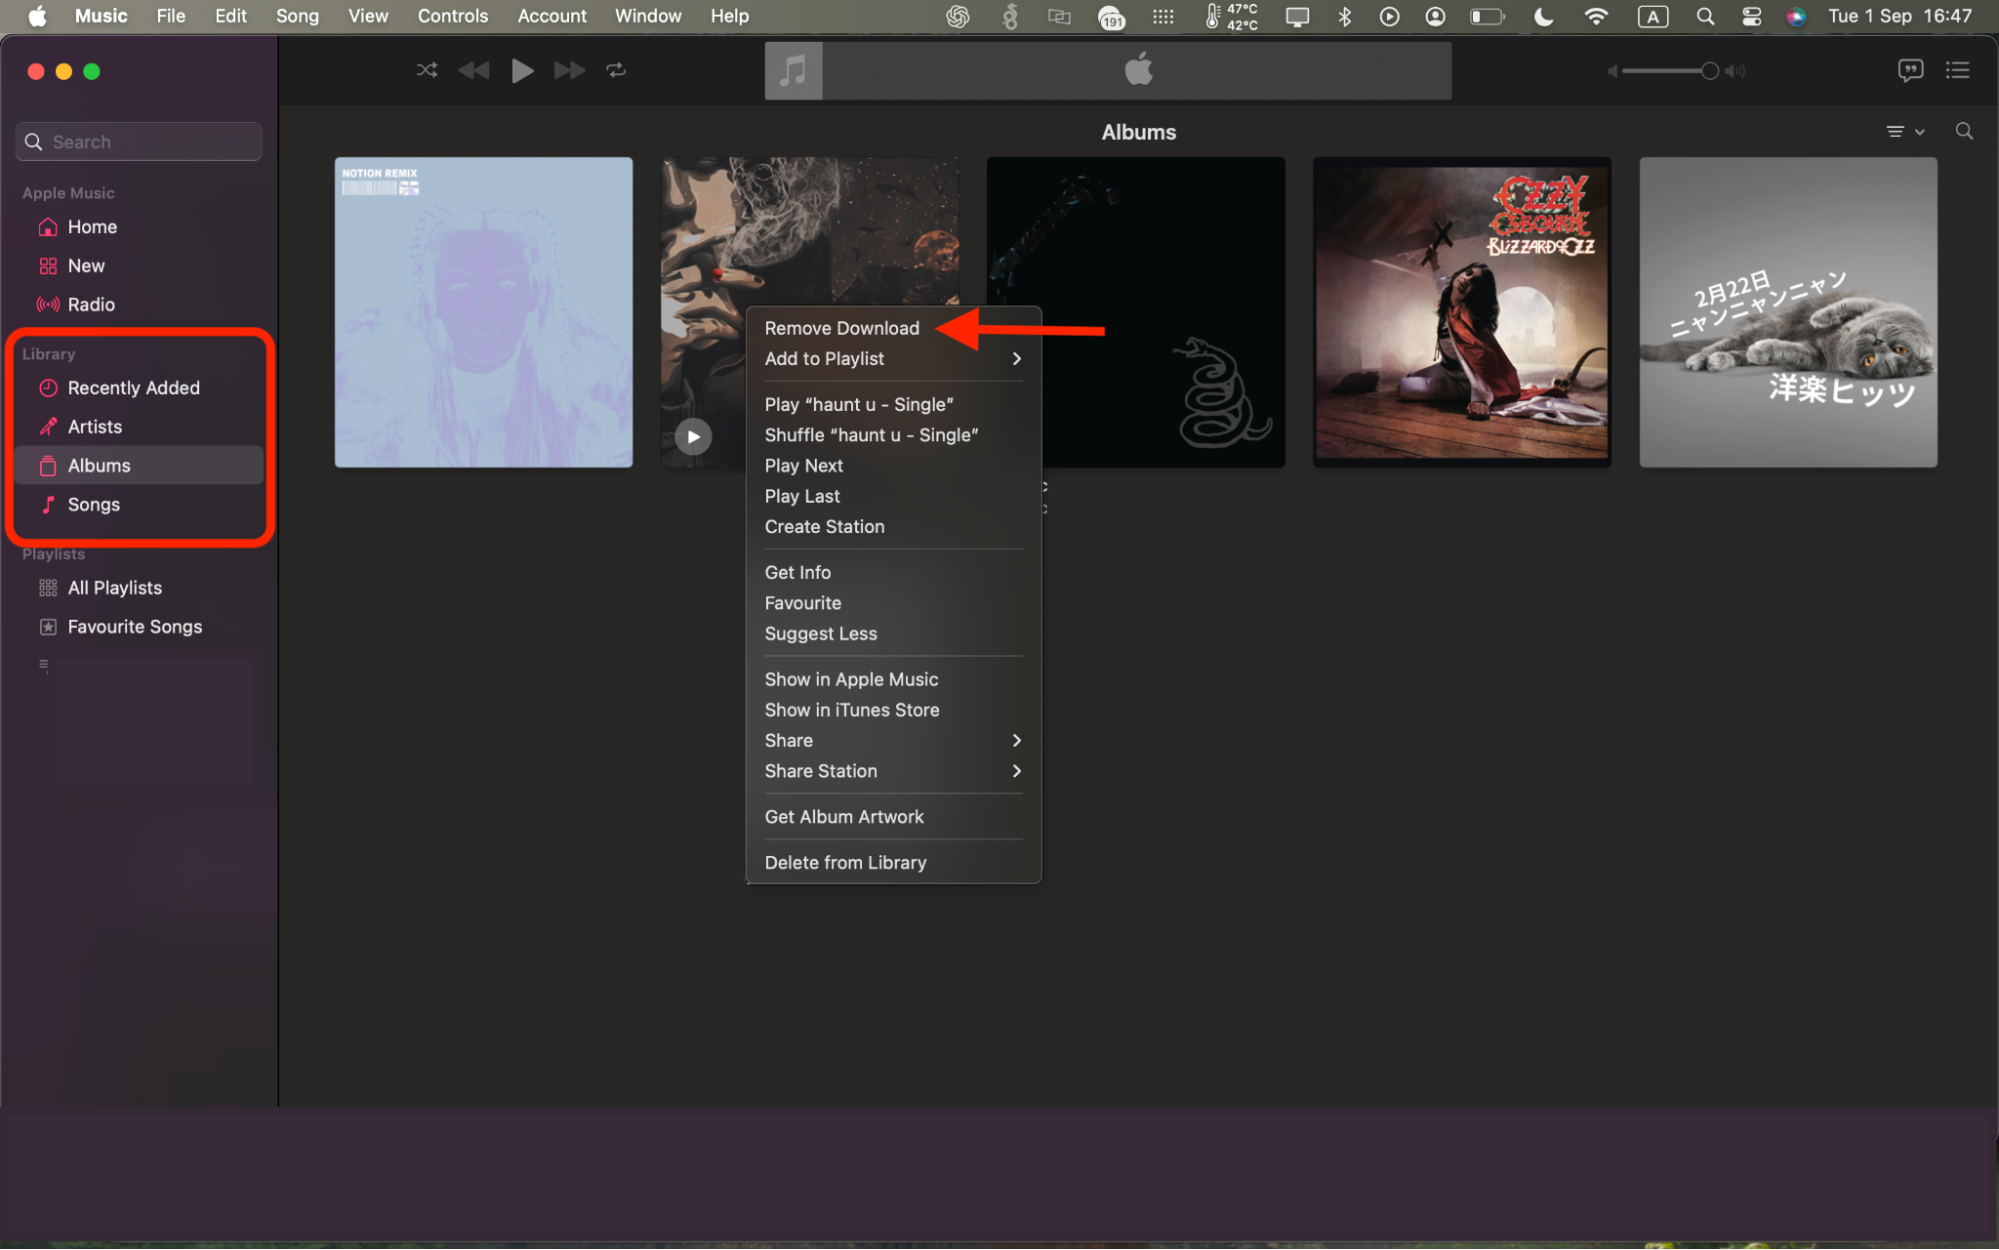
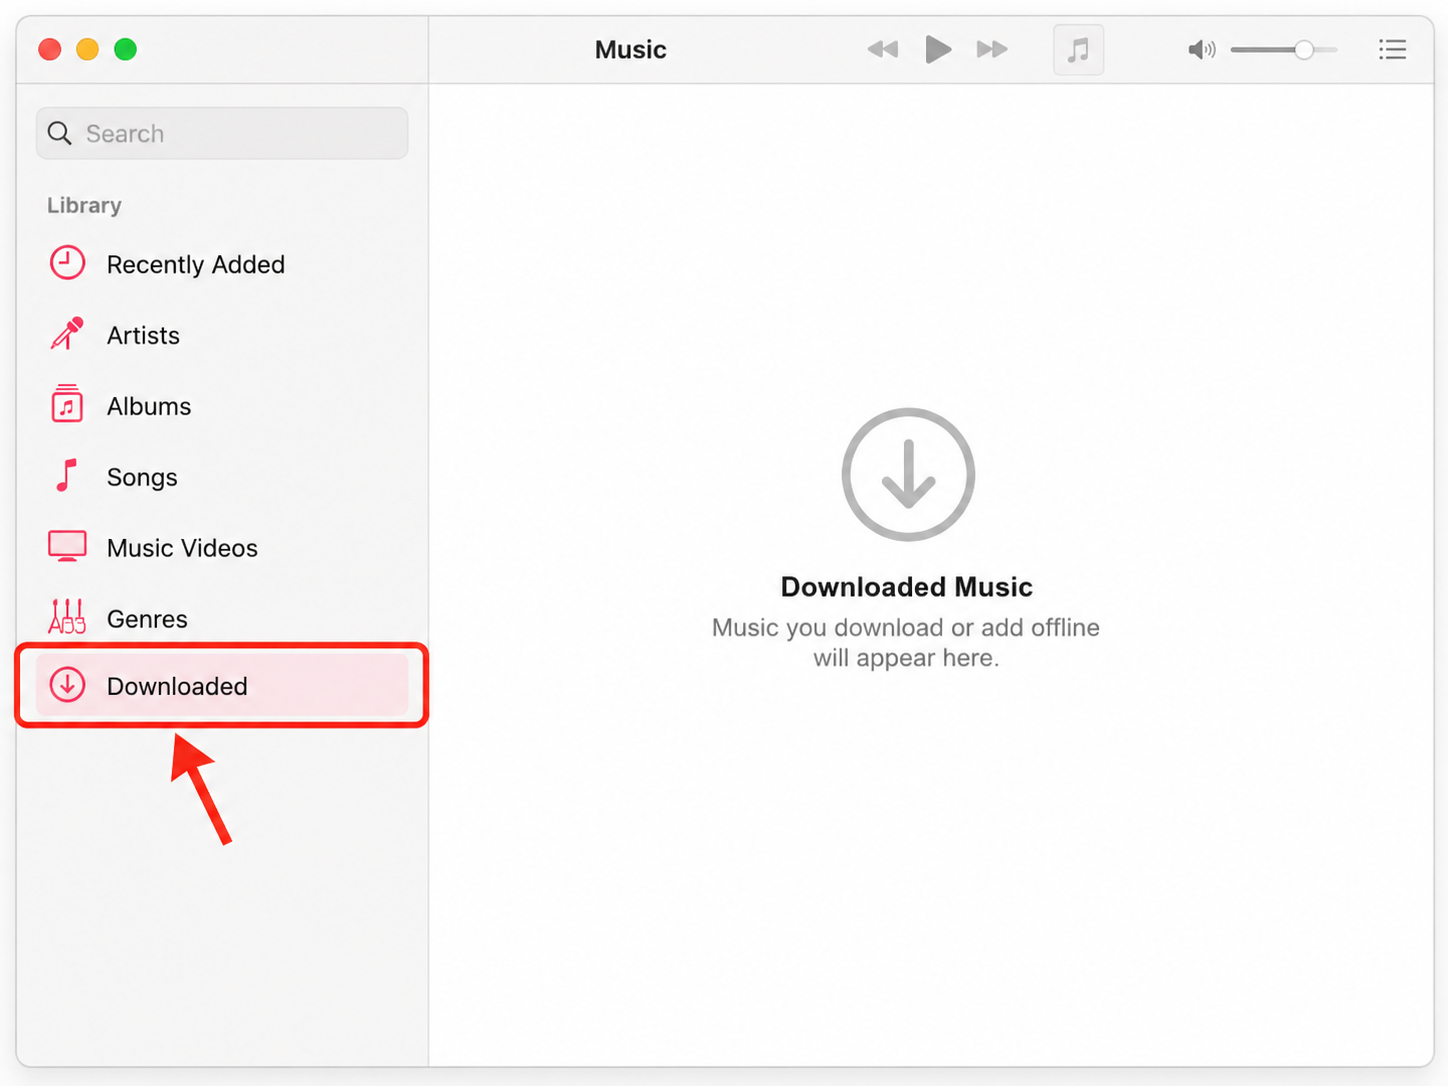
Open Music and go to your Library.
Control-click a song, album, or playlist you’ve downloaded.
Select Remove Download.
Step 1. Go to Finder > Applications > Music appStep 2. Go to Library > Control-click on the song > Remove Download
2. Delete old music files and duplicates
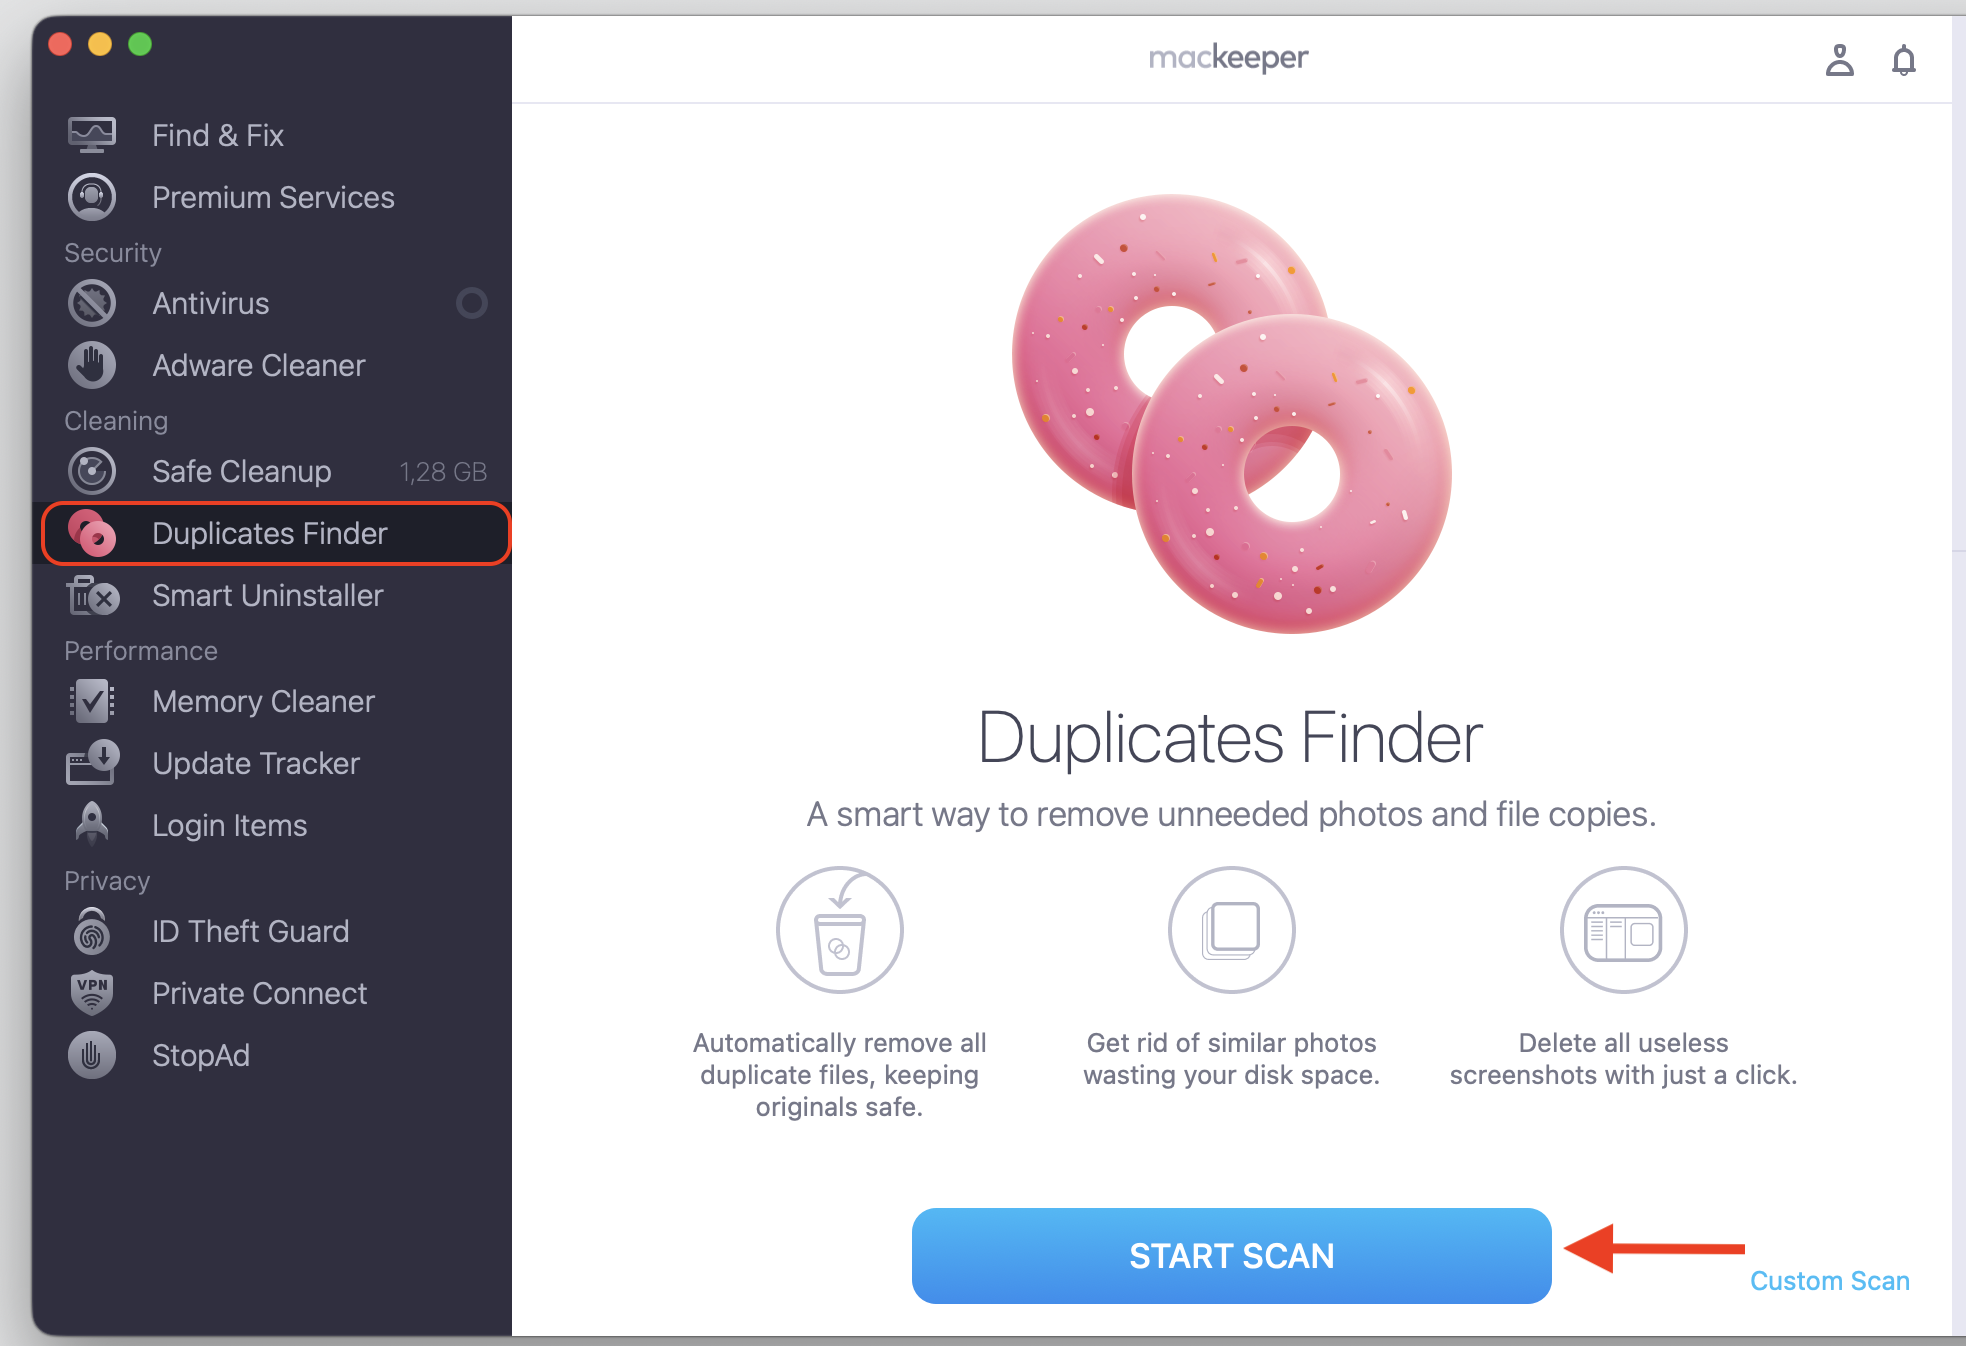
Older imported tracks, duplicated songs, and copied media folders pile up fast, especially if you’ve moved libraries between a MacBook and another device. We suggest using MacKeeper’s Duplicates Finder instead of the manual file search and deletion, as identifies duplicate files and removes them while keeping your originals safe.
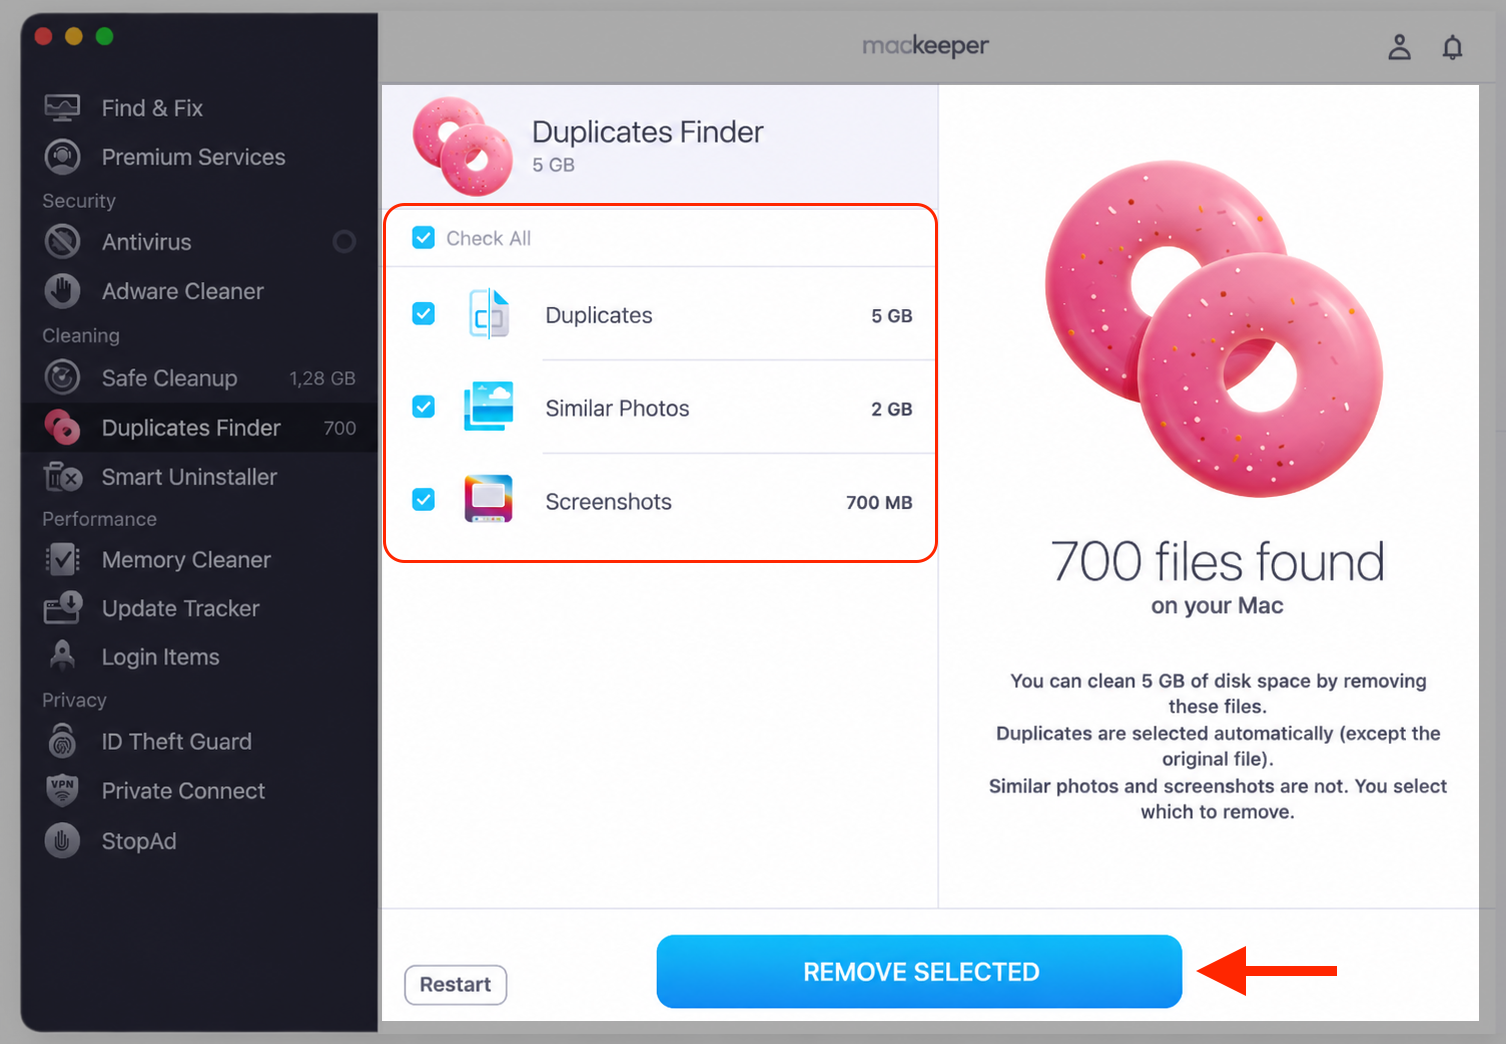
Select the copies you don’t need, then click Remove Selected.
Step 1. Go to MacKeeper > Duplicate Finder and Start ScanStep 2. Check All before proceed and press Remove Selected button
3. Clear Apple Music cache and temporary files
Apple Music and related media services may store cache or temporary data that you can sometimes clear to free up space. In our experience, clearing it also helps when songs keep loading slowly, and you can delete temp files on Mac safely with the right approach.
We’ll free up that cache in four steps:
Quit the Music app.
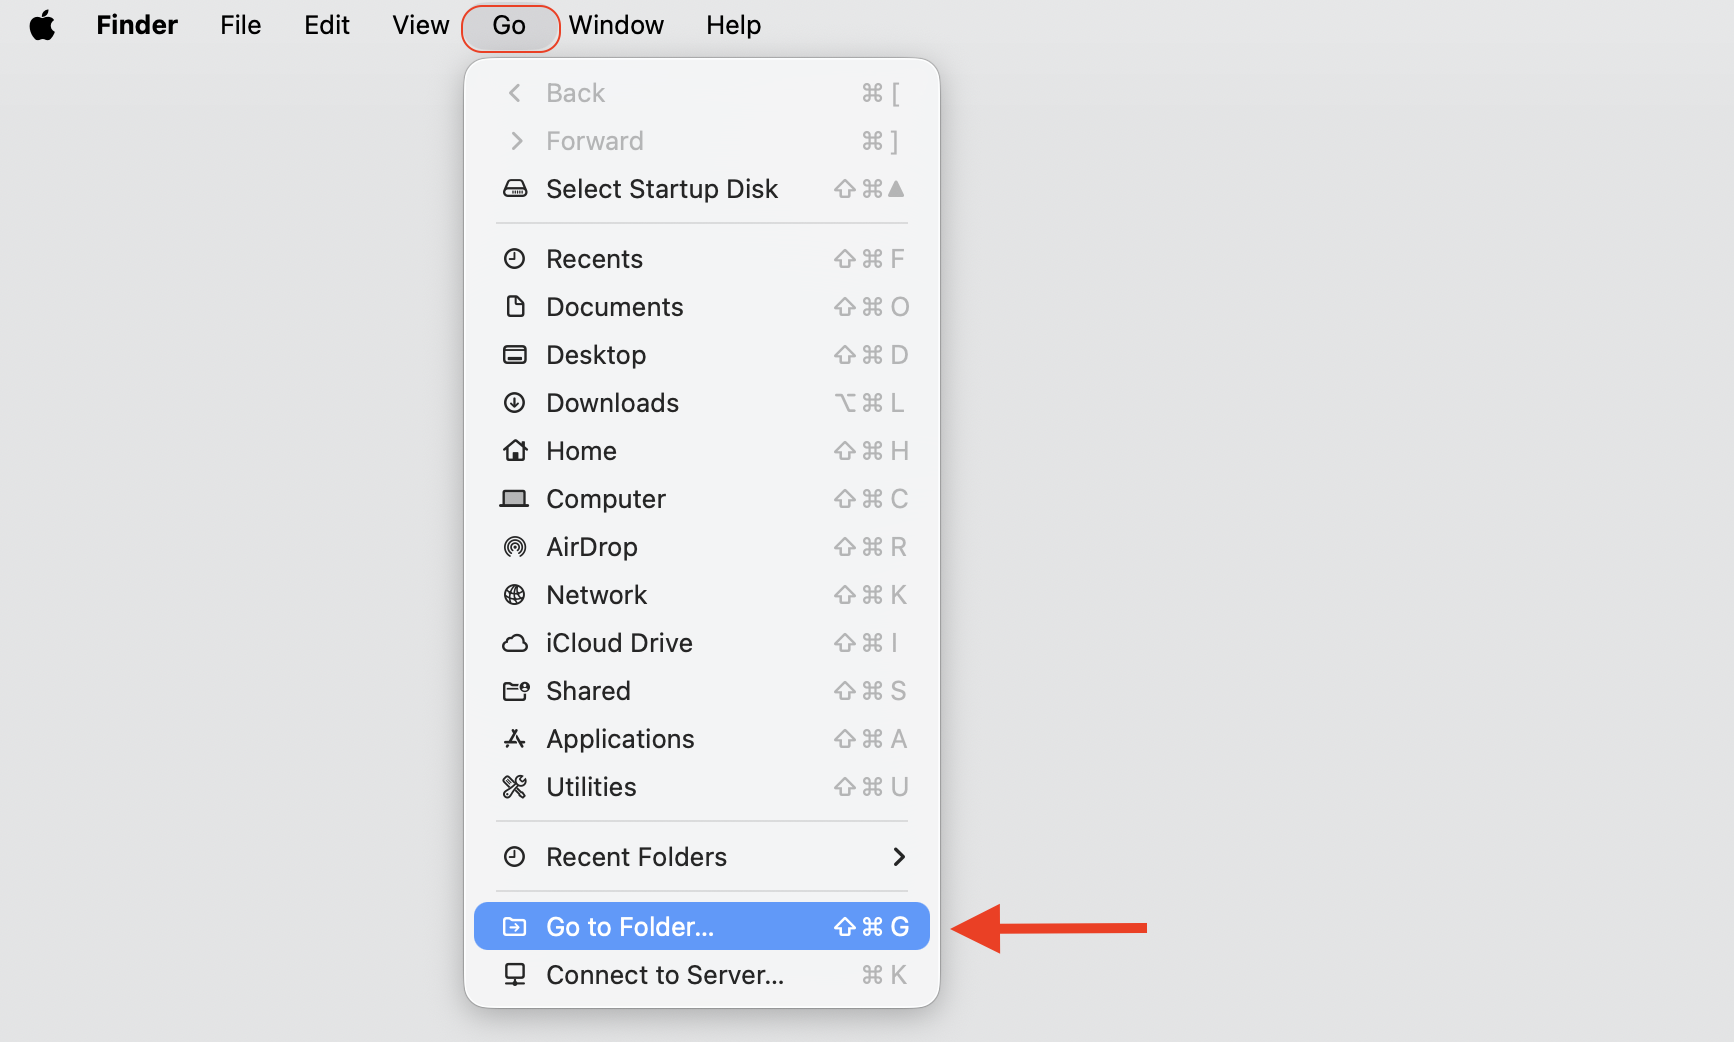
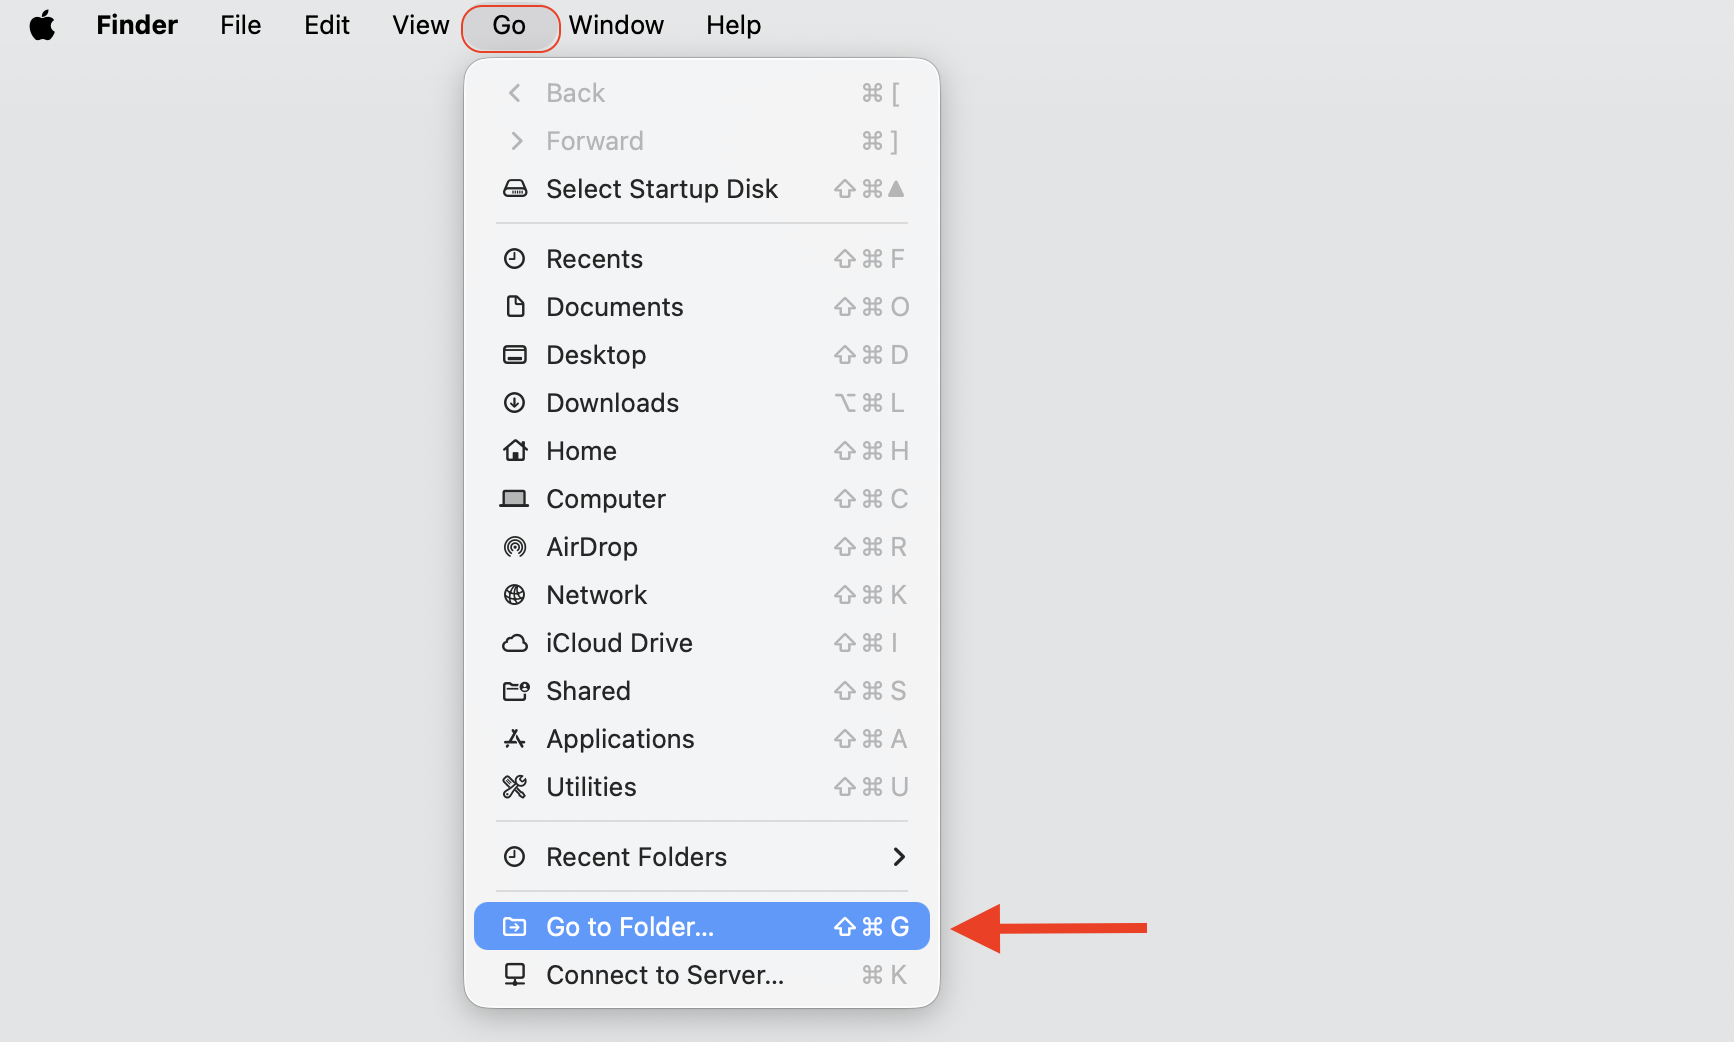
In Finder, click Go, then Go to Folder.
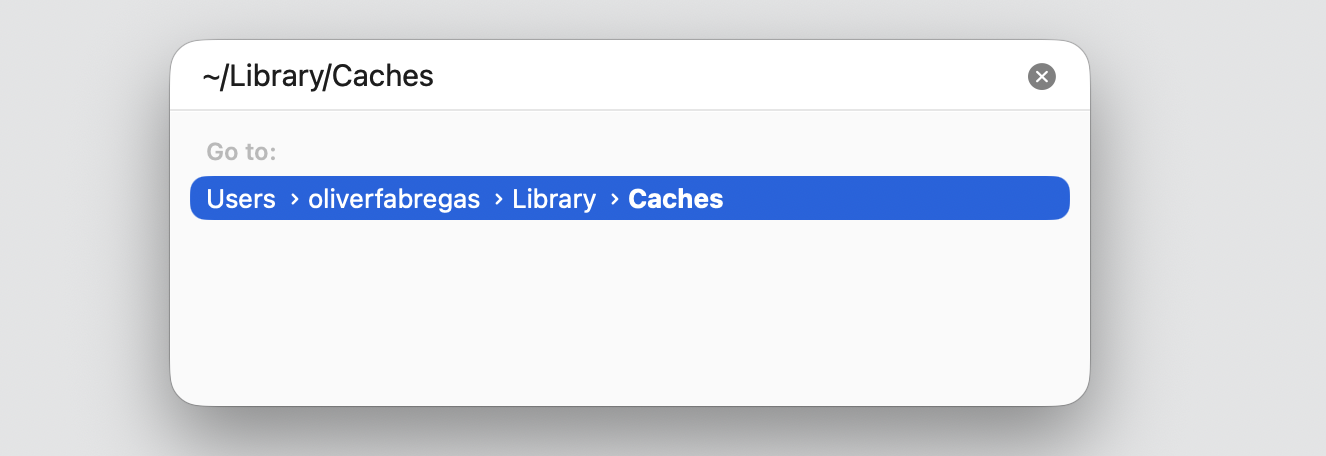
Type ~/Library/Caches and press Return.
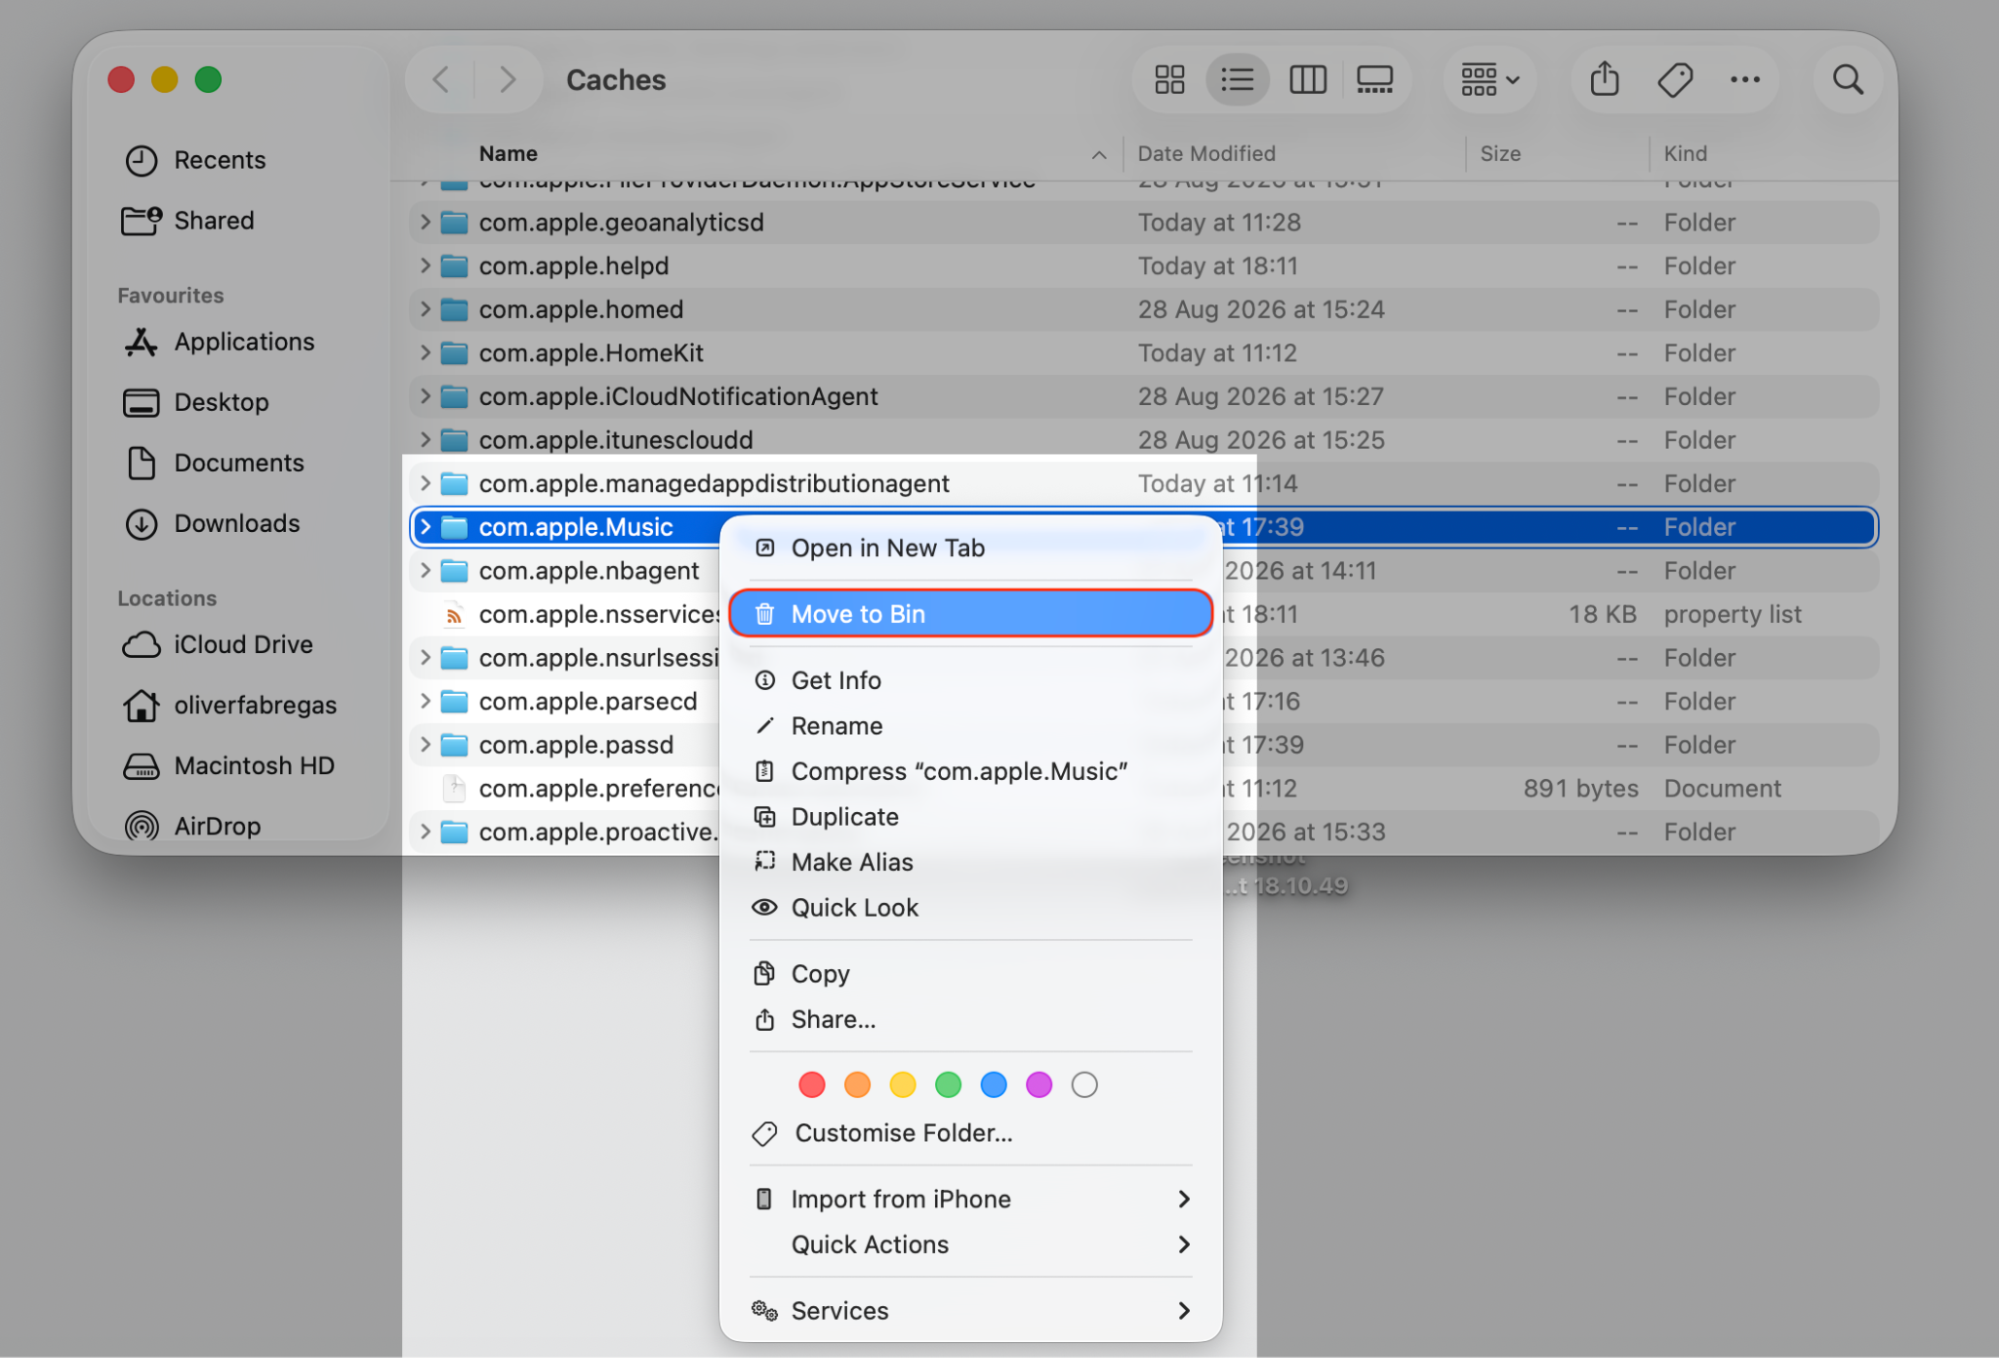
Move Apple Music-related cache folders to the Bin.
Step 1. In Finder, click Go, then Go to FolderStep 2. Type ~/Library/CachesStep 3. Select Music-related folder and Move to the Bin with the Control-click
4. Empty Trash after deleting music files
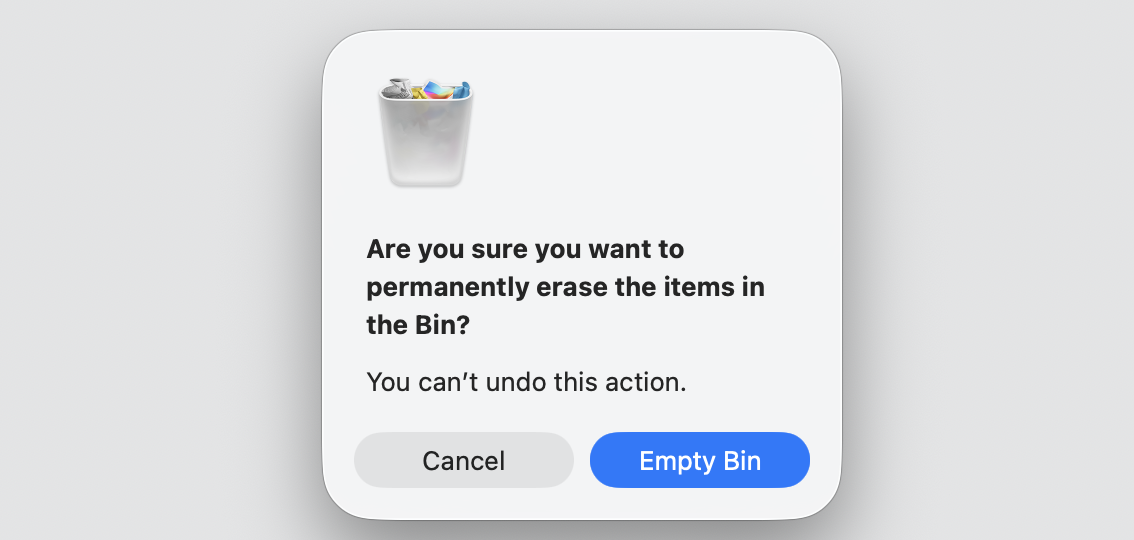
We see this a lot—deleted media still sits on your disk until the Bin is emptied. Until you empty trash on Mac, that space stays locked.
Let’s finish what we started:
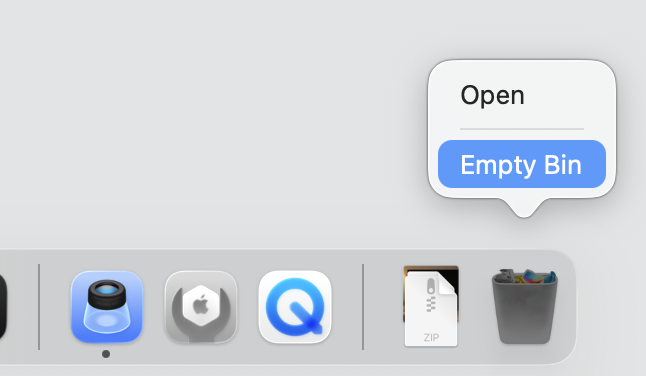
Control-click the Bin icon in your Dock.
Select Empty Bin.
Confirm to permanently delete the files.
Step 1. Select the Bin > Empty Bin with the Control-clickStep 2. Confirm the action
5. Move Music library to external drive
If you keep a large offline library, we’d move it to an external drive to ease pressure on your internal disk. This is handy when you want to transfer files from MacBook to external hard drive and keep your collection intact.
Moving it over is straightforward with our guidelines:
Quit the Music app.
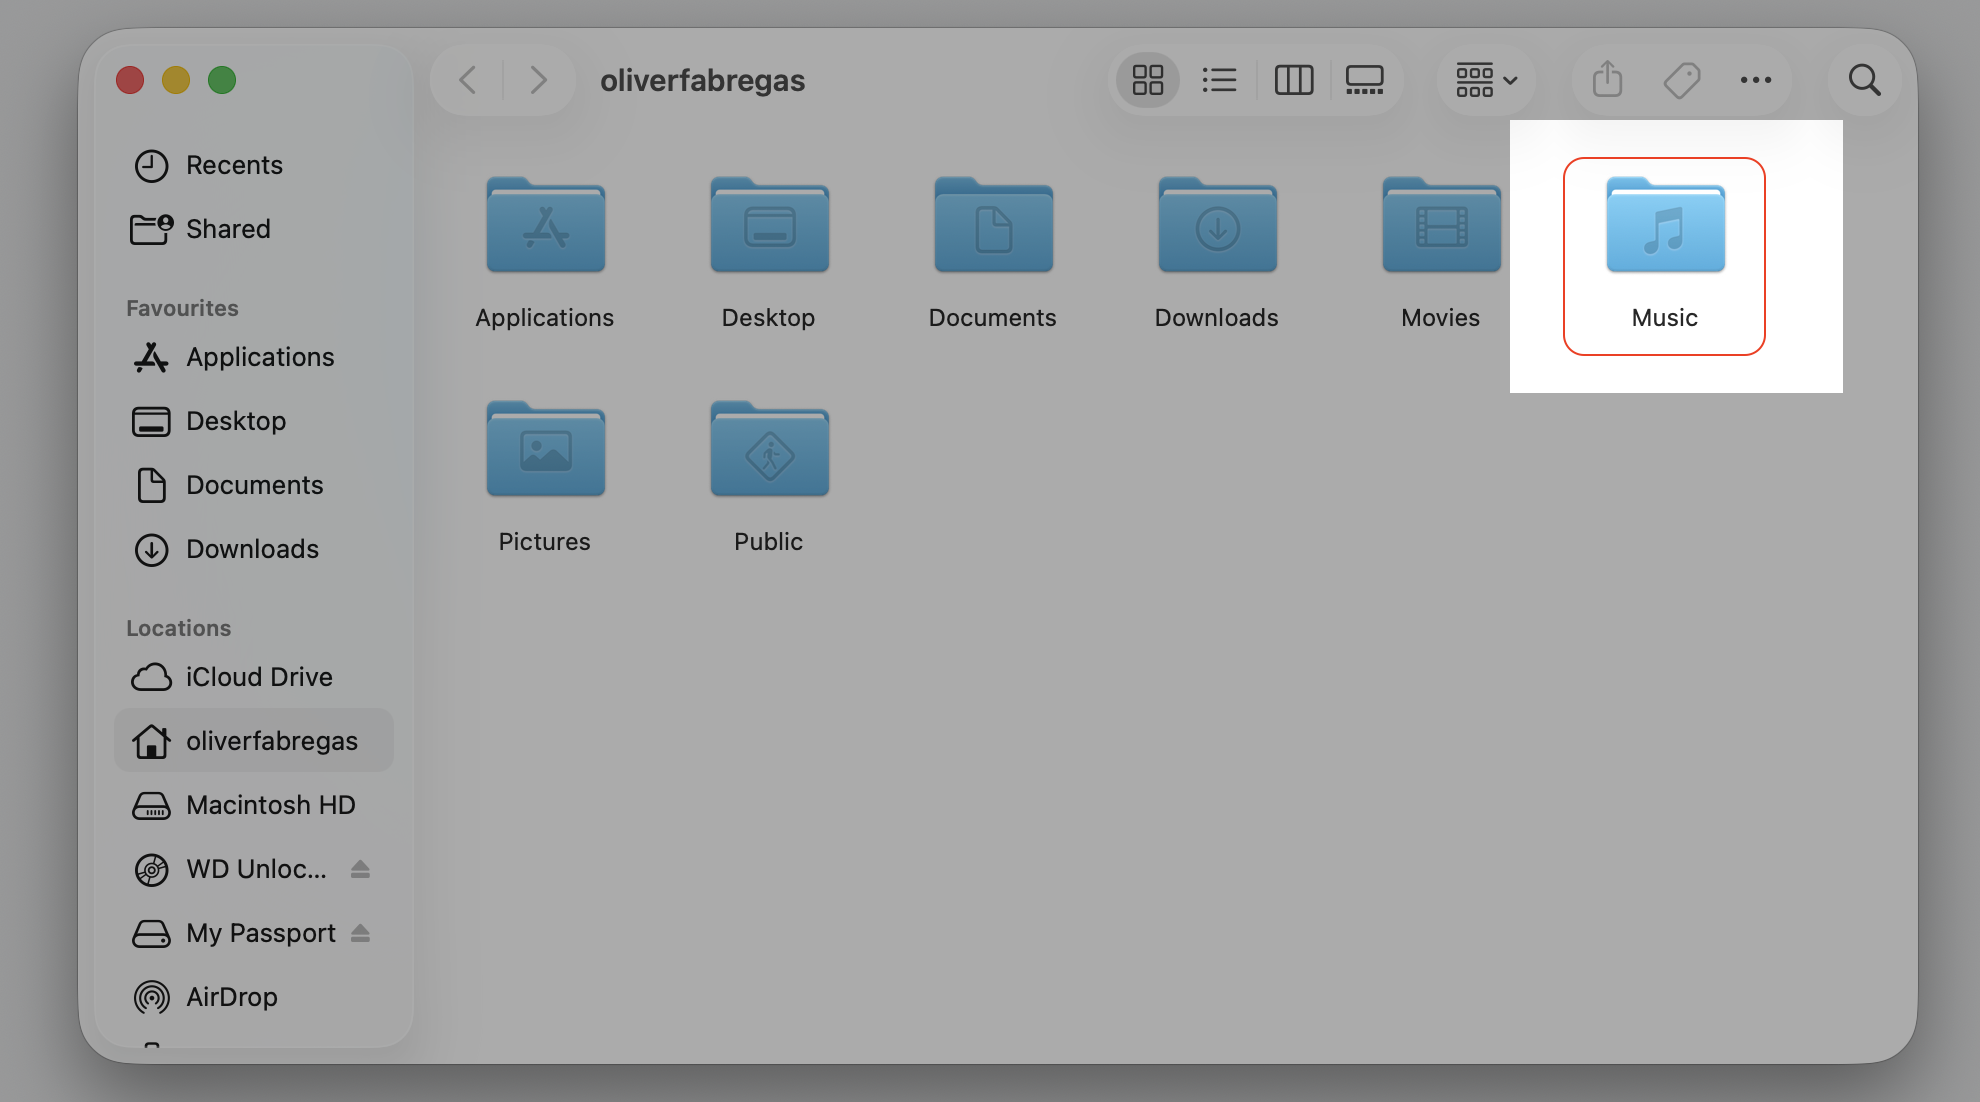
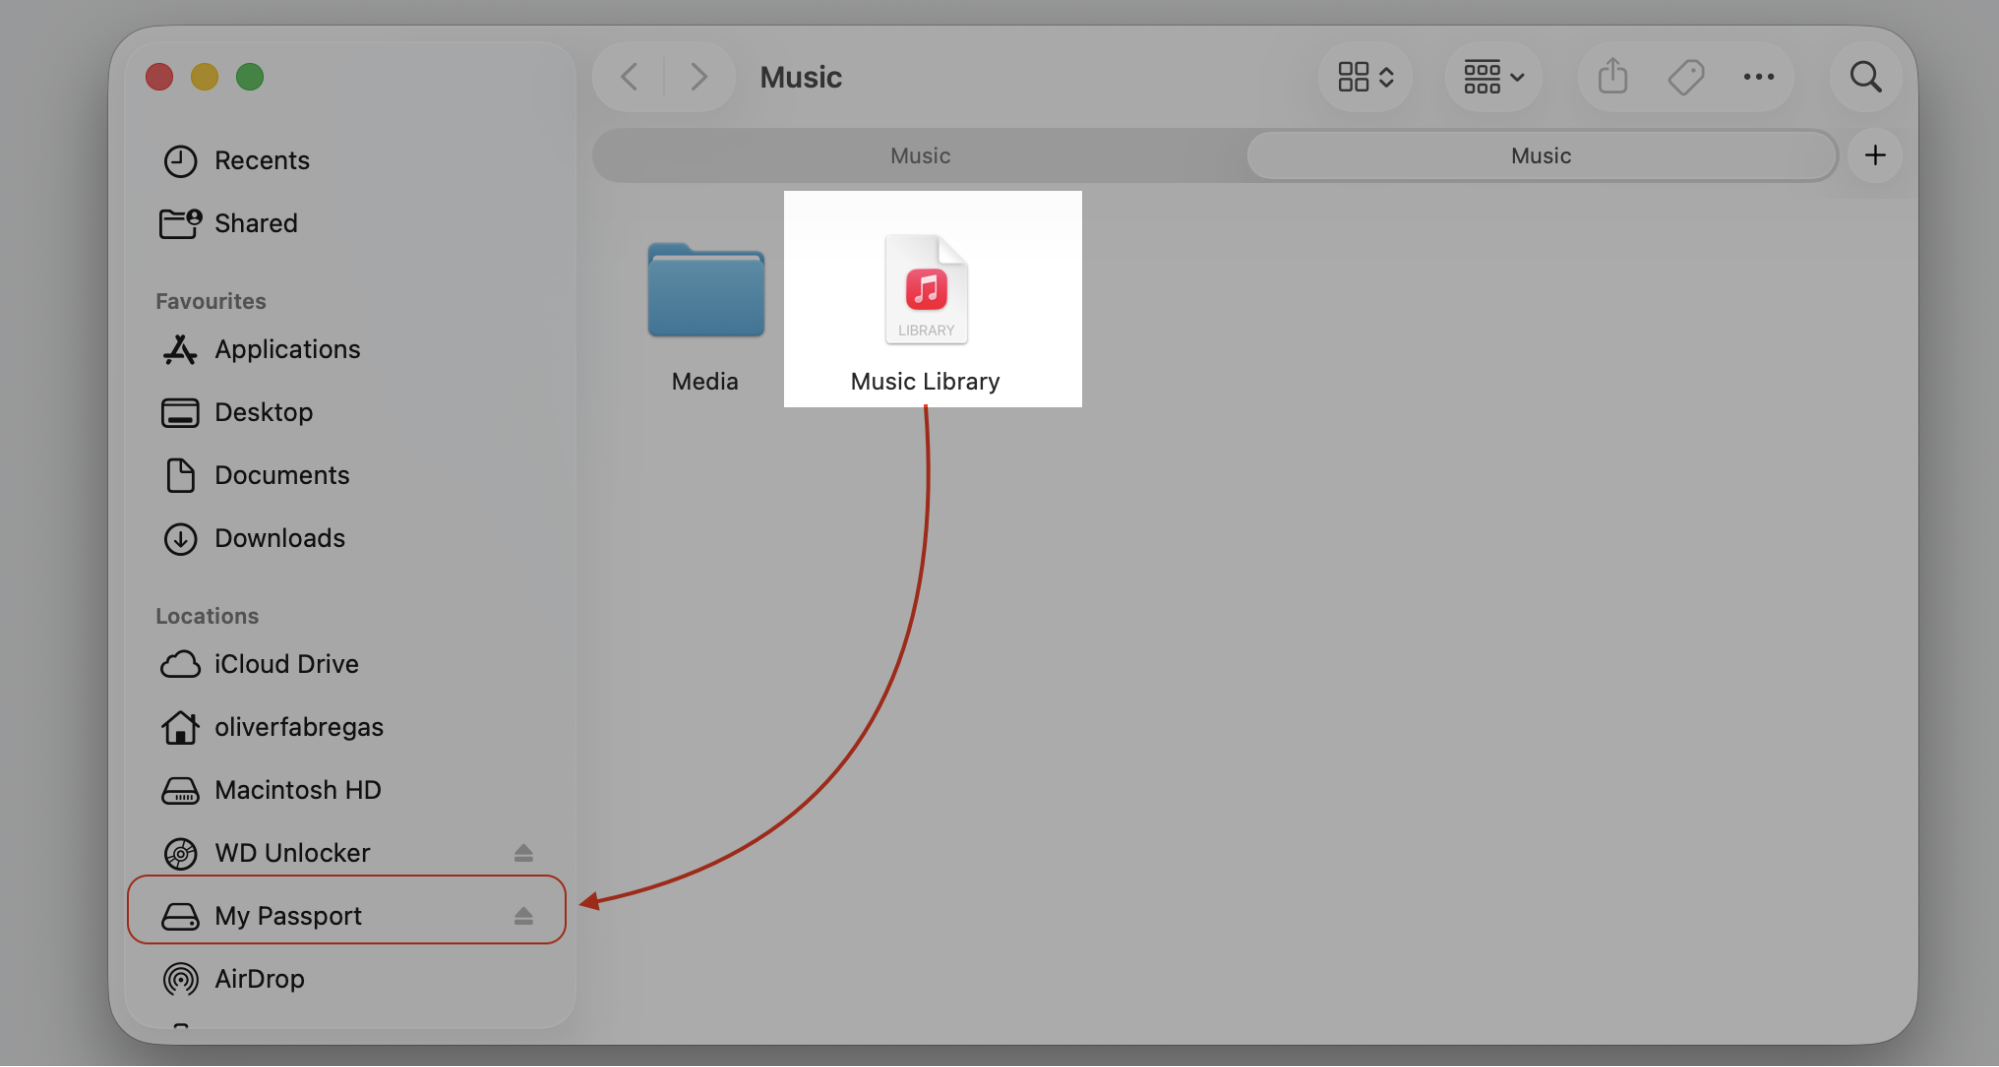
Select the Music folder from your Home directory to the external drive.
Hold Option and open Music to choose the new library location.
Select the library on the external drive.
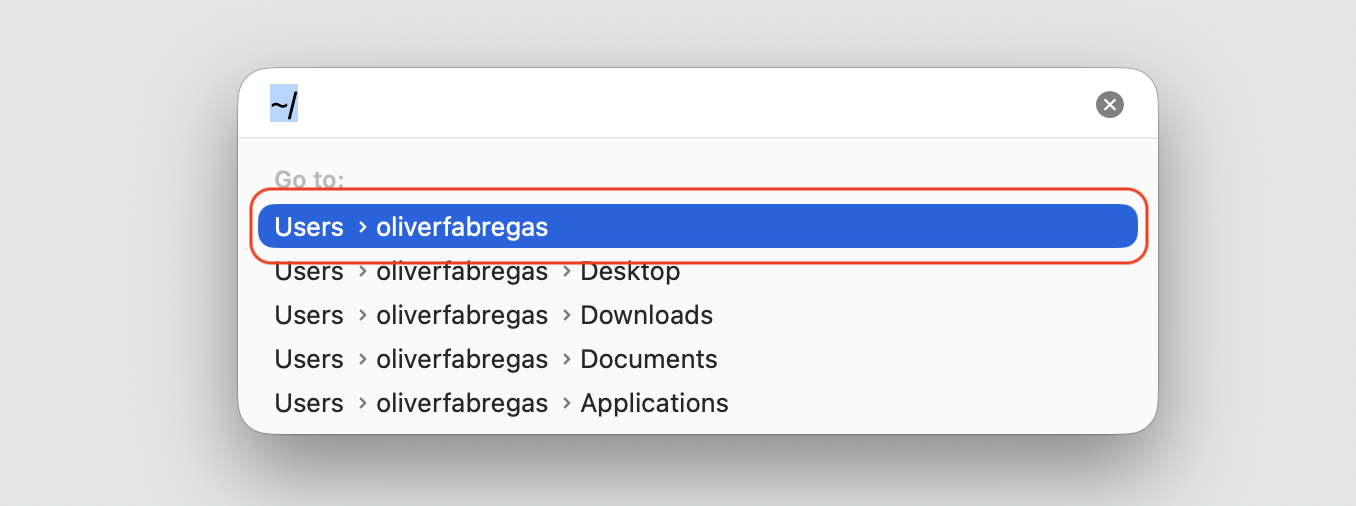
Step 1. In Finder, click Go, then Go to FolderStep 2. Type ~/ and select your userStep 3. Open Music Folder by holding Option buttonStep 4. Move Music Library to the external hard drive
6. Check iPhone or iPad sync data
We often find device backups, synced media, and local files tied to Apple Music, adding to storage trouble too. It helps to know what are iOS files on Mac storage before you remove them.
Let’s see what’s synced to your device:
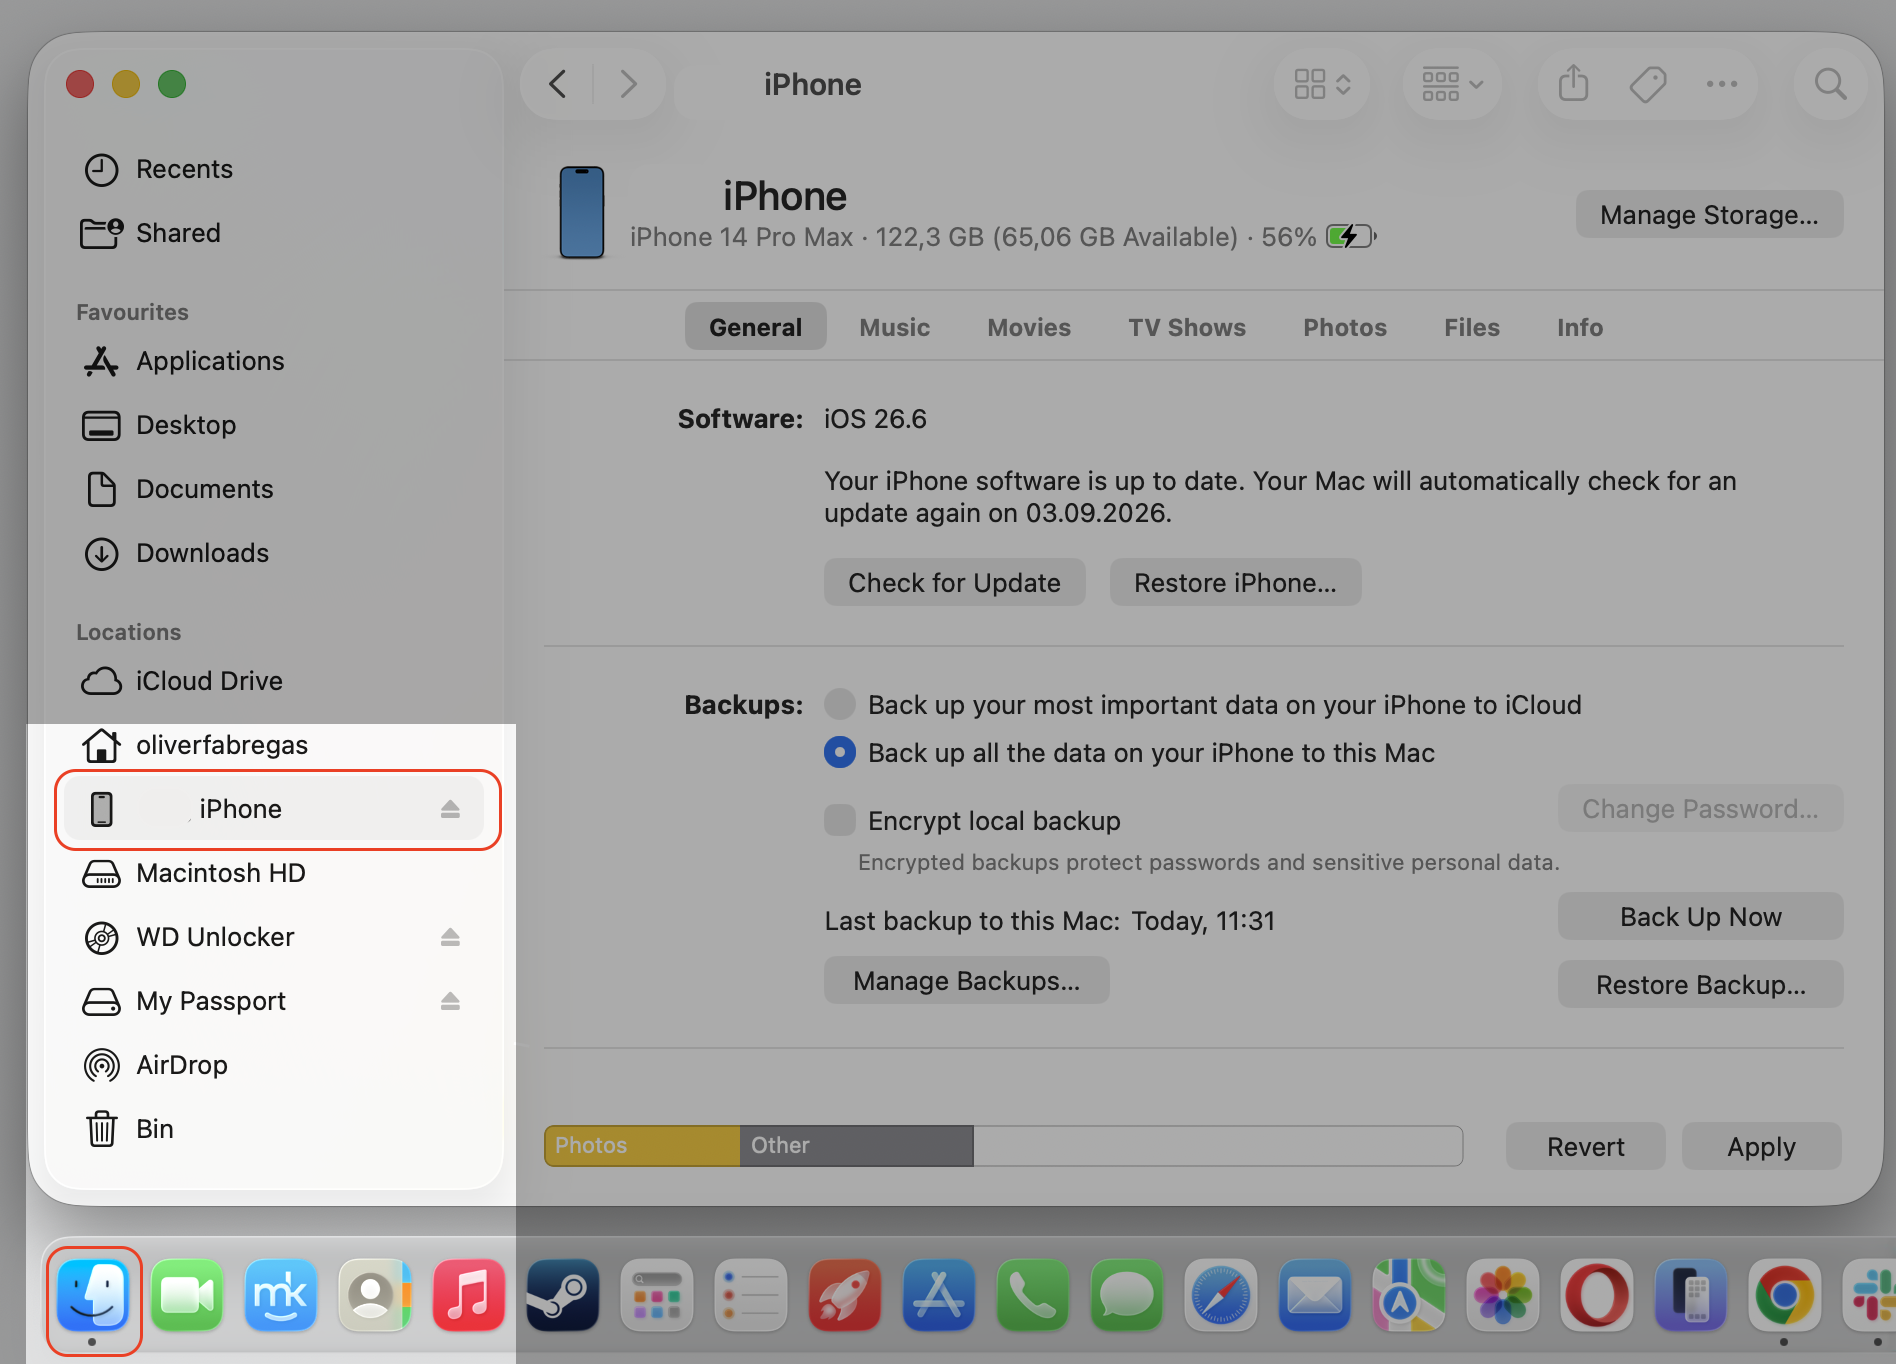
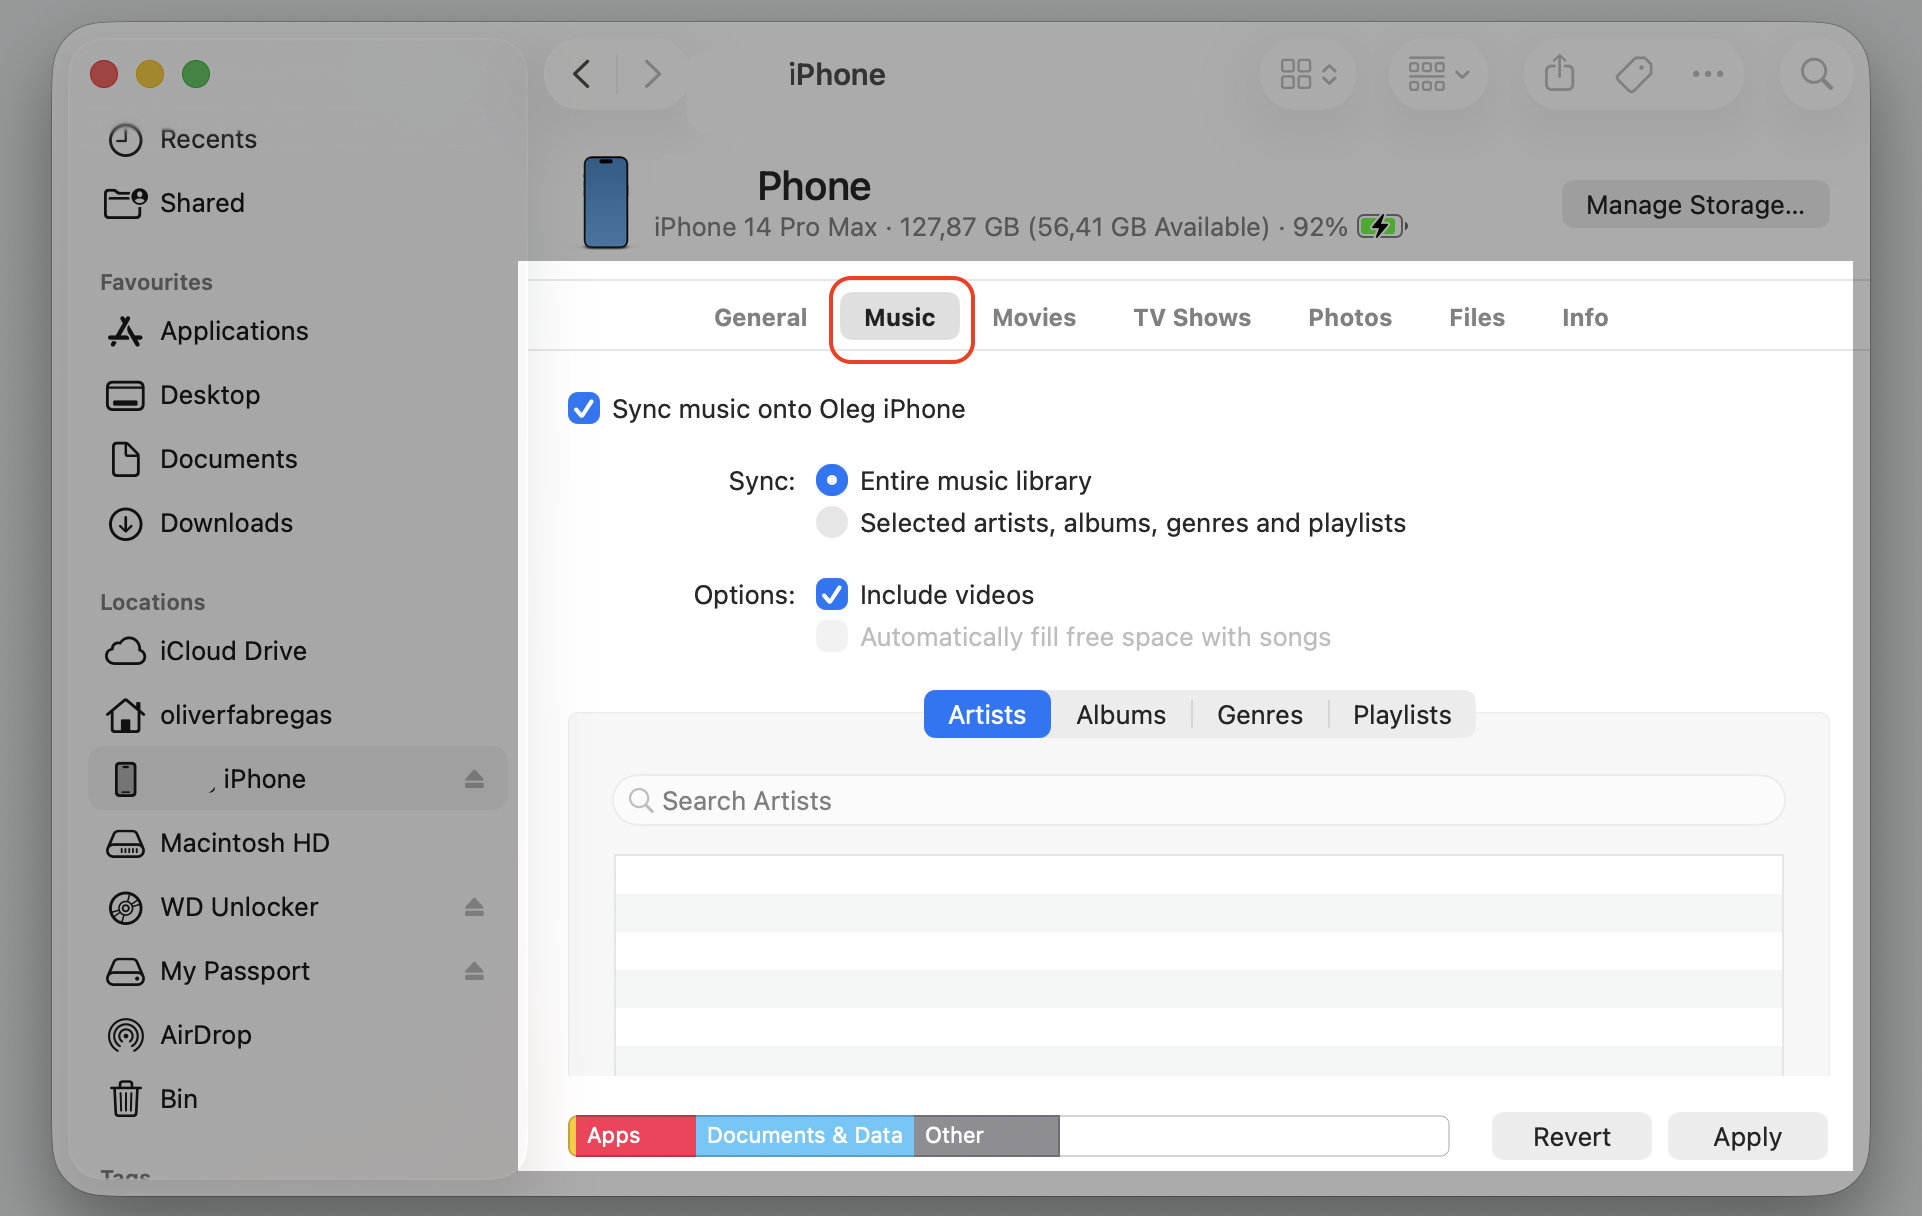
Connect your iPhone or iPad and open Finder.
Select your device in the sidebar.
Review the Music and Backups sections.
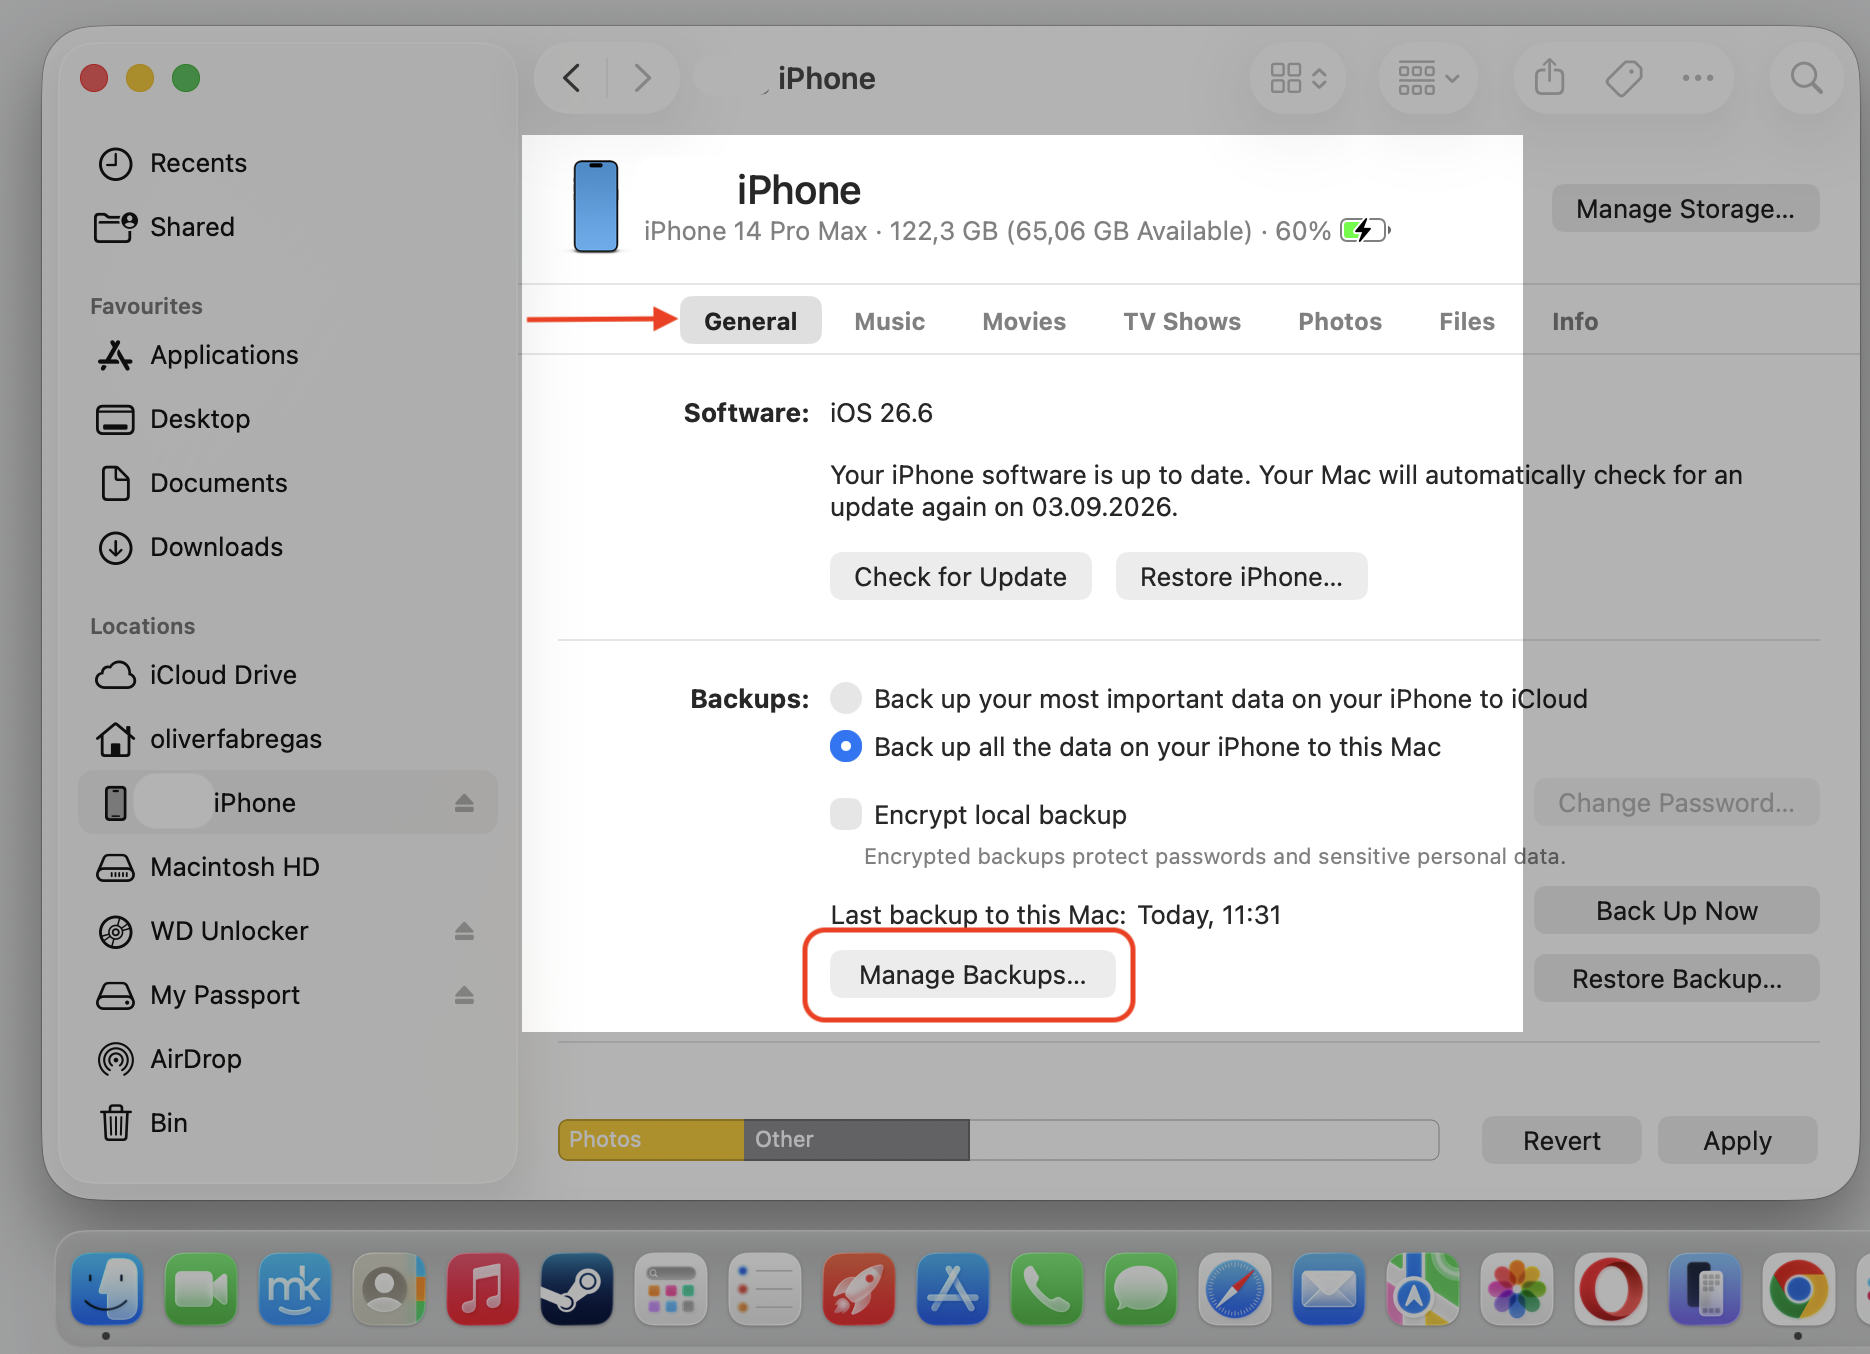
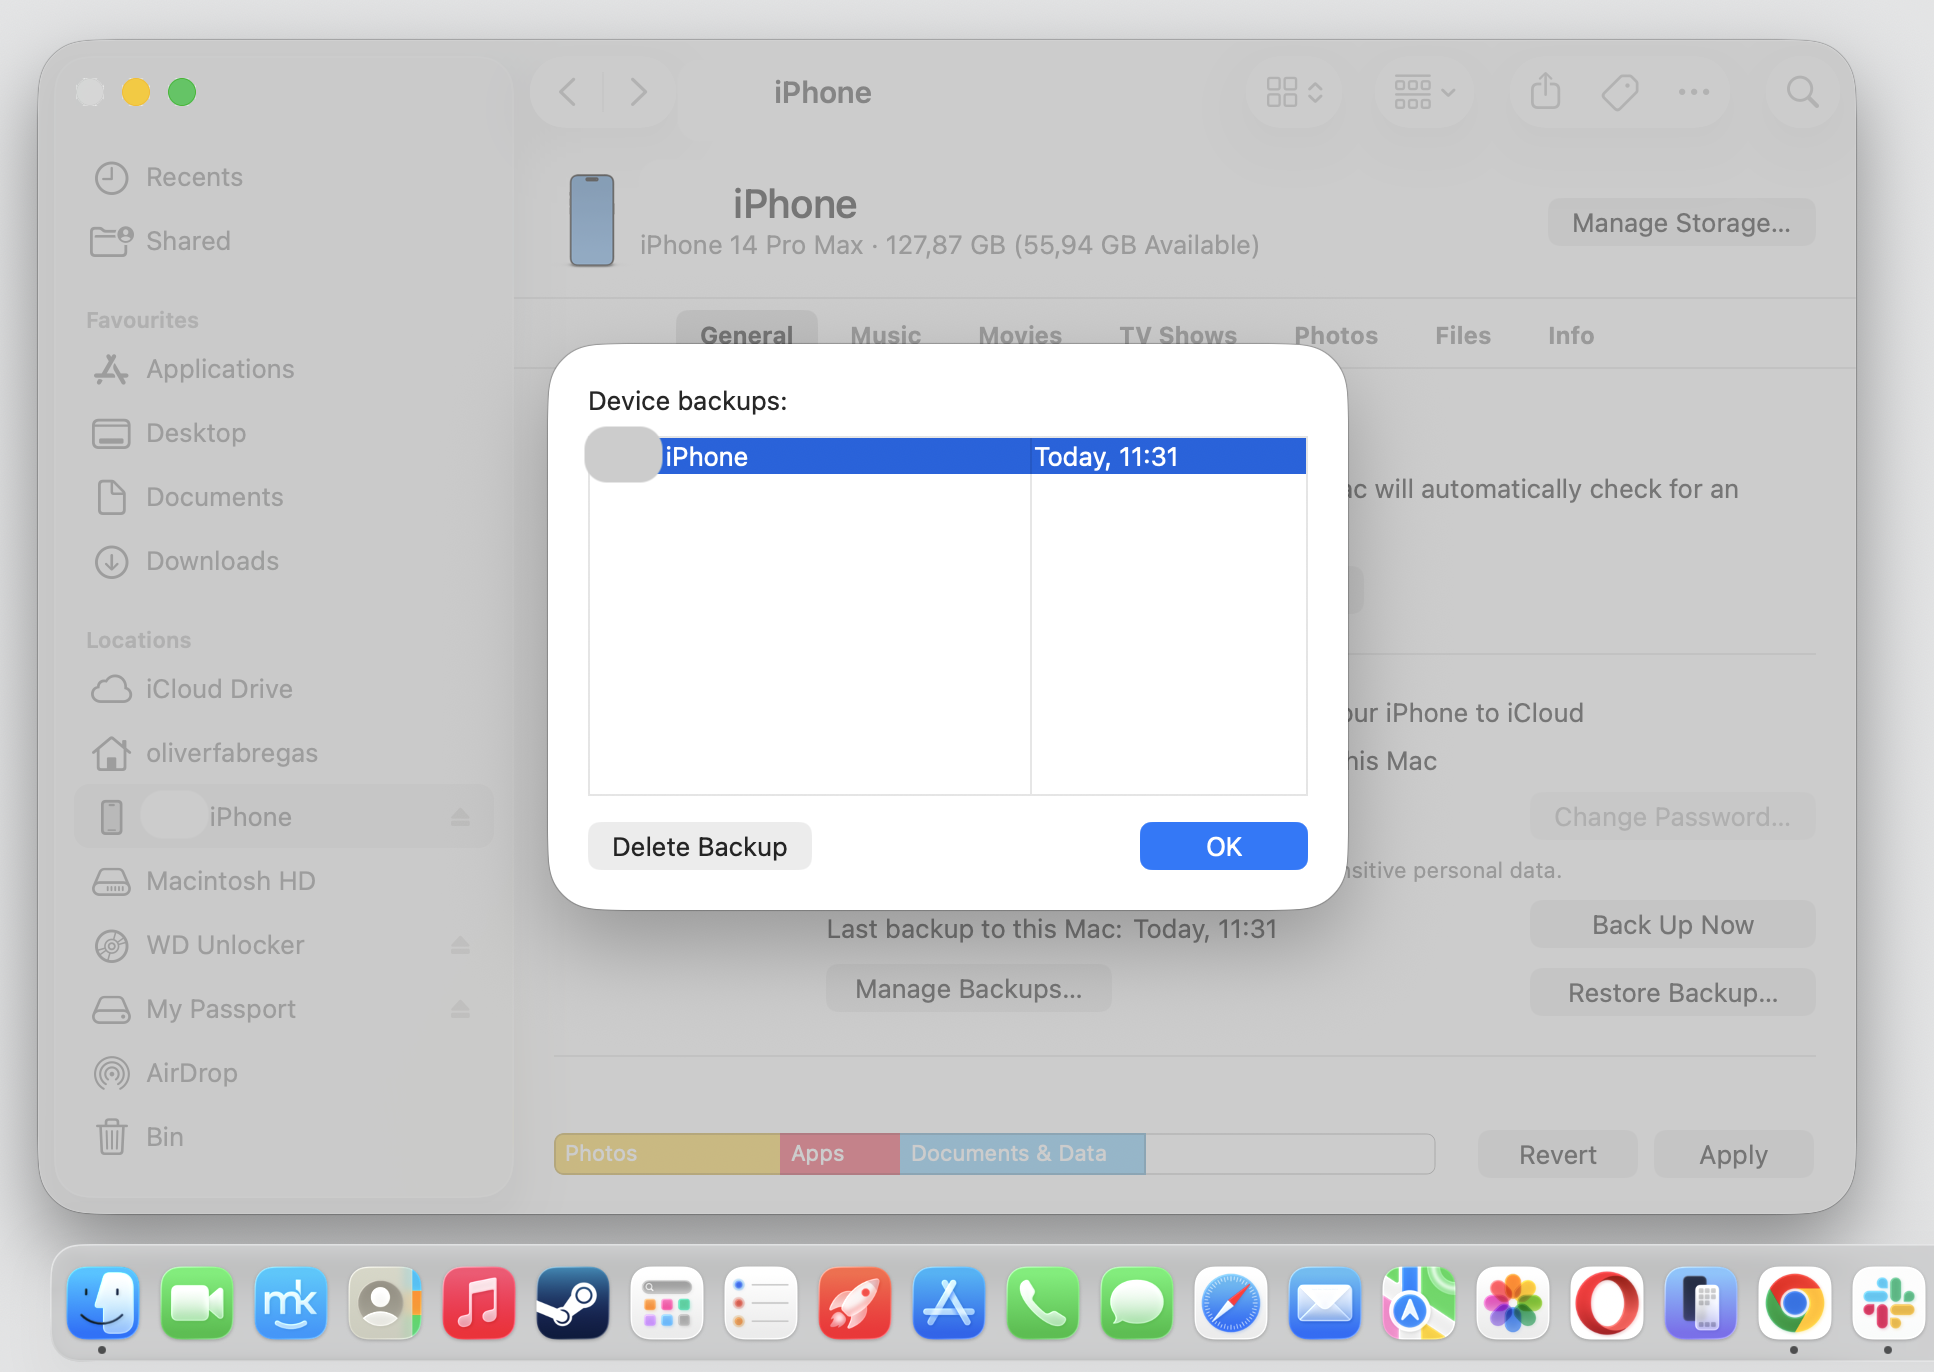
Remove old backups or synced files you no longer need.
Step 1. Go to Finder and select your iPhoneStep 2. Go to General > Manage BackupsStep 3. Delete any iPhone backups you no longer needStep 4. Go back to the Music section and review all unnecessary libraries
7. Review downloads in other Apple apps
One thing we often overlook—the issue may not come from Apple Music alone. Apple TV, Podcasts, and other media apps can fill storage too, and a quick scan of each app’s downloads often reveals hidden GB you can recover.
One last sweep of the rest:
Open each media app, such as Apple TV or Podcasts.
Look for a Downloaded section.
Remove episodes, shows, or movies you’ve finished.
What to do if Apple Music still says disk full after cleanup?
If your Mac keeps saying disk full, a few more checks usually help. Restart your Mac, then review your storage again to confirm space was cleared. An out-of-date system can misreport space, so a quick macOS upgrade is worth trying. Double-check your library location and make sure any external drive isn’t disconnected or full.
How to prevent Apple Music from filling up disk again?
A few simple habits keep your Mac roomy. We’ve prepared the list of the top useful tips that work on any Macintosh—from an older MacBook to a brand-new model. Have a look below:
Limit automatic downloads in Apple Music settings.
Review your offline music every month and remove what you’ve outgrown.
Stream songs instead of downloading when you’re on Wi-Fi.
Keep a healthy buffer of free storage, ideally at least 10–20 GB when possible.
A disk full Apple Music message usually traces back to downloaded music, cache buildup, duplicate media, synced iPhone or iPad content, or simply low Mac storage. The good news is that most of it is easy to sort out. Start by checking what’s using your space, then remove only what’s safe to delete—offline downloads you no longer play, cached files, and emptied Trash.
Tired of seeing a disk full Apple Music message? Don’t let cache and old downloads crowd your Mac. MacKeeper’s Safe Cleanup clears junk in one click and frees space, without touching your files. Get started with MacKeeper today and give your Mac room to breathe.
We respect your privacy and
use cookies
for the best site experience.
Privacy Preferences Center
We use cookies along with other tools to give you the best possible experience while using the
MacKeeper website. Cookies are small text files that help the website load faster. The cookies we
use don’t contain any type of personal data meaning they never store information such as your
location, email address, or IP address.
Help us improve how you interact with our website by accepting the use of cookies. You can change
your privacy settings whenever you like.
Manage consent
All cookies
These cookies are strictly necessary for enabling basic website functionality (including page
navigation, form submission, language detection, post commenting), downloading and purchasing
software. The website might malfunction without these cookies.