Need to transfer files fast or run Boot Camp smoothly on an older Mac? We suggest temporarily disabling FileVault. To improve your Mac’s system even further, use MacKeeper’s StopAd as a bonus to your privacy and optimization. It’s a helpful tool that blocks intrusive ads and trackers that could slow down your Mac’s performance.
What is FileVault, and why might you want to disable it?
FileVault disk encryption is Mac’s built-in, full disk encryption feature. It uses XTS-AES-128 encryption to help prevent unauthorized access to your personal data by encrypting your hard drive or SSD. This helps protect your privacy if you ever lose your Mac.
So why disable it, then?
Reasons for disabling FileVault on a Mac:
Speed up file transfers on older Macs
Boost drive performance during intensive video editing
Run Boot Camp on older Macs without partitioning errors
Remove recovery keys to eliminate master key management
Update firmware easily without getting stuck in rebooting loops
Recover files from unencrypted drives effortlessly using third-party tools
Prevent permanent lockouts and avoid total data loss when you’ve forgotten your password
What to know before you stop FileVault on Mac?
Before stopping FileVault on Mac, complete the simple checklist below to protect your data. This is important since decryption rewrites your storage drive, and disruptions could permanently corrupt your files. You may also want to disable password prompts on wake by adjusting your Lock Screen settings so the screen does not lock unexpectedly during the long process.
Do this before disabling FileVault:
Back up your data to prevent permanent data loss in the event of a system crash.
Connect to a power source to prevent your battery from dying mid-process, which could affect your operating system.
Have your admin password ready, as you’ll need it to disable encryption or modify boot security.
Check your drive’s health to avoid storage failure.
Ensure you have enough storage to uncompress, move, and rewrite files safely.
Set aside time. Since the decryption process uses a lot of system resources, multitasking can sometimes slow down the process and cause your device to freeze.
A note from our experts:
While FileVault does a great job of locking down your local files, it can’t stop online threats from reaching your screen—especially if you opt out of encryption. That’s where a tool like MacKeeper’s StopAd comes in. As an Apple-notarized utility backed by an independent AV-TEST certification, it automatically blocks malicious pop-ups, fake virus alerts, and tracking scripts before they can download malware. Use it to keep your browsing private, fast, and free from dangerous distractions.
Follow these steps to use MacKeeper’s StopAd:
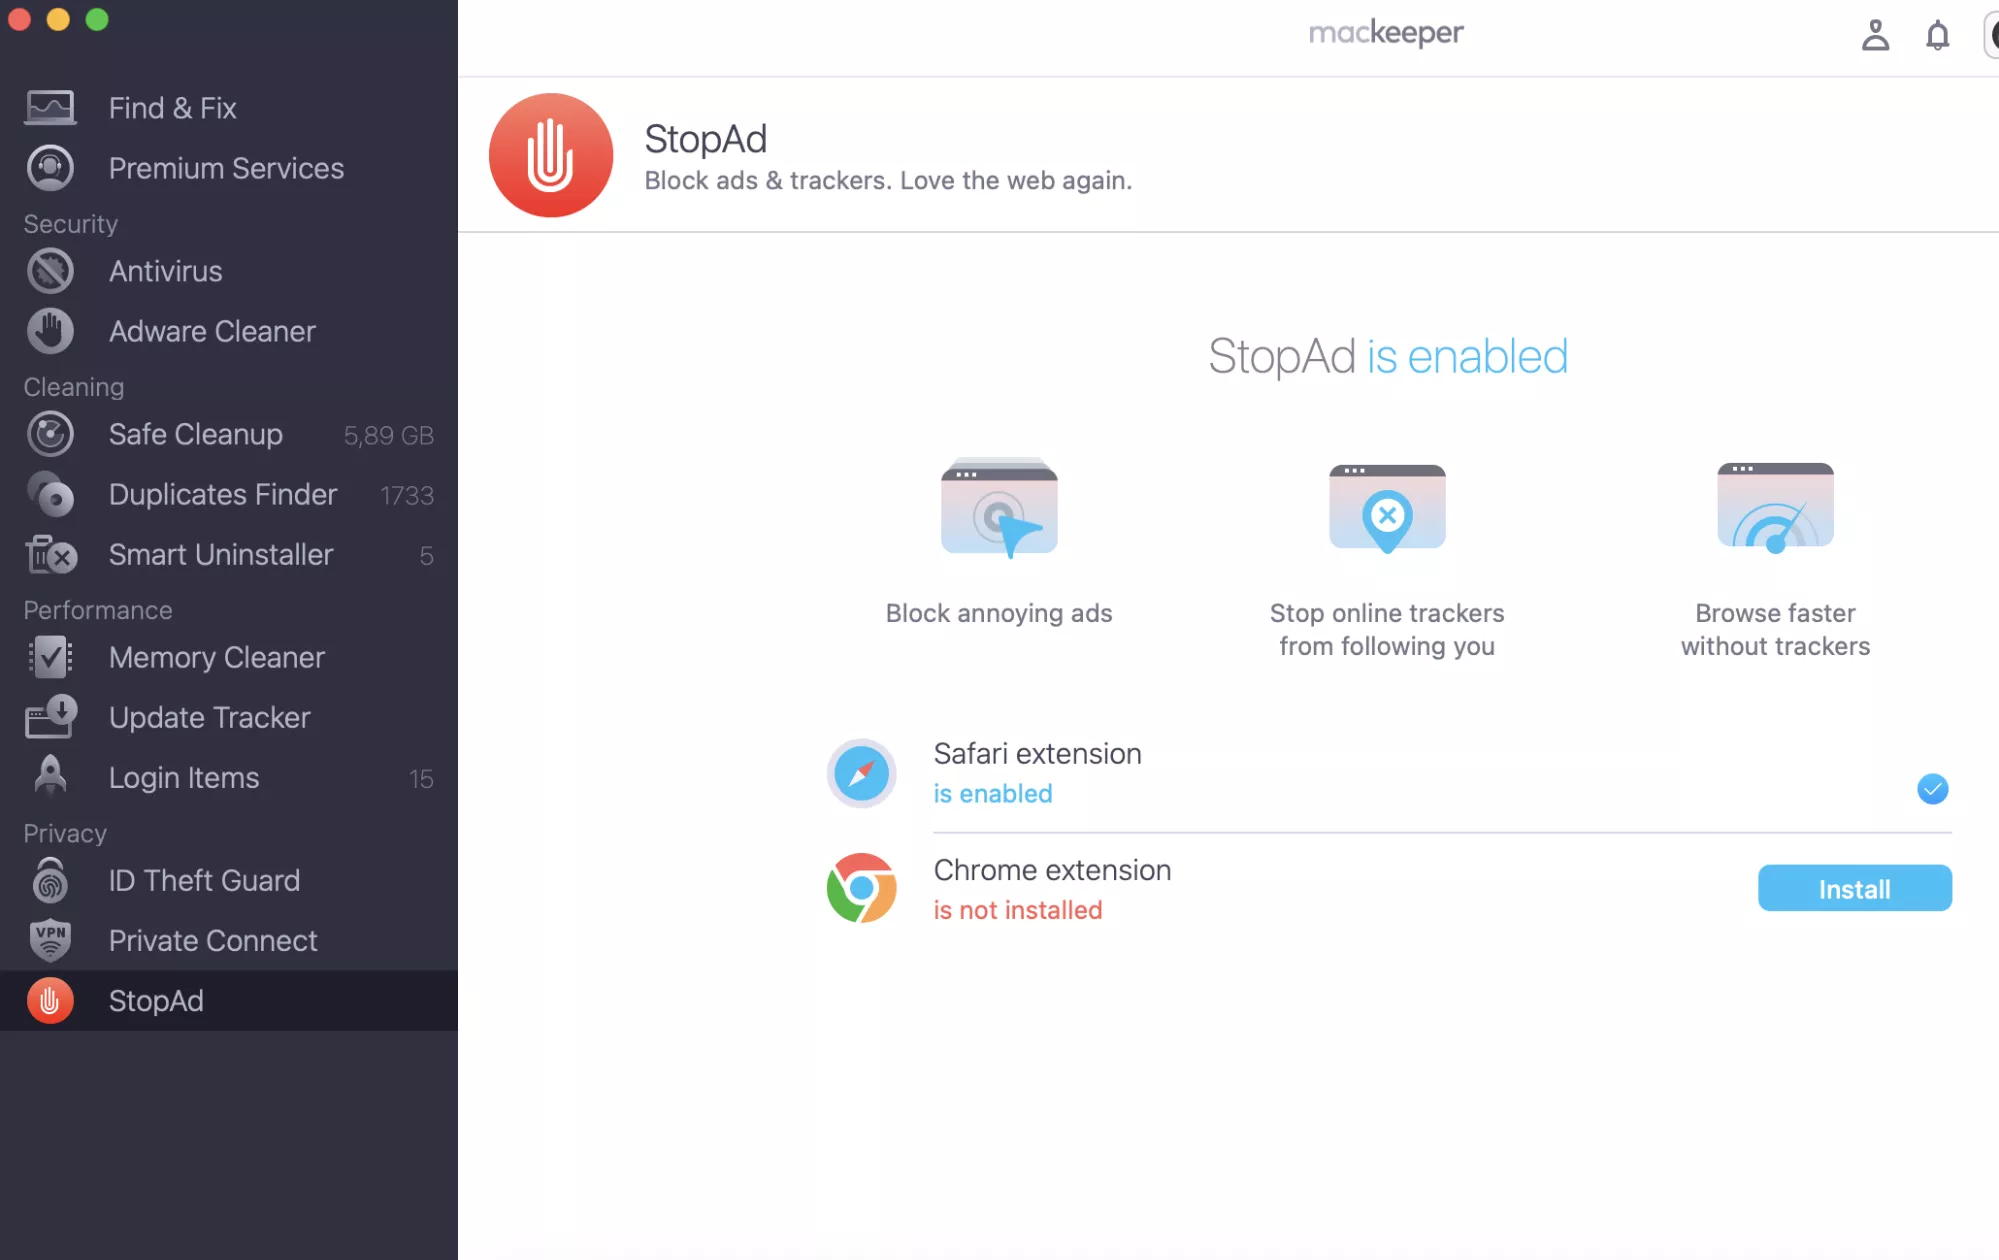
Download MacKeeper on your MacBook Pro, MacBook Air, iMac, or Mac mini and click StopAd in the sidebar.
Click the Install button next to each browser on the screen.
Complete the on-screen prompts.
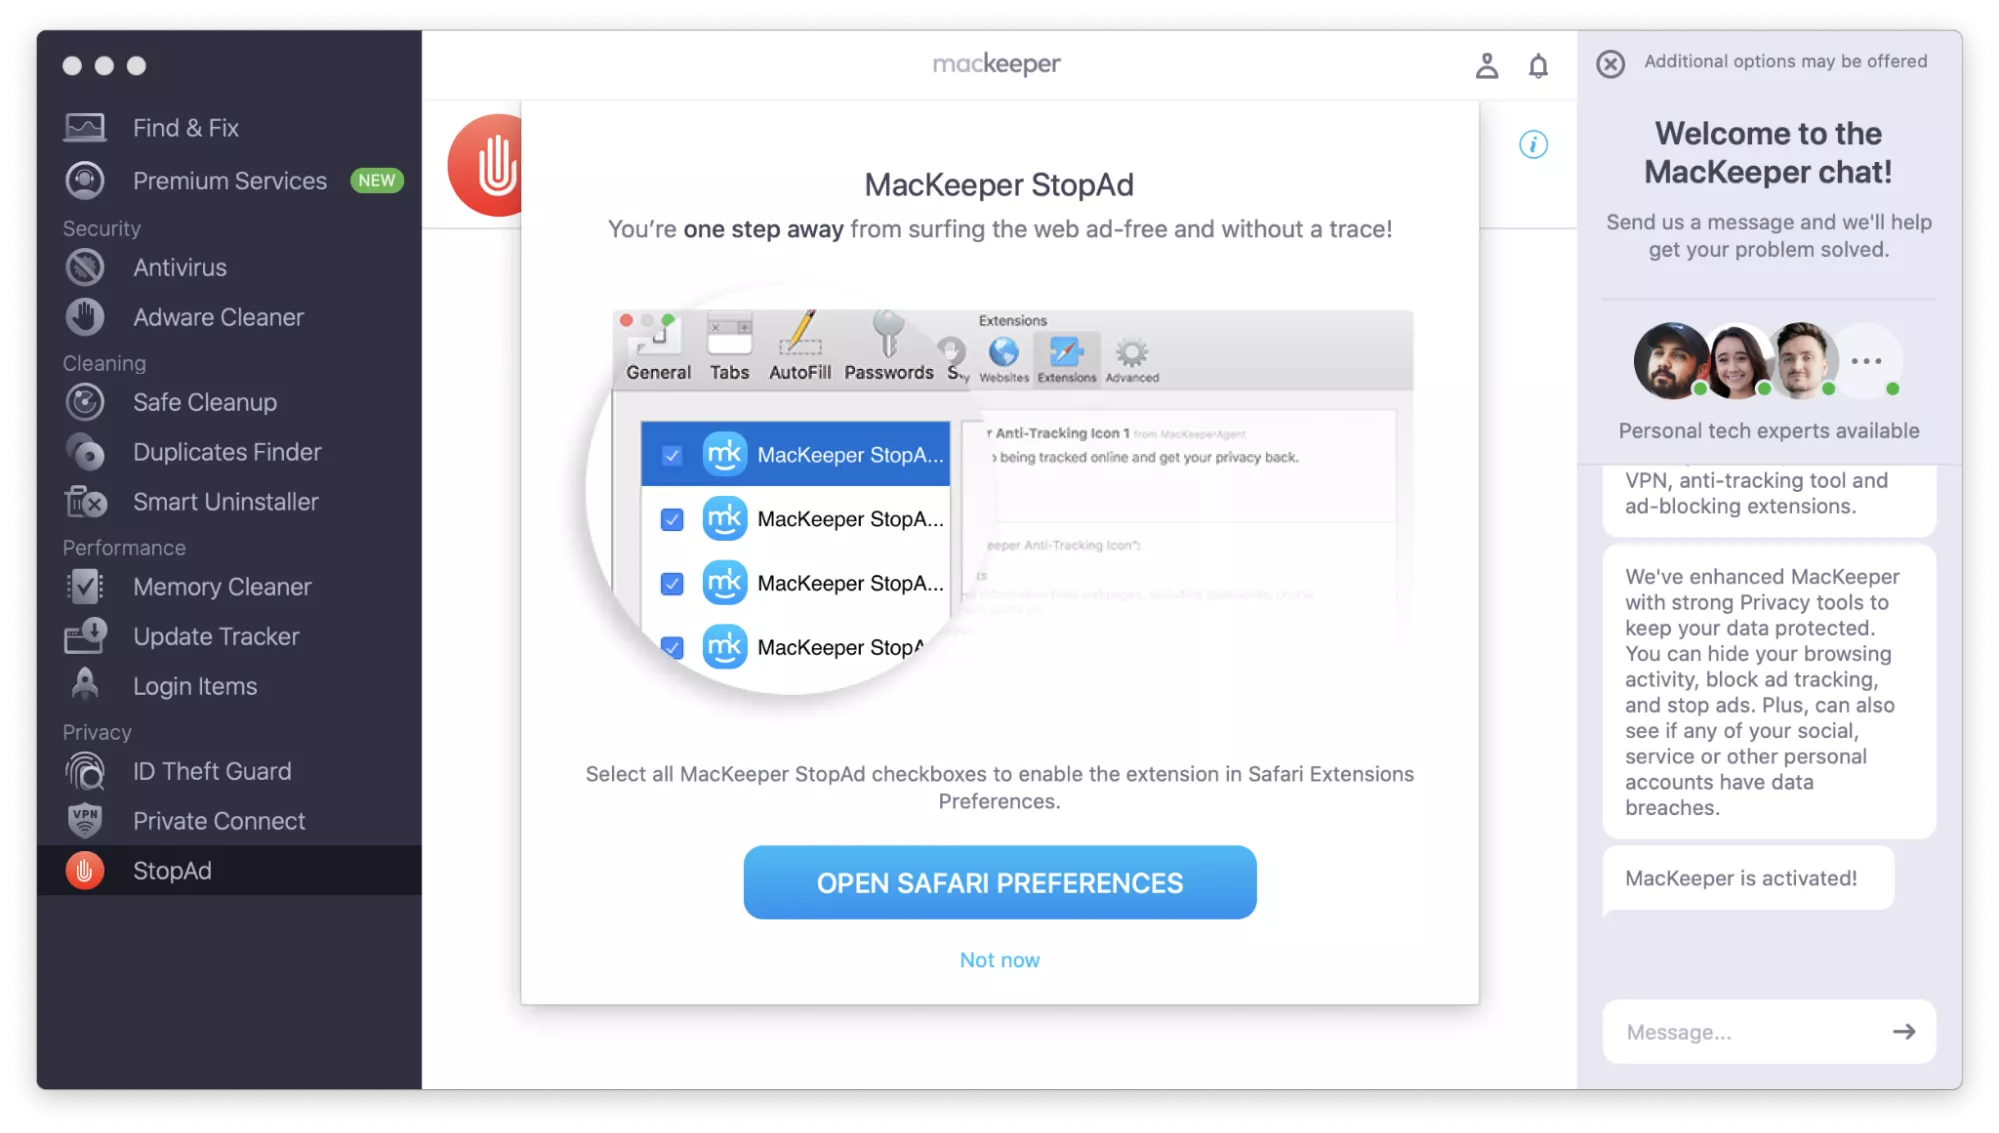
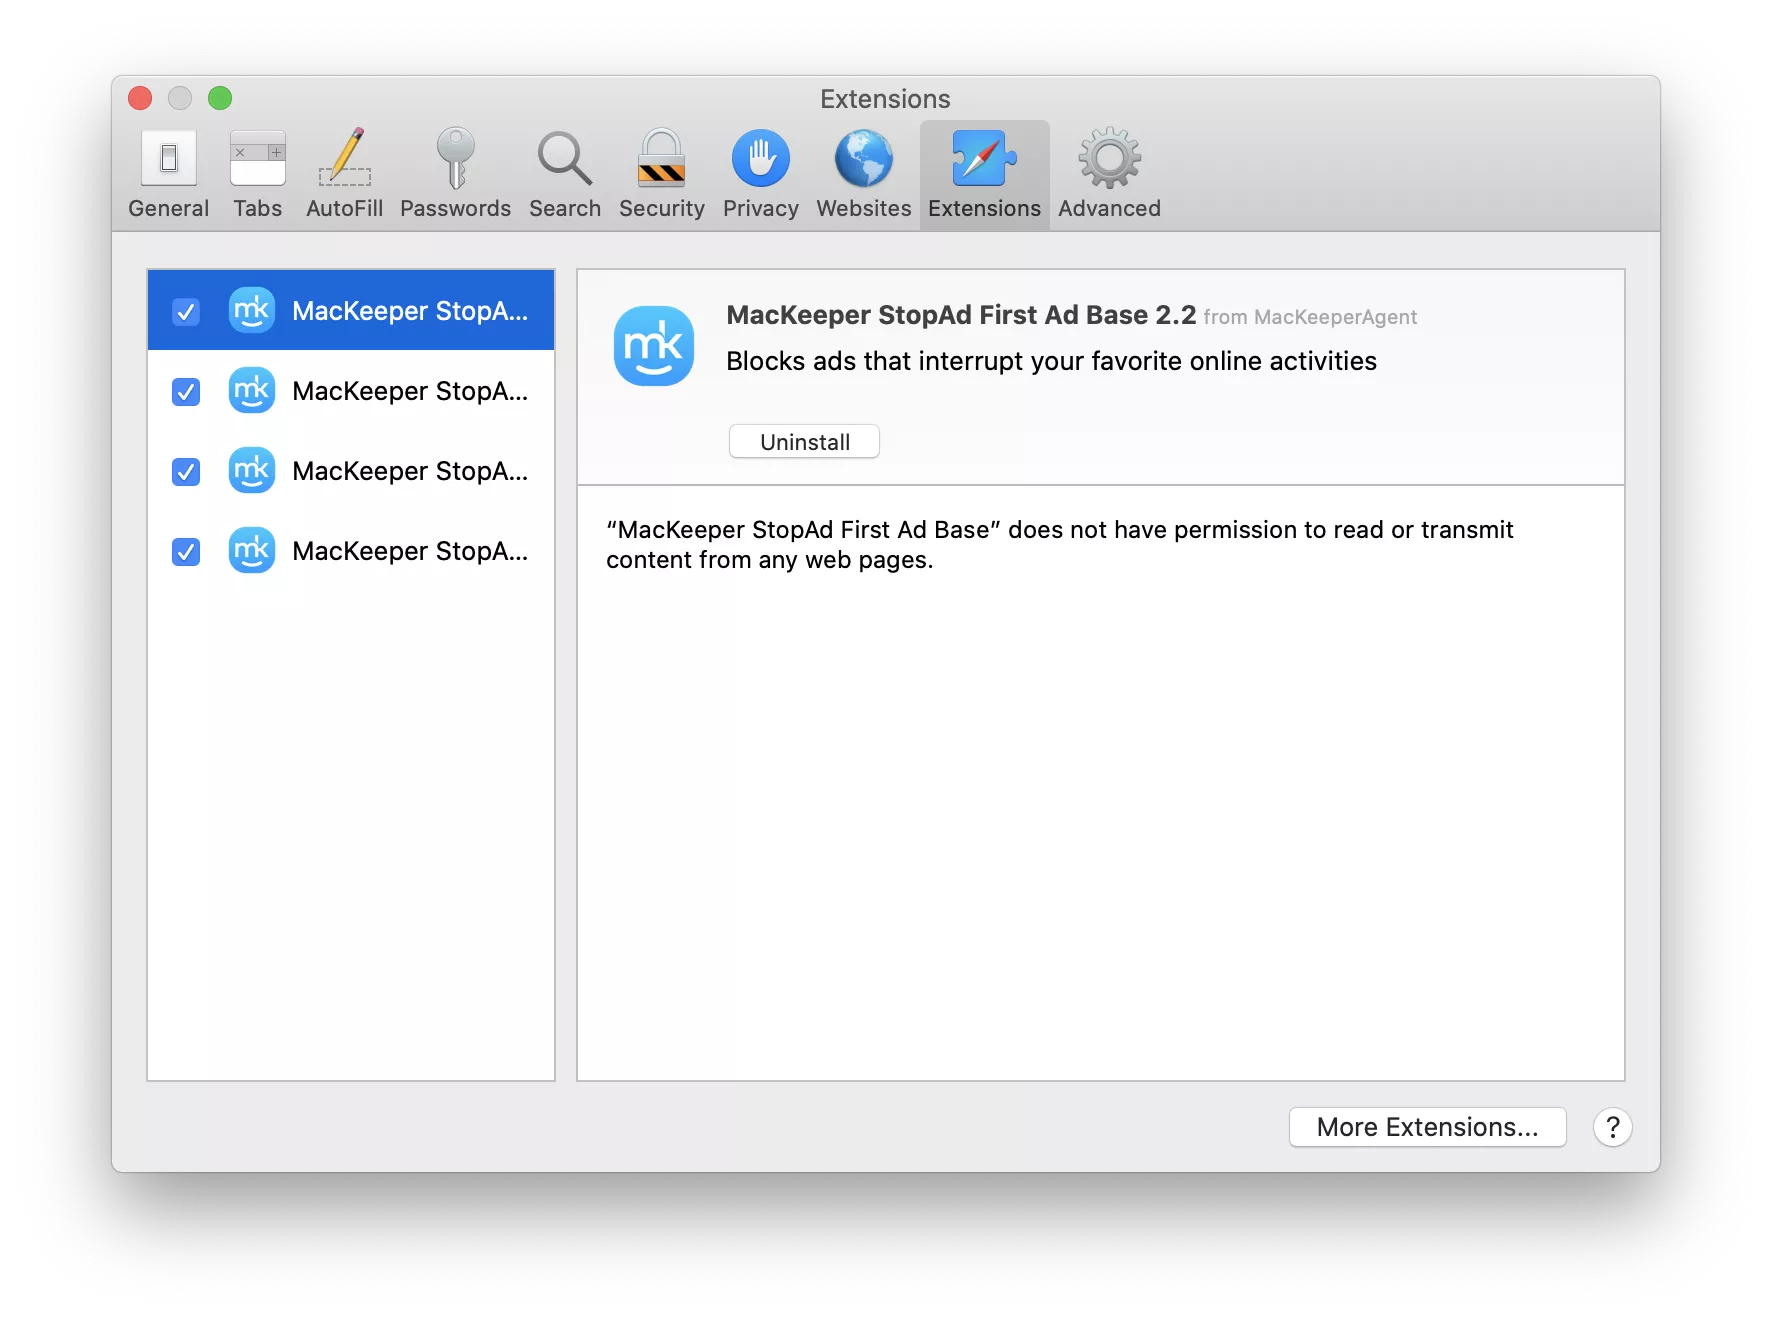
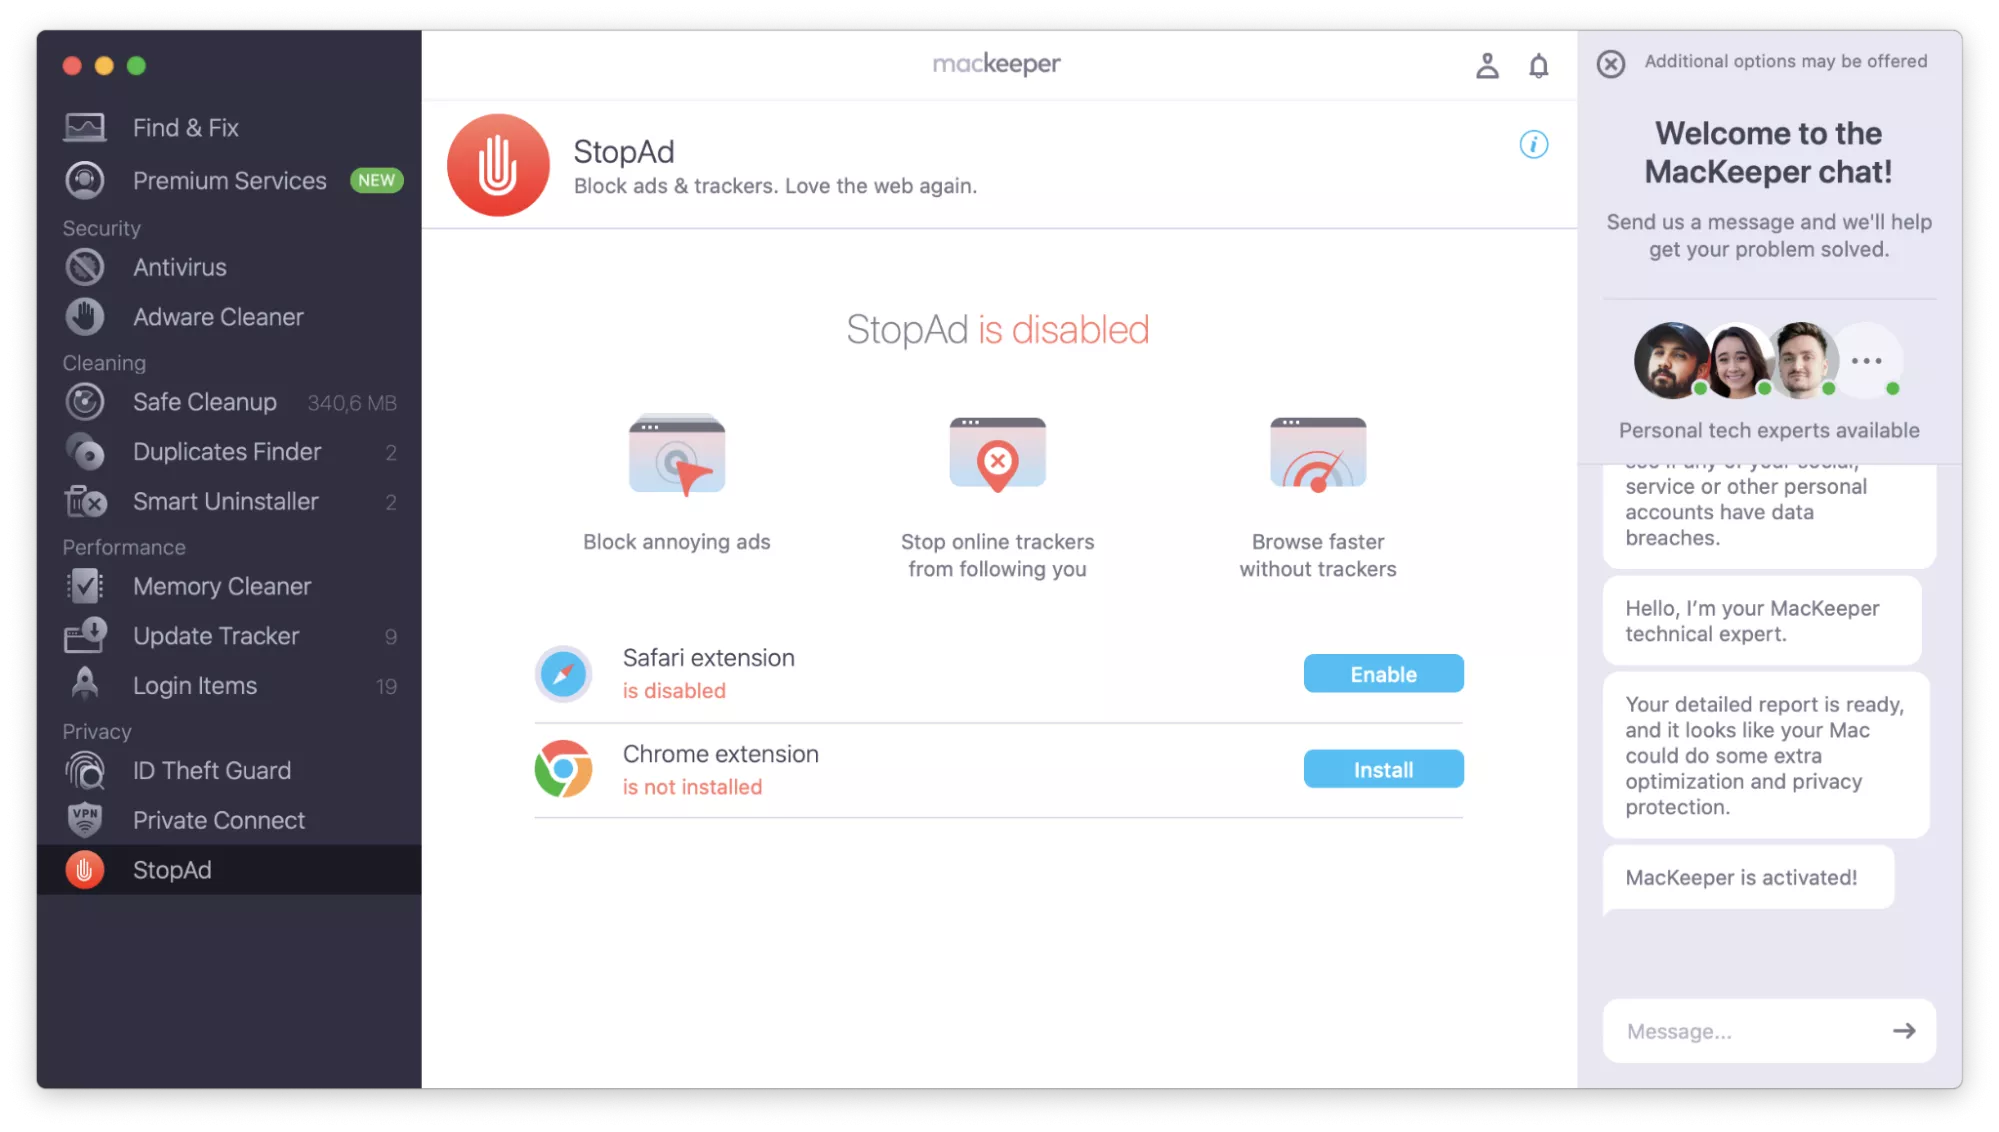
Step 1. Click StopAd > Open > EnableStep 2. Click the Open Safari Preferences button in the pop-up windowStep 3. Check every box next to each MacKeeper entry in the sidebar in Safari PreferencesStep 4. Go back to MacKeeper and click Turn On
How to turn off FileVault on Mac?
You can turn off FileVault via System Settings, Terminal, Recovery Mode, or on managed (MDM) devices. Everyday users like you and me can typically use the graphical interface in System Settings, while advanced administrators may have more experience using Terminal commands or Recovery Mode for deep troubleshooting. For company computers, IT teams manage encryption remotely using MDM profiles. Note that you can’t use Target Disk mode to disable encryption, as it only allows you to access files from another Mac.
1. How to disable FileVault on Mac via System Settings?
We follow a specific approach to disable FileVault in System Settings/Preferences, depending on the macOS version we’re using at the time.
1.1 macOS Ventura or later
For macOS Ventura, Sonoma, Sequoia, or Tahoe, we disable FileVault encryption directly within the Privacy & Security panel in System Settings. It only takes a few clicks.
Follow the steps below to turn off FileVault on Mac via System Settings:
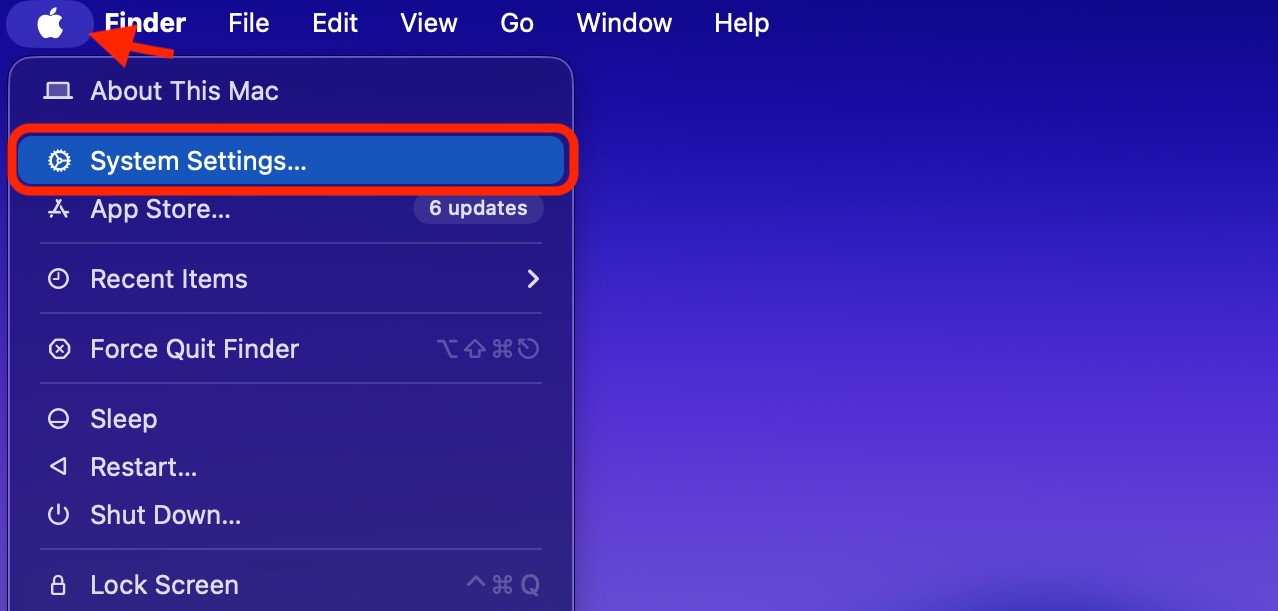
Open System Settings via the Apple menu.
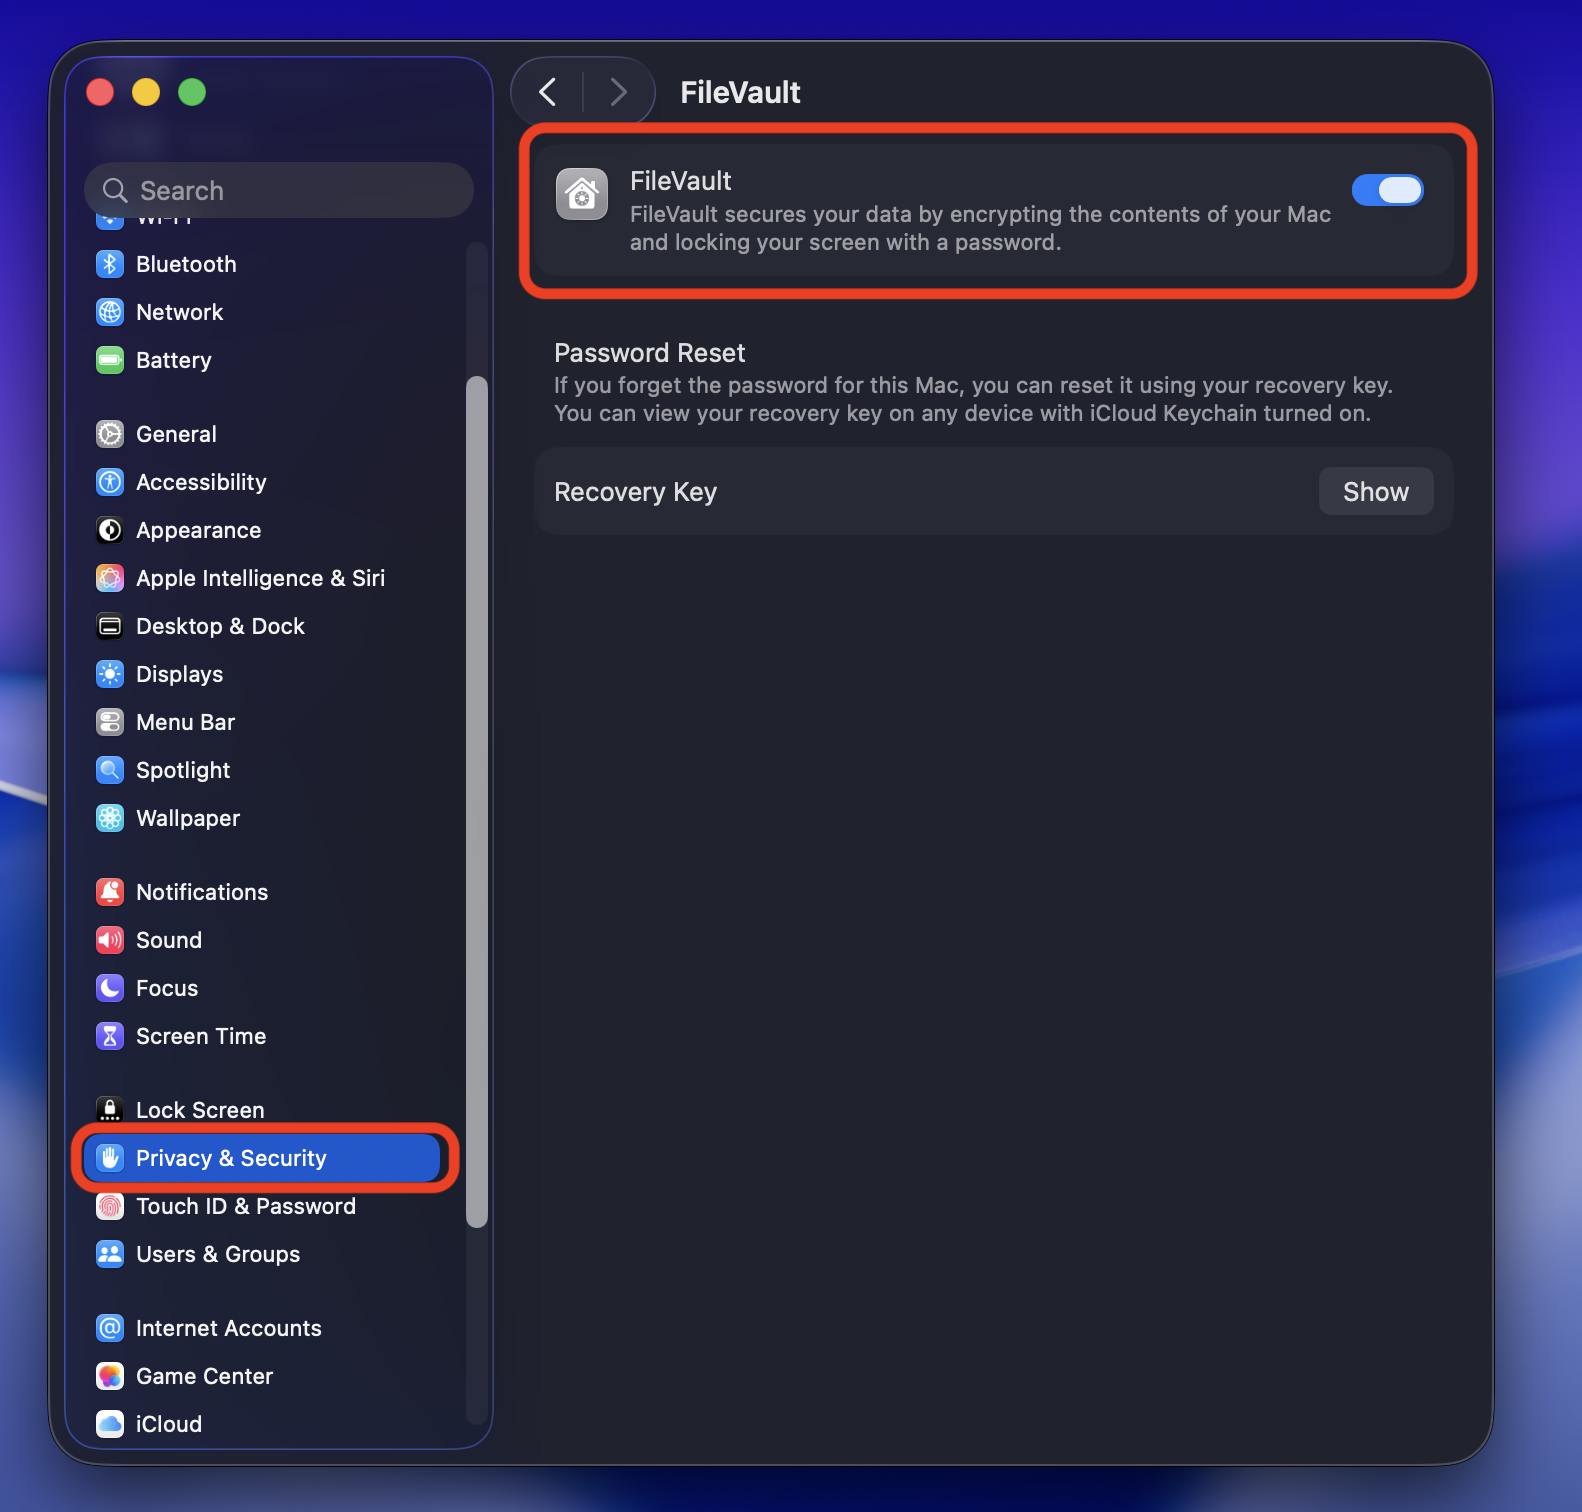
Click Privacy & Security > FileVault > Turn off > Turn off Encryption in the pop-up window.
Step 1. Open System Settings via the Apple menuStep 2. Click Privacy & Security > FileVault > Turn off > Turn off Encryption in the pop-up window
1.2 macOS Monterey or earlier
To disable FileVault on macOS Monterey or earlier, we navigate the legacy Security & Privacy pane, which requires us to unlock a padlock icon with admin credentials first.
Follow this method to turn off FileVault on Mac via System Preferences:
Launch System Preferences using the Apple menu.
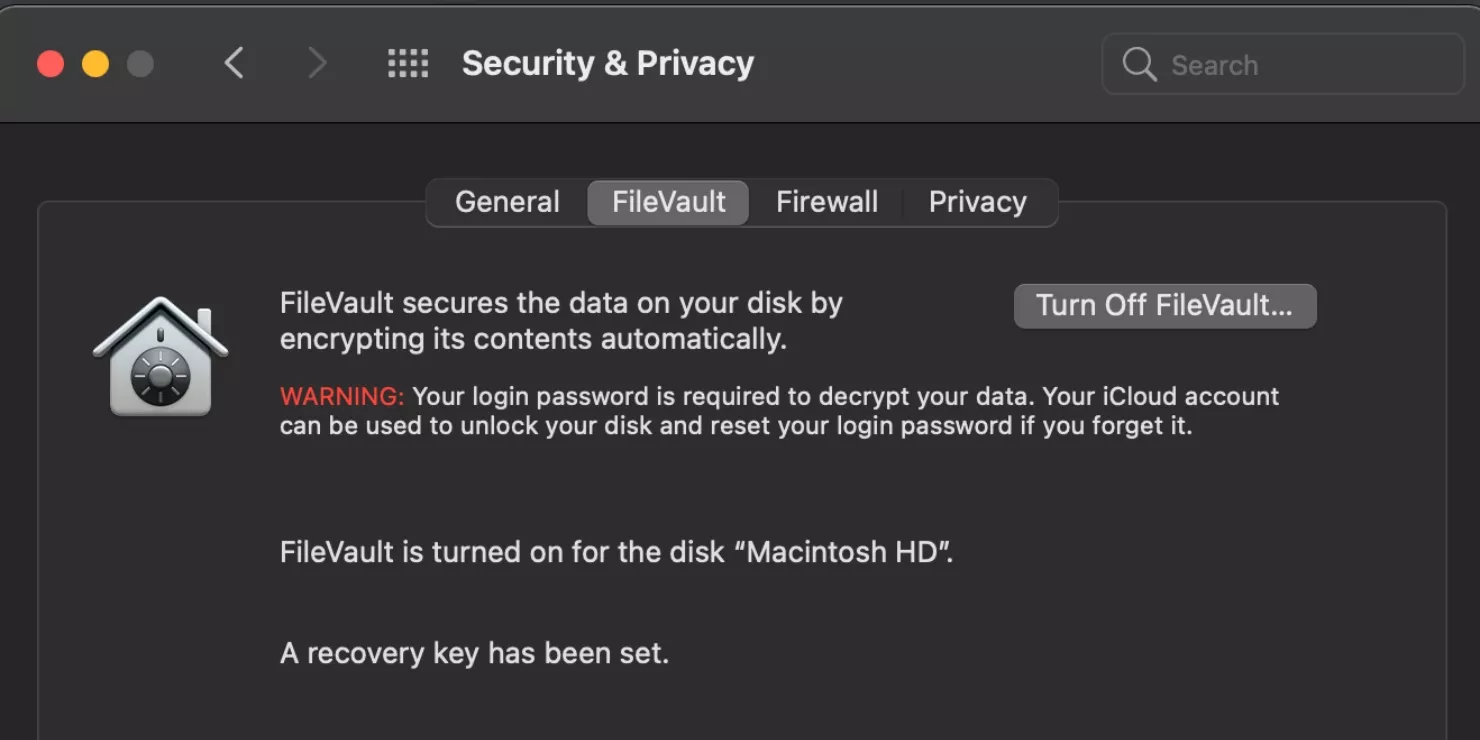
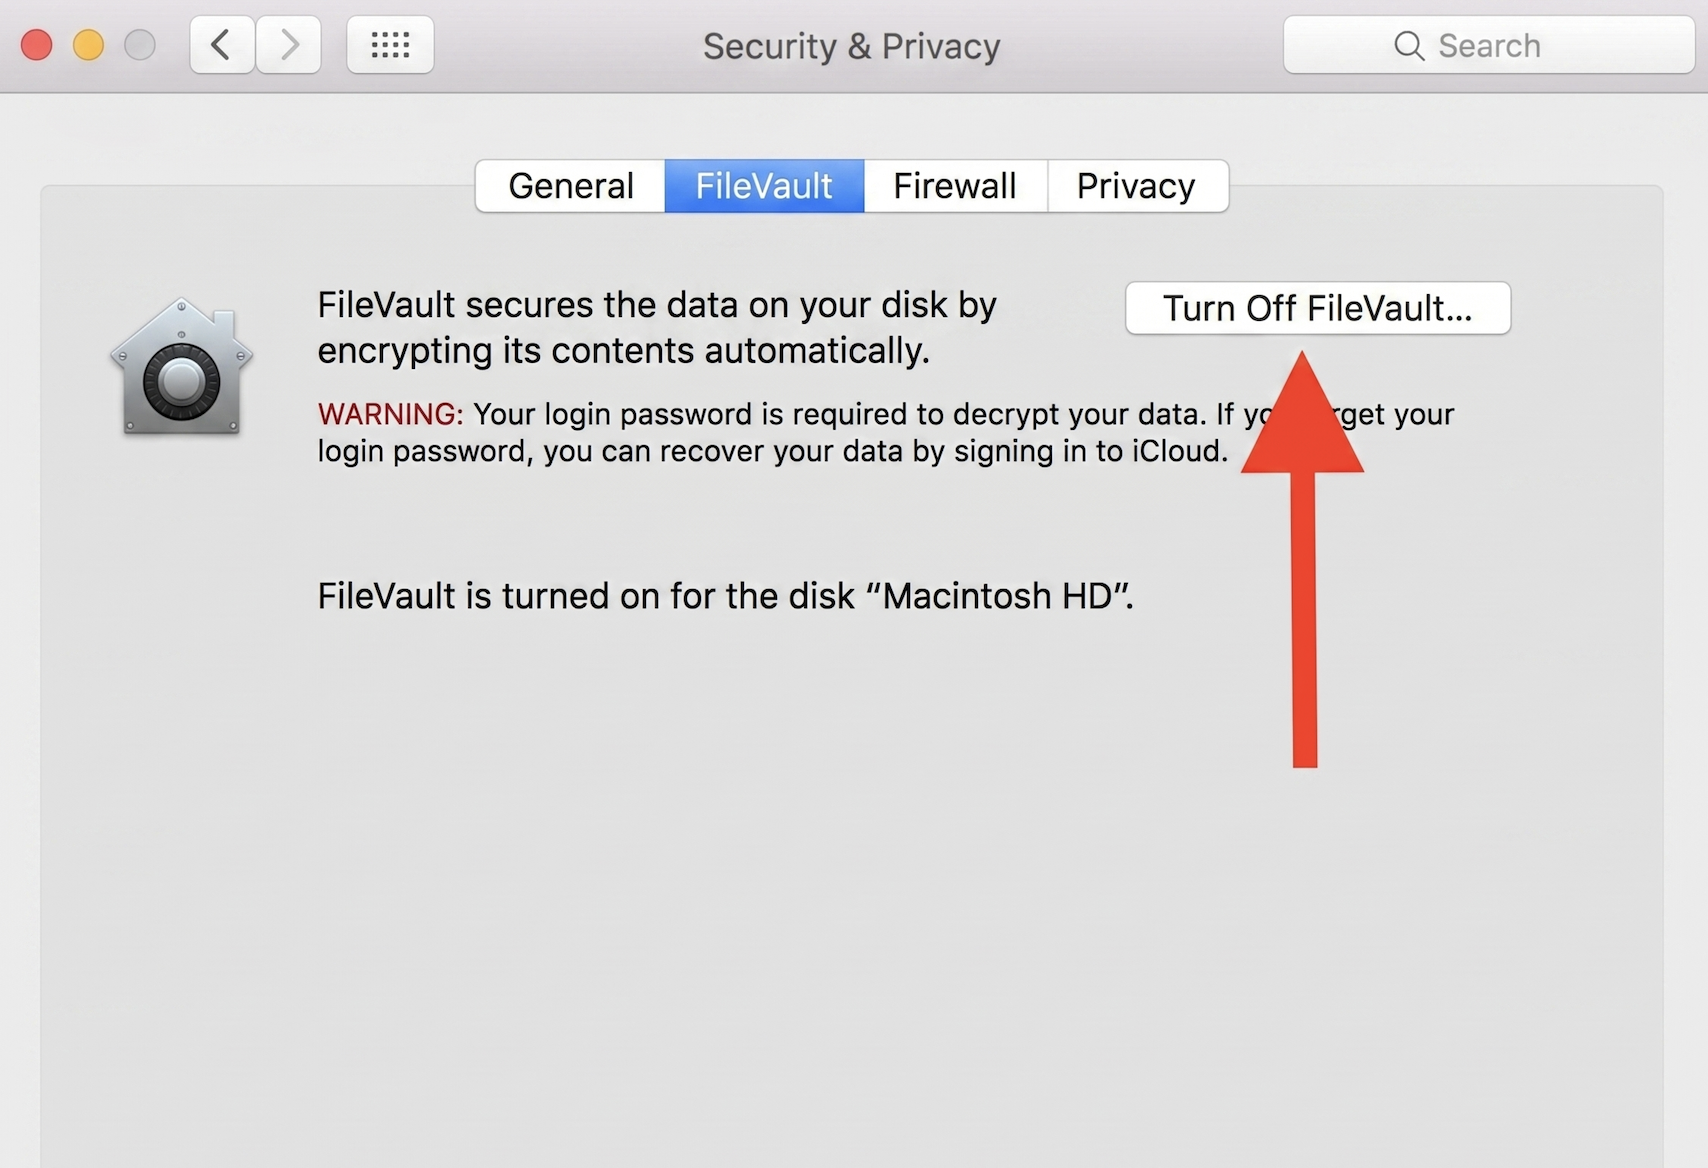
Click the Security & Privacy pane, followed by the FileVault tab.
Tap the lock in the lower-left corner, enter your admin login details, then click Unlock > Turn Off FileVault.
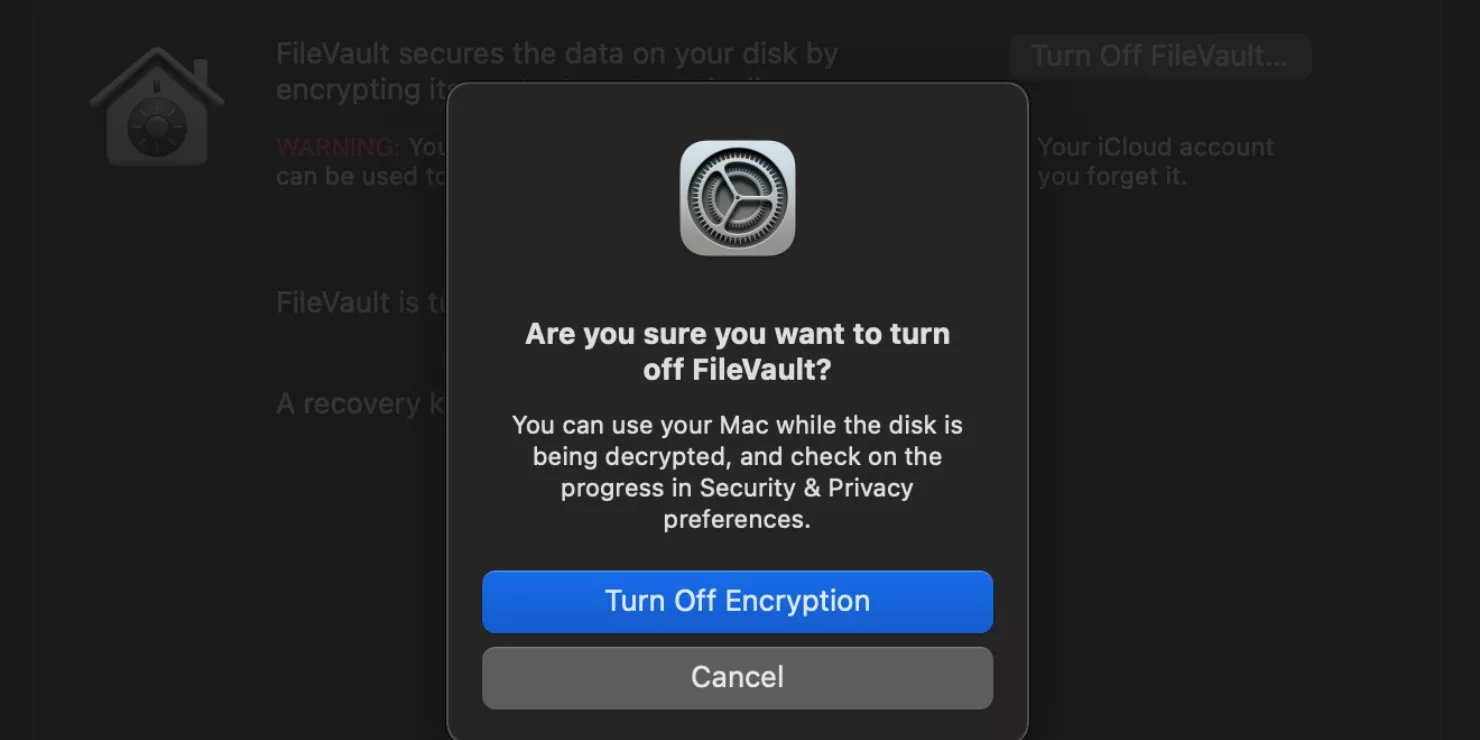
Now select the Turn Off Encryption option.
Steps 1-3. Go to Apple’s System Preferences > Security & Privacy > FileVault > Turn Off FileVaultStep 4. Click Turn Off Encryption
2. How to turn off FileVault using Terminal?
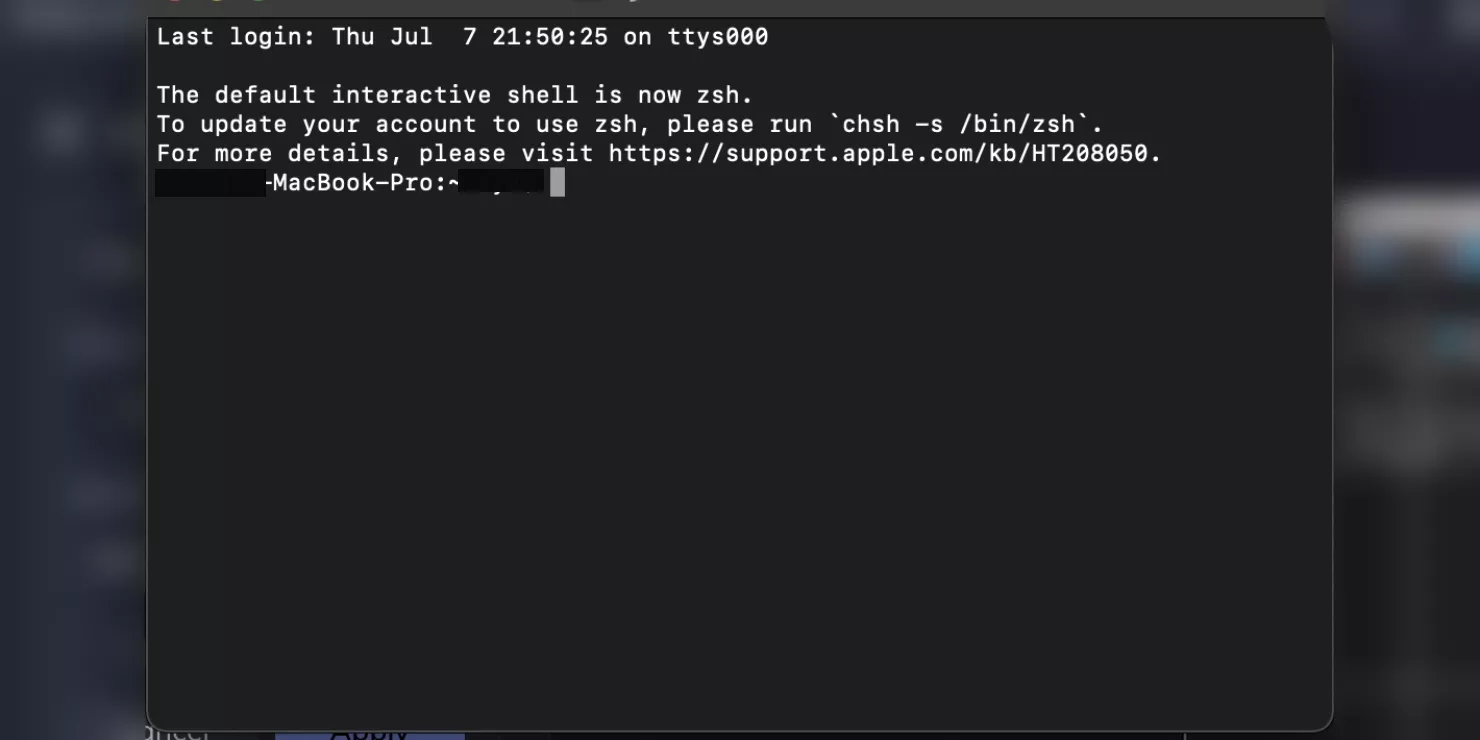
We use the Terminal application to manage encryption on a Mac that will not boot into the graphical interface. This helps us to instantly initiate the drive decryption sequence without navigating through system menus. Consider learning how to use Terminal if you’re not familiar with it.
To disable FileVault using Terminal, do this:
Launch the Terminal app via the Utilities folder in Finder.
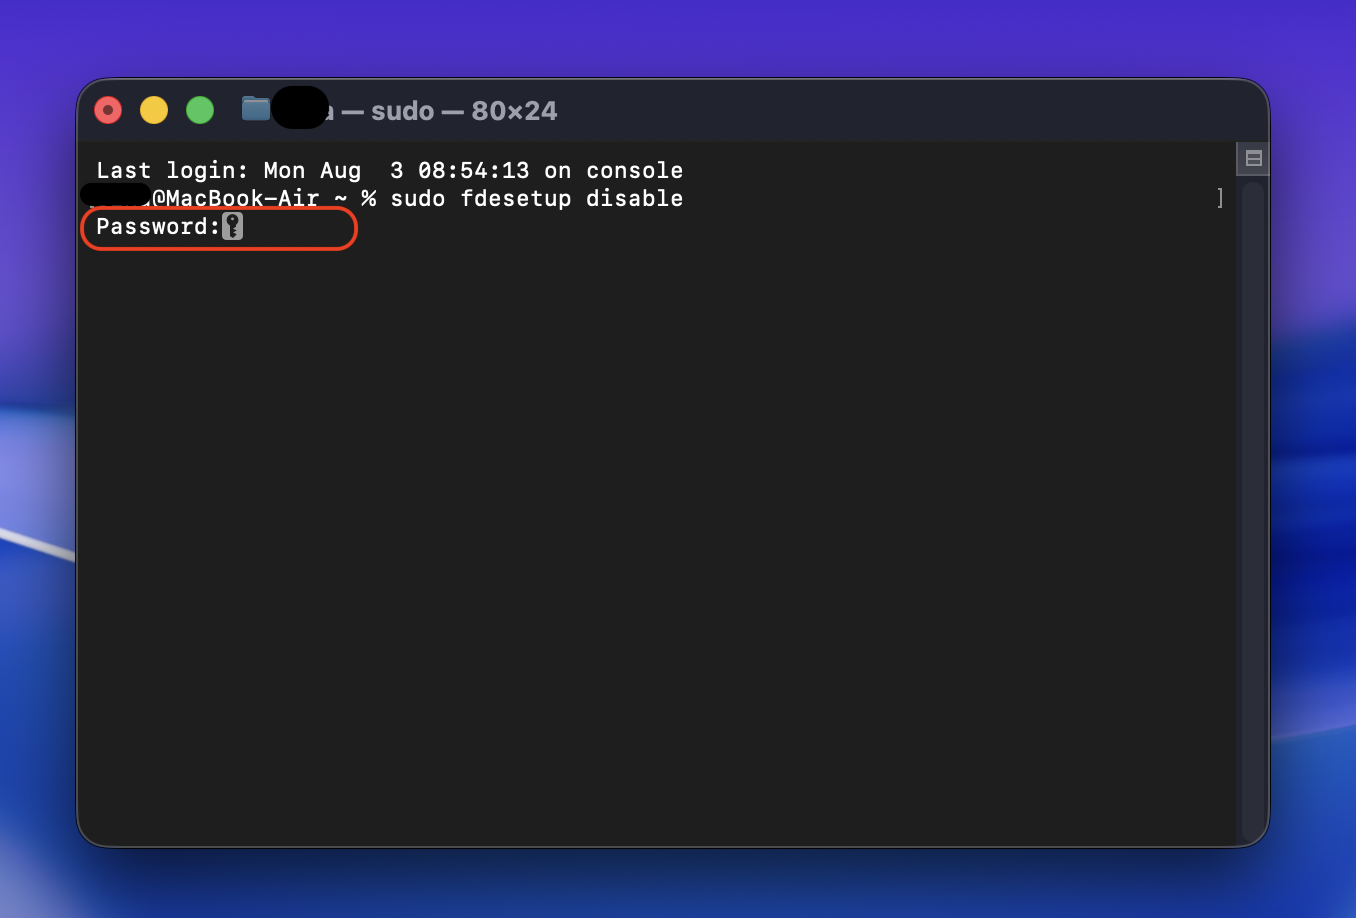
Copy and paste this command in the Terminal app: sudo fdesetup disable and press Enter.
Enter your admin login details if needed, then type your username and press Enter.
Now type your password and hit Enter.
Steps 1-2. Copy and paste the command sudo fdesetup disable into TerminalSteps 3-4. Type your password and hit Enter
3. How to stop FileVault in macOS Recovery Mode?
We’ve found that we can still disable full-disk encryption by booting into macOS Recovery Mode when file corruption or operating system errors prevent our devices from booting normally. This allows you to bypass the standard login screen, unlock the startup drive using our password, and start the decryption process directly from the built-in system tools.
Below. we’ll share with you how to stop FileVault in Recovery Mode.
On older Mac devices, do the following:
Restart your Mac into macOS Recovery.
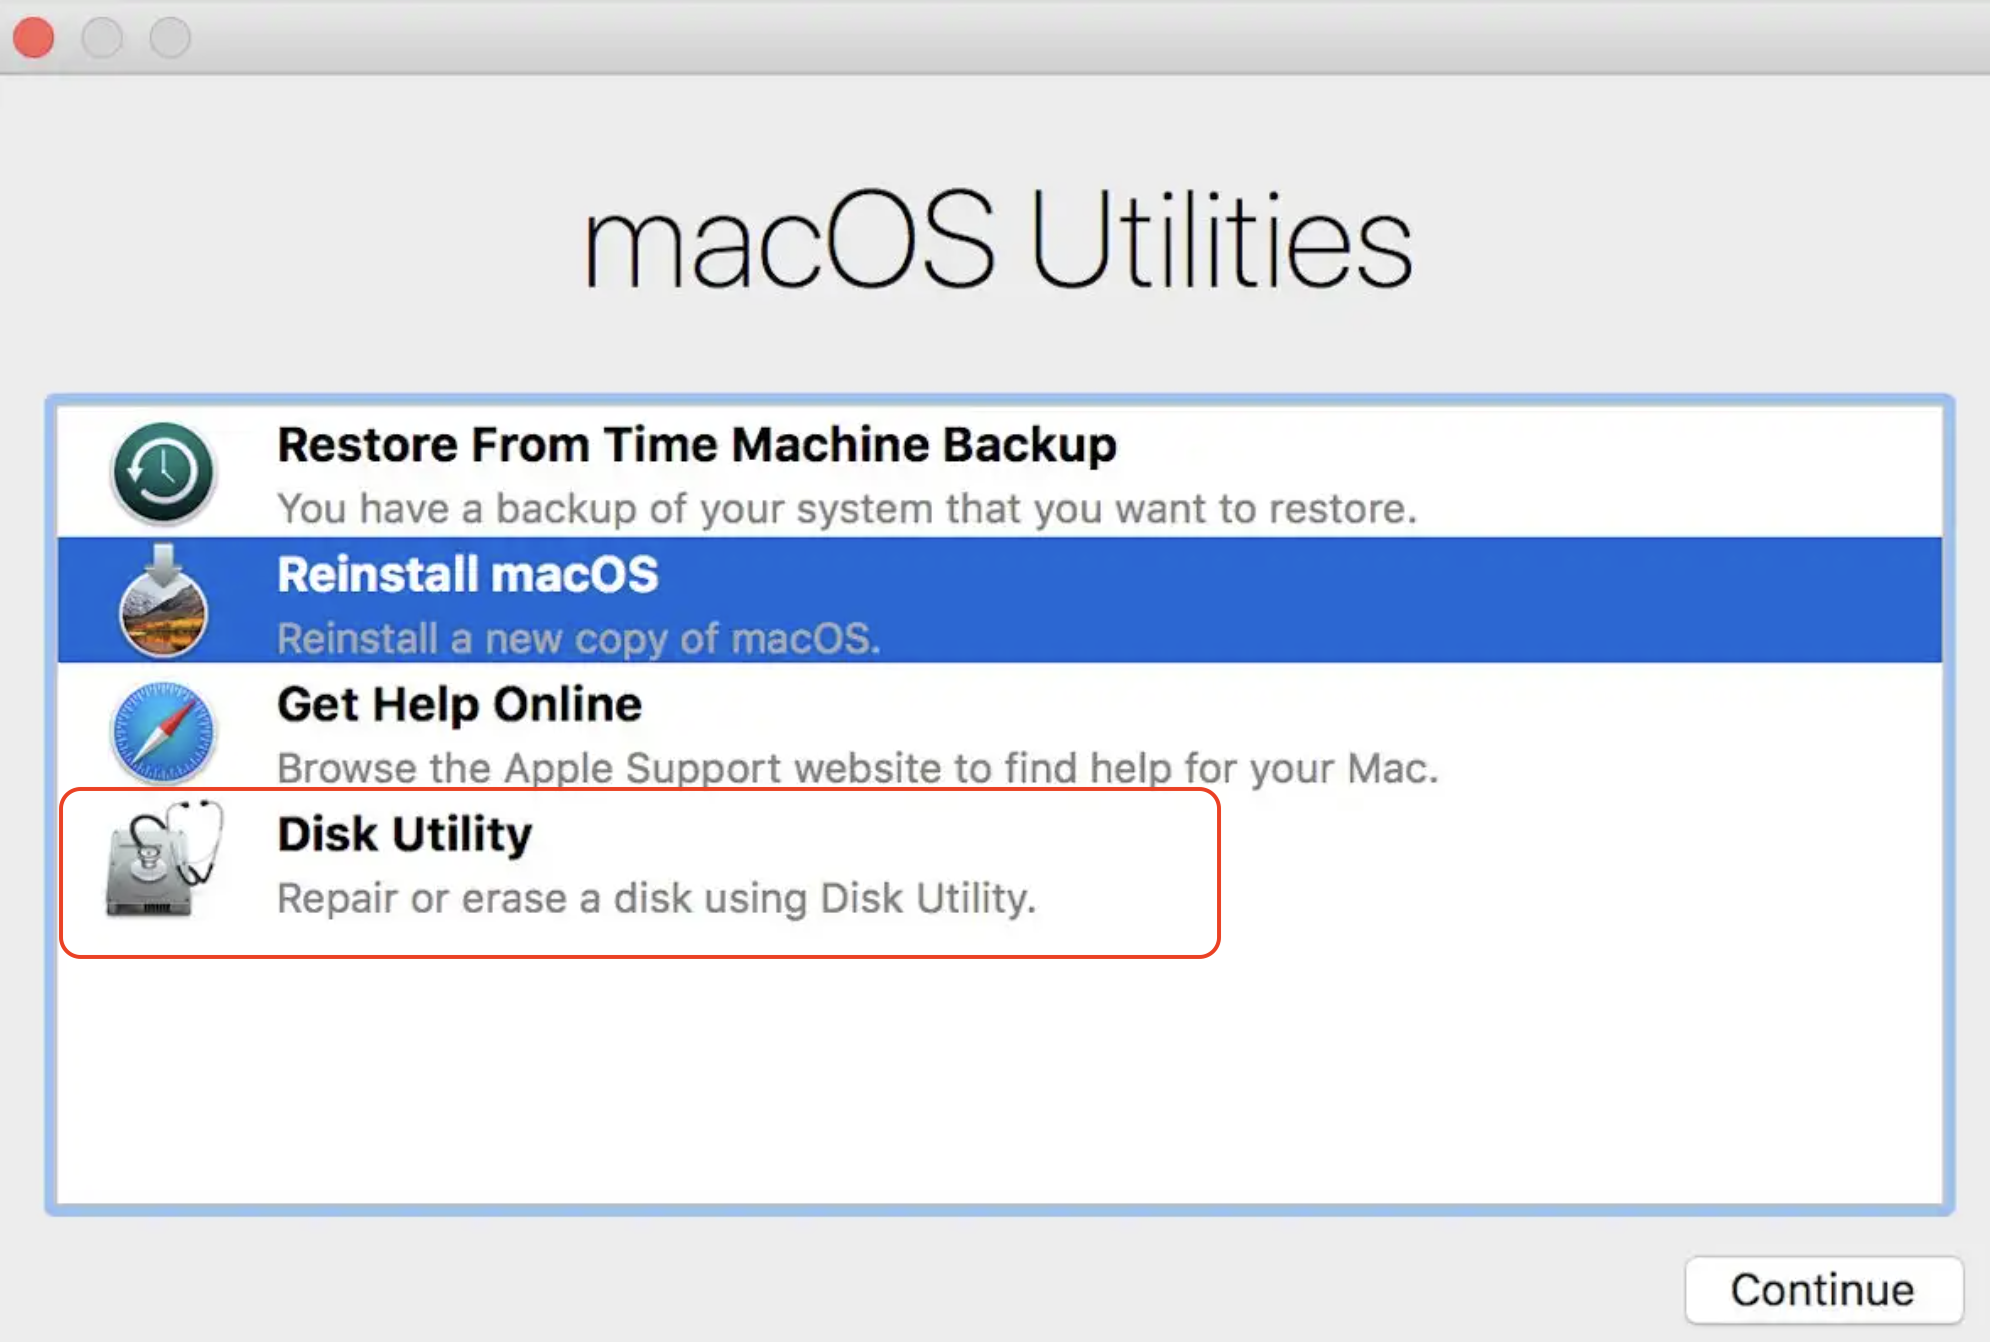
Open Disk Utility and choose your startup disk.
Click File > Turn Off Encryption > enter your password.
Steps 1-2. Restart your Mac into macOS Recovery, open Disk Utility, and choose your startup diskStep 3. Click File > Turn Off Encryption > enter your password
On macOS Mojave or later:
Boot your Mac into macOS Recovery.
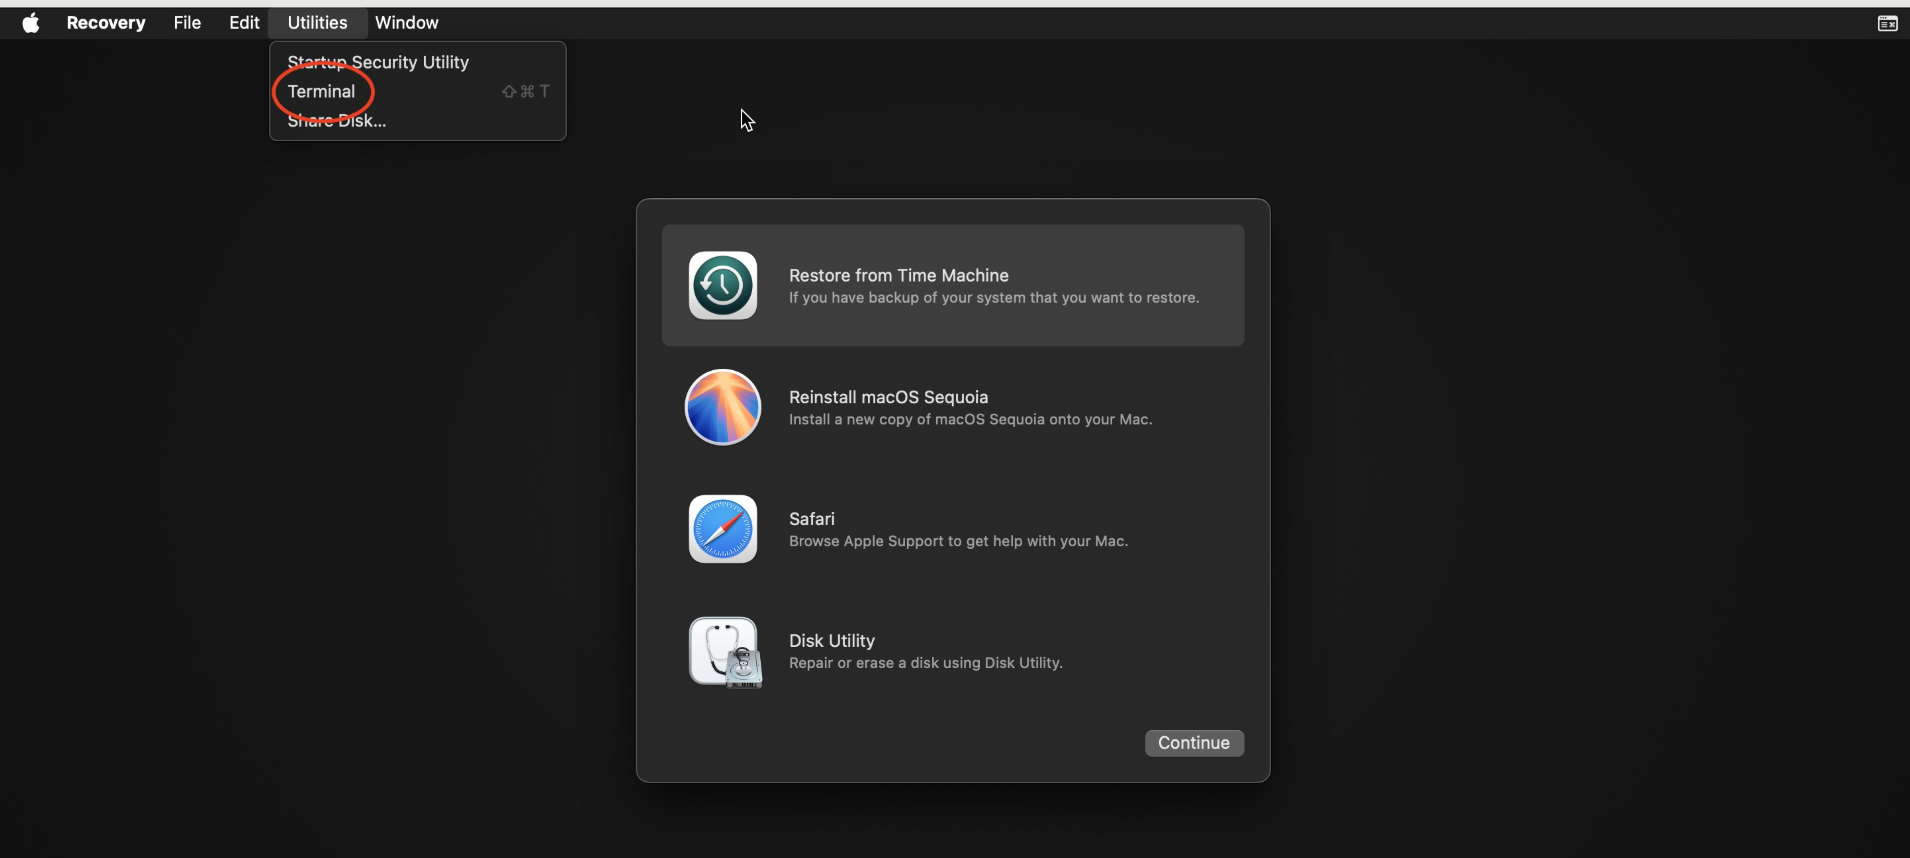
Navigate to the top menu bar and click on Utilities > Terminal.
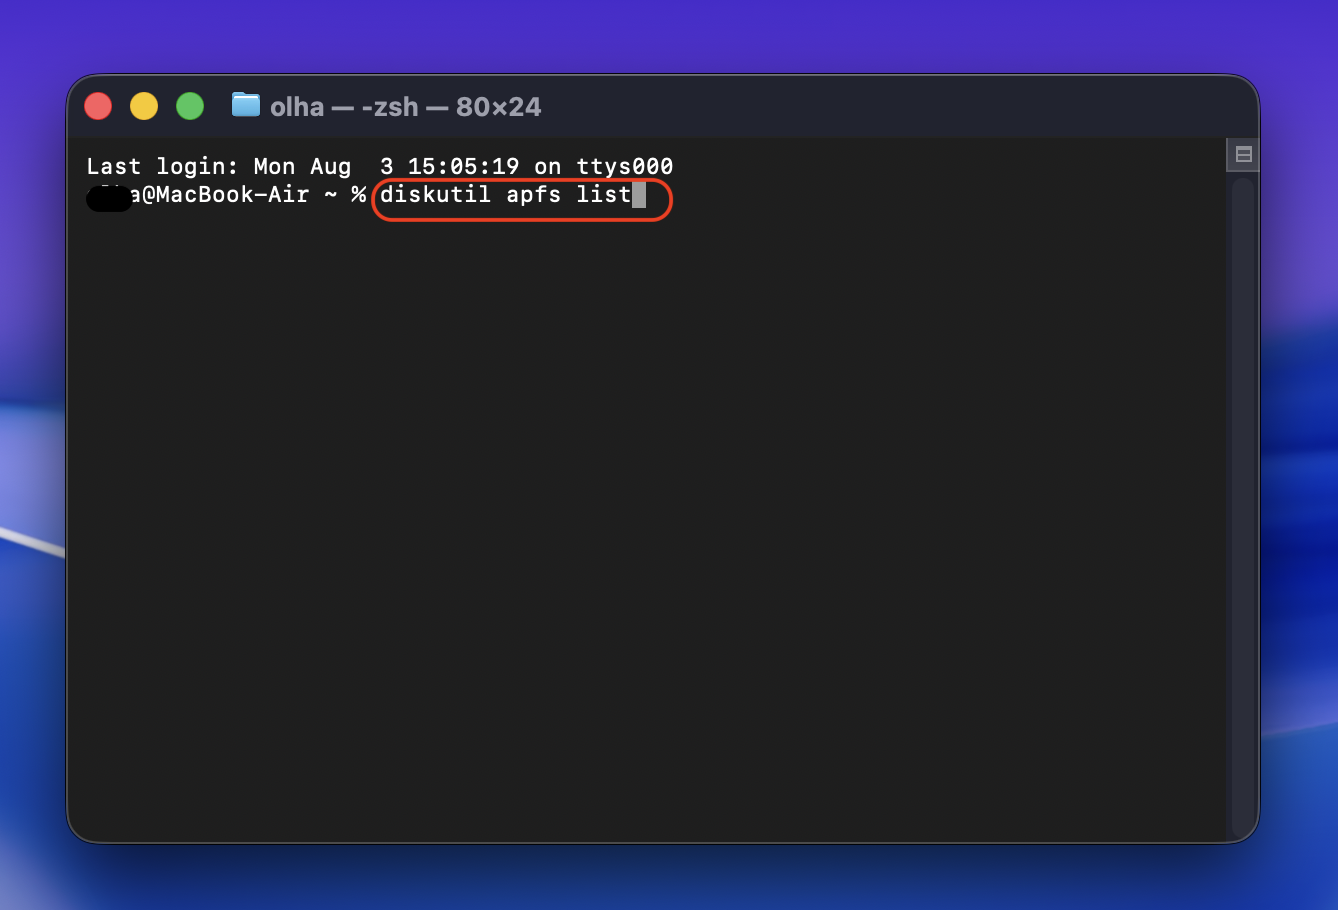
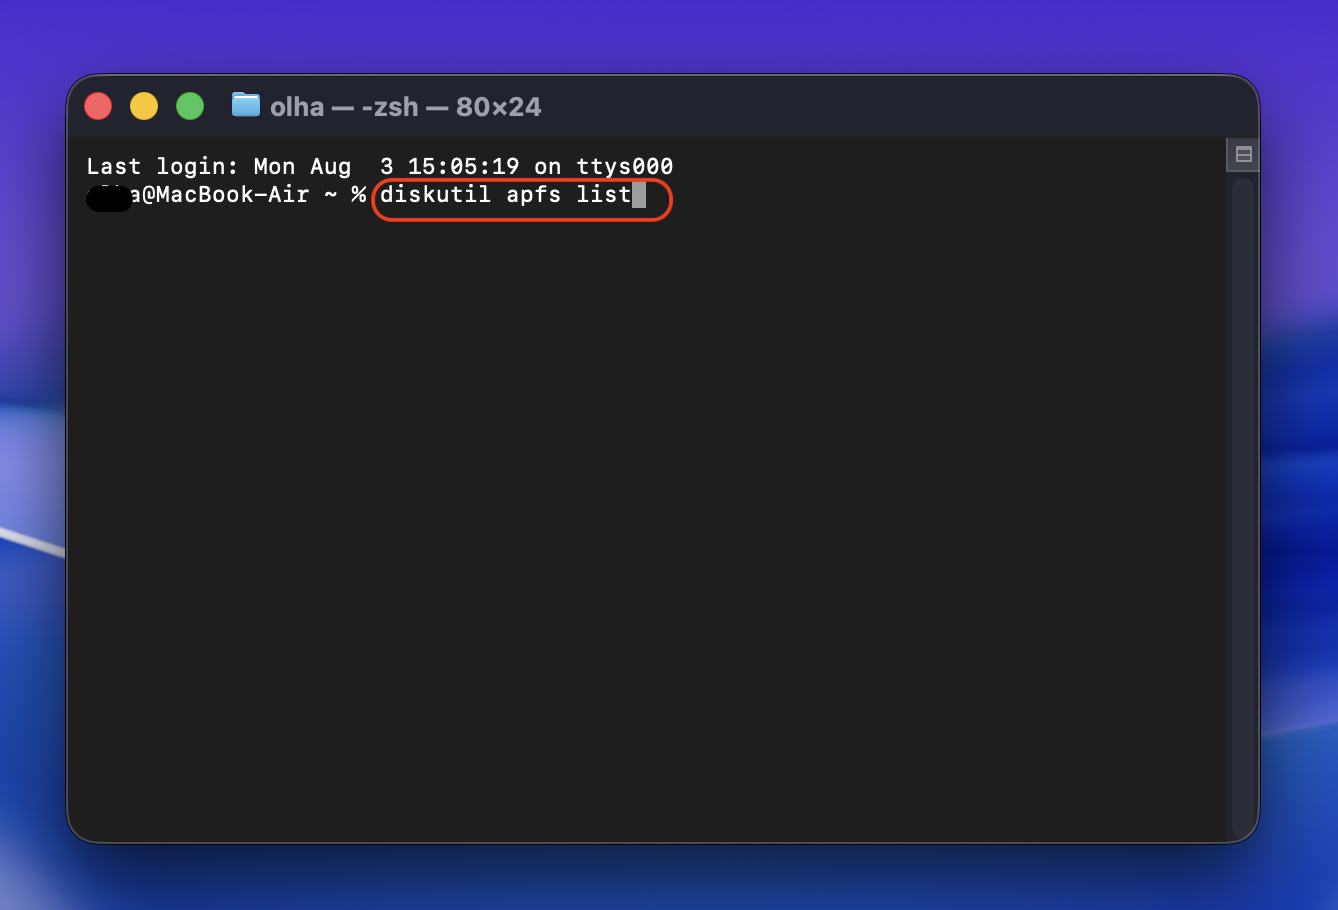
Copy and paste this command in Terminal: diskutil apfs list and press Enter.
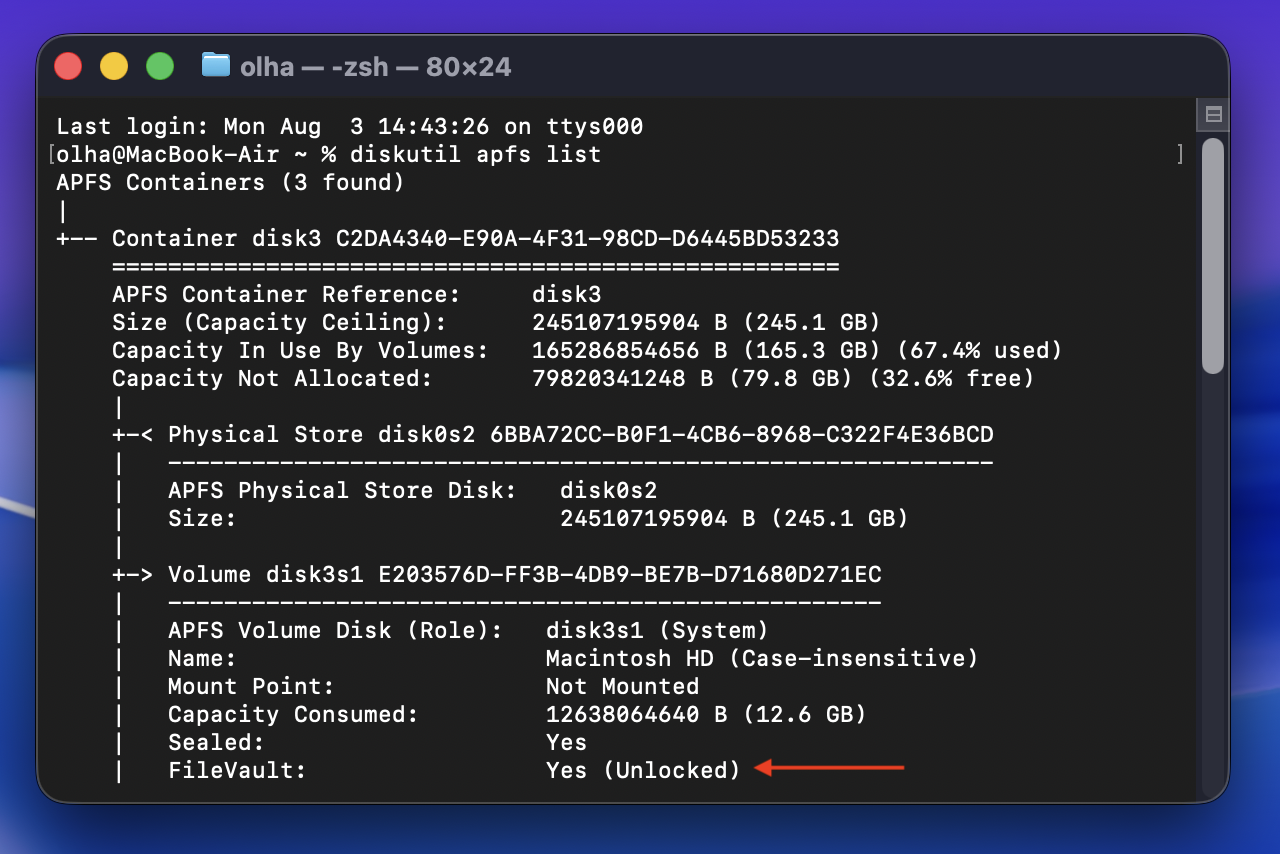
Locate the volume with FileVault enabled and make a note of its identifier (if there are multiple FileVault-enabled volumes, choose the Data volume).
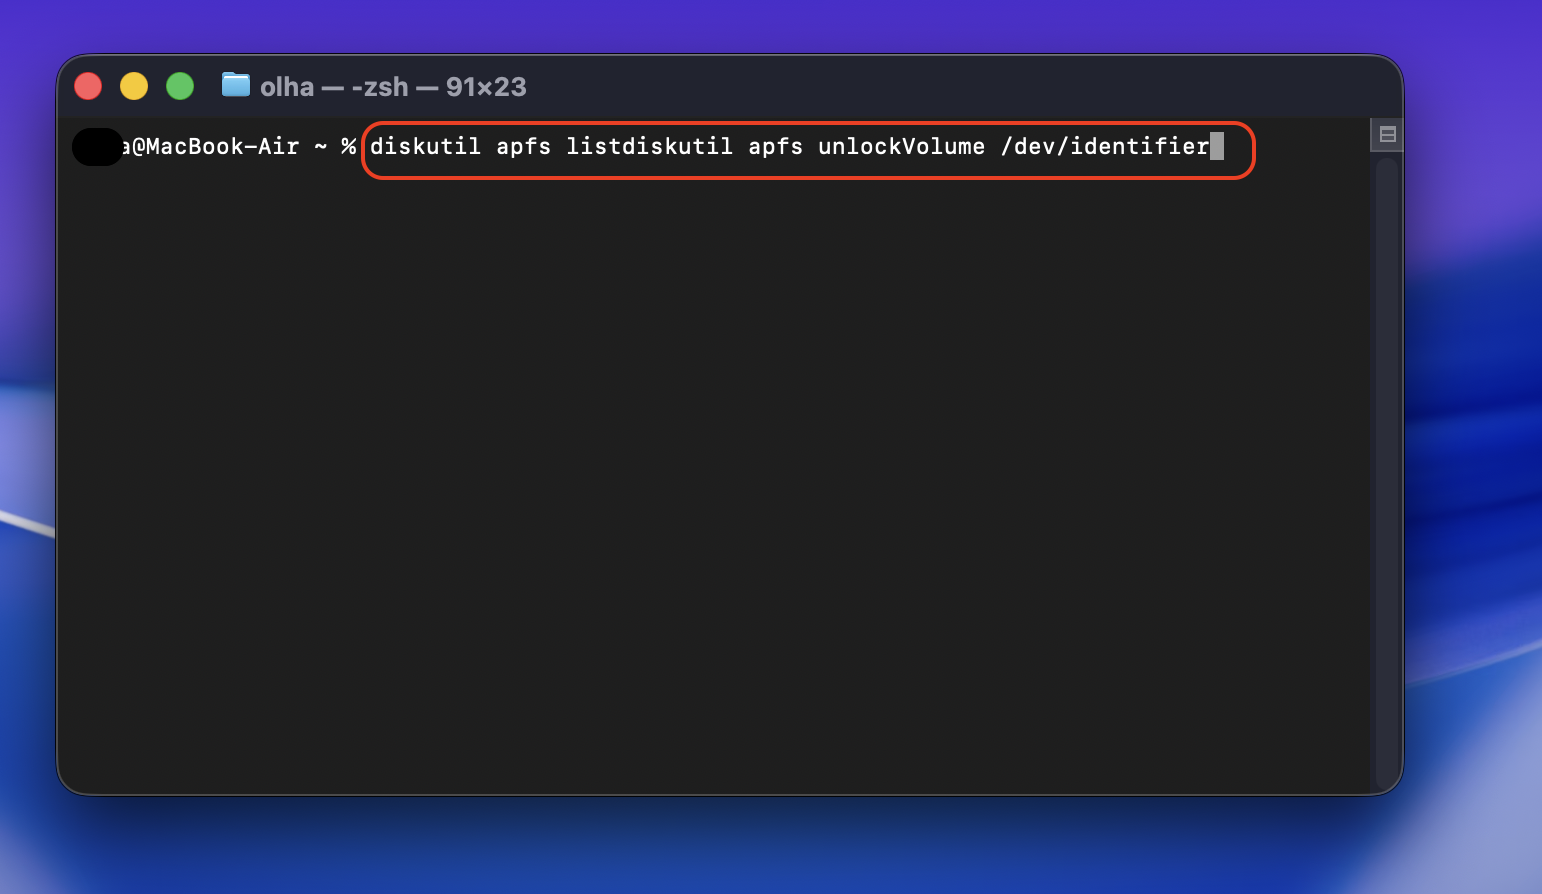
Run the command diskutil apfs unlockVolume /dev/identifier (replace the identifier with the number you wrote down in step 4).
Enter your password and press Enter, then look for a notification that reads Unlocked and mounted APFS volume.
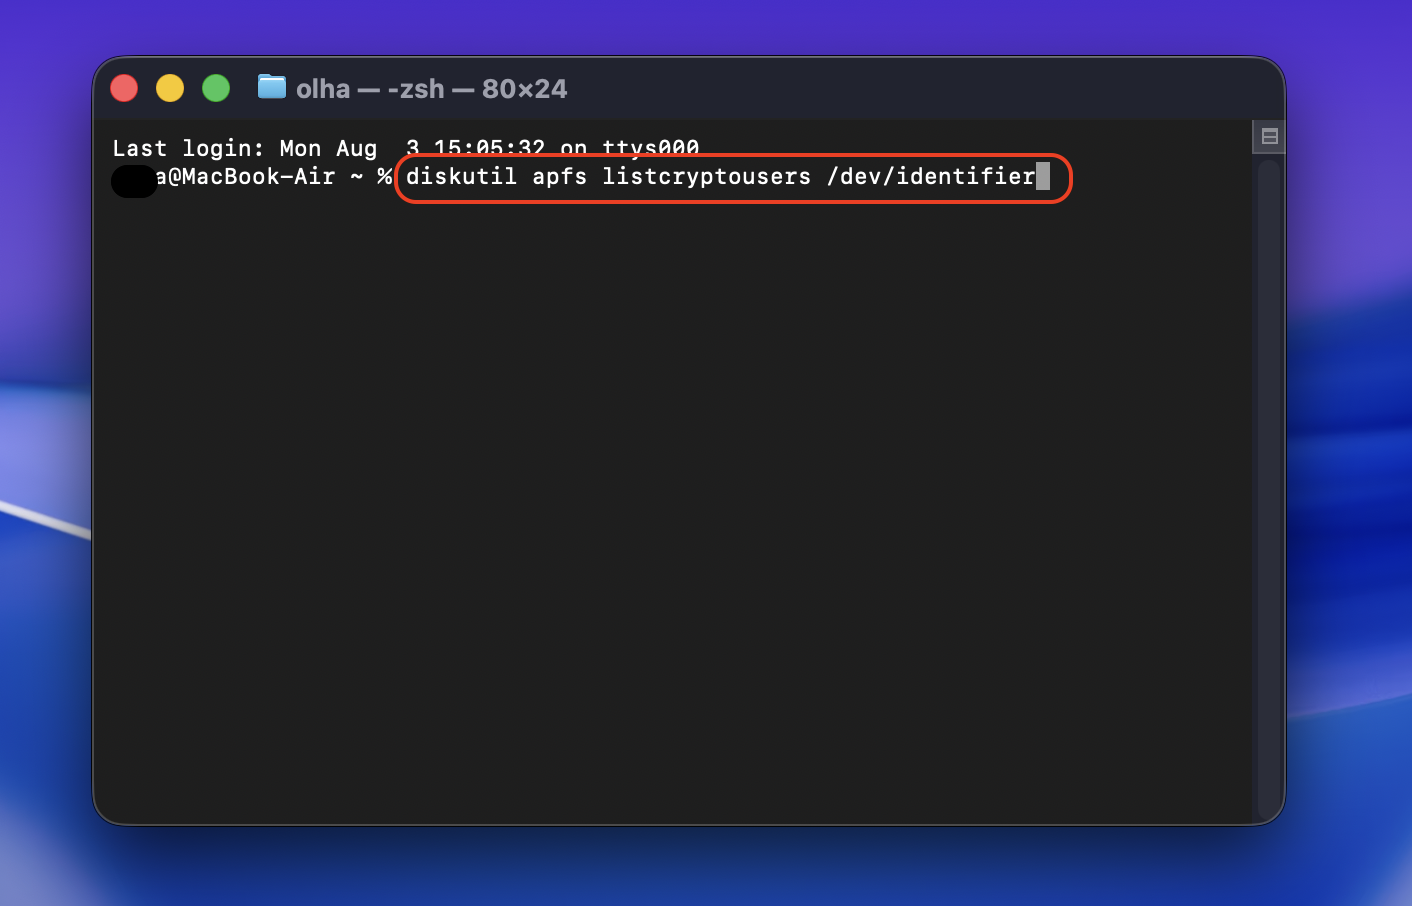
Execute the command diskutil apfs listcryptousers /dev/identifier (replace identifier with yours).
Enter your password and press Enter.
Make a note of the UUID associated with the Local Open Directory User entry.
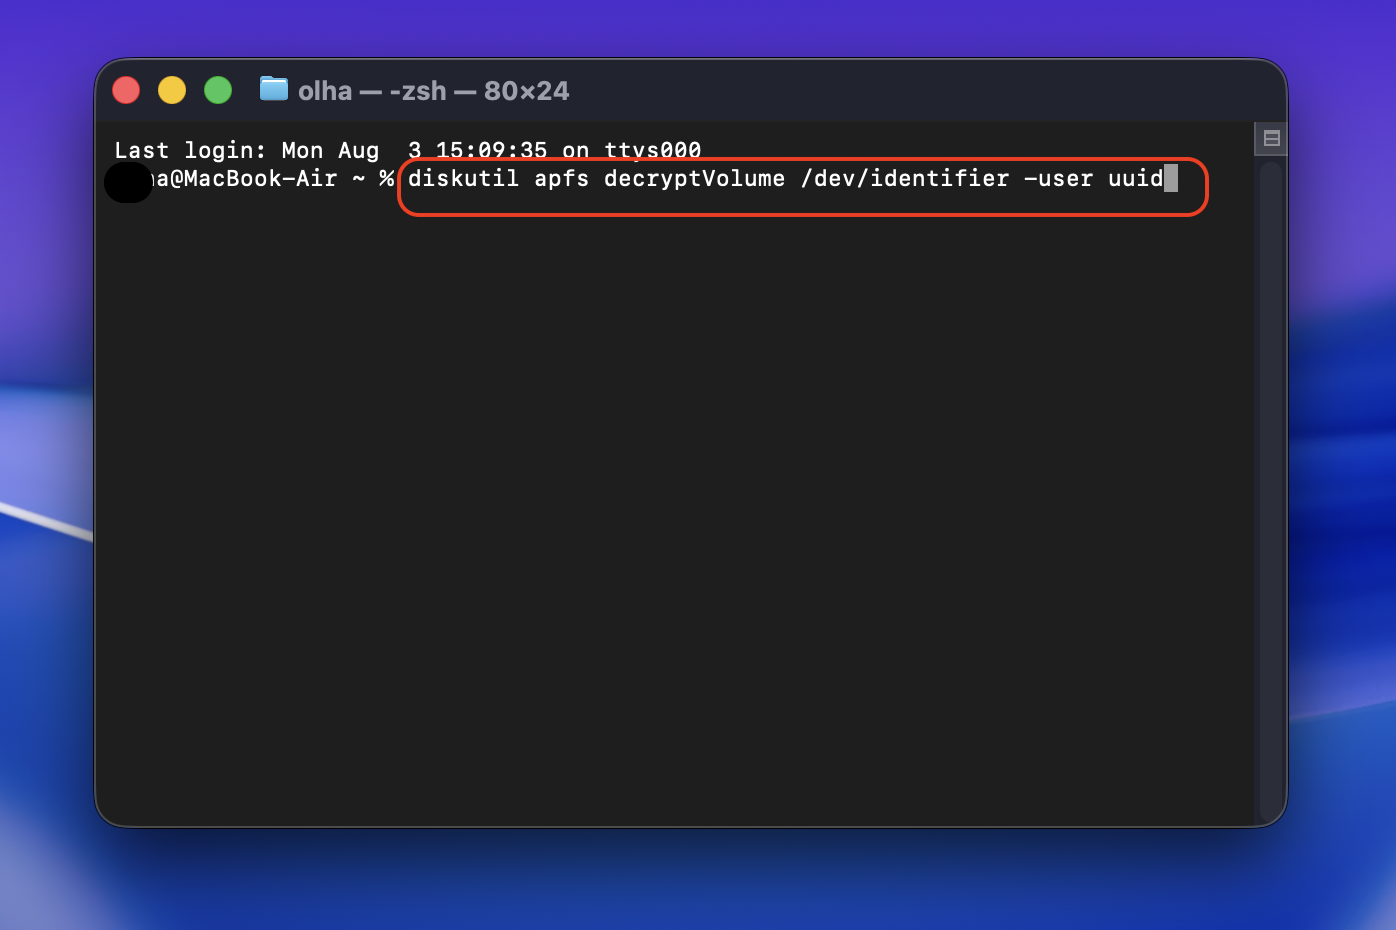
Copy and paste the command diskutil apfs decryptVolume /dev/identifier -user uuid (replace identifier and UUID with yours).
Enter the command diskutil apfs list to monitor the APFS volume’s decryption process.
Step 1. Navigate to the top menu bar and click on Utilities > TerminalStep 2. Copy and paste this command in Terminal: diskutil apfs list and press Enter Step 3. Locate the volume with FileVault enabled and make a note of its identifier (if there are multiple FileVault-enabled volumes, choose the Data volume)Step 4. Run the command diskutil apfs unlockVolume /dev/identifier (replace the identifier with the number you wrote down in step 4)Step 6. Execute the command diskutil apfs listcryptousers /dev/identifier (replace identifier with yours)Step 7. Copy and paste the command diskutil apfs decryptVolume /dev/identifier -user uuid (replace identifier and UUID with yours)Step 8. Enter the command diskutil apfs list to monitor the APFS volume’s decryption process
4. How to disable FileVault on managed (MDM) devices?
IT administrators can remotely disable FileVault for MacBook computers deployed in organizations. This allows network admins to push specific configuration profiles or remote terminal commands to automatically trigger the drive decryption sequence across a single Mac or an entire fleet.
Disable FileVault safely on a Mac
In this guide, we’ve provided a handful of methods to disable FileVault on a Mac. Choose the solution you’re comfortable with, such as stopping FileVault in Recovery Mode. However, remember that turning off encryption leaves your local storage vulnerable.
Using a browser tool like MacKeeper’s StopAd is a smart way to add a layer of protection. It stops online threats at the front line by instantly blocking the malicious pop-ups and tracking scripts that can put an unencrypted Mac at risk.
We respect your privacy and
use cookies
for the best site experience.
Privacy Preferences Center
We use cookies along with other tools to give you the best possible experience while using the
MacKeeper website. Cookies are small text files that help the website load faster. The cookies we
use don’t contain any type of personal data meaning they never store information such as your
location, email address, or IP address.
Help us improve how you interact with our website by accepting the use of cookies. You can change
your privacy settings whenever you like.
Manage consent
All cookies
These cookies are strictly necessary for enabling basic website functionality (including page
navigation, form submission, language detection, post commenting), downloading and purchasing
software. The website might malfunction without these cookies.