In this article you will find the following:
What to know before uninstalling Tor Browser?
Dragging Tor Browser to the Trash removes the app itself, but that’s often only half the job. Support files, preferences, saved state, cache, and profile data can stay tucked away in hidden folders. To completely uninstall Tor Browser on macOS, you need to remove both the app and everything it leaves behind.
Think of it like moving out of an apartment—the furniture is gone, yet a few boxes are still in the closet. Those leftover files are harmless, but they take up space and clutter your Library. If you’re also comparing options for your next best web browser for Mac, it helps to start with a clean slate.
Below, we’ll walk through both the manual route and a faster automatic one, so you can pick whichever feels right for you.
How to delete Tor Browser from Mac manually?
The manual method suits anyone comfortable with Finder and hidden folders, and it works much like the way you delete apps on MacBook in general. You’ll quit the browser, remove it from Applications, then clear its leftover files by hand. Take it one step at a time with us—follow our manual walkthrough below to clear out every trace of the browser.
A note from our experts:
We understand you may be interested in manually deleting Tor Browser, so we’ll share the best ways to do so below. However, before you start reading these steps, we’d like to note that uninstalling the app with all leftovers is always a winning strategy. And for this, you need to use a third-party app like MacKeeper’s Smart Uninstaller. With its help, you’ll remove all the hidden support files, cache, log files, and associated app rubbish, freeing up more space on your Mac.
1. Quit Tor Browser
First, make sure the browser is fully closed. Quitting a window isn’t enough—the app can keep running in the background.
Here’s the quickest way to do it:
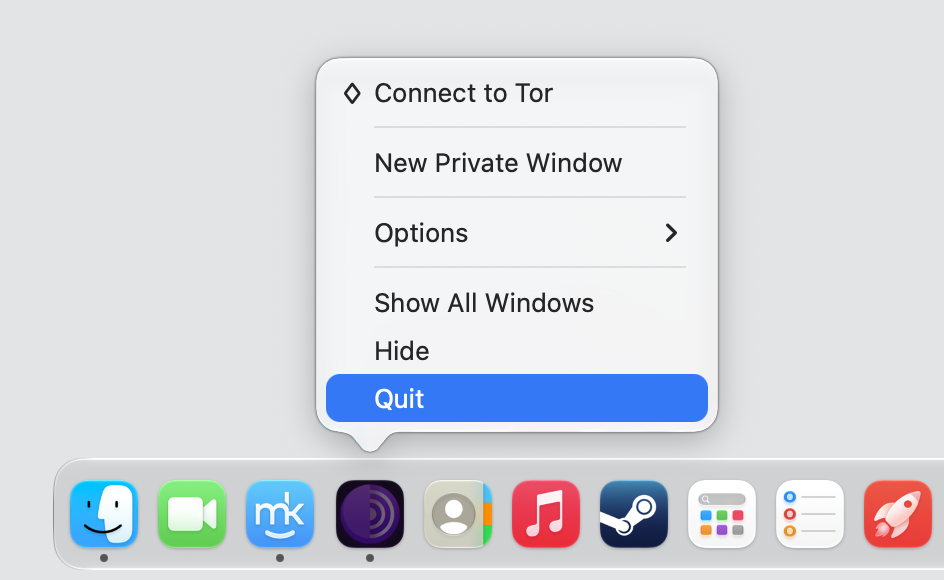
- Control-click the Tor Browser icon in the Dock, then choose Quit.
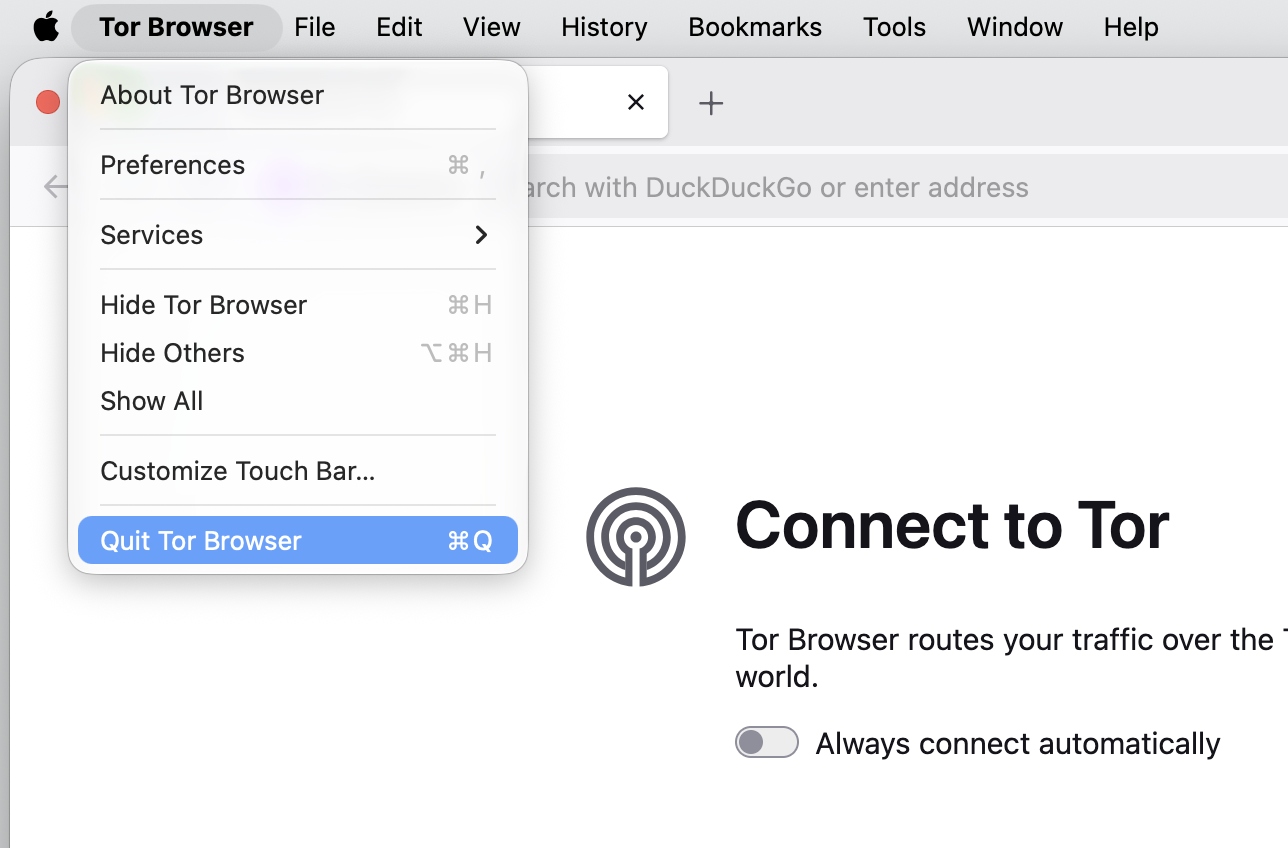
- If the browser is open, select Tor Browser in the menu bar, then click Quit Tor Browser.
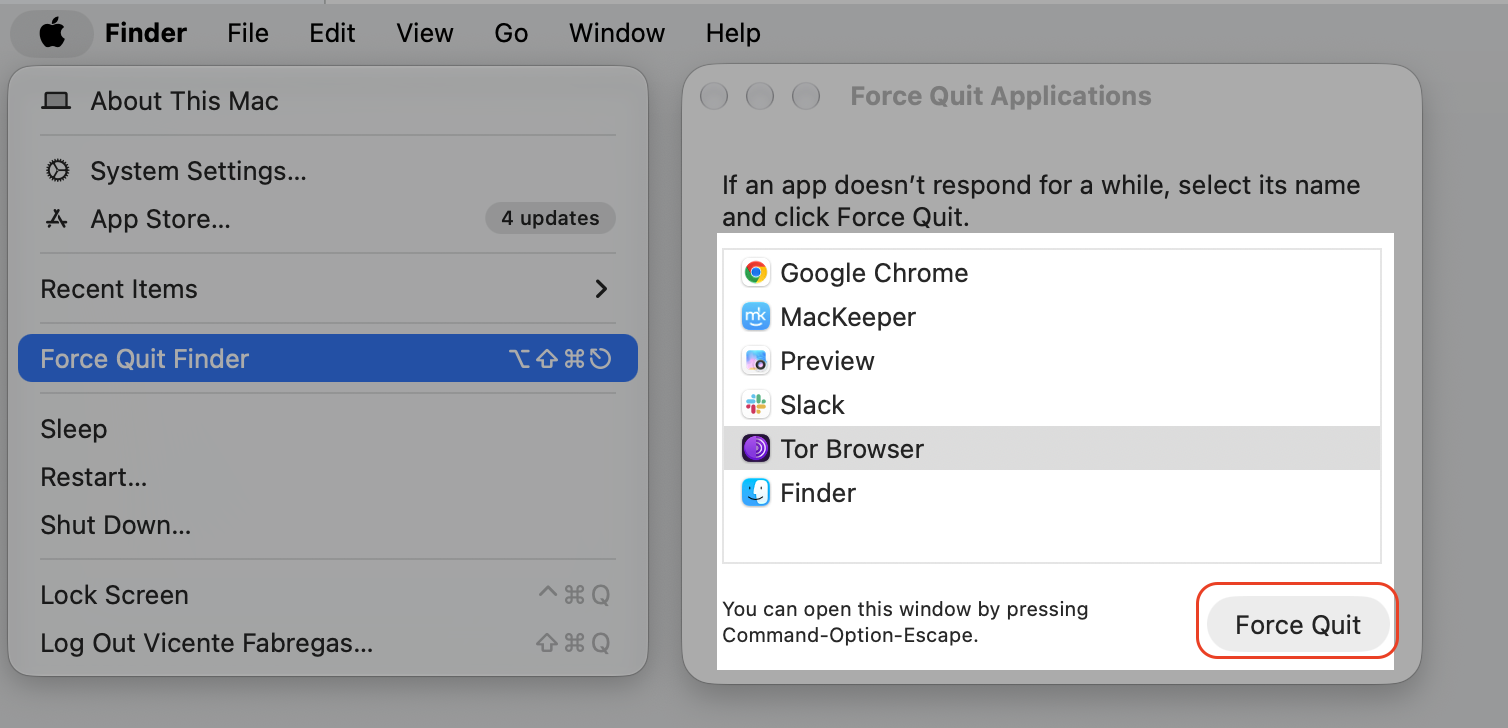
- If it’s stuck or unresponsive, go to Apple menu, choose Force Quit, select Tor Browser, and confirm Force Quit.
2. Delete Tor Browser from Applications
With the browser quit, you can remove the app itself. If you’re not sure where to find Applications folder on Mac, it lives in the Finder sidebar and holds every app you’ve installed.
Follow these steps to move it out:
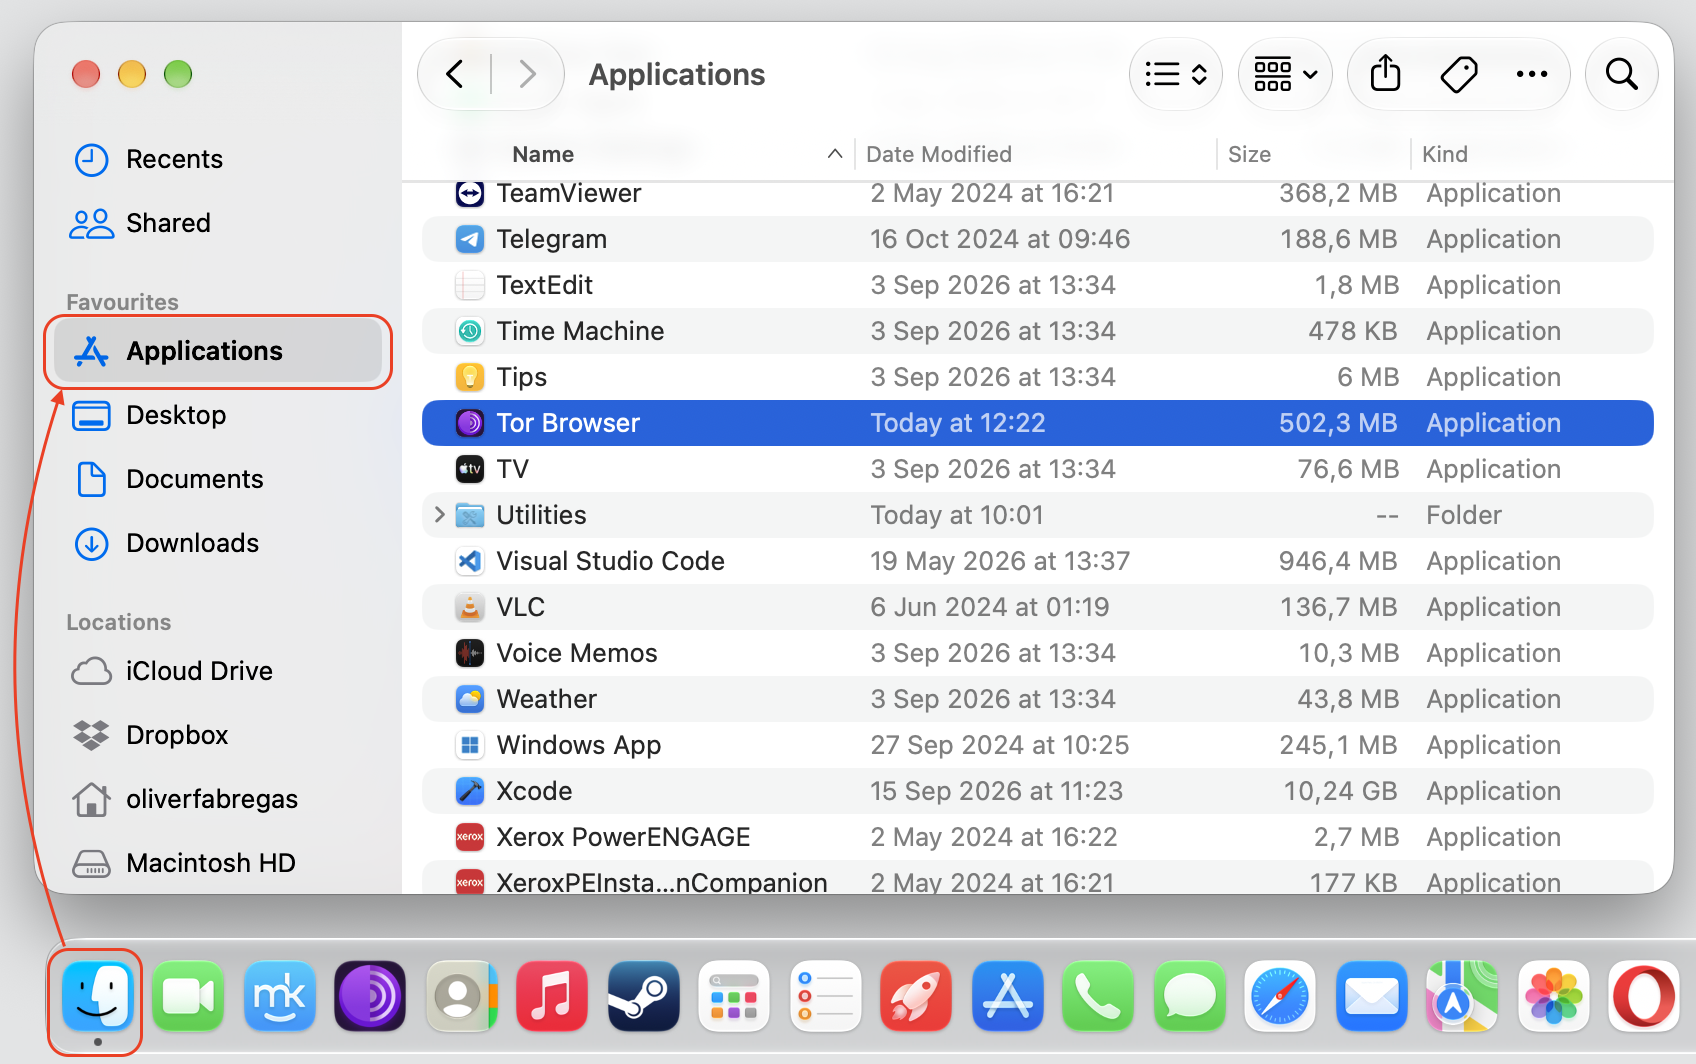
- Open Finder from your Dock.
- Click Applications in the left sidebar.
- Find Tor Browser in the list of applications.
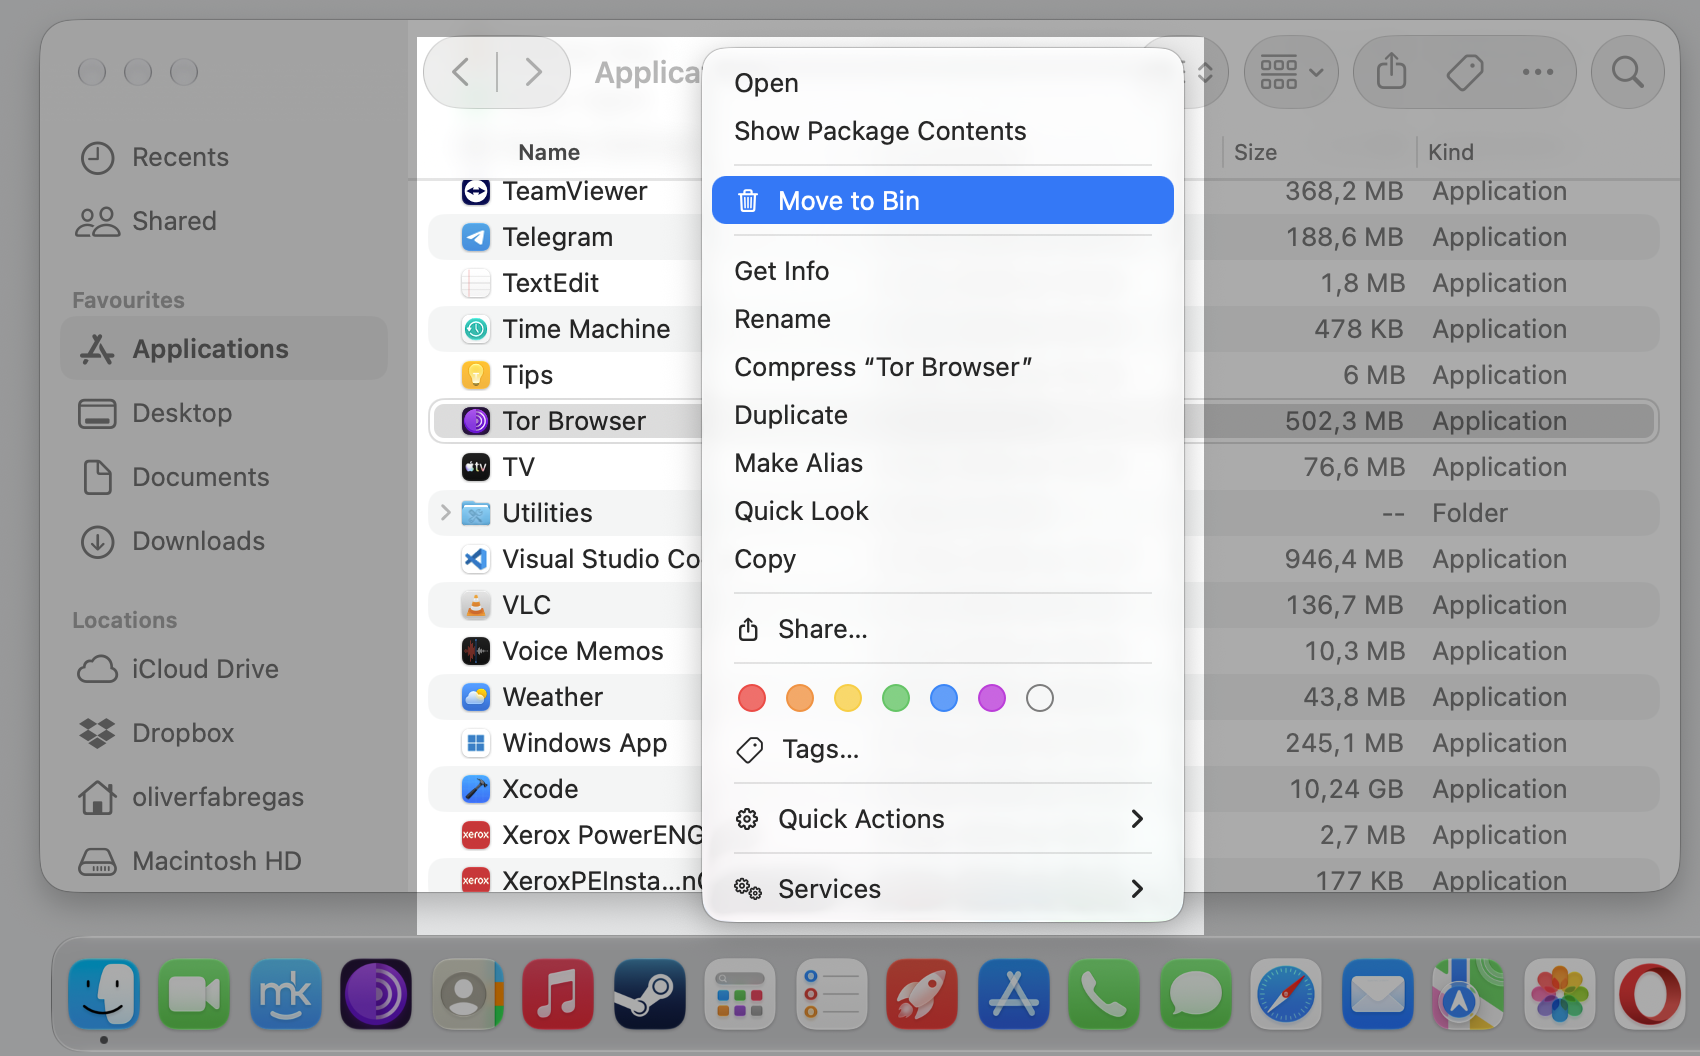
- Drag it to the Bin, or right-click it and choose Move to Bin.
3. Open hidden Library folder
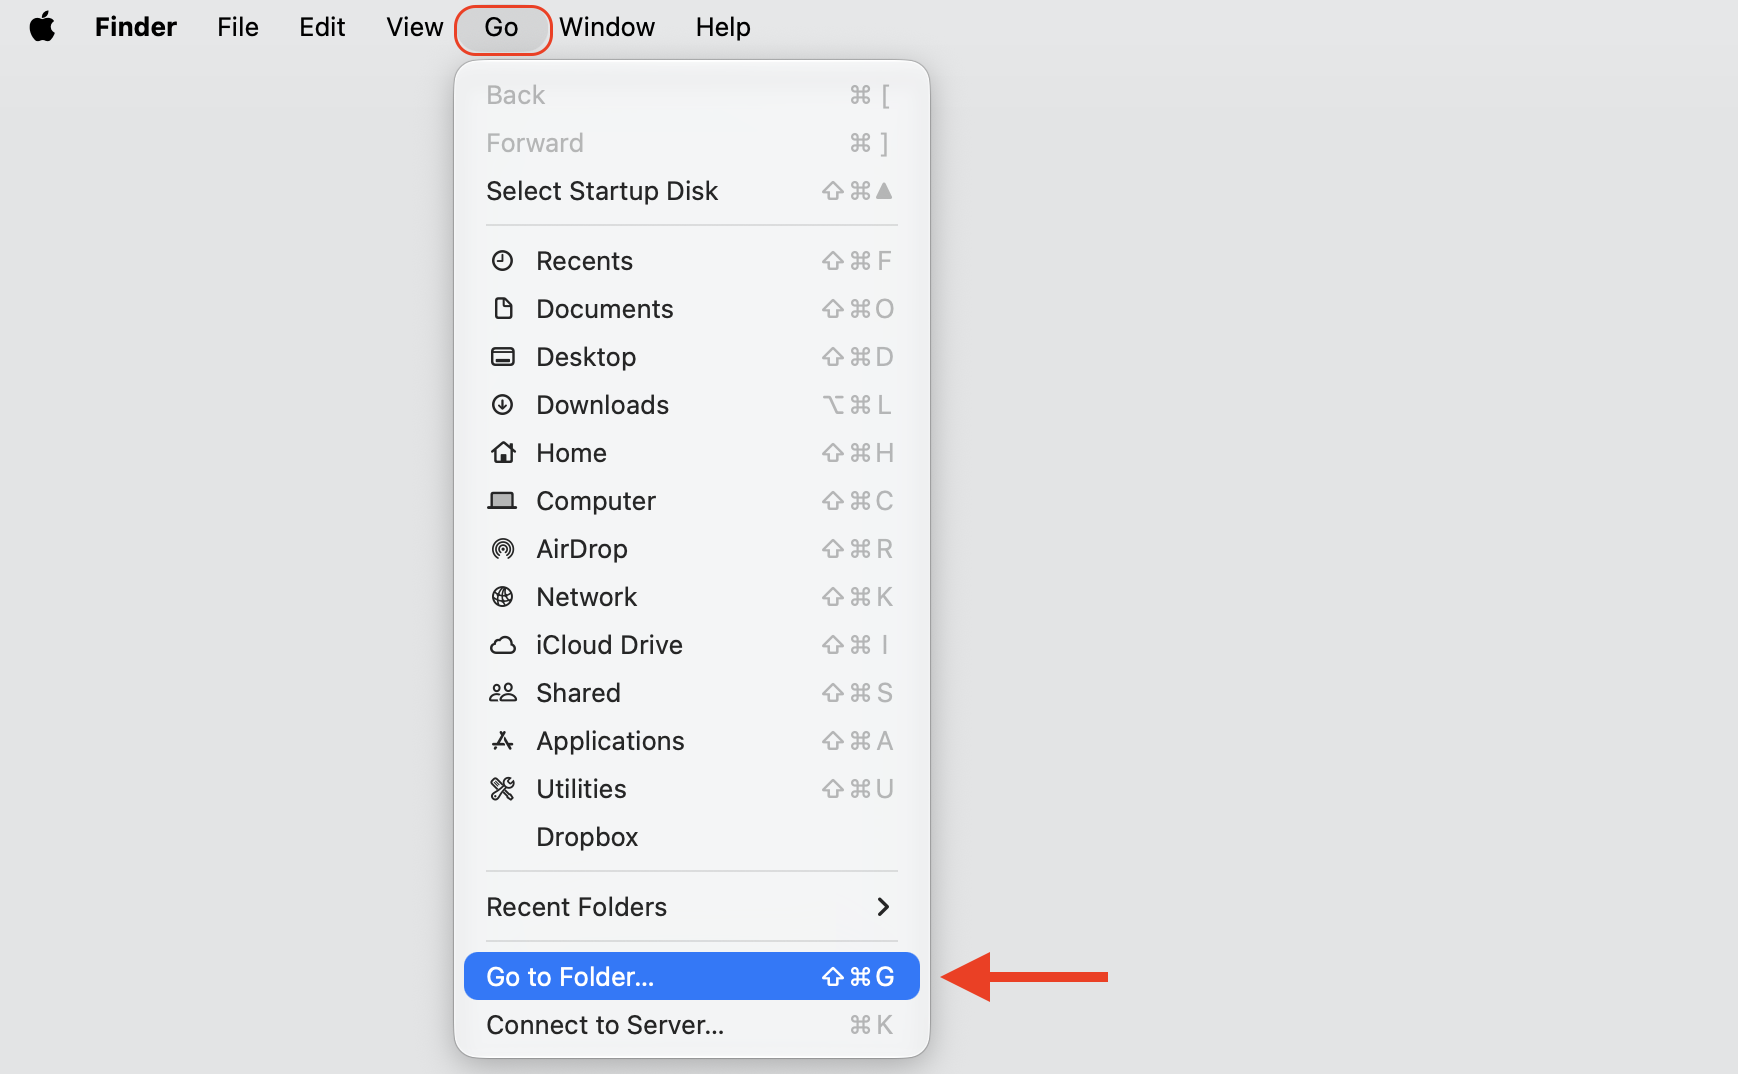
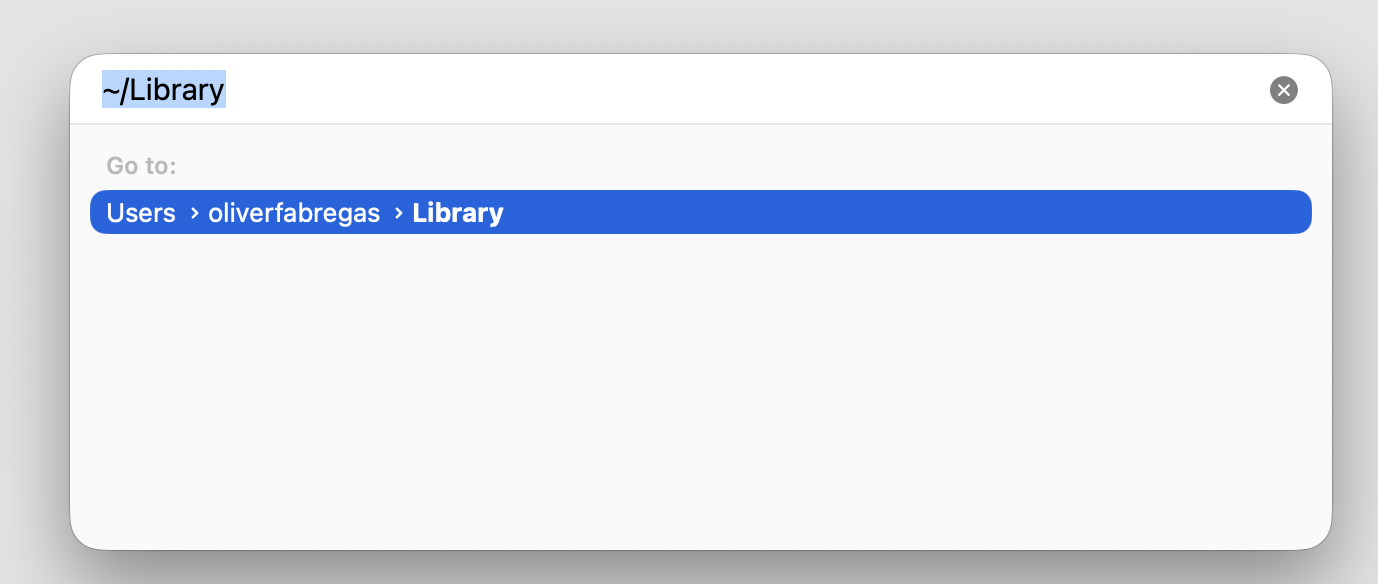
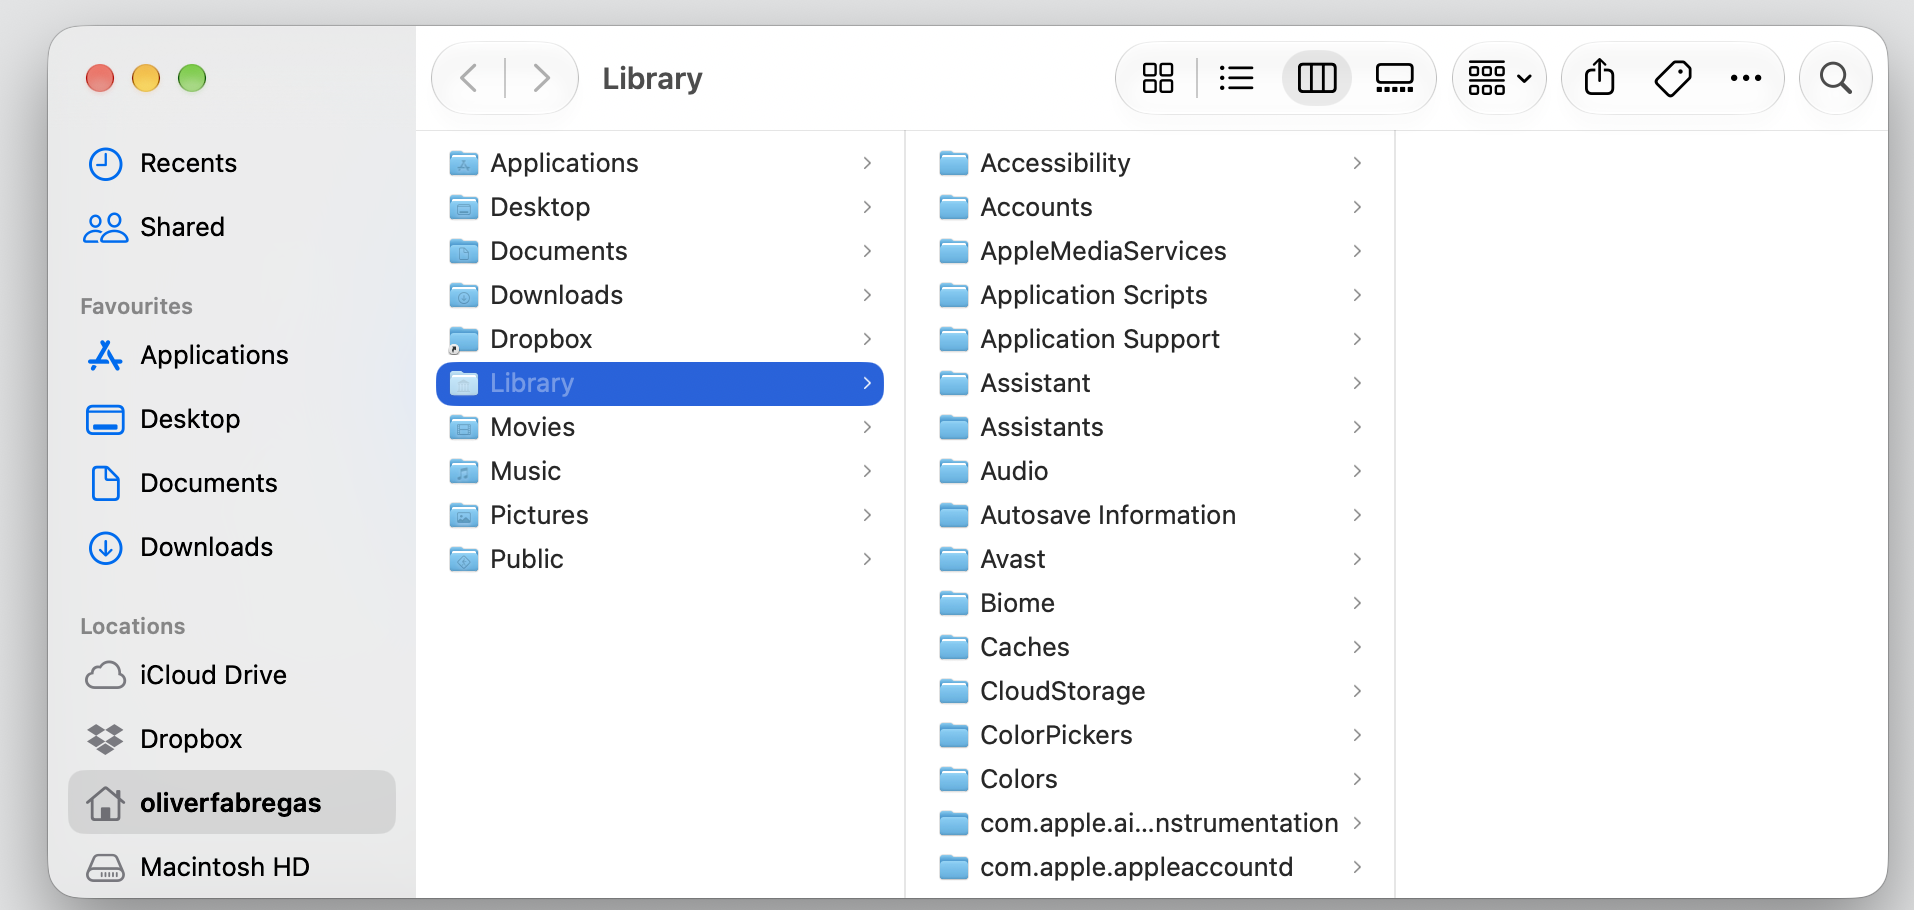
The Library folder is hidden by default, which is why leftover files are easy to miss. You can access Library on Mac in a few clicks using Finder’s Go to Folder option.
You can reach it in a couple of ways:
- In Finder, click Go in the menu bar, then hold Option and select Library. Alternatively, press Shift + Command + G to open the same window.
- Type ~/Library, and press Return.
- Browse the folders carefully, and remove only Tor-related items so you don’t touch files that other apps depend on.
4. Remove Tor Browser support files
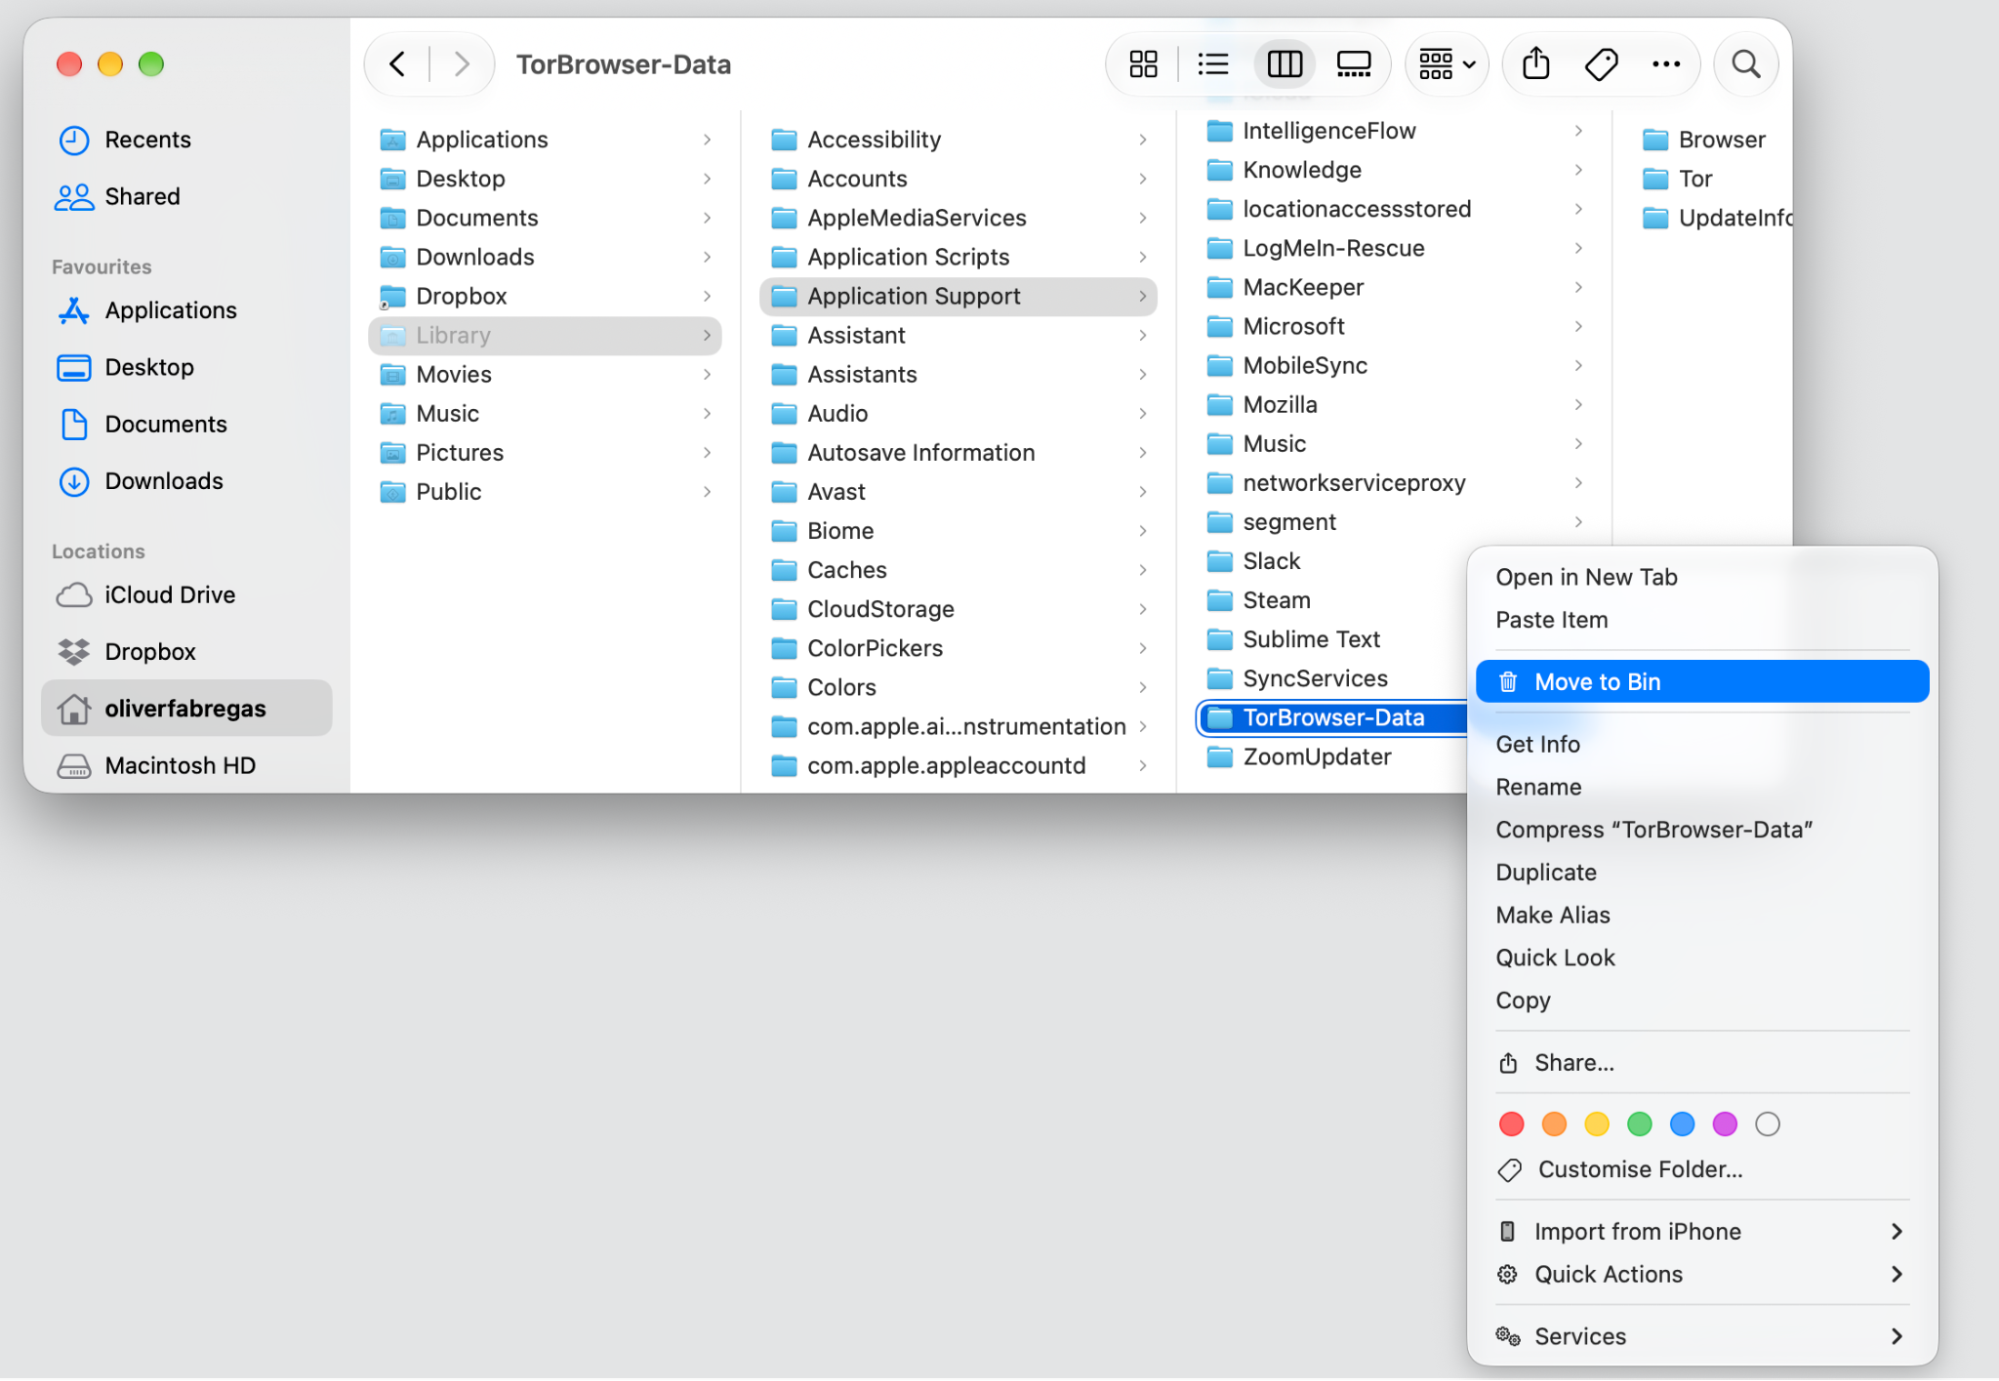
Now let’s search the Library subfolders for anything tied to Tor Browser. Exact file names vary depending on the version you had installed, so look for entries that include “Tor” or “TorBrowser” in the name.
Here are the main locations we suggest checking:
- ~/Library/Application Support/TorBrowser-Data—profile data and saved settings
- ~/Library/Caches—temporary cache files
- ~/Library/Preferences—preference files for the browser
- ~/Library/Saved Application State—saved window and session state
Move any matching items to the Trash. When you’re removing files manually, it’s good practice to double-check each name before you delete it.
An extra hint from our team:
We’d say that clearing the support files out is the same idea as when you delete leftover files from uninstalled programs on Mac after removing any other app. A quick sweep keeps your laptop clean and your Library uncluttered.
5. Empty Trash
Your uninstall isn’t finished until you empty the Trash—that’s the moment the files are actually removed. Before you clear Trash on Mac, take a quick look inside to confirm you’re only clearing Tor-related items.
Do the following to finish up:
- Control-click the Bin icon in your Dock.
- Review the contents to make sure nothing important is there.
- Select Empty Trash, then confirm.

How to get rid of Tor Browser automatically?
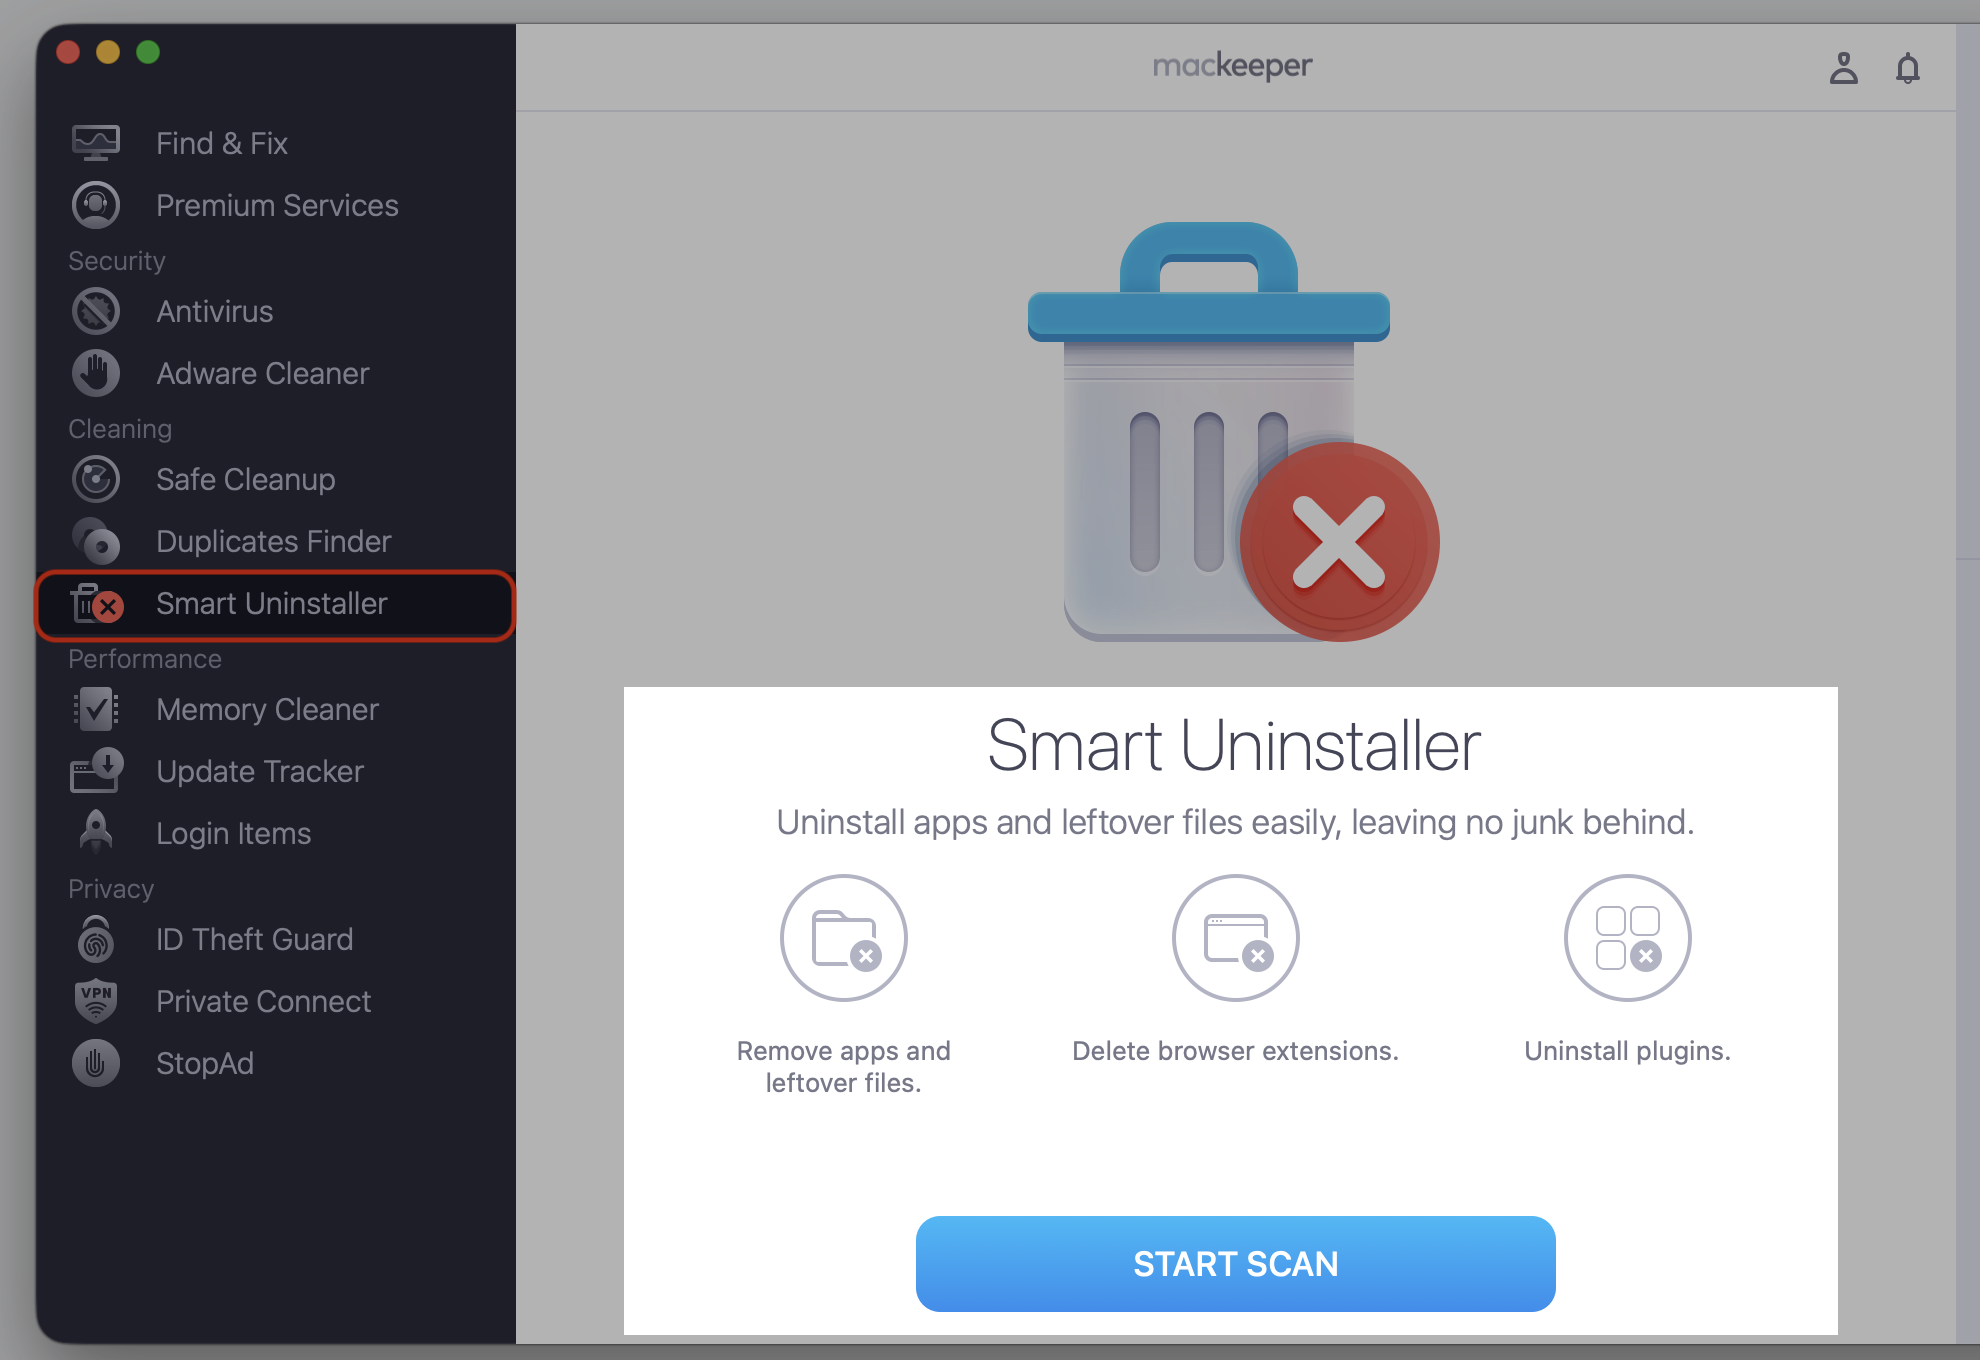
If hunting through hidden folders sounds tedious, an app uninstaller can get rid of Tor from Mac for you. MacKeeper’s Smart Uninstaller finds the app and its associated files, then removes them together—no manual searching required. It’s a safer option for anyone who’d rather not dig around the Library by hand.
It only takes a few clicks:
- Open MacKeeper and select Smart Uninstaller in the sidebar.
- Click Start Scan to list your installed applications.
- Find Tor Browser and select it, along with any related leftover items.
- Click Remove Selected, then confirm.
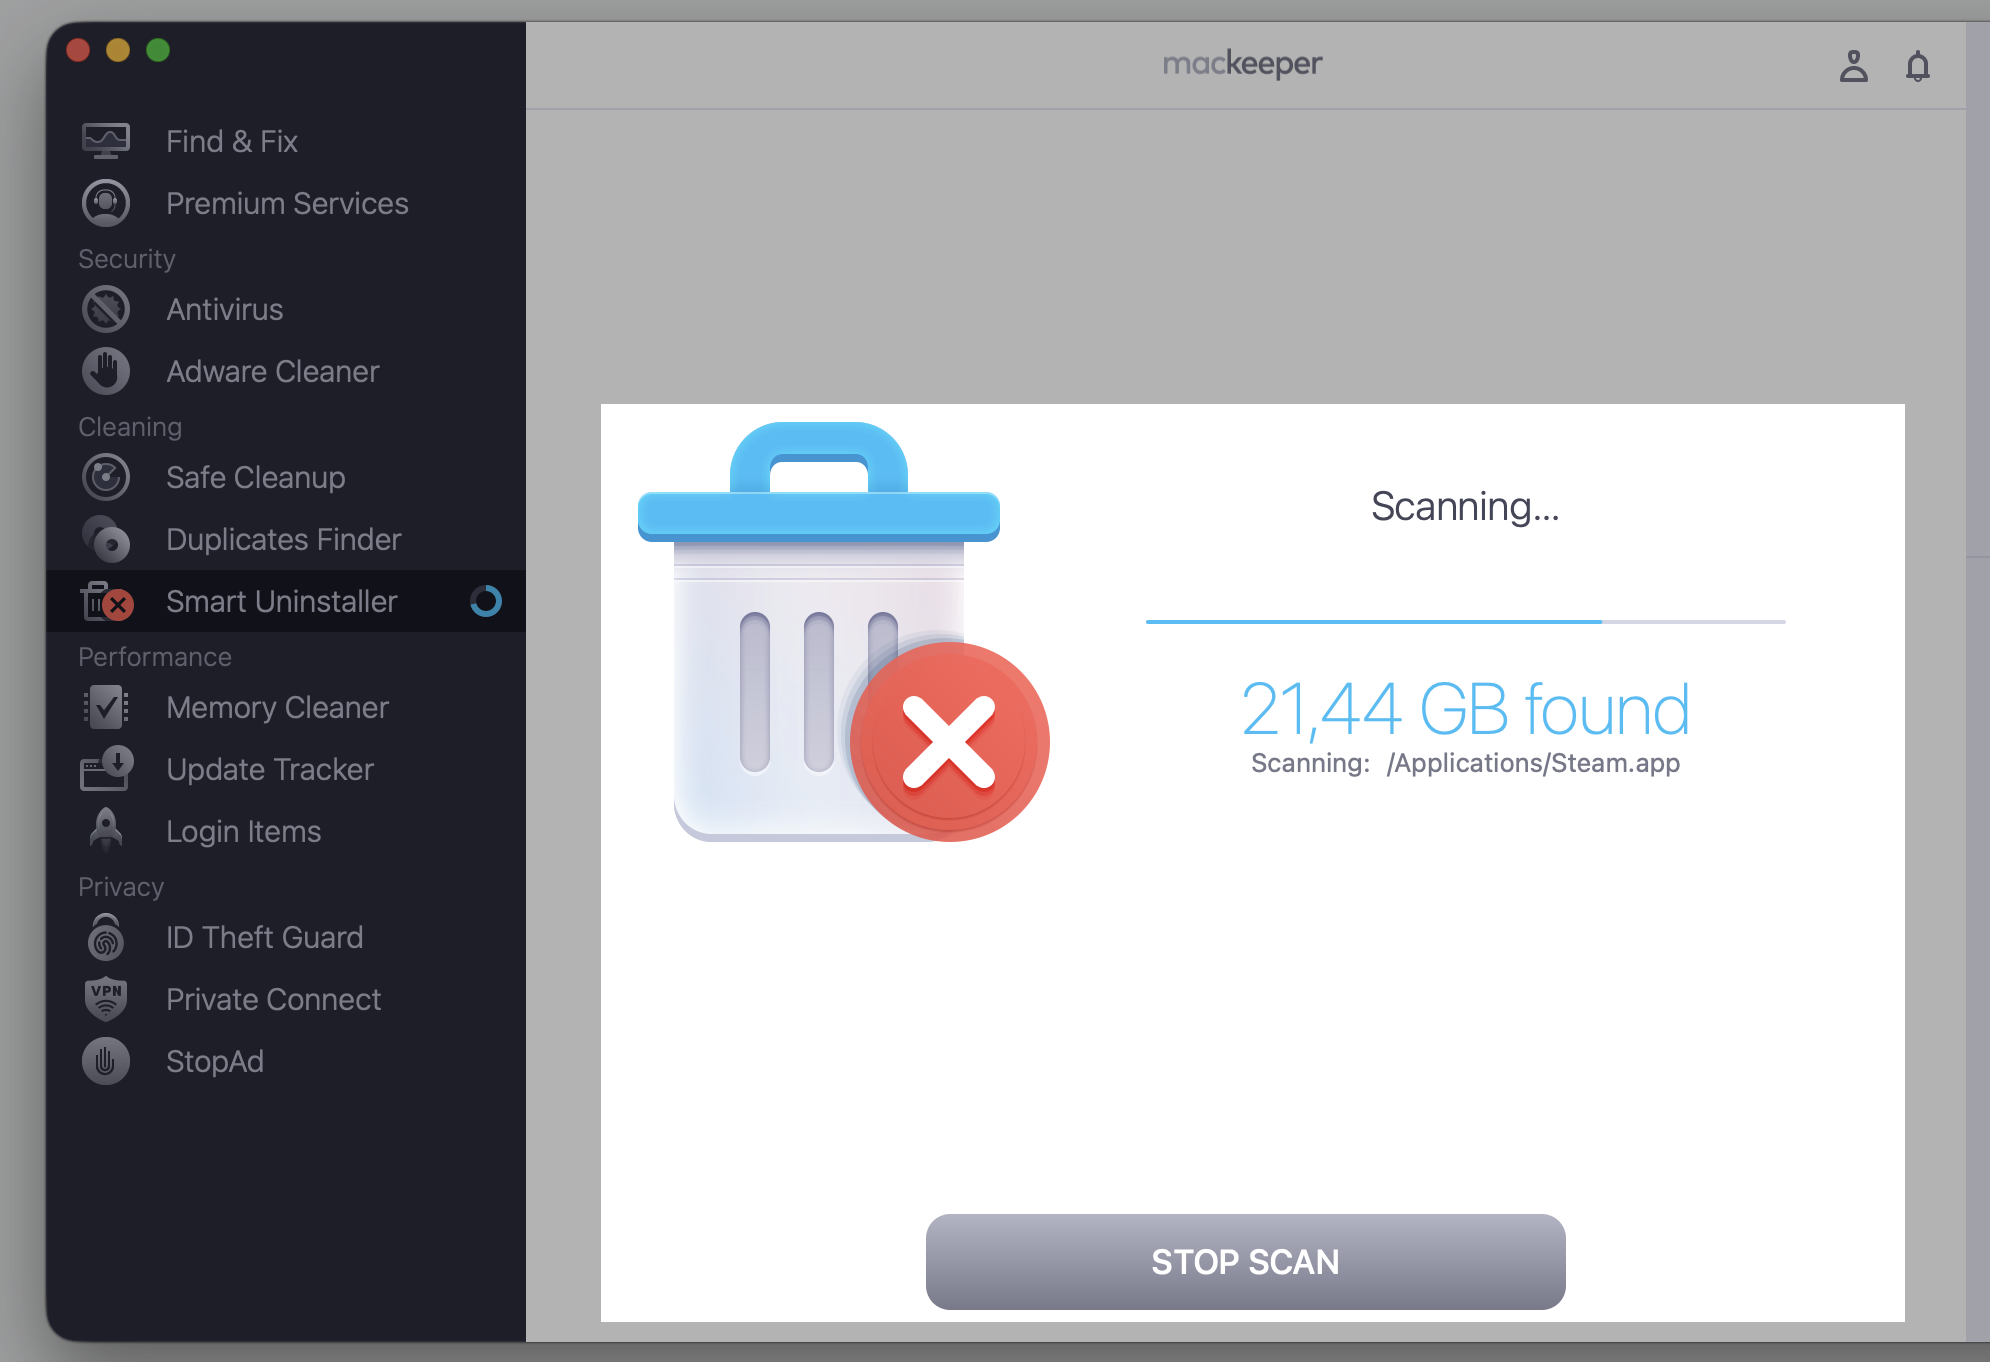
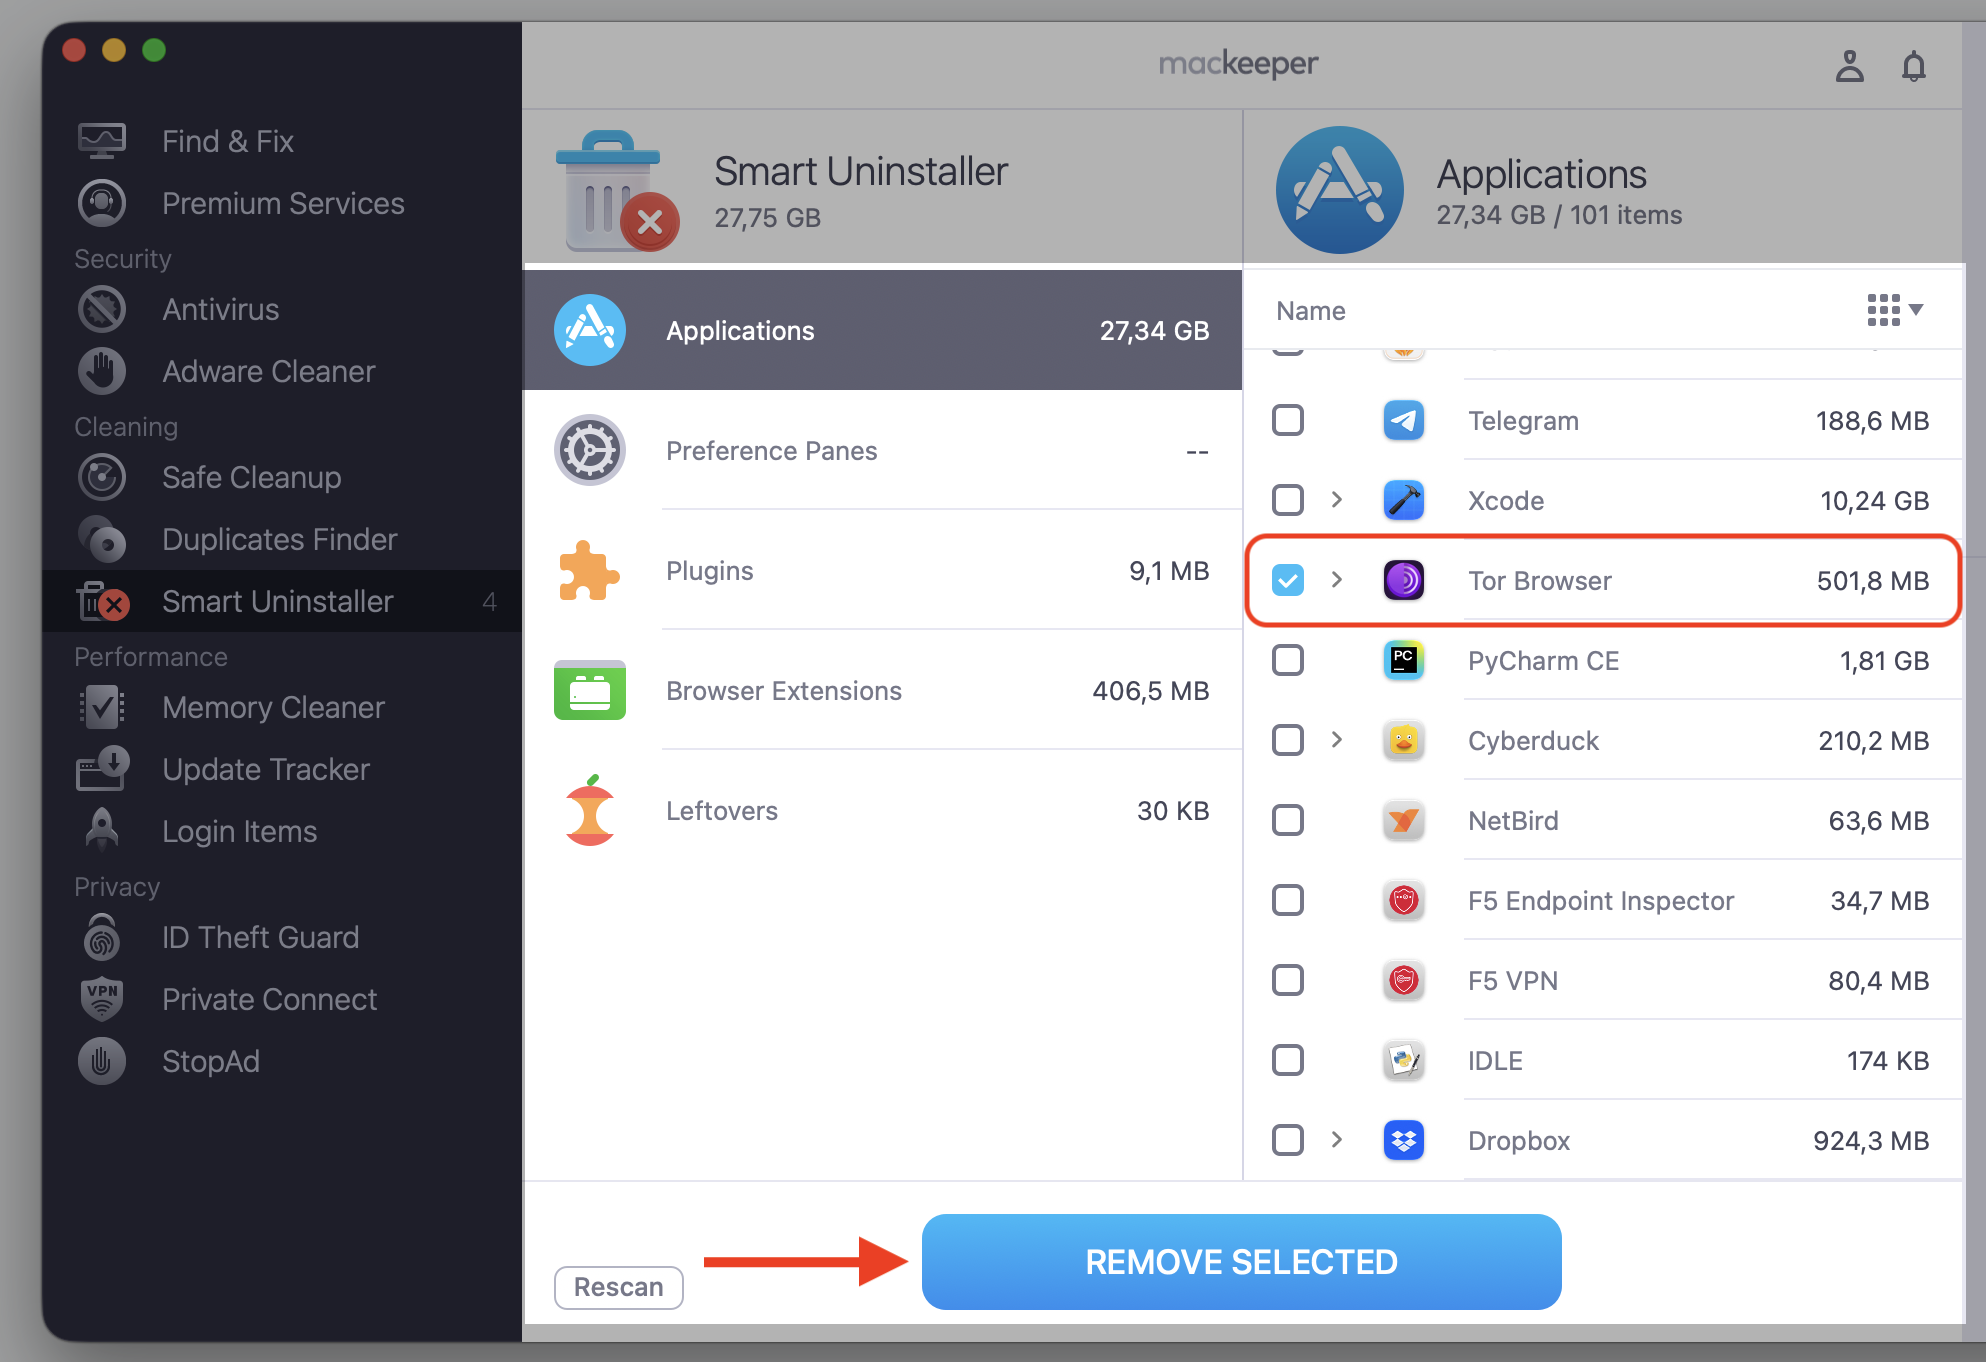
Removing apps this way is also a handy way to clear storage on MacBook, since it clears out the extra files a manual uninstall can miss.
Conclusion
Uninstalling Tor Browser on Mac comes down to two things—removing the app from Applications and clearing its leftover Library files. The trouble is that those hidden files are easy to overlook, which leaves clutter behind long after the browser is gone.
If you’re confident with Finder, the manual steps above will remove Tor browser from Mac cleanly. If you’d prefer a simpler path, MacKeeper’s Smart Uninstaller does the whole uninstallation for you—it removes the app and its support files in a few clicks, so you can free up space and keep your Mac tidy without the guesswork.
Ready for a clutter-free Mac? Use MacKeeper’s Smart Uninstaller to handle the cleanup while you get on with your day.