Just like any other app, MacKeeper sometimes releases technical updates.
We do this to make our app work even more effectively and, in case of some major upgrades, extend its functionality by adding new features. We strongly recommend you install every update we release just to make sure you’re getting the most out of your app and using the best available version of MacKeeper.
How to find out it’s time to update your MacKeeper app
Let’s start with checking what version of MacKeeper you have on your Mac now.
1. Open MacKeeper, and click MacKeeper in the top menu bar next to the Apple logo. Then select About MacKeeper.
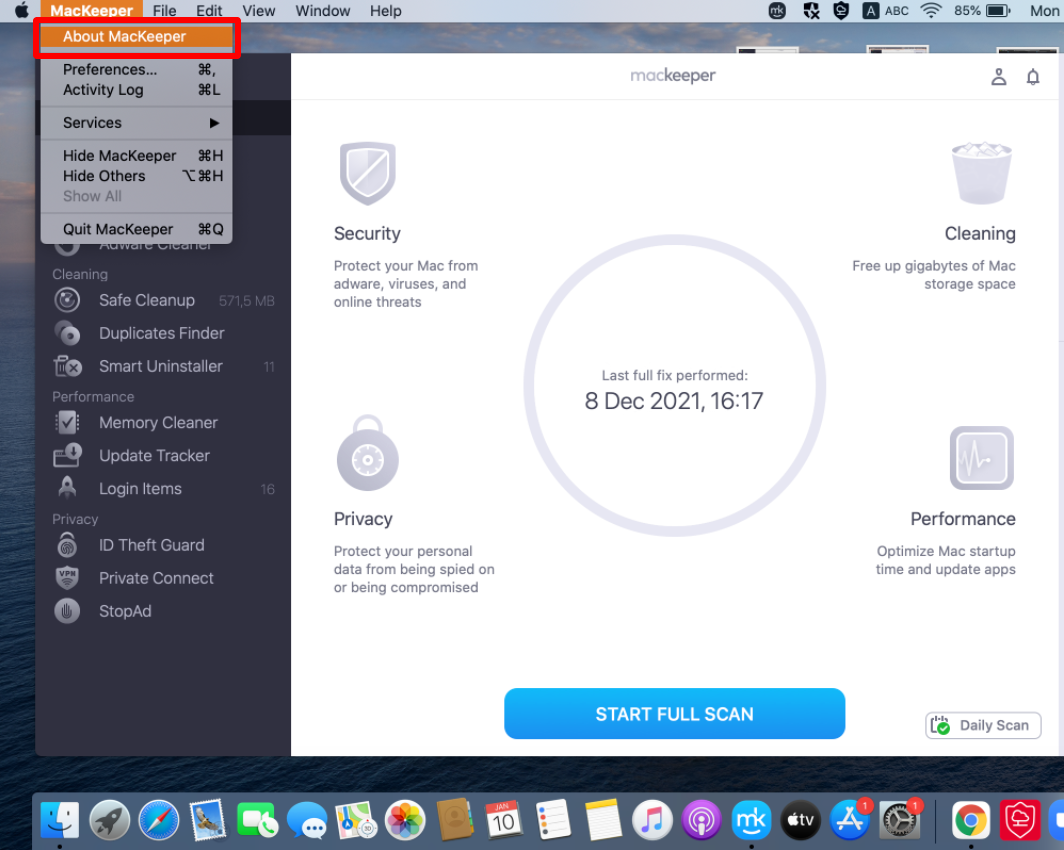
2. You’ll see basic information about the app including the version number.
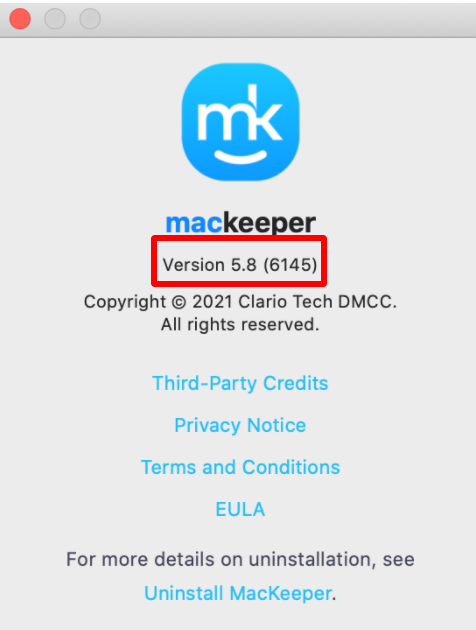
Now that you know what version you have, you can check if it needs to be updated.
To do this, visit the MacKeeper website and scroll down the homepage.
If your version of MacKeeper is older than the one stated on our website, this means it’s time for you to update. Follow the instructions below to get the newest version of MacKeeper quickly and easily.
Before you update
1. Make sure your MacKeeper license is valid
If you are logged into MacKeeper with a valid license, you will receive an update notification that you can click right in the app. This will automatically update MacKeeper to the newest version. If you do not have a valid license for MacKeeper, you will be shown a special offer in the MacKeeper app to update with a license.
If you did not receive any notifications, there could be several reasons for this, but you may still be able to install the update.
Please keep following this tutorial to learn how to install the newest version of MacKeeper.
2. System requirements for the new MacKeeper
The latest MacKeeper will work on macOS version 10.11 or later. The hardware specs required for MacKeeper can be found here. The update to the newest version of MacKeeper is completely free. Current MacKeeper customers with a valid license will have access to all of the latest features in the new version of MacKeeper.
How to update MacKeeper with Google Chrome
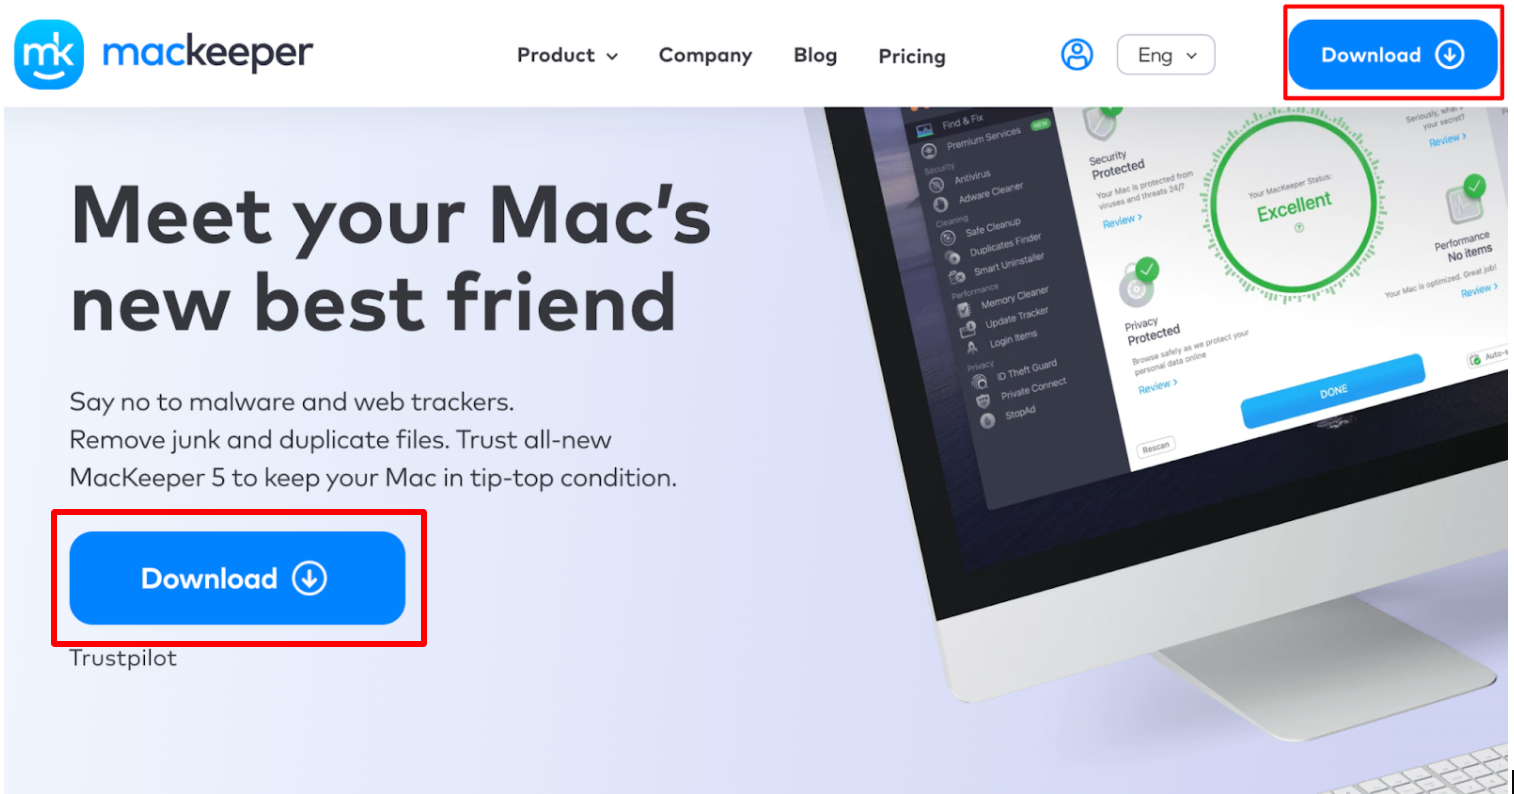
1. Go to the official MacKeeper website in the Google Chrome browser.
2. Click the blue Download button to download the latest version of MacKeeper — you will see the MacKeeper installation file appear in the bottom left of the screen as a download.
3. Then, double-click the MacKeeper.pkg or MacKeeper.dmg file on the bottom of your screen to start the installation process.
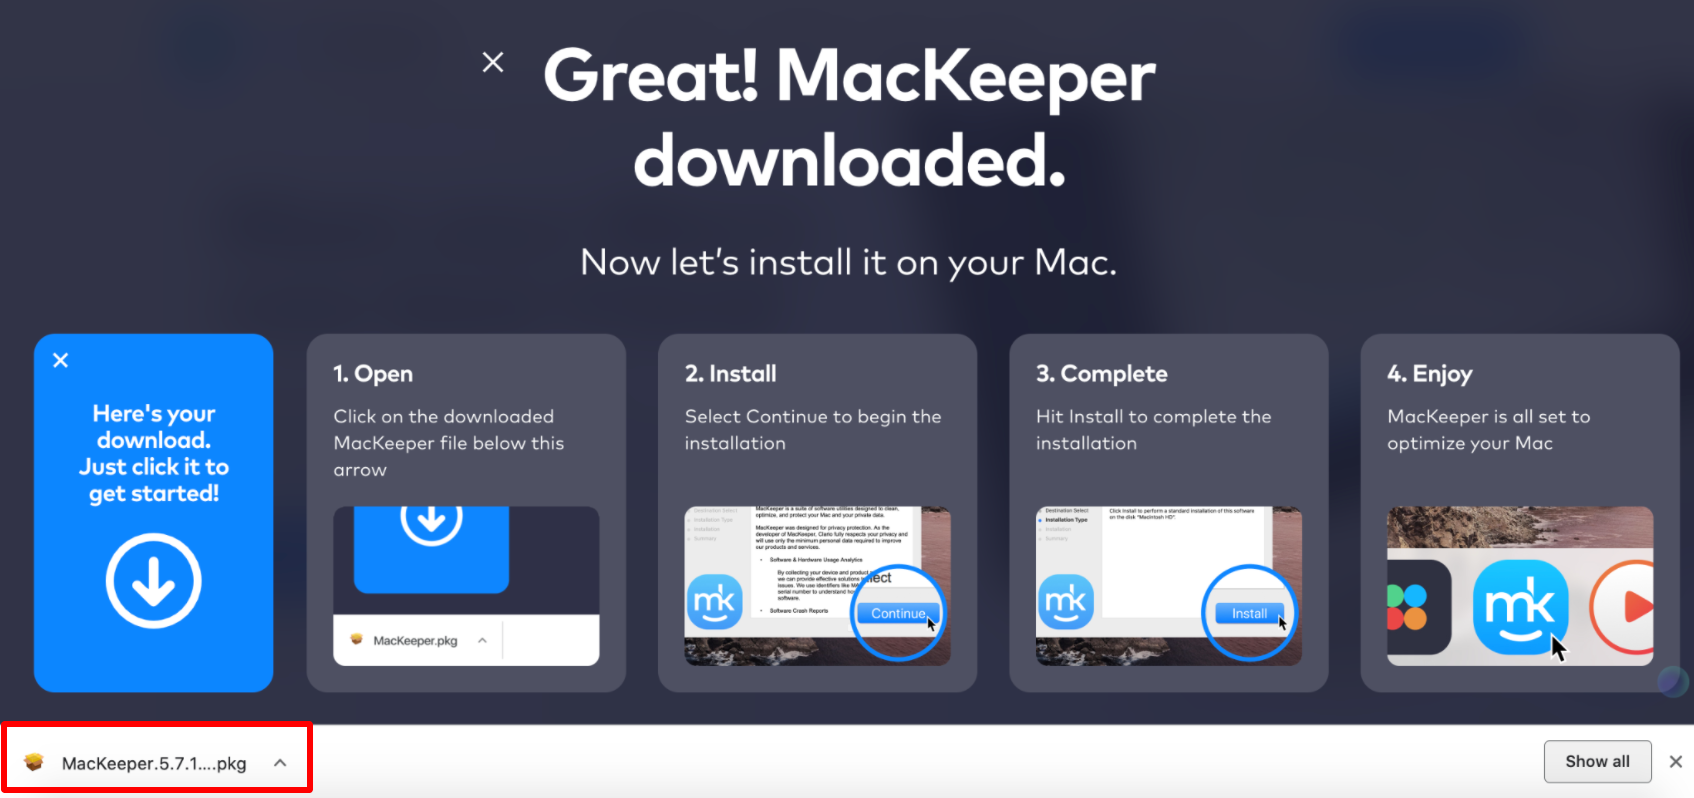
4. Click on the Continue button to proceed with the installation.
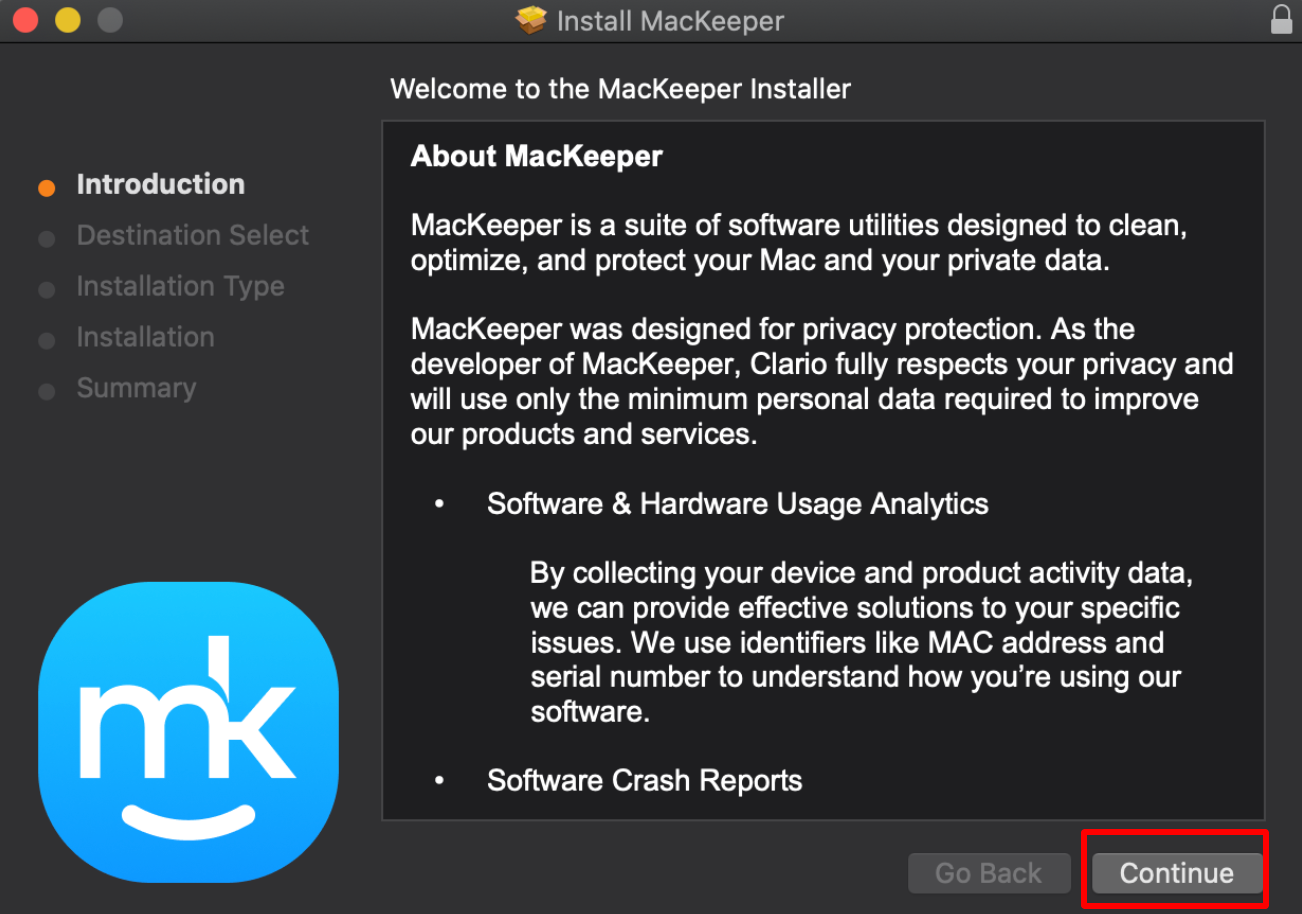
5. Click on the Install button to install MacKeeper.
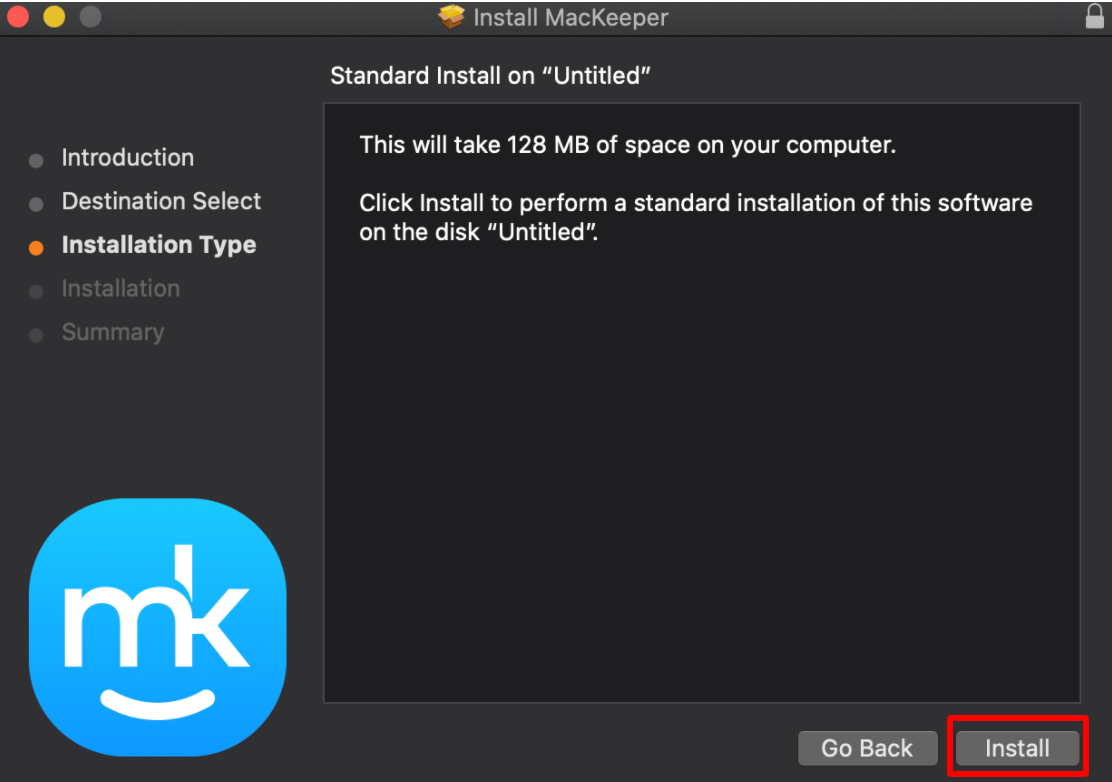
6. Enter your password, then click the Install Software button to authorize the installation.
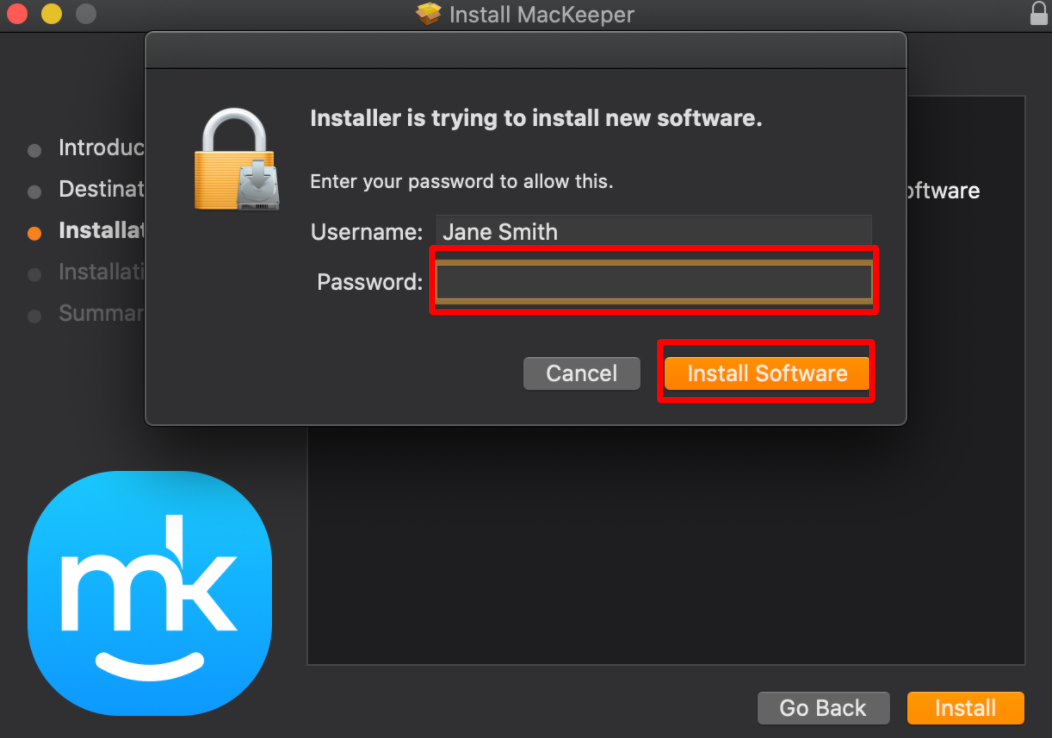
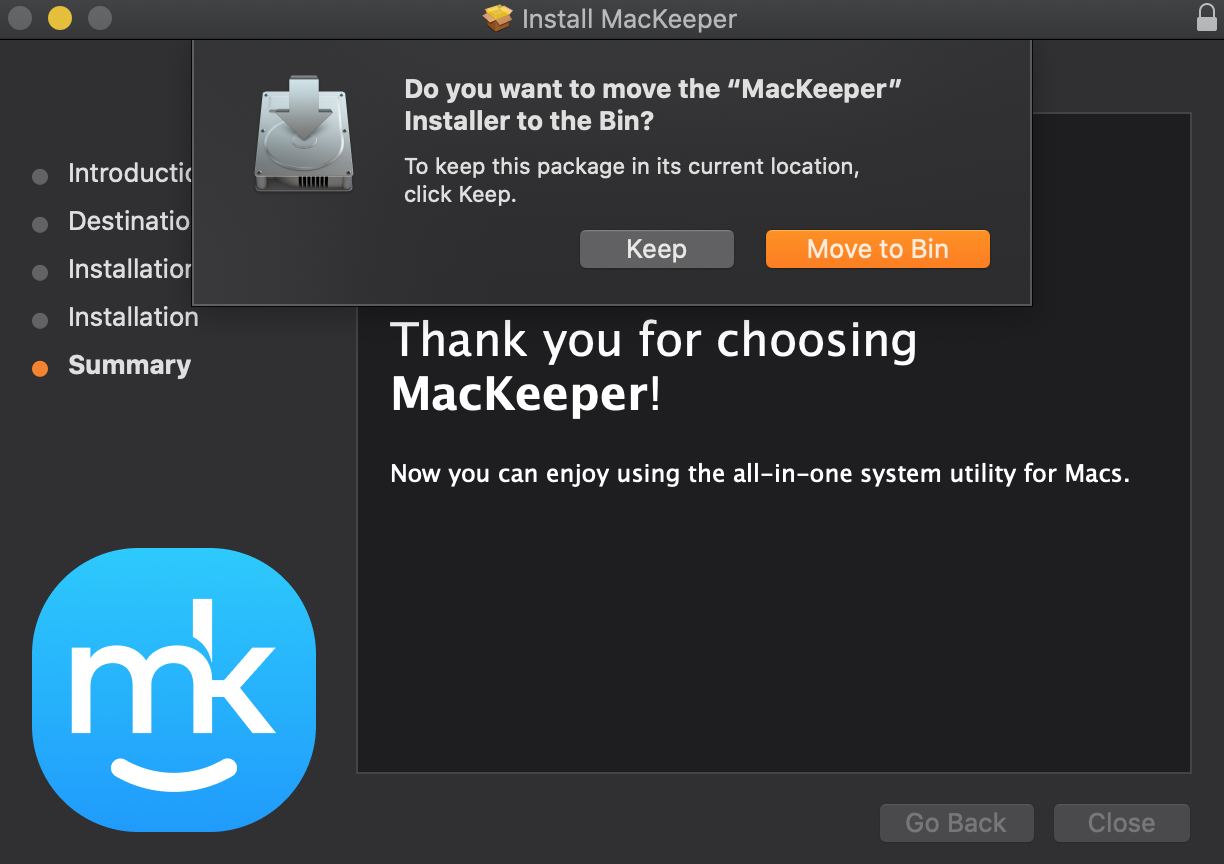
7. Click the Close button to complete the installation.
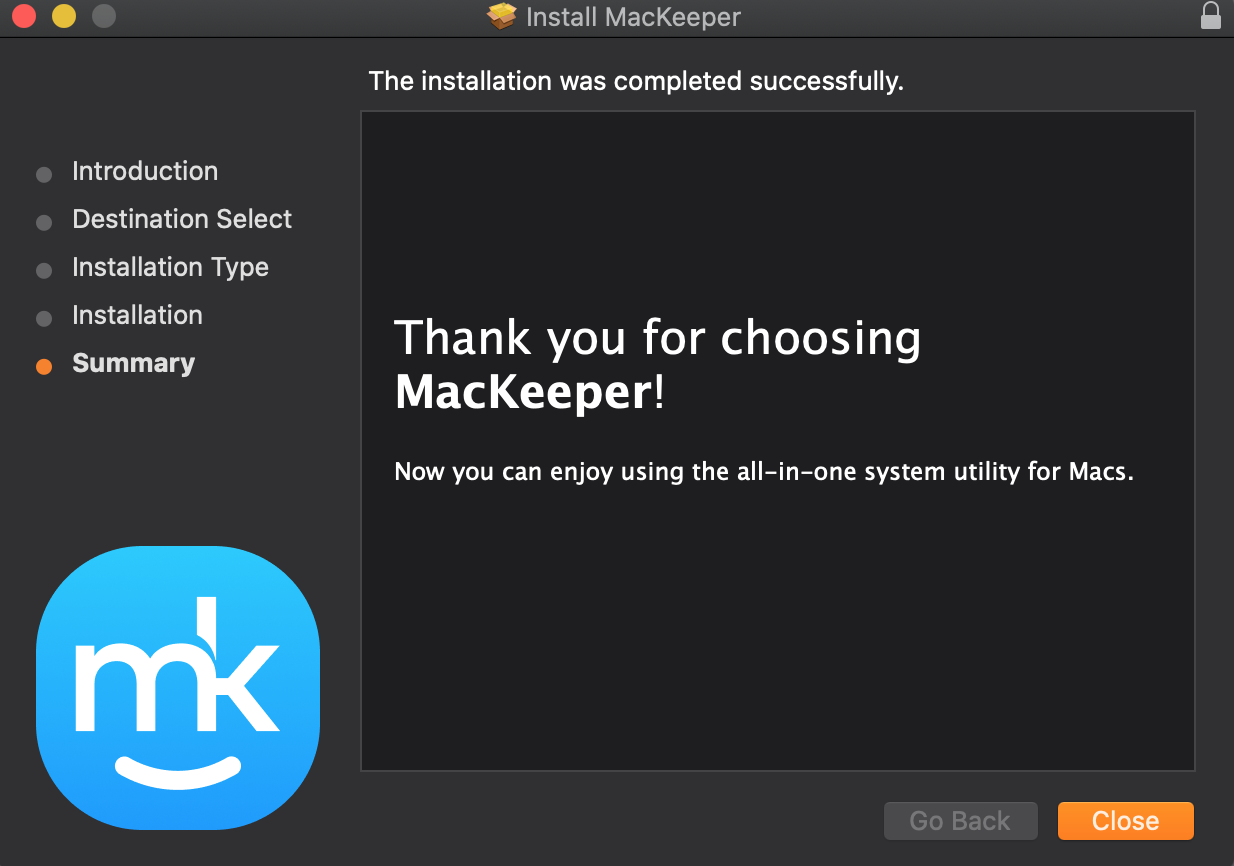
8. Click the Move to Bin button to delete the MacKeeper Installer.
How to update MacKeeper with Safari
1. In the Safari browser, go to the official MacKeeper website.
2. Click the blue Download button to get the latest version of MacKeeper.

3. You’ll be redirected to the download page. To start the process, allow downloads from the MacKeeper website by clicking the Allow button.

4. Click on the Downloads folder in the Dock. Here, you will see the MacKeeper.pkg or MacKeeper.dmg file.
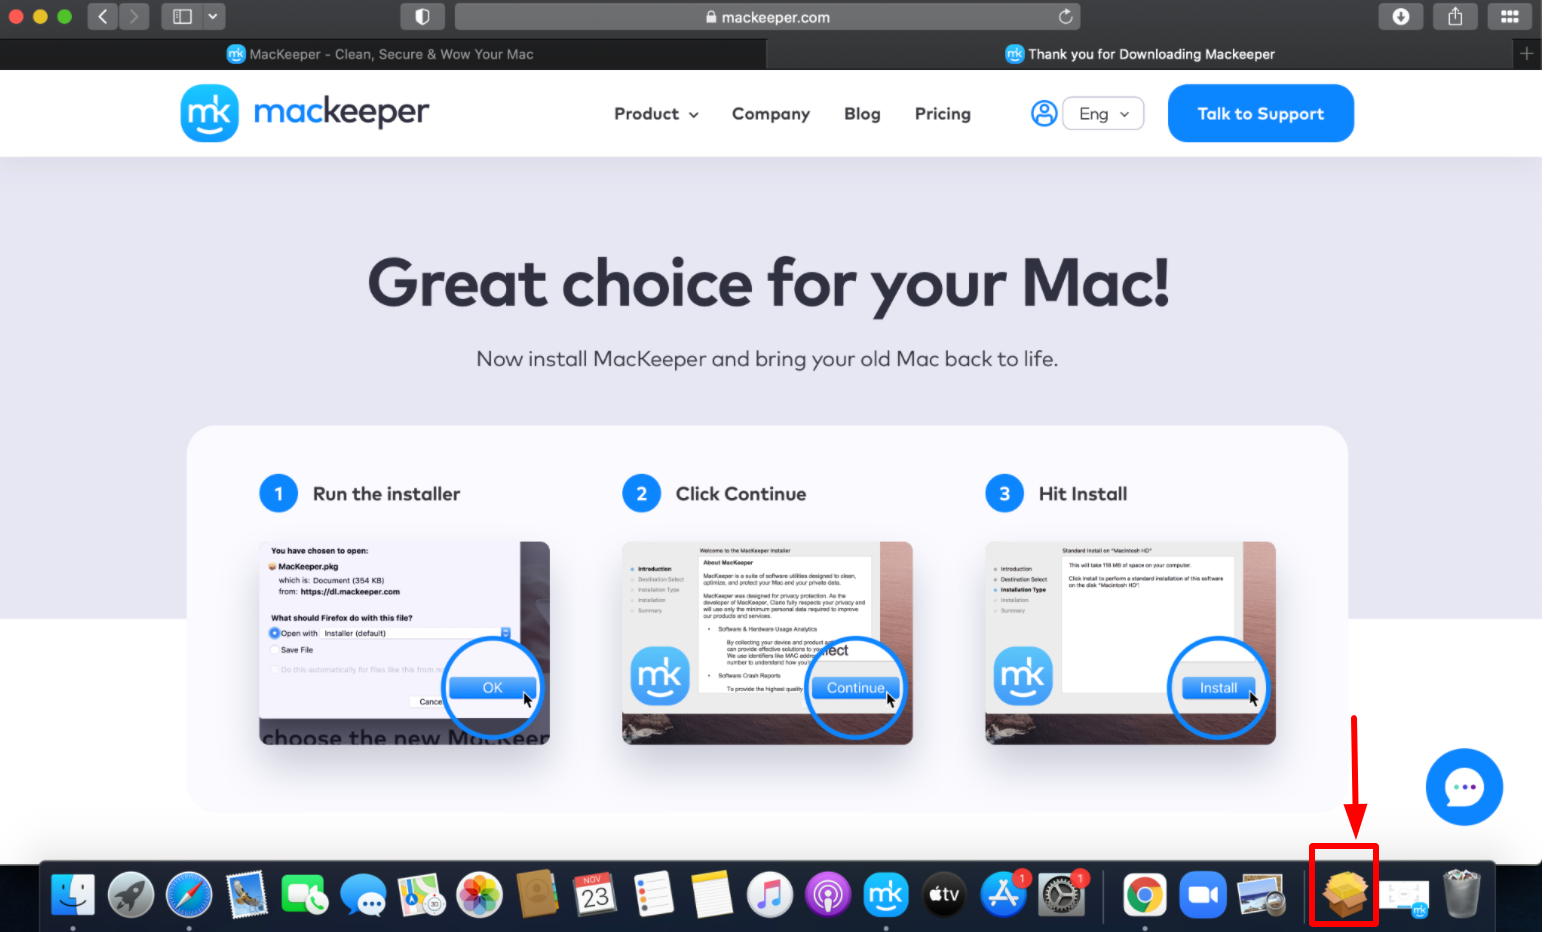
5. Double-click on the MacKeeper.pkg or MacKeeper.dmg file to open it.
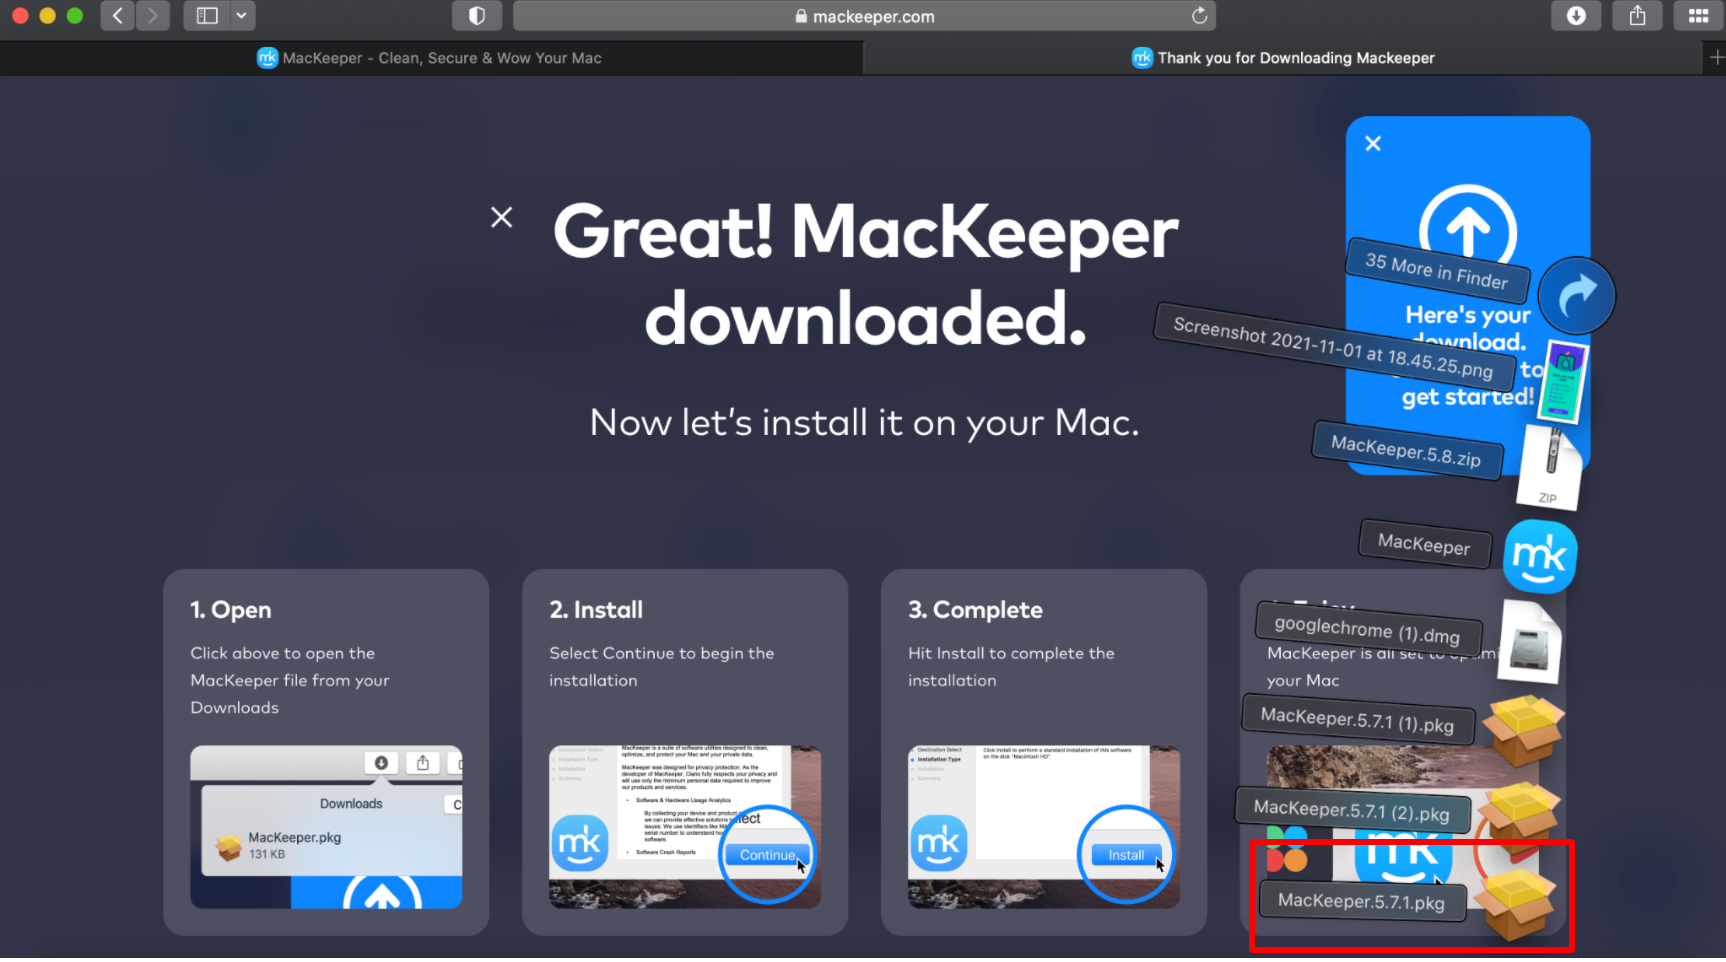
6. Click the Continue button on the Install MacKeeper screen.

7. Click the Install button in the bottom right-hand corner of the Install MacKeeper screen to install MacKeeper.

8. Enter your password, then click the Install Software button to authorize the installation.

9. Click the Close button to complete the installation.

10. Click the Move to Bin button to delete the MacKeeper Installer.

Congratulations! You have successfully updated to the newest version of MacKeeper.
If you have any questions about this installation, please see the most popular questions about MacKeeper installation on our frequently asked questions in the Knowledge Base. Alternatively, you can contact MacKeeper support via live chat on our website.


