In this article you will find the following:
If you regularly find your Mac is cluttered with recent files and folders, fear not, clearing this digital debris is a straightforward task. As this will ensure smoother access to the content you truly need, you should be interested in reading our guide on ways to get rid of recents on Mac and keep your Mac activity efficient and pain-free.
Before we start:
When clearing recent folders on your Mac, it’s essential that you do it safely. The easiest way to achieve this security is by using reputable third-party software, such as MacKeeper.
MacKeeper has a built-in Safe Cleanup feature that can help you delete junk files and potentially fix other issues that might impact your MacBook’s performance. Get rid of any digital clutter with ease in just a few steps:
- Download and install MacKeeper.
- Launch the app, choose Safe Cleanup, and click Start Scan.
- Review the results after the scan is complete, and select the junk you want to delete.
- Then click on Clean Junk Files.
What is the Recents folder on Mac
The Recents folder on your Mac acts as a live activity record of all your recently opened or modified files and folders. It offers a quick and handy way to jump back into recent projects or help you find a document you were just working on.
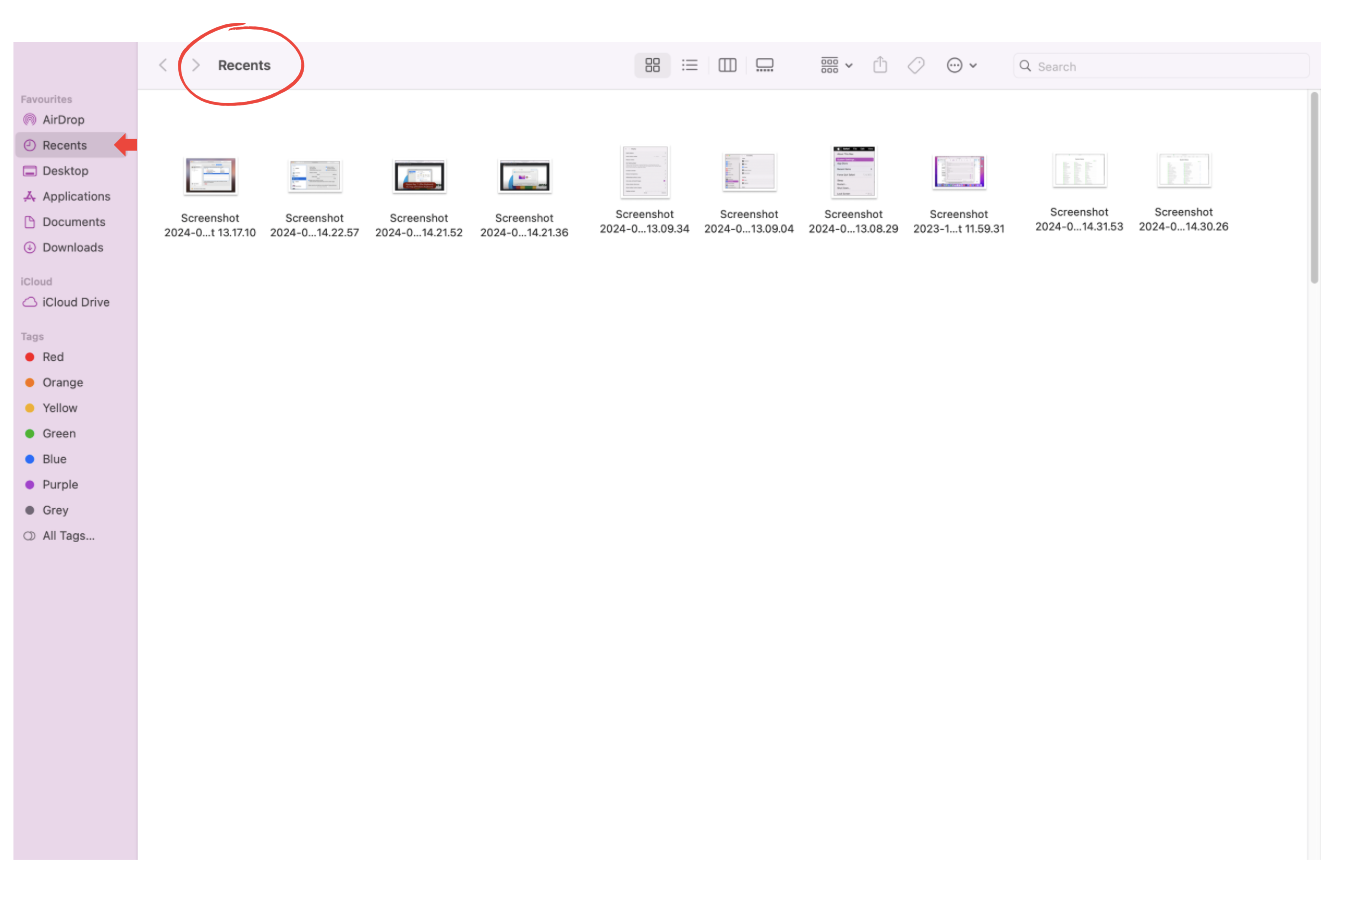
Though the Recents folder can toe the line between helpful and bothersome, its continuous display of recent activity might overwhelm you, making it more of a hindrance than helpful. Bearing this concern in mind, below we’ll explore ways to disable or delete recents on Mac completely.
Can you delete your recents on Mac
Yes, you can get rid of your Recent folder to suit your personal preferences. Whether you want to remove recents from your Mac entirely or you just want to declutter the digital accumulation from time to time, we can help you regain more control of your device.
In brief, you can manually empty your Recent folder, use macOS in-built tools, or refer to third-party applications to help you delete recents on Mac.
What happens if you delete recents on Mac
When you choose to empty recents on your Mac, you're essentially wiping the slate clean in your Recents folder. This action has a two-fold effect:
- It enhances your privacy by removing the visible trail of recent documents and activities. So if you share your Mac with other users, it ensures that your digital footprint remains private.
- Deleting recents on Mac contributes to a more efficient and organized workflow. It’s not just about clearing space—you're creating a cleaner, more private, and more efficient environment for your digital needs.
Getting rid of recent files on your Mac can free up some space, so if you want to know how to clear more space on Mac, check out our guide for some easy tips.
How to get rid of recents on Mac
Are you longing for a more personalized and clutter-free MacBook experience? Let's explore various methods to help you get rid of recents on Mac:
- Hide the boot drive from Spotlight search
- Clear recent files from Spotlight on the startup drive
- Clear the recent with Apple menu
- Place the files in the excluded folder
- Rename the Recent folder in Terminal
- Turn off the entire hard drive
- Move files to an encrypted drive
1. Hide the boot drive from Spotlight search
If you want to optimize your MacBook experience and limit the number of unnecessary background processes, you may want to start by hiding the boot drive from your Spotlight search.
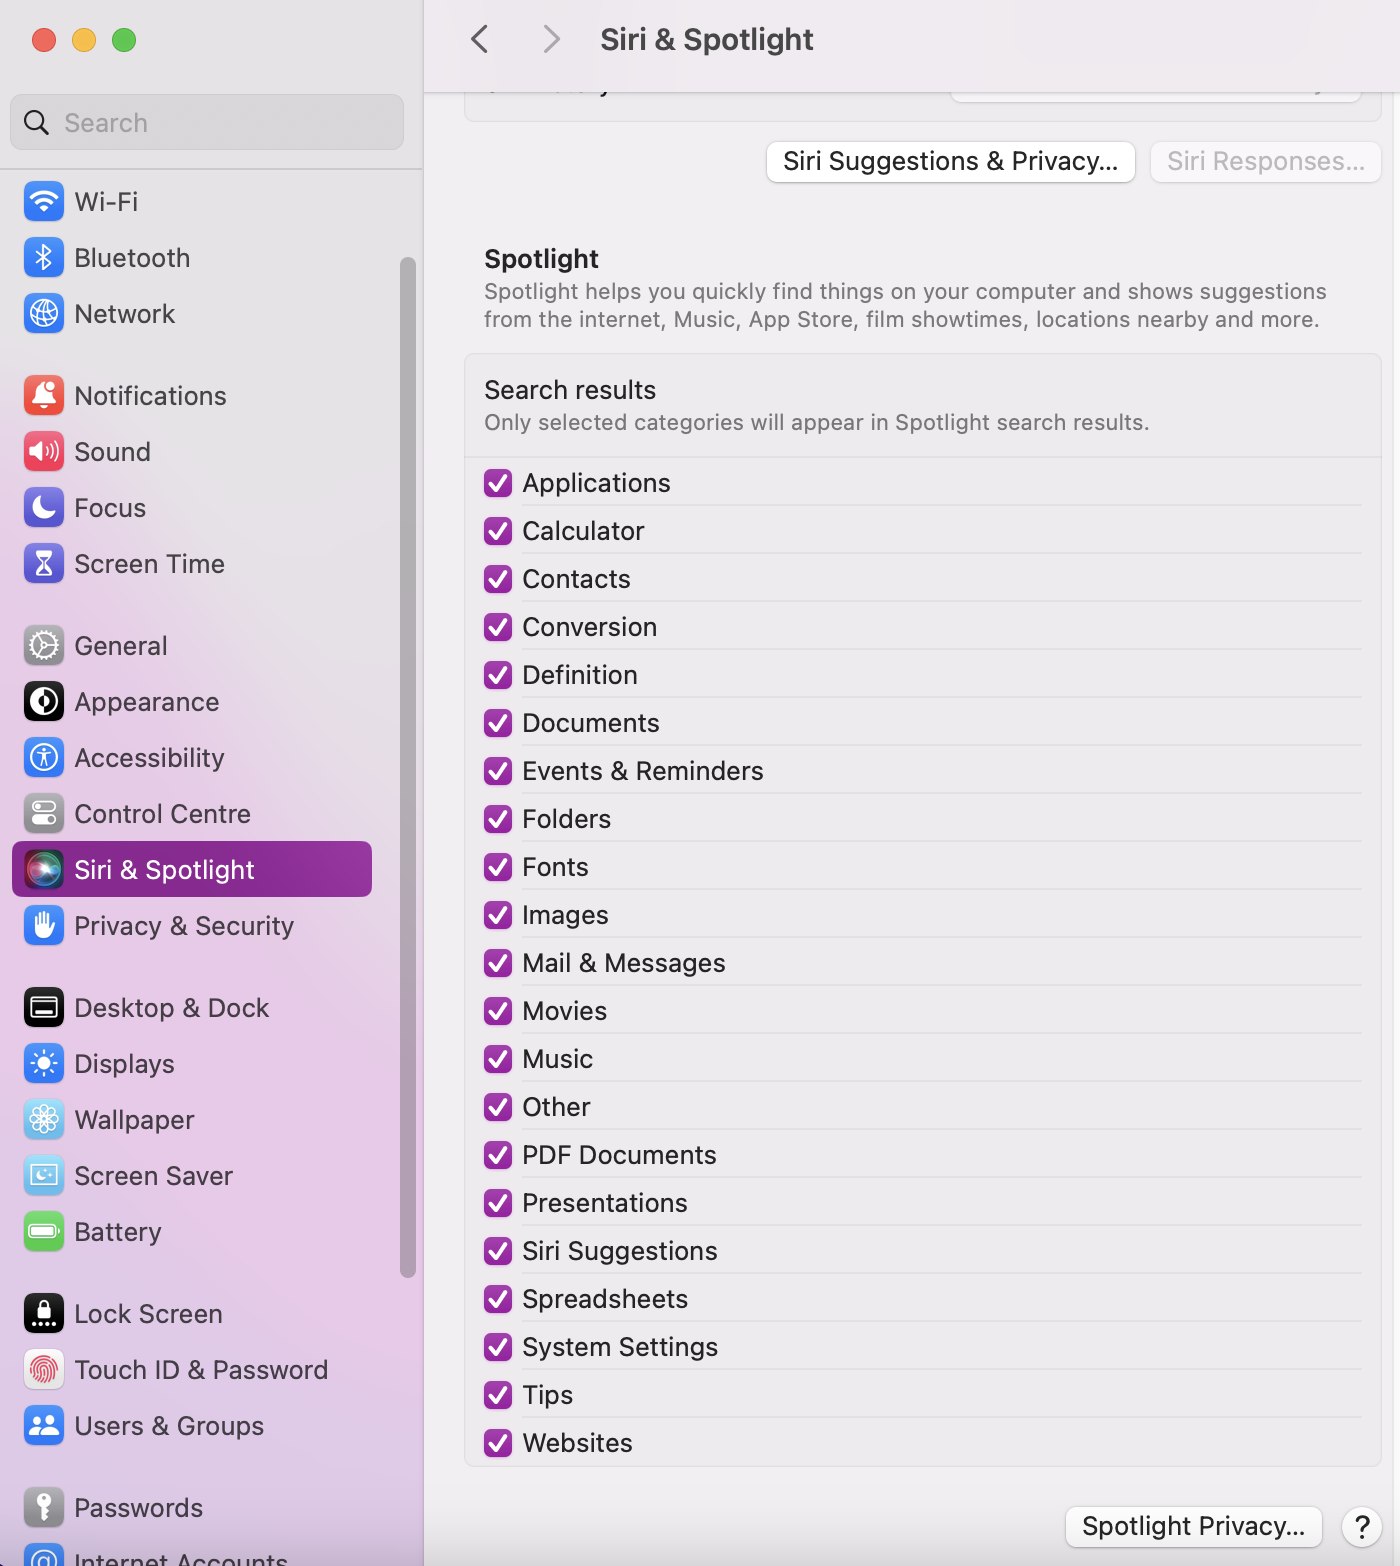
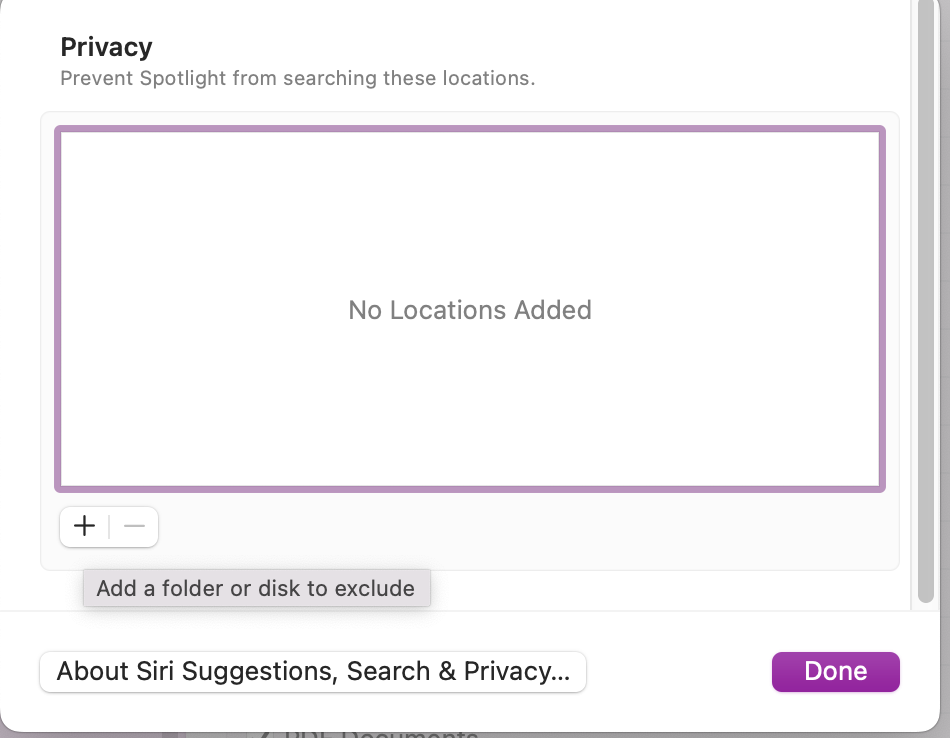
- Open System Settings, click Siri & Spotlight > Spotlight Privacy.
- Click the + button and select your boot drive to add it to the list of locations excluded from Spotlight searches.
- Confirm your actions, and now Spotlight will no longer index or display recent files from the specified boot drive you added.
2. Clear recent files from Spotlight on the startup drive
Taking control of your files can also include clearing Recent folders on your Mac’s startup drive. Here's how you can clear recent files from Spotlight:
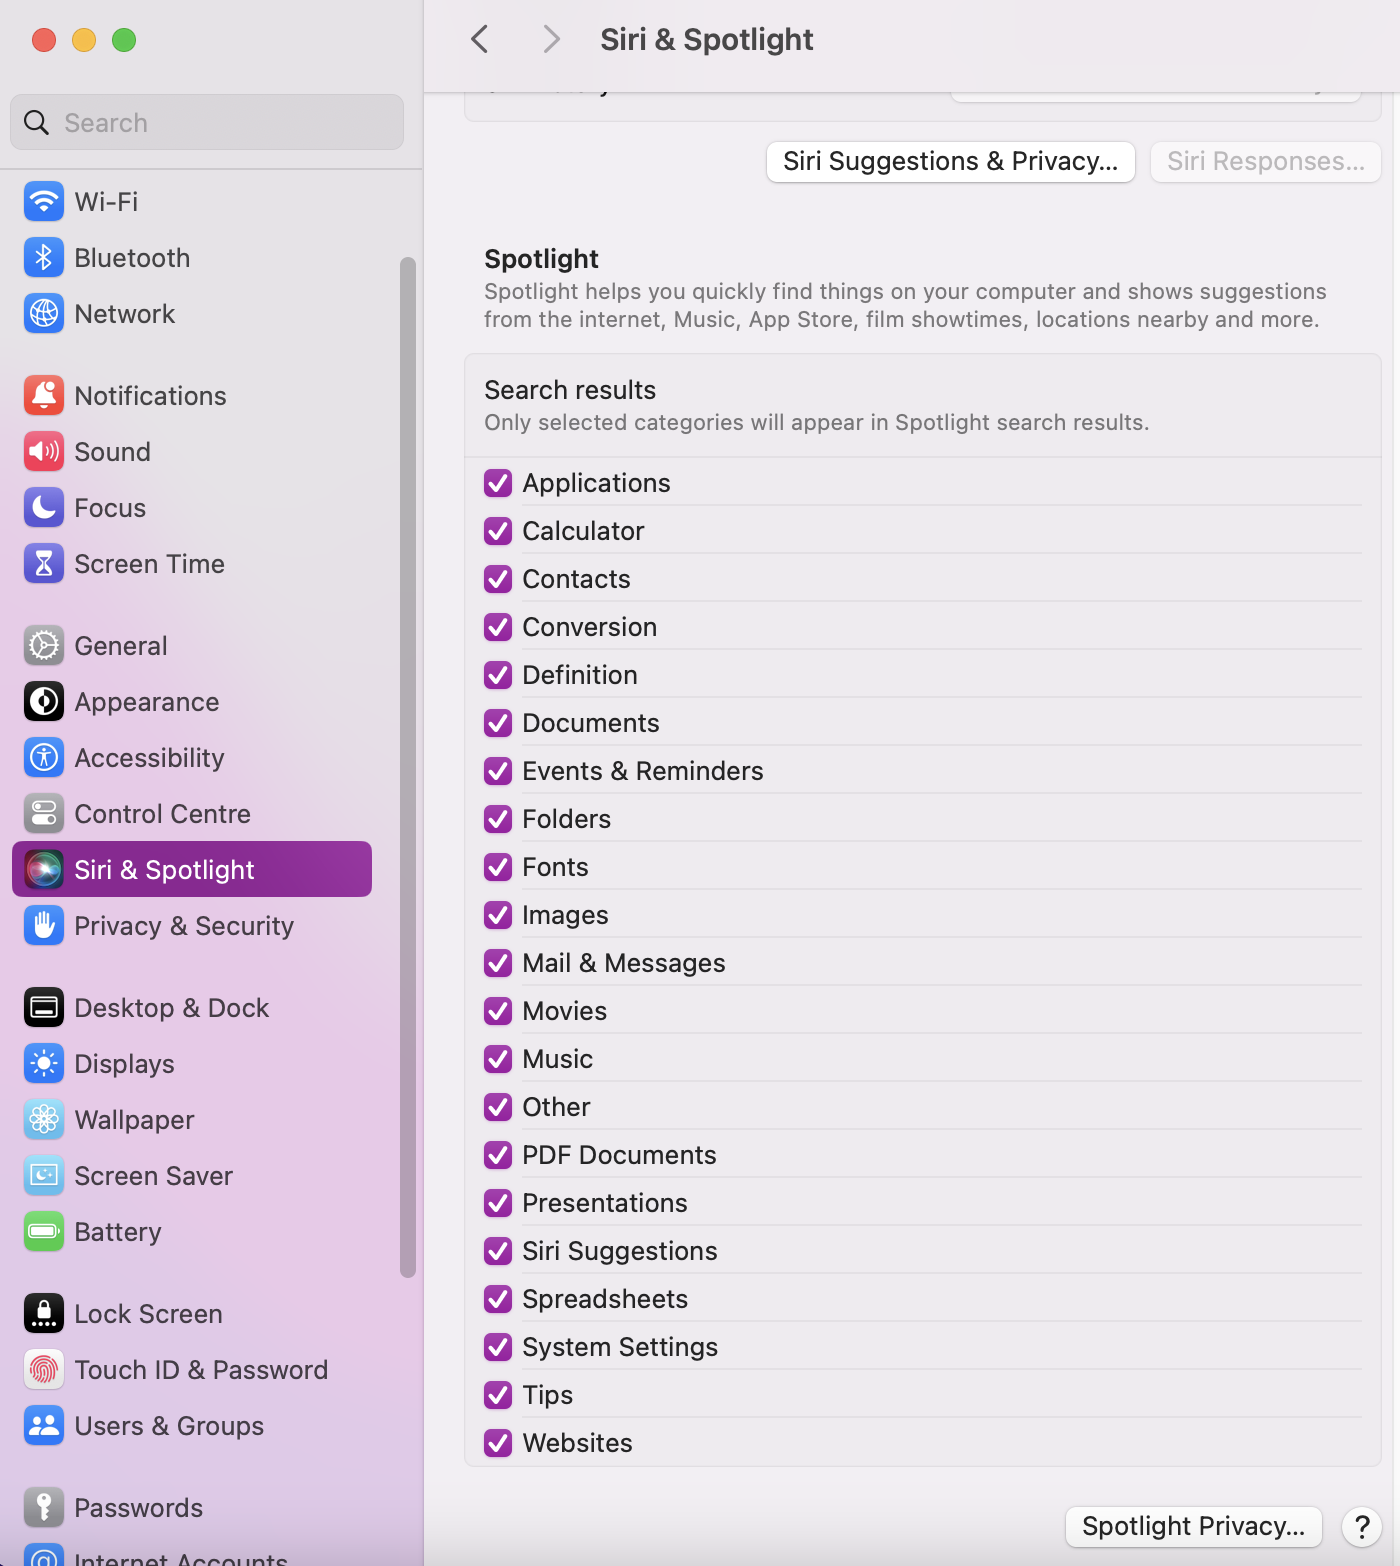
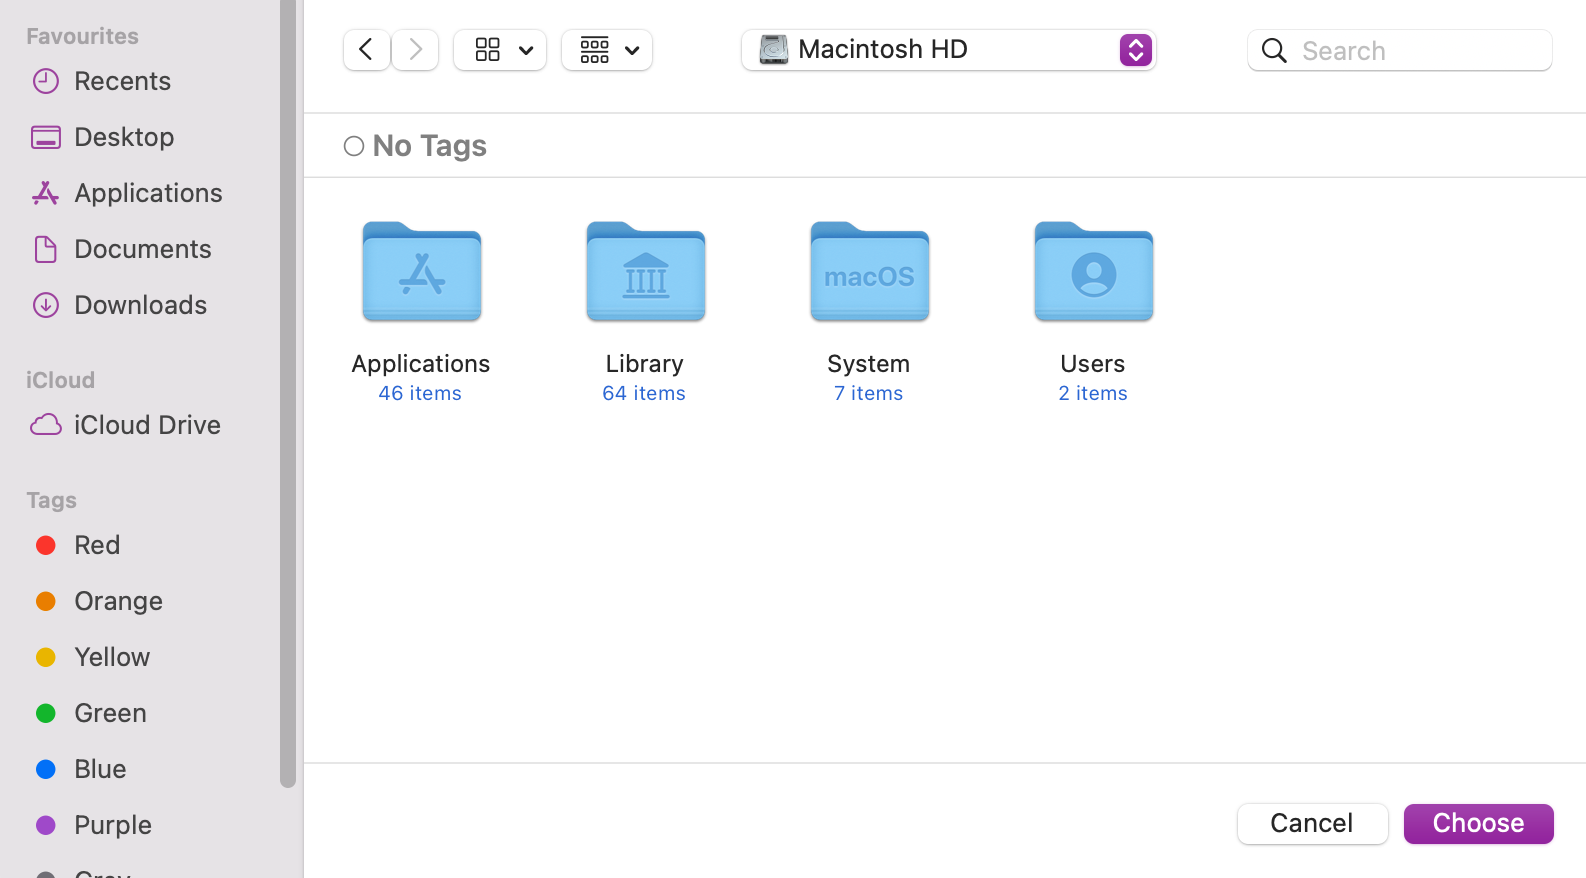
- Open System Settings, click Siri & Spotlight > Spotlight Privacy.
- Click the + button and choose Macintosh HD to add to the list.
- On the warning message, click OK.
Tip from our team:
For further assistance on how to delete files on Mac, read our other guide to be sure that you’re removing your redundant files accurately.
3. Clear the recent with the Apple menu
Clearing your Recent folder on Mac can also be carried out by utilizing the Apple menu to remove your digital clutter. This solution offers a straightforward way not just to empty your recent folder, but also to keep your documents private from other users’ Mac storage. Here’s how:
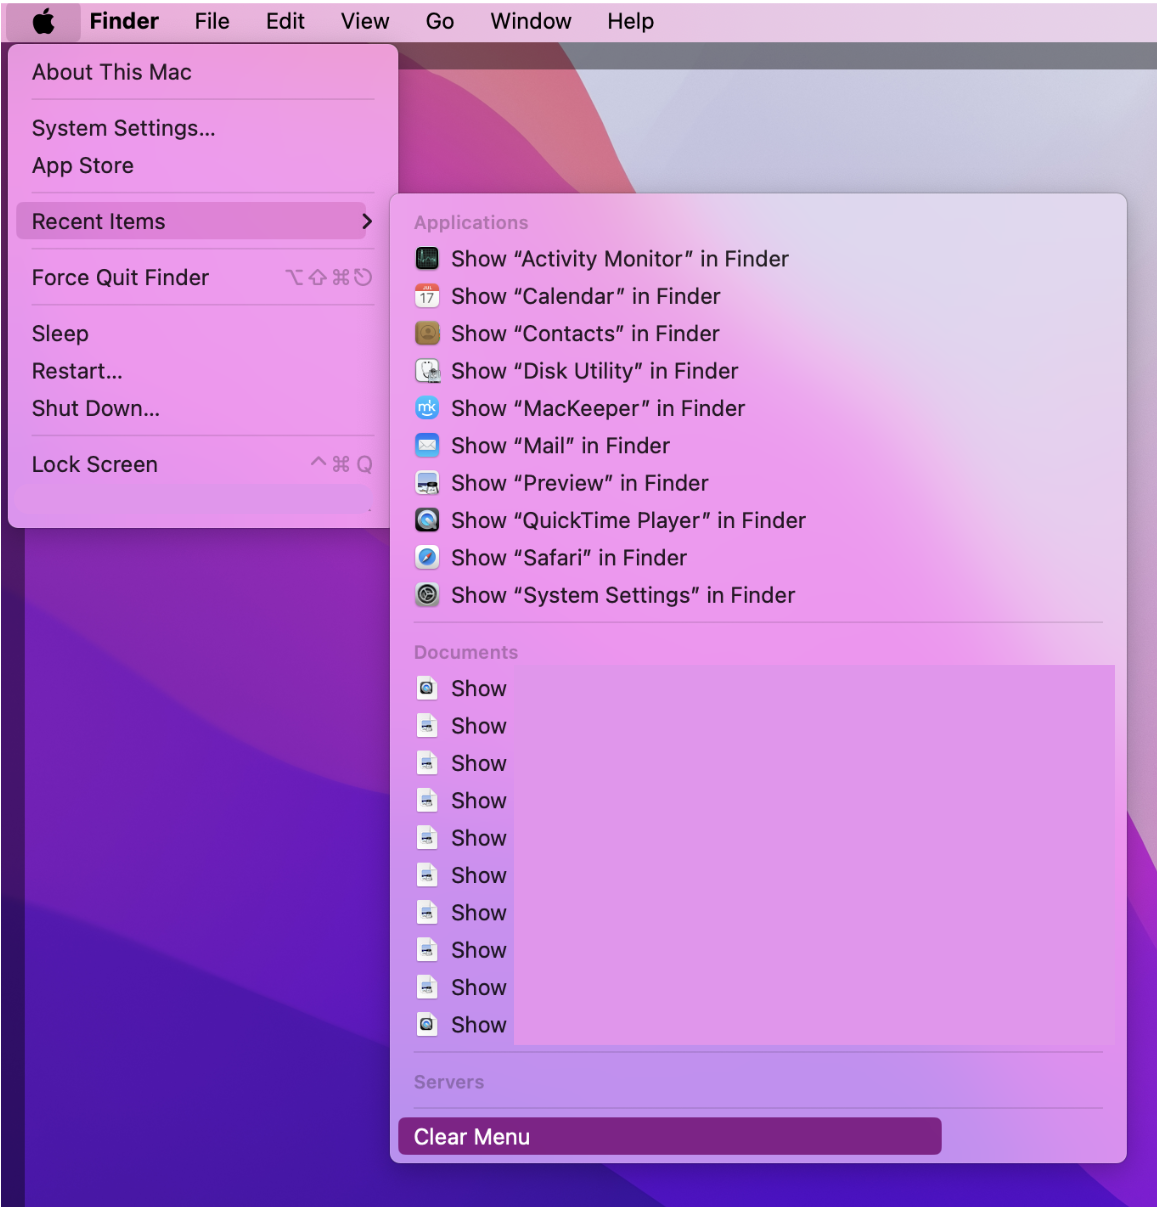
- Click on the Apple icon.
- Look and hover over Recent Items.
- Choose Clear Menu to remove all recent items.
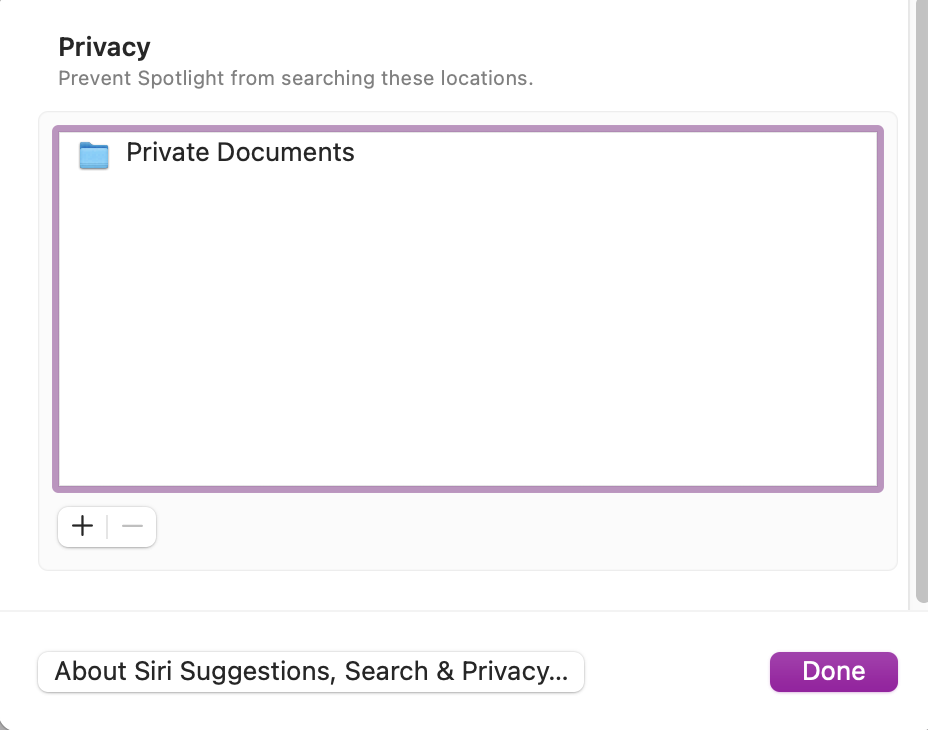
4. Place the files in the excluded folder
Tailoring your Mac's organization can mean moving specific files into the excluded folder to better manage documents on Mac. By doing this, you maintain control over what appears in your MacBook’s Recents folder. Here's how to place files in an excluded folder:
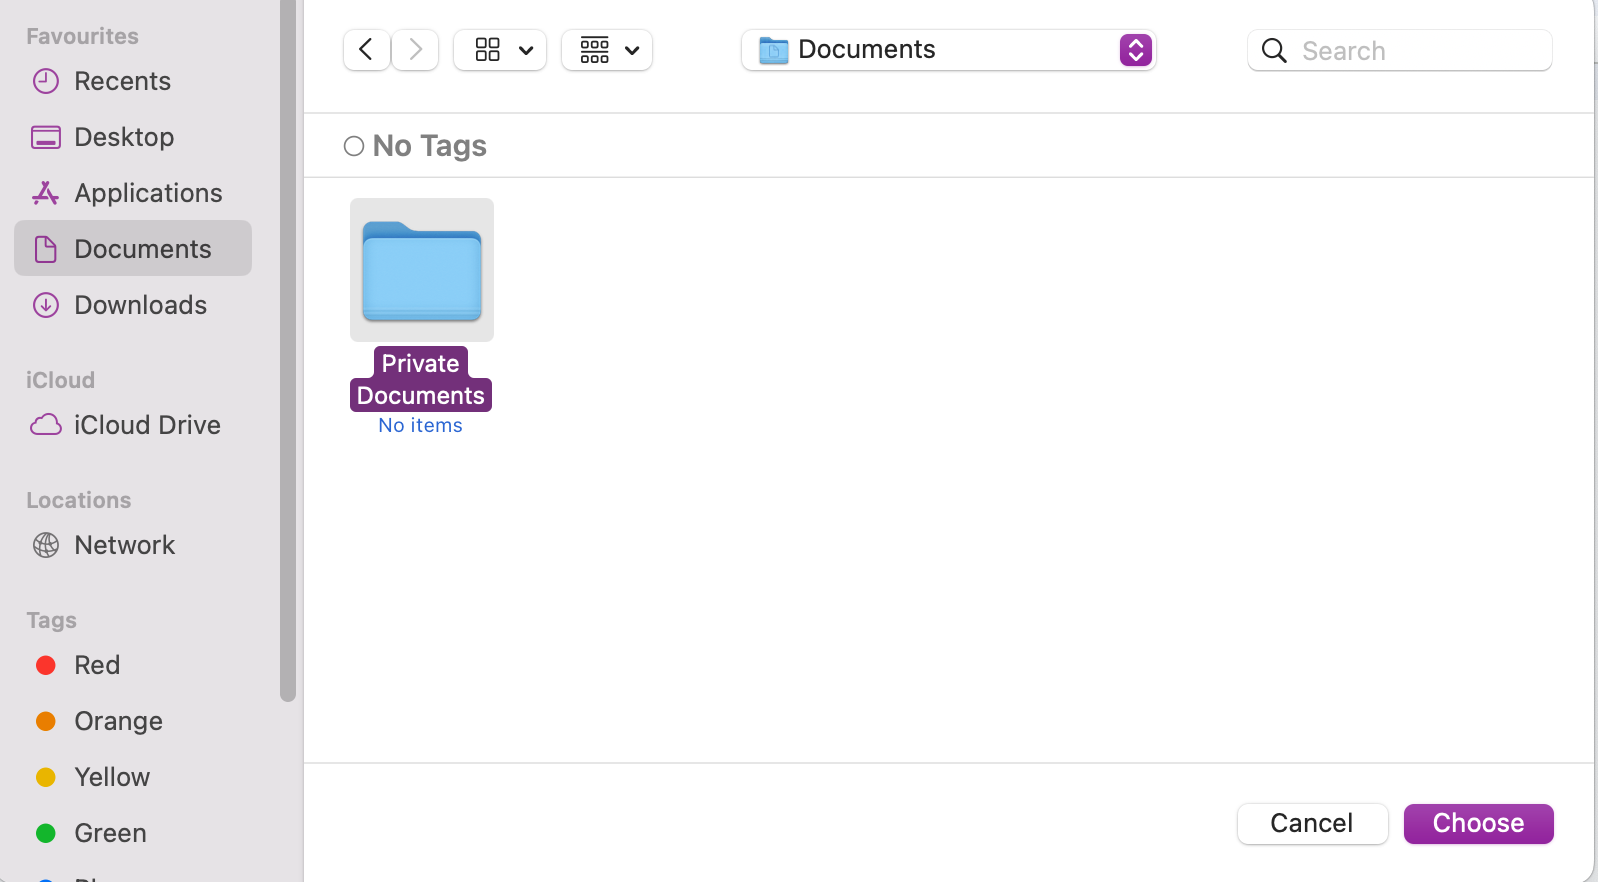
- Find the folder on your Mac that you have designated as your excluded folder and add all the files you don’t want in the Recent Folder.
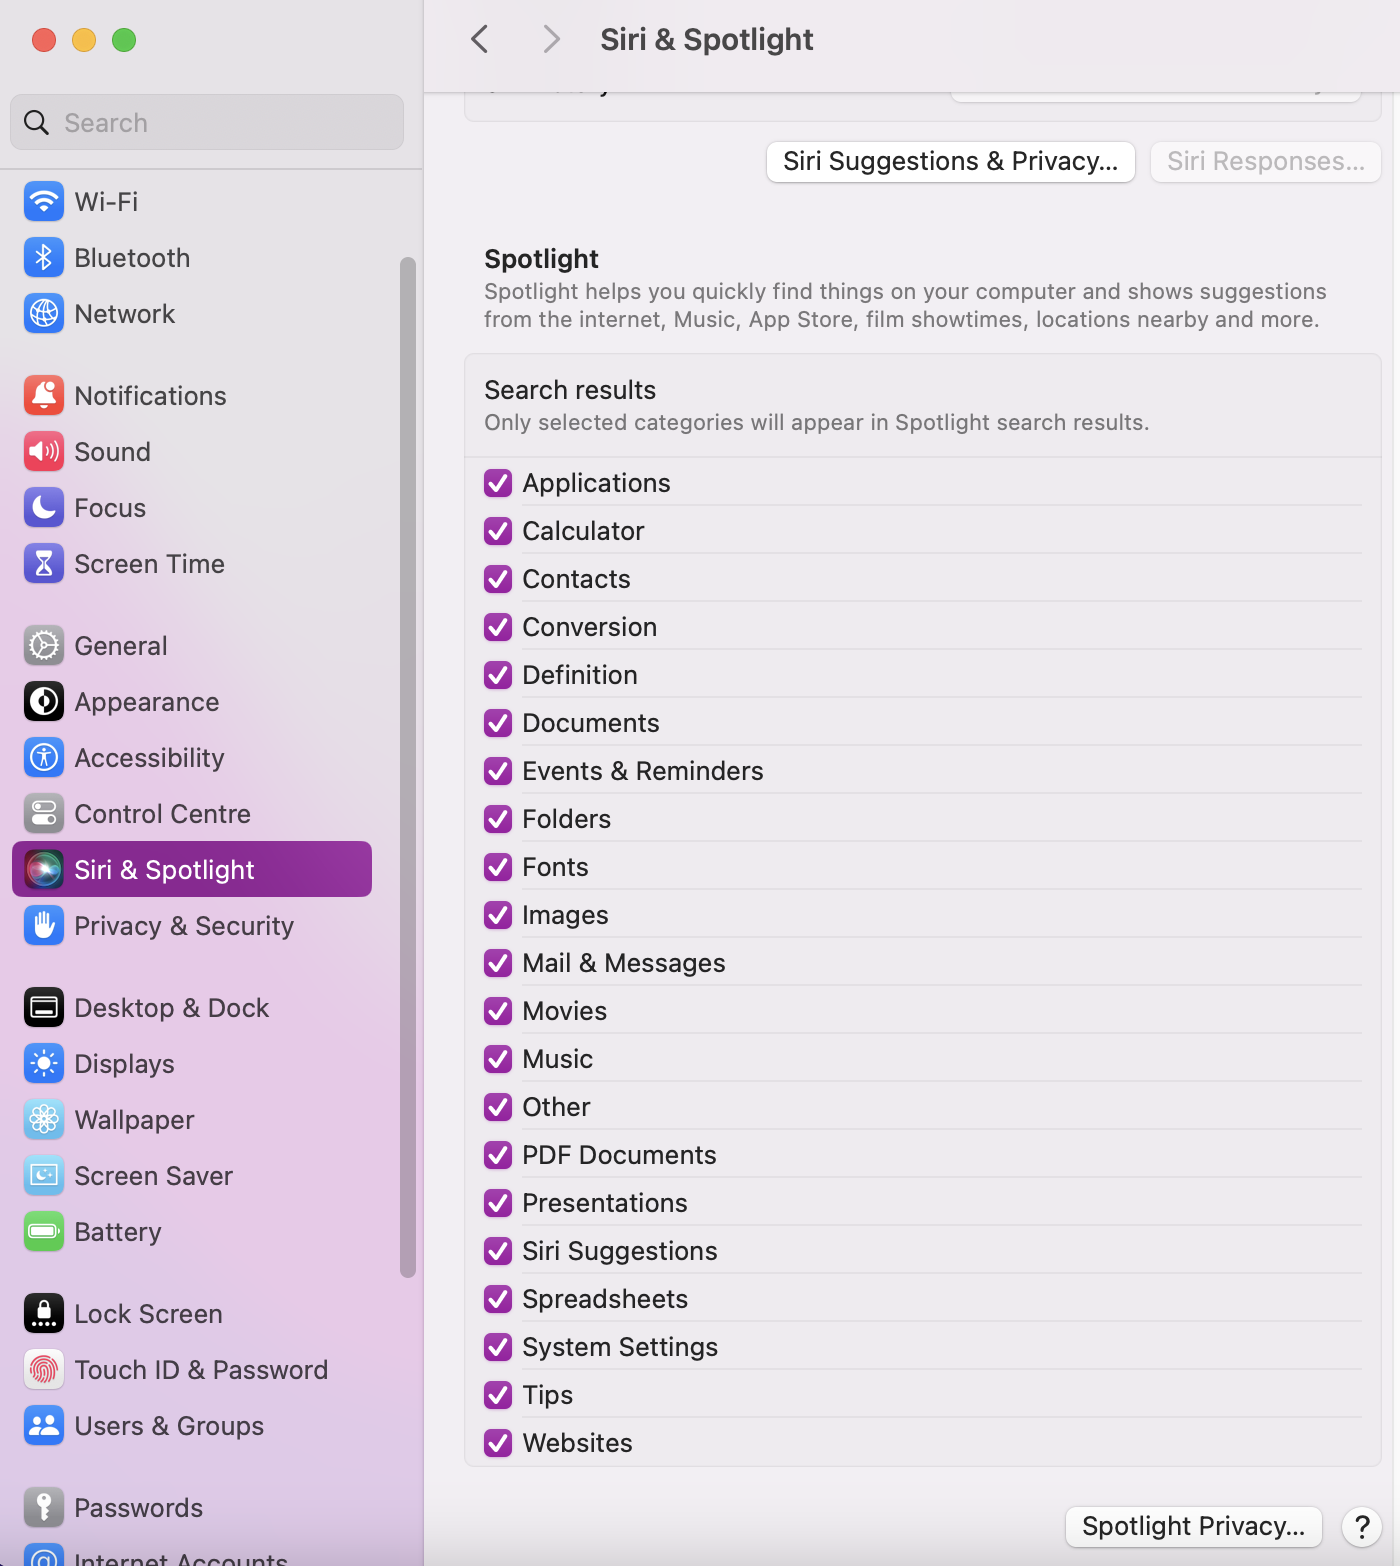
- Then in System Settings, go to Siri & Spotlight and scroll down until you see Spotlight Privacy.
- Click on the + button, look for your excluded folder, and click Choose.
- Confirm your actions and now the folder you have excluded will not appear in Recents. Click on Done to finish.
5. Rename the Recent folder in Terminal
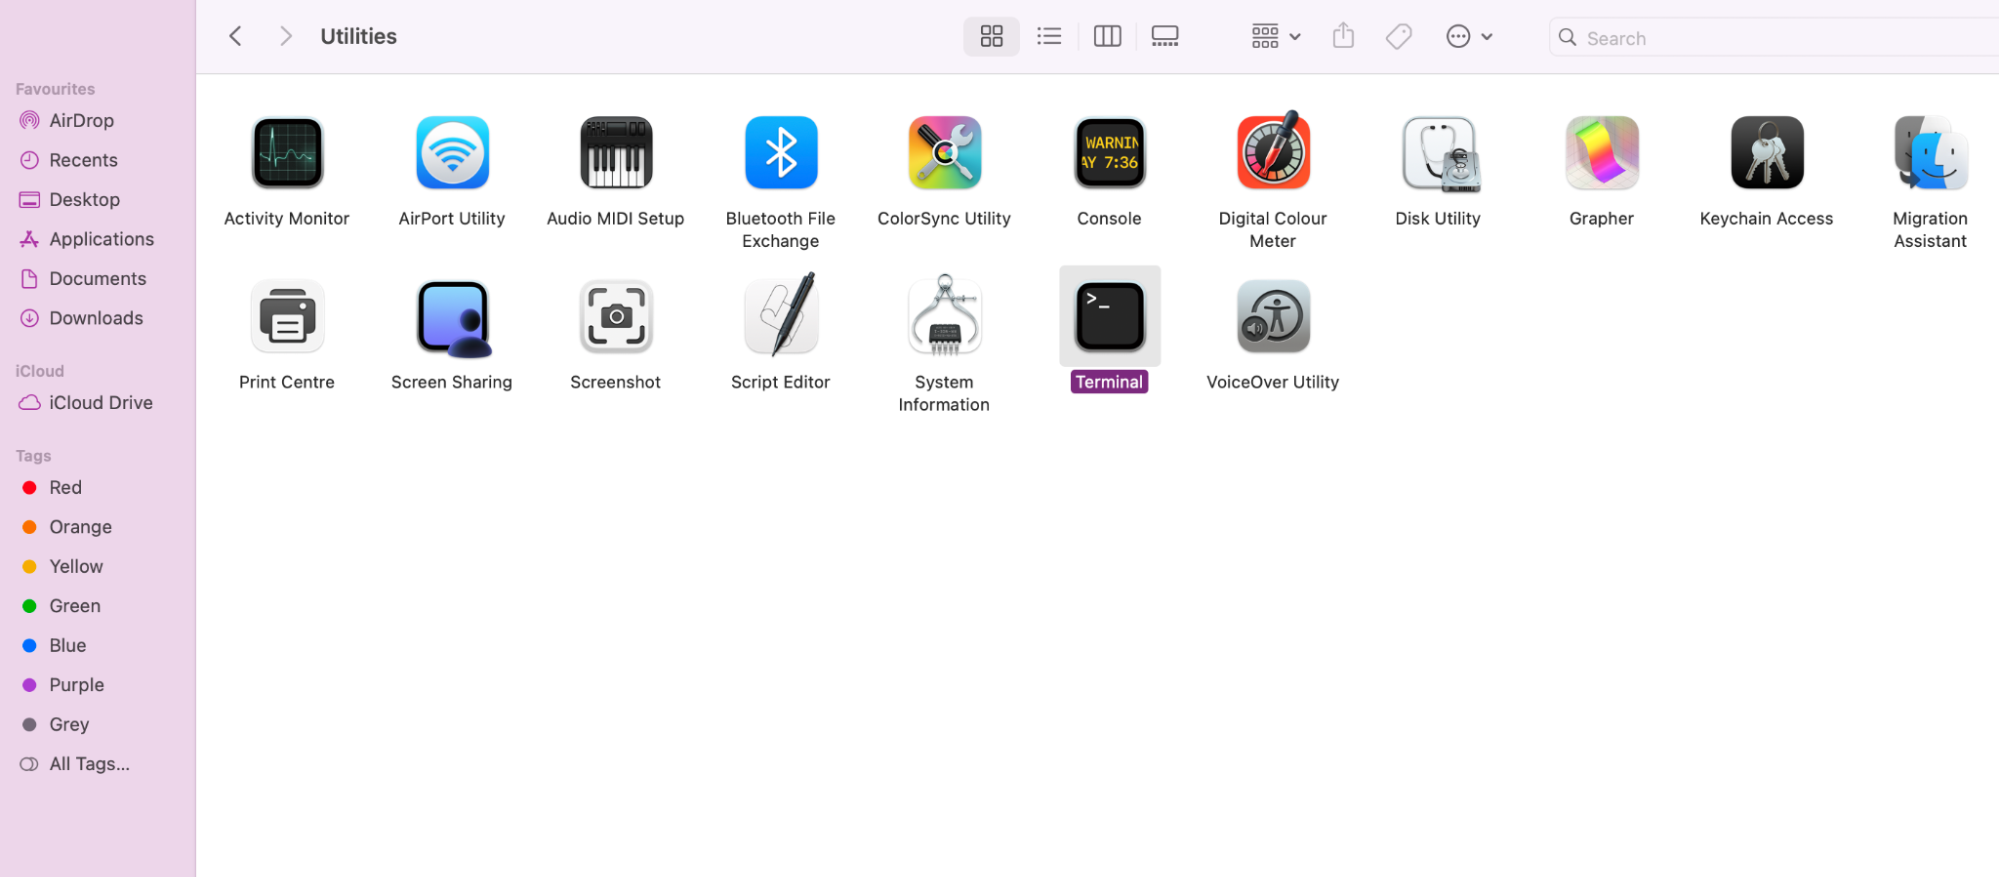
If you're looking for a more advanced approach to managing your files, you could also rename the Recent drive using Terminal. Here's how you can easily rename your Recent folder using Terminal:
- Open Terminal on your Mac.
- Use the cd command to navigate to the directory containing the Recent folder.
- Execute the mv command followed by the current name of the Recent folder and the desired new name.
- Confirm that the Recent folder now has its new name to adjust its behavior according to your personal preferences.

6. Turn off the entire hard drive
For a more comprehensive approach to clearing recents on Mac, you might want to consider turning off the entire hard drive.
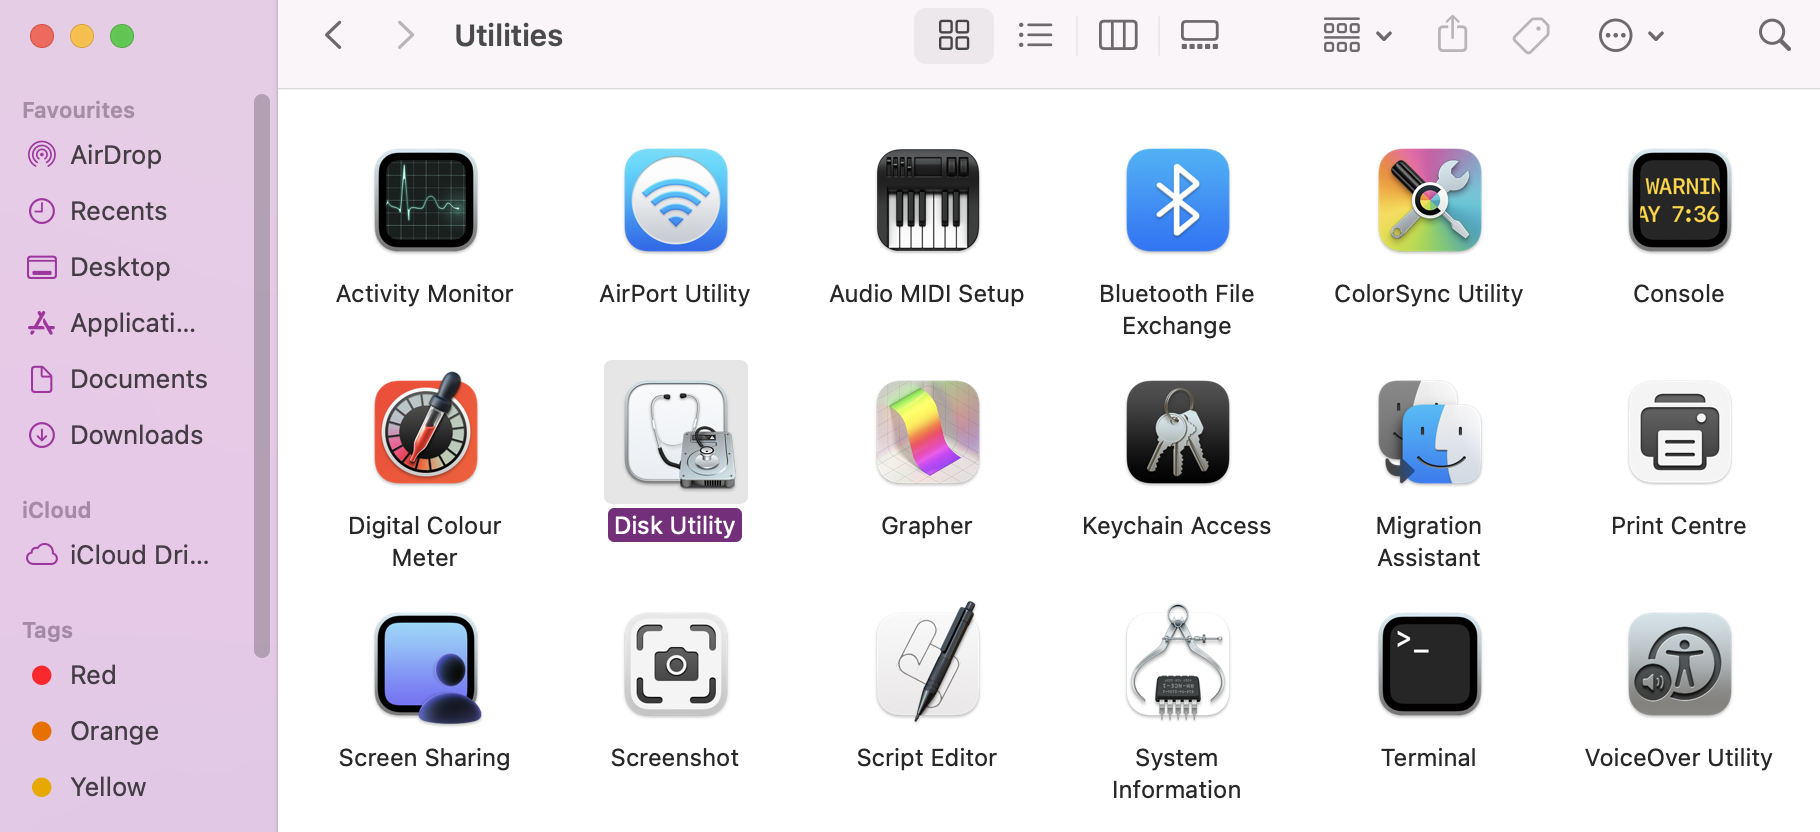
- In Finder, go to Applications > Utilities > Disk Utility.
- In Disk Utility, locate and select the hard drive you want to turn off from the list of available drives.
- Click the Unmount button, and this will turn off the selected hard drive, temporarily stopping any ongoing processes and clearing recent files.

7. Move files to an encrypted drive
If you prefer to simply move your files to an encrypted drive for enhanced security, then this is a solution you can adopt. This method not only safeguards your sensitive information but also allows you to manage better the Recents folder on your MacBook or iMac device.
Here's how you can move files to an encrypted drive:
- Prepare the encrypted drive. Ensure that you have an encrypted drive ready for use. If not, you can create one using Disk Utility on your Mac.
- Select files for encryption. Identify the files in your Recents folder that you want to move to the encrypted drive.
- Transfer files. Copy or drag the selected files to the encrypted drive. The encryption process will automatically secure these files, providing an additional layer of protection.
Alternative from our experts: You can use keyboard shortcuts as an alternative approach to transferring files to an external hard drive on your Mac. Select the files you want to transfer, copy them with Command + C, open the external drive, and use Option + Command + V to paste them, ensuring a smooth and efficient transfer.
How to clear recents in Finder
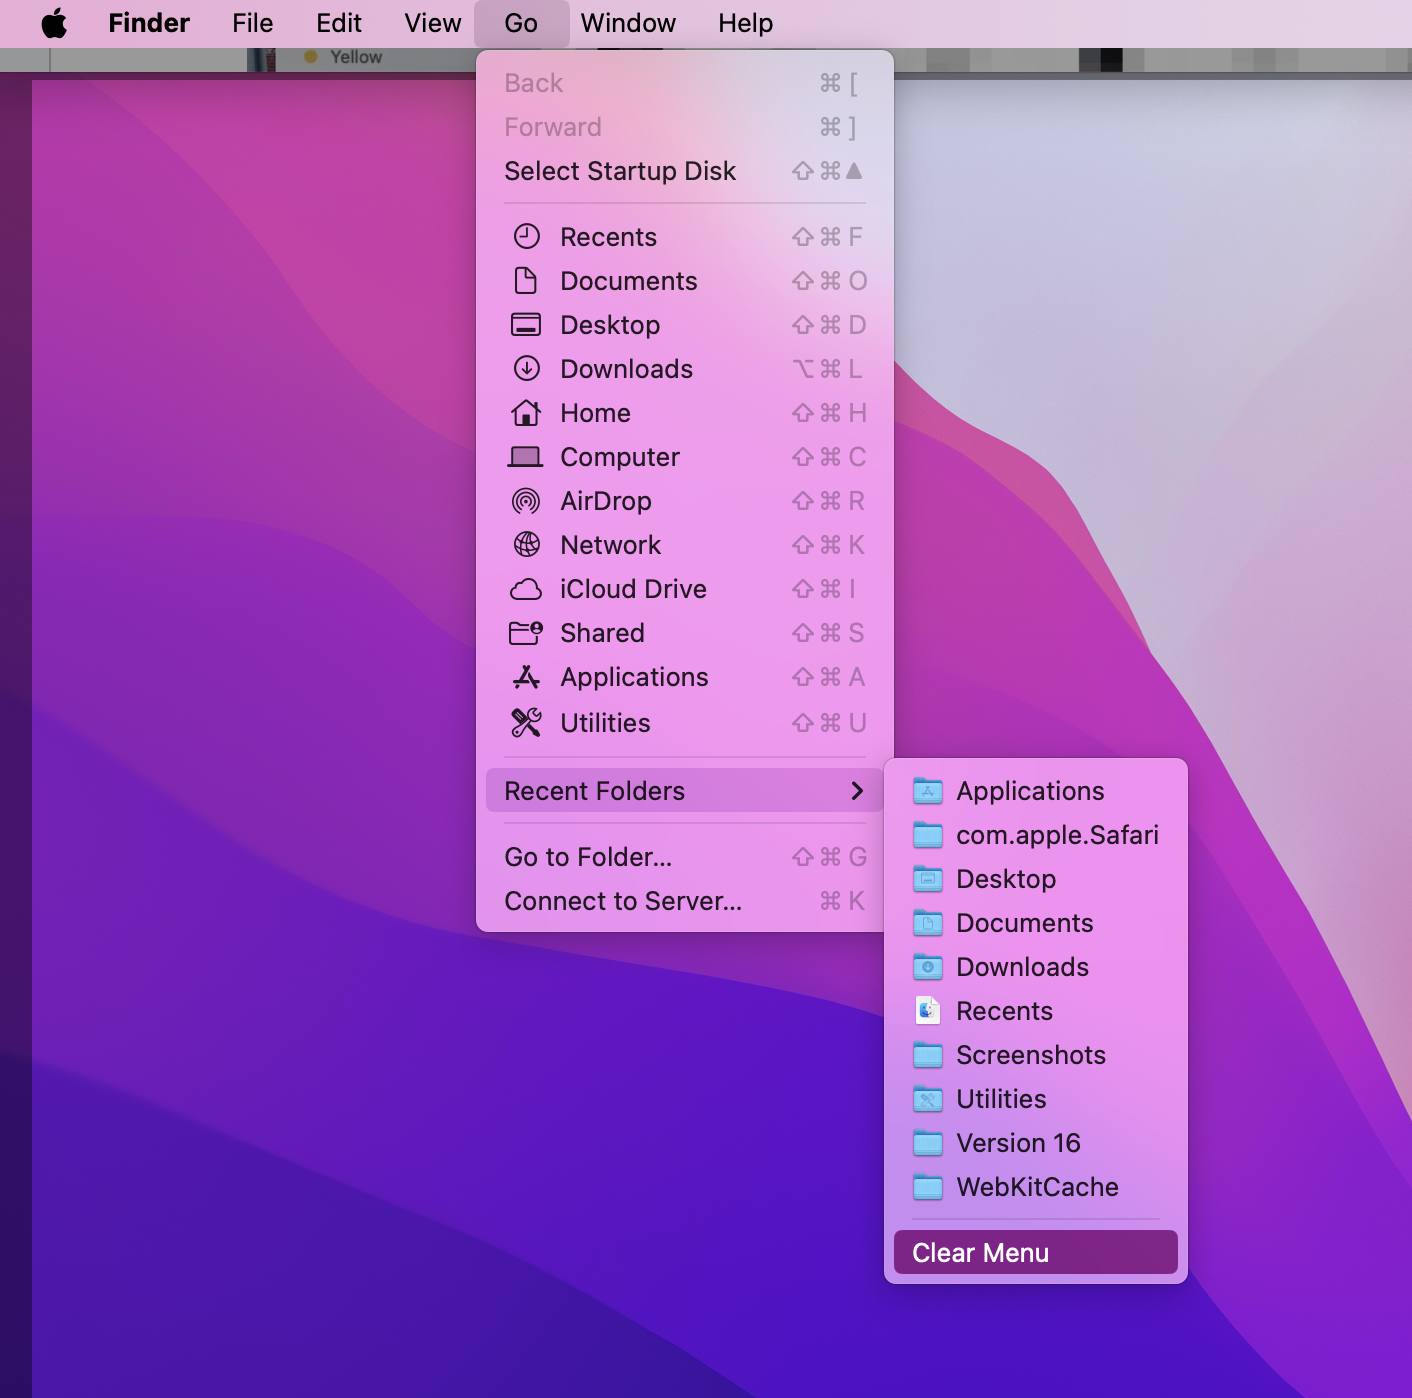
If you want to clear your recents on Mac using Finder, then this is easily done. All you need to follow these steps:
- Open Finder on your Mac.
- Click on Go in your device’s toolbar.
- From the dropdown menu, go to Recent Folders and press Clear Menu.
How to turn off recent files in Finder
Sometimes, you might need the files in your Recents drive. In such cases, getting rid of recents on Mac altogether isn’t a good idea. Fortunately, your Mac gives you an option just to turn off recent files using the Finder app—here’s how:
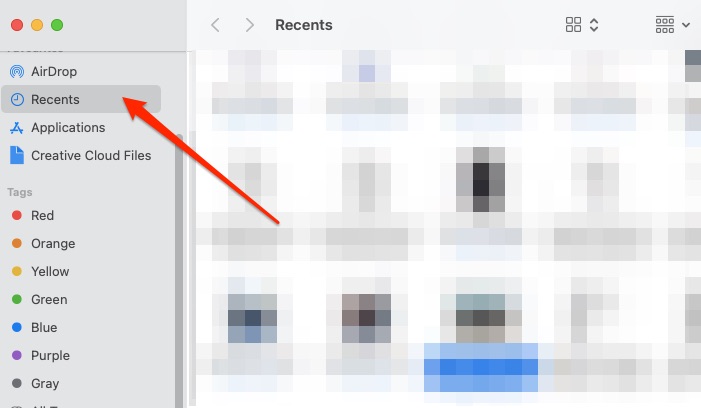
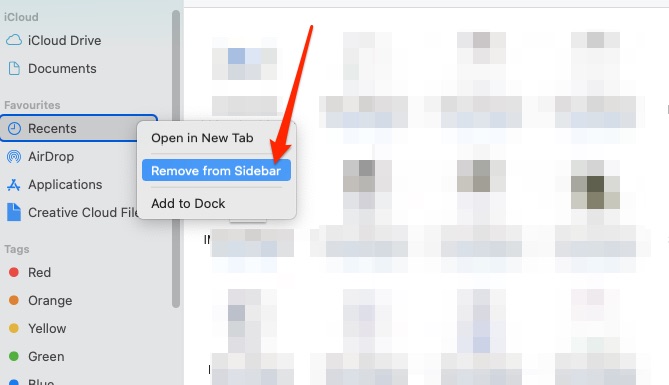
- Open Finder and go to the Recents tab.
- Click on the section while holding down the Ctrl button at the same time.
- Select Remove from the sidebar.
How to delete recent searches in Mac browser
Clearing recents in your Mac browsers is another way you can declutter your browsing history and online activity. There are various methods to ensure your recent browser searches remain confidential. We’ll explore the following options together to help you get rid of recent searches in various Mac browsers:
- Delete recent searches in Chrome
- Clear recent searches in Safari
- Get rid of recent in Opera
- Delete recent in Firefox
- Delete recent searches using MacKeeper
1. Delete recent searches in Chrome
If you want to delete recent searches in Google Chrome, you can do so from your browser. Here’s how to do it:
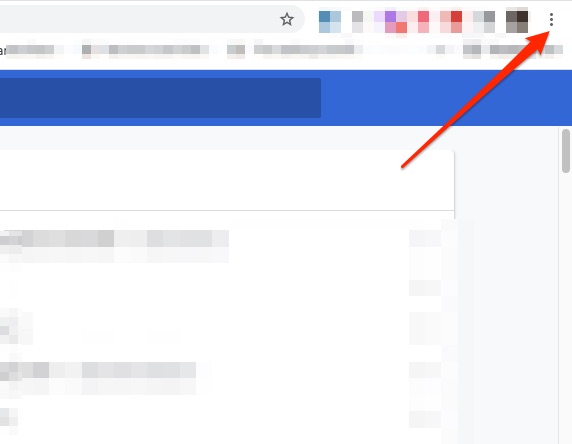
- Open Chrome and click on the three dots in the top right-hand corner.
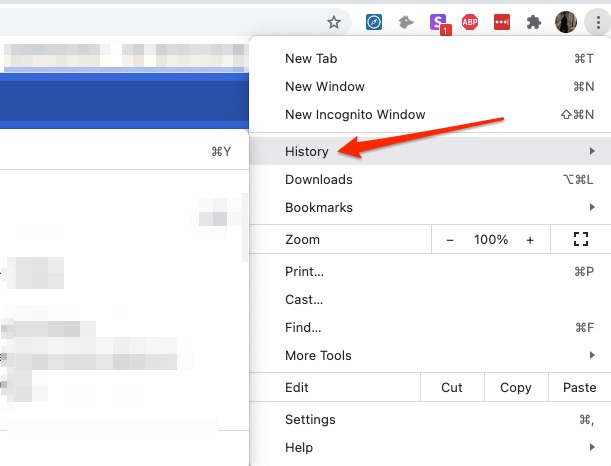
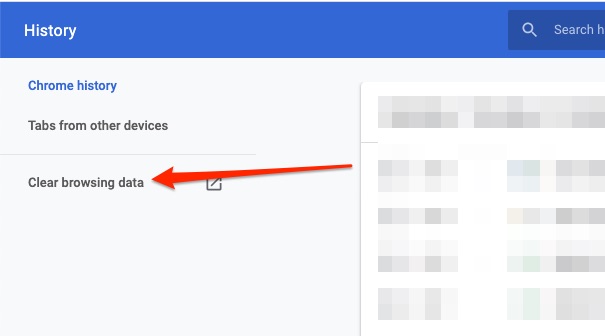
- Click on History.
- Select History again on the expanded tab.
- Click on Clear browsing data.
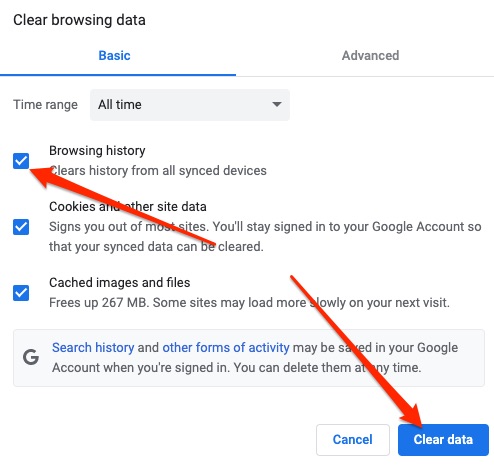
- Make sure the Browser history box is ticked and select Clear data.

2. Clear recent searches in Safari
As Safari is a different browser from Google Chrome, the steps to delete recent searches are a little different. Here’s how to delete recent searches in Safari:
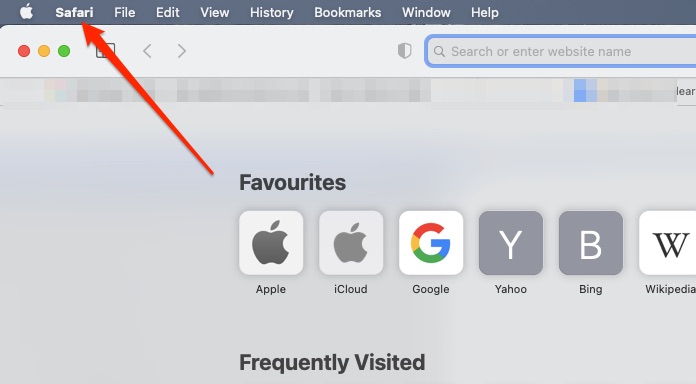
- Open Safari and go to the Safari option in the toolbar.
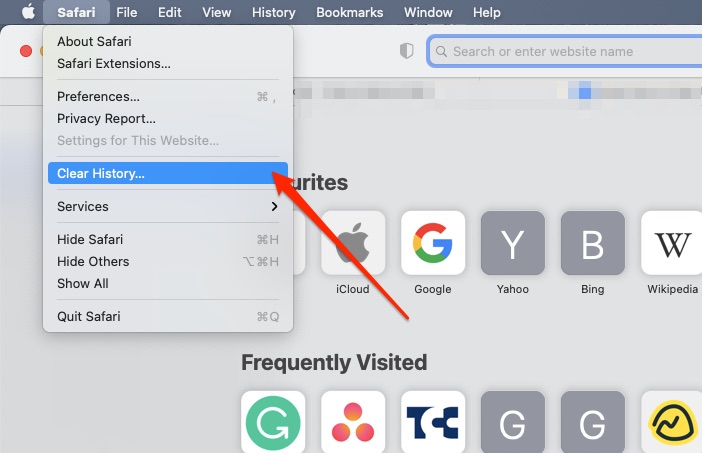
- Click on Safari and choose Clear History.
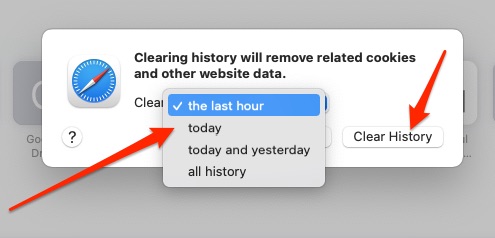
- When the popup window appears, expand the dropdown menu and select how far back you want to delete your history.
- Then, hit the Clear History button.
3. Get rid of recent in Opera
Freeing up space and maintaining privacy in Opera is also a breeze.
Follow the steps below to get rid of recent searches effortlessly:
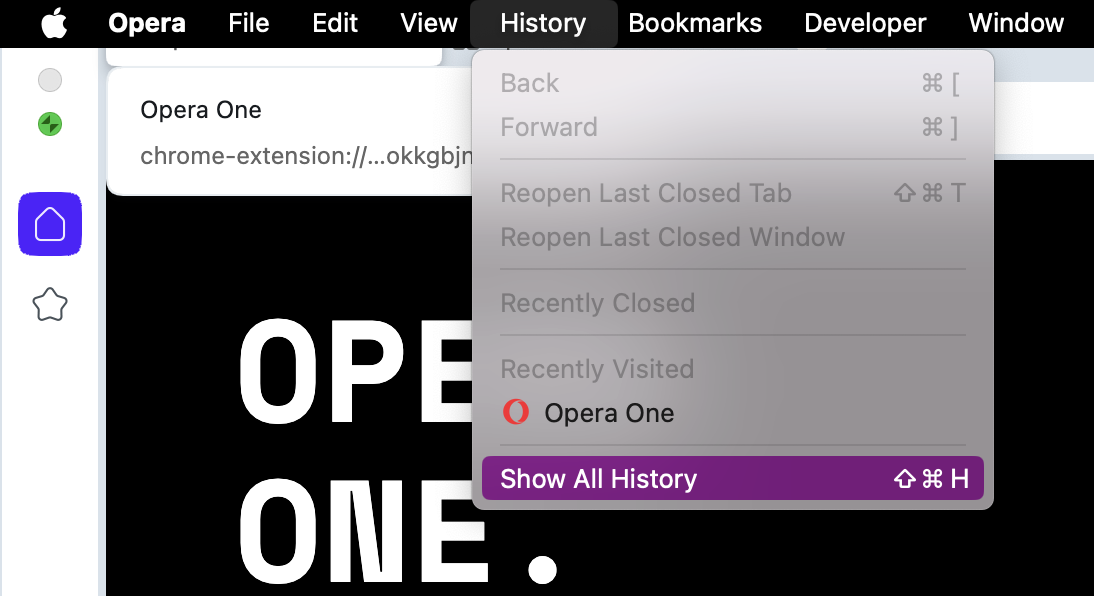
- Open Opera and click on History at the top of the menu.
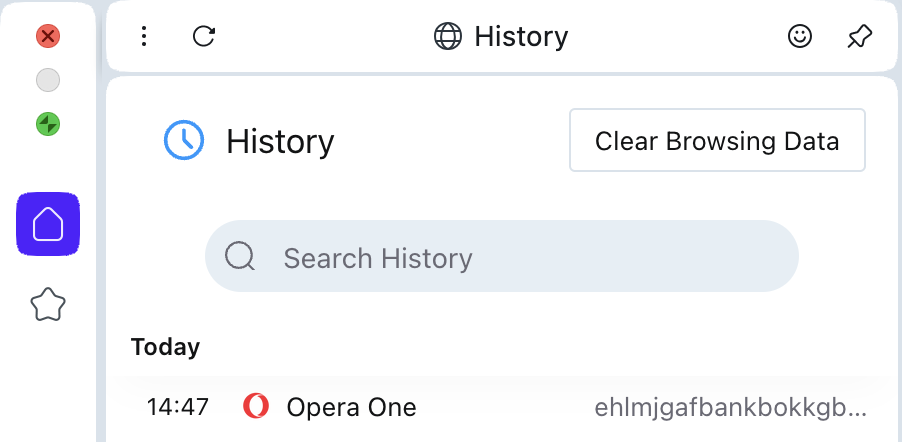
- Select Show All History.
- Select your preferred time range and specific data categories, then click Clear browsing data to get rid of recent searches and history in Opera.
4. Delete recent in Firefox
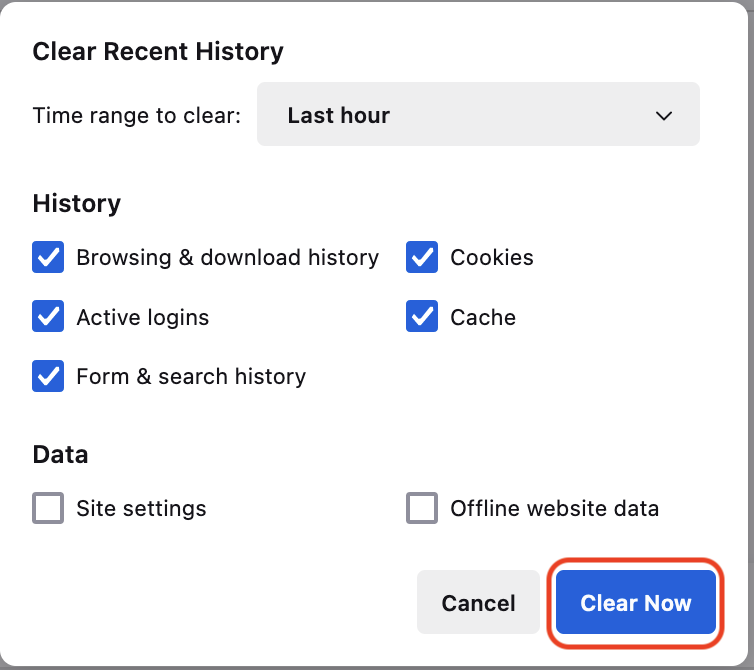
If your go-to web browser is Firefox, and you want to get rid of all your recent searches or browsing activity from your Mac, you can easily delete recents on Mac using the Firefox history clearing option. Here’s how:
- In Firefox, click the menu button to open the menu panel.
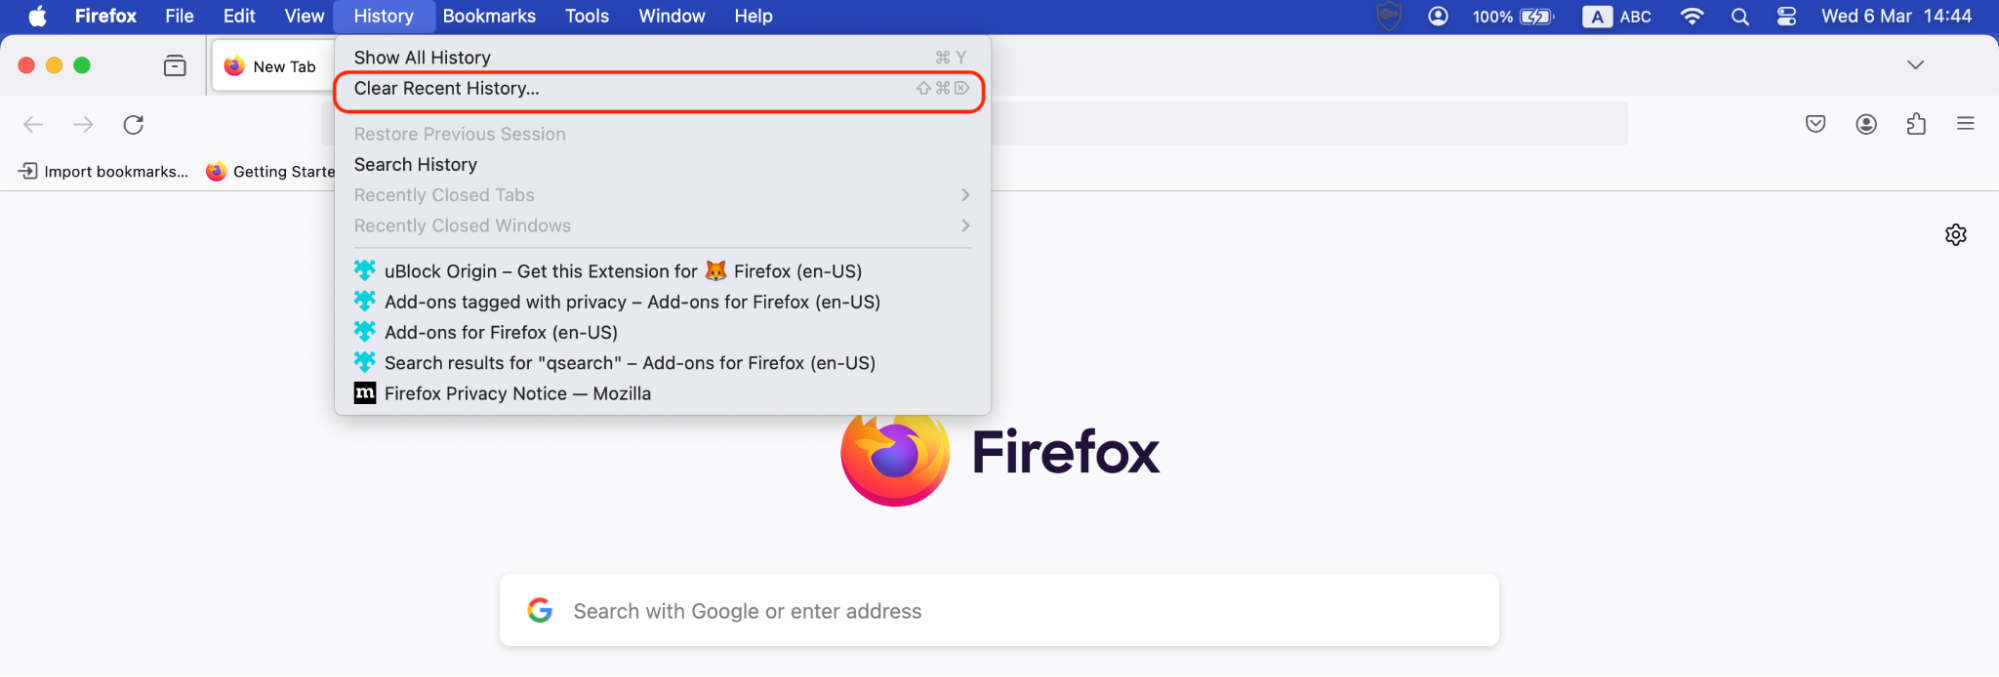
- Click History and select Clear Recent History.
- Select how much history you want to clear.
- Click the Clear Now button.

5. Delete recent searches using MacKeeper
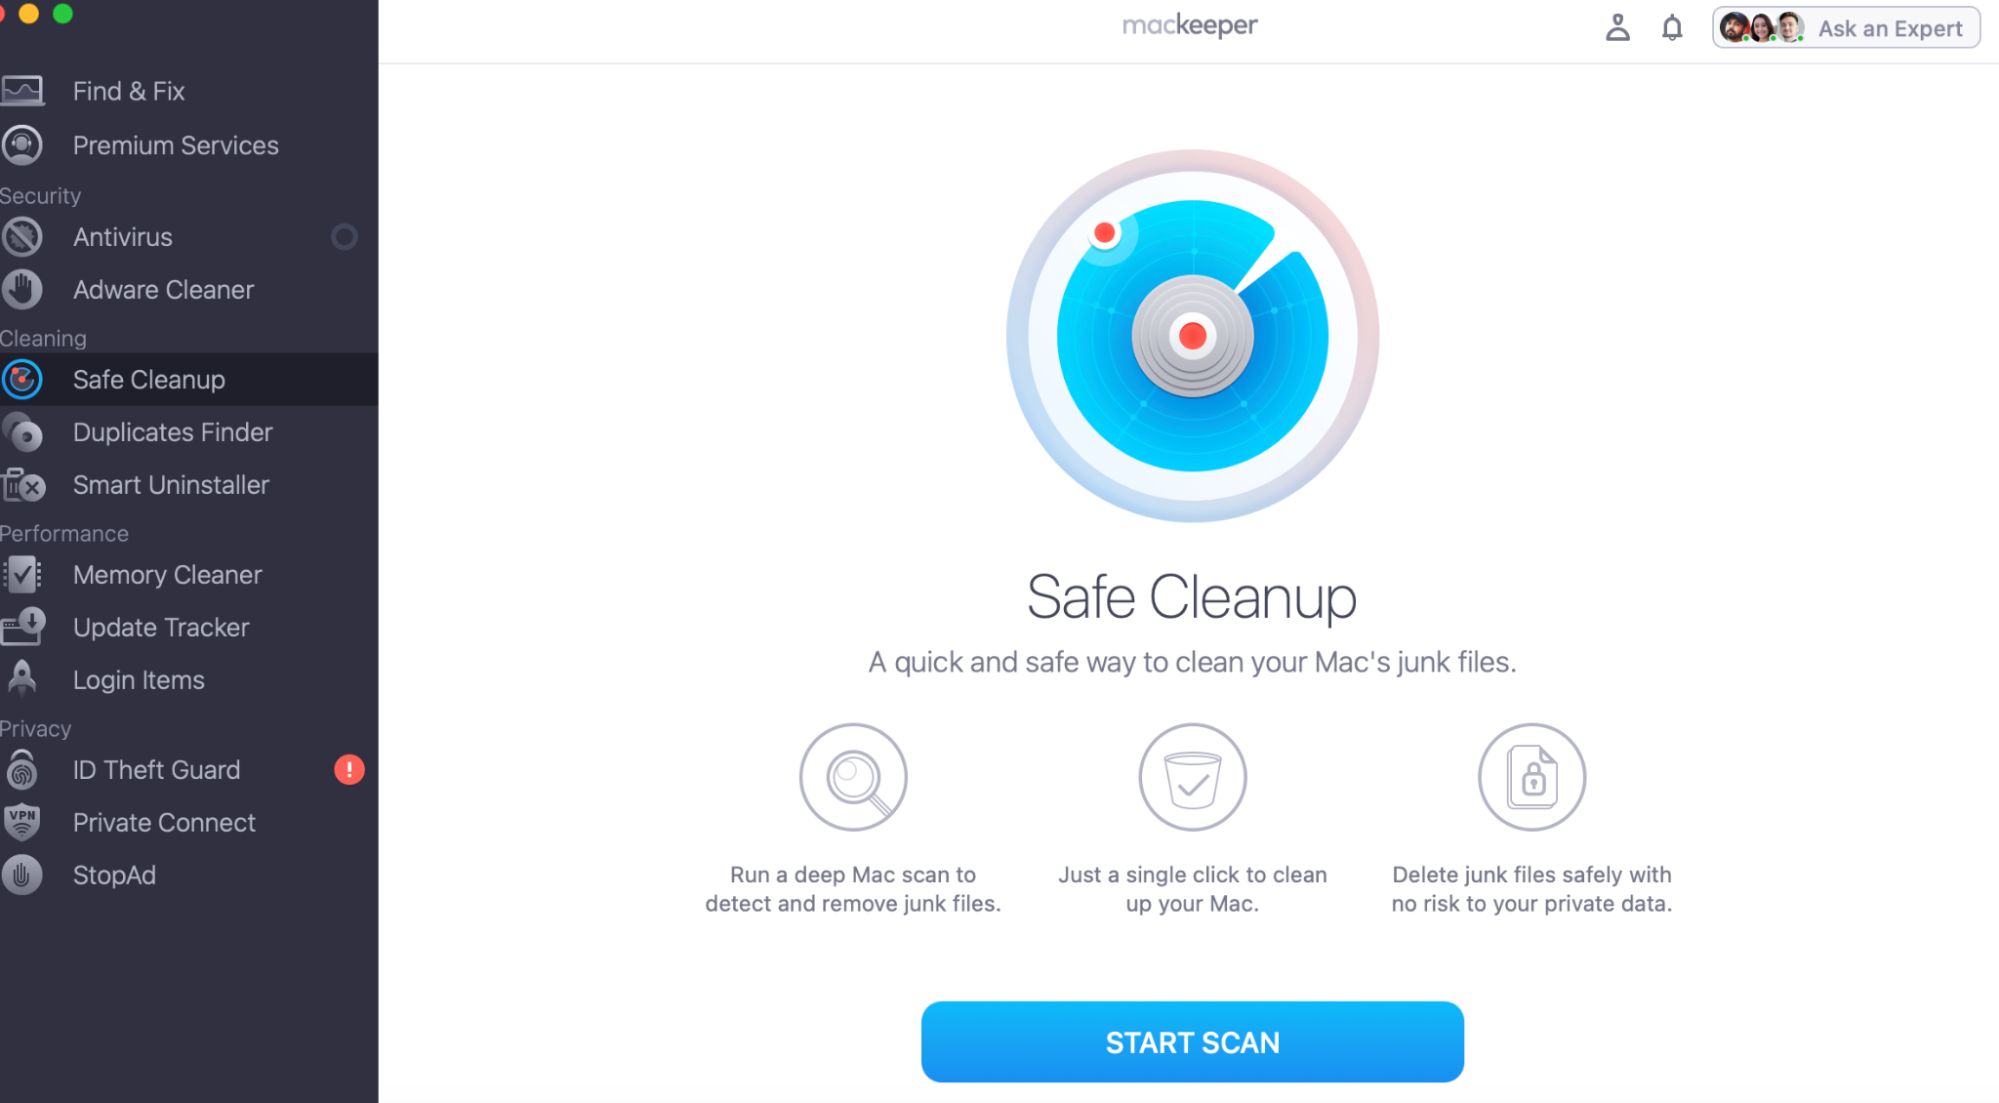
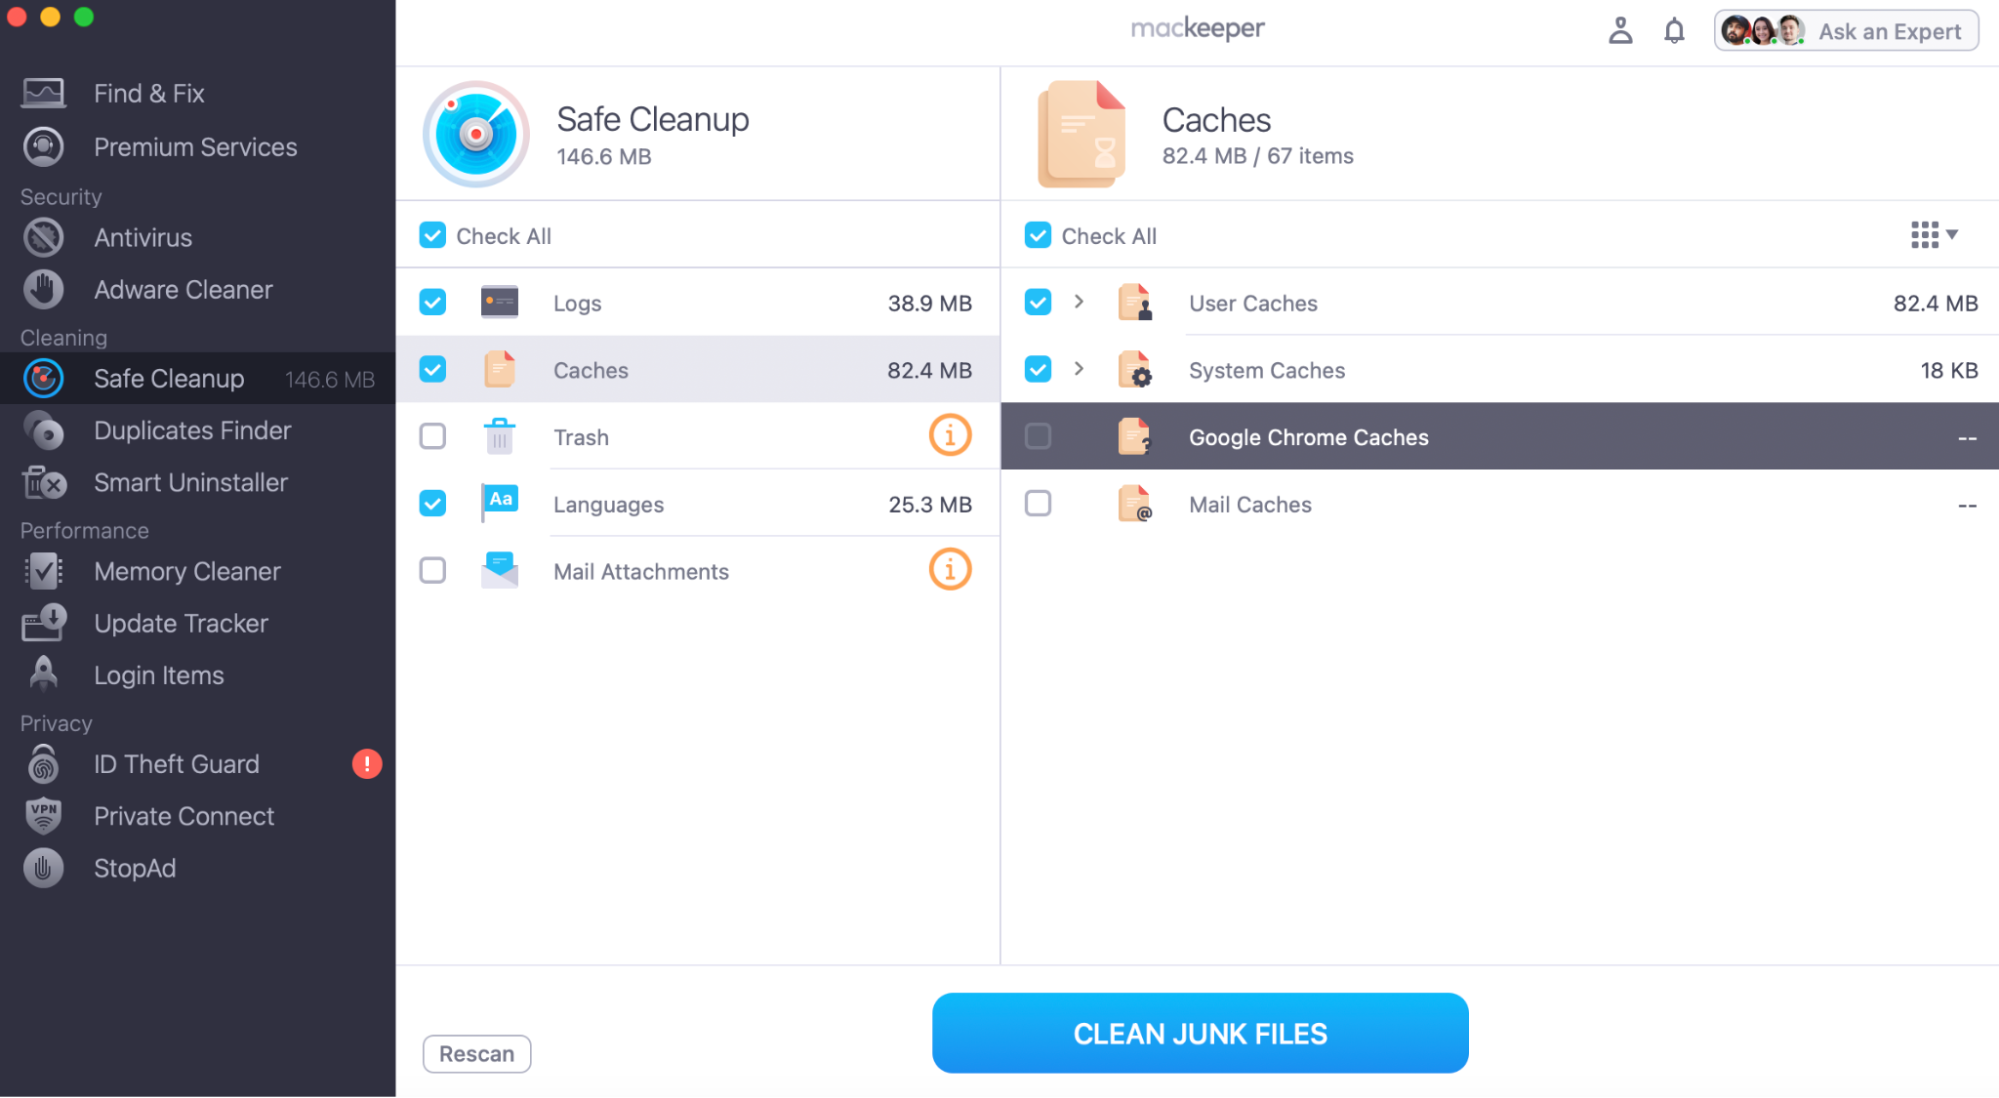
If you’re worried that you may accidentally get rid of important search or browser history, use a third-party app to help make the removal process run smoother. MacKeeper’s Safe Cleanup offers a hassle-free solution to remove recents on Mac—here’s how:
- Open MacKeeper.
- Launch the app, choose Safe Cleanup, and click Start Scan.
- Review the results and select the specific browser cache you want to delete.
- Then click on Clean Junk Files.
Clearing recents on your Mac is easy
Having read this article, you should now know how to clear recents on your Mac. Whether you want to get rid of the Recent folder or remove your web browser history, you don’t need to worry about complex steps with our informative article guiding you along the along.
Automating this task using MacKeeper’s Safe Cleanup makes it even easier to keep everything in check as well as saves you a lot of time. Whether you're cleaning up your browsing history or looking to delete FaceTime history from your device, MacKeeper has you covered to make the removal process quicker and more efficient.


