The longer a virus is on your Mac, the more damage it can do and the more data it can steal. To remove malware from your Mac fast, use MacKeeper’s Antivirus tool. As well as constant, real-time protection, you can run on-demand scans at any time.
The first step to remove malware from your Mac is to disconnect it from the internet and boot into Safe Mode to disable all third-party software. After that, check Activity Monitor for malicious processes and run a malware scanner to remove malware and other threats. Finally, uninstall suspicious apps, clear browser data and cache, and check your login items and profiles.
Despite what some people think, Macs can and do get viruses and other malware. If your Mac is infected, how do you get rid of malware and give your system a clean bill of health? In this guide, we’ll explore some of the most practical Mac malware detection and removal measures you can take.
How to tell if your Mac has a virus
Sometimes, malware will do its best to remain undetected. Other times it will be more obvious, and that can be by design or a side effect that the virus coders never intended. Either way, there may be warning signs that help you delete viruses on your trusty Macintosh.
Signs of malware on Mac
Whether you have an iMac, MacBook, or Mac mini, malware can result in these kinds of symptoms:
These symptoms can be caused by legitimate things, like background downloads or software conflicts. If you’re looking to clean viruses from your Mac, you need a reliable way of checking the cause of unwanted behavior.
A note from our experts:
It's best to prevent a virus or malware from infecting your Mac; if it's already on your computer, remove it as soon as possible. The best way to protect your Mac from viruses and remove those that have already infected your Mac is with MacKeeper Antivirus.
Here’s how to protect your Mac with MacKeeper’s Antivirus:
If the scan finds anything suspicious, select it from the results list.
Click Delete, and then Delete to confirm.
Step 1. Select Antivirus and start a scanStep 2. Select malware and click DeleteStep 3. Confirm that you want to delete the malware
How to get rid of viruses on Mac
To remove malware from Mac, immediately disconnect it from the Internet and start in Safe Mode. Then, check for suspicious processes in Activity Monitor, remove malicious software, check the homepage and search engine, and clear cache and browser data. Here's how to get rid of viruses on Mac:
1. Disconnect from the internet
Malware is often designed to connect to the internet—sending stolen information to criminals, using your machine to send spam emails, or just spreading itself further. If you’re trying to get rid of a potential threat detected on your Mac, it’s a good idea to disable your internet connection.
Here’s how to disable Wi-Fi on a Mac:
In System Settings, click Network.
Select Wi-Fi.
Click the toggle to turn off Wi-Fi.
Step 1. Select Network in System SettingsStep 2. Open Wi-Fi settingsStep 3. Turn off Wi-Fi
How to disable Ethernet on Mac:
In System Settings, click Network > Ethernet.
Click Make Inactive.
Step 1. Go to Network > Ethernet in System SettingsStep 2. Click Make Inactive
To be doubly sure you’re not connected to the internet, you could unplug your Ethernet cable.
2. Reboot into safe mode
Sometimes, malware is difficult to remove, because it loads up as soon as macOS starts. But if you boot into safe mode, you might be able to remove this malware, because it’s designed to load only the files and apps macOS needs to run. Safe mode also deletes some system caches, so they can be rebuilt again automatically.
How to boot into safe mode on an Intel Mac:
Hold down Shift as soon as your Mac turns on or restarts.
When you see the login window, take your finger off the Shift key.
Log in using your usual details.
You should see Safe Boot in the top-right corner of the login screen.
How to boot into safe mode on an Apple Silicon Mac:
Shut down your Mac. Press and hold the power button for 10 seconds.
Release it when you see the startup options window.
Choose your startup disk, then hold down Shift.
When prompted, click Continue in Safe Mode and release the Shift key.
Log in, and you should find your Mac in safe mode.
Hint from our team:
To check safe boot is on, follow these steps:
Click the Apple logo in the top-left of your screen
Go to About This Mac > More Info > System Report > Software
Check Boot Mode says Safe. Be aware, this process is slightly different in older versions of macOS like Catalina.
If your Mac is now running normally, then there’s either malware on it that doesn’t load in safe mode, or you have some other kind of software-related problem. If you know what you’re looking for, you can try deleting suspicious files, extensions, and so on. Reboot your Mac normally and see if your problem has been fixed.
3. Find suspicious processes in Activity Monitor
If you suspect malware on your Mac, start by checking Activity Monitor. This built-in macOS tool shows you what’s running on your Mac, including in the background. If anything is taking up a lot of CPU cycles or RAM, it could be malware, and Activity Monitor can help with finding it.
Here’s how to check Activity Monitor for macOS malware:
Open Activity Monitor from Applications > Utilities. Click the CPU tab, then click the % CPU column to sort processes by most CPU used. Look for processes you don’t recognize that are using a lot of processing power
Do the same with the Memory column in the Memory tab, Bytes Written in the Disk tab, Sent Bytes in Network.
Take note of anything that seems suspicious and Google it. If it’s malware or something else you don’t want, double-click on it in Activity Monitor and click Quit. Then click Force Quit to kill the process.
Step 1. Use Activity Monitor to detect suspicious CPU usageStep 2. Check memory, disk, and network use tooStep 3. Quit any suspicious processes
Stopping a process doesn’t eliminate it. It might start up again immediately or when you restart your Mac.
4. Remove malicious programs
If an app is causing suspicious activity on your Mac, you should remove it by uninstalling that app. This might not remove malware from a Mac completely, but it's an important step. If you suspect an app is unsafe, check out our guide on how to remove a trojan virus.
This is the normal way of uninstalling apps on a Mac:
In Finder, navigate to your Applications folder. If you see anything suspicious, right-click it and select Move to Trash.
Now right-click your trash, and select Empty Trash.
Step 1. Move unwanted apps to your trashStep 2. Empty your trash
A nuance to know:
You can also uninstall apps with MacKeeper’s Smart Uninstaller. Our tool will also delete files that would normally be left behind, which is vital when doing a virus cleanup. Download MacKeeper and try it yourself.
A warning on manually removing malware
Be very careful when manually deleting malware from your Mac—you may delete the wrong thing and make your Mac worse.
If in doubt, you may want to contact Apple support. You can also get support from MacKeeper’s Premium Services—as an alternative to quickly solve your user's concern.
5. Delete Mac malware from your Login Items
Malware is often designed to launch when computers start up. On a Mac, you may find these are listed in the Login Items part of System Settings. Follow these steps to check:
Open System Settings, and select General > Login Items
Look through the list for anything suspicious. Select what you want to remove, and click the minus button
Restart your Mac, and then check to see if the suspicious Login Item didn’t reinstall itself.
Step 1. Go to General > Login ItemsStep 2. Select a login item and remove it
Unfortunately, the standard Login Items tool doesn’t show absolutely everything that starts with macOS. To find and stop these hidden items, use MacKeeper’s Login Items tool to find a wider variety of startup processes.
6. Run an antivirus app
A good antivirus app can scan your entire Mac quickly and check every single file against a vast database of threats and suspicious behavior. MacKeeper Antivirus is one such app, which makes it easy to find and get rid of Mac malware.
7. Clear browser data
Certain types of malware can modify your web browser settings and redirect you to malicious websites, putting your Mac at significant risk. To resolve these issues, we recommend you remove any unwanted extensions, reset your homepage, and clear your cache and browsing history.
Verify your browser’s homepage
A favorite trick of malware creators is taking over people’s web browser homepages. Doing so, they can serve you ads or notifications that they get paid for—or in worse cases, direct you to other sites, which may install even more malware.
Using Safari, there are a few things you can do to check your homepage hasn’t been affected:
Click the address bar to reveal the full URL and make sure it’s accurate.
In the menu bar, select Safari > Settings.
In the General tab, check what it says next to the Homepage. If it’s wrong, change it.
Step 1. Click the URL to check itStep 2. Go to Safari settings
Checking your homepage with Chrome is similar:
Double-click the address bar to reveal the full URL, and verify it.
Select Chrome > Settings from the menu bar.
Click Appearance, and under Show Home button, check the URL.
Step 1. Click the Chrome search bar to see the full URLStep 2. Open Chrome's settingsStep 3. Check the homepage is right
In cases of serious infection, your homepage may still get redirected, and it won’t be fixed until you delete the virus from your Mac.
Clear your cache
There are various caches on your caches. Individual apps and web browsers have their own caches, but there’s also system cache. Clearing these temporary files out can help you remove all traces of malware from your desktop or laptop Mac.
Follow these steps to manually clear caches on your Mac:
In Finder, select Go > Go to Folder from the menu bar.
Type in ~/Library/Caches/ and press return.
You can now see cached files for many of the apps on your Mac.
Delete the contents of a folder to clear the cache.
Step 1. In Finder, select Go > Go to FolderStep 2. Use Go to get into your Mac's cachesStep 3. Look through the different app cachesStep 4. Delete anything you know is safe to remove
While manually deleting cached files manually may work, it’s not always clear what you’re deleting, so there’s a risk you could mess something up. Avoid that risk with MacKeeper’s Safe Cleanup—in just a few clicks process to find and remove cached data.
Delete suspicious browser extensions
If you’re experiencing problems with your web browser, they could be caused by a rogue extension. Remove any recently installed extensions and any that don’t come from reputable sources. Here, we’ll look at removing extensions from Safari and Chrome, but the process is similar for other browsers like Firefox.
How to remove extensions in Safari:
In Safari, click Safari, from the top menu, and select Settings. In the Extensions tab, select an extension, then click the Uninstall button.
Click Show in Finder.
Delete the extension like would any other file.
Step 1. Select an extension and then UninstallStep 2. Click Show in FinderStep 3. Delete the extension
How to remove extensions from Chrome:
In Chrome, select Window > Task Manager.
Sort the CPU column to see if any extensions are using a lot of processing power. Do the same with the Memory footprint and Network columns.
Now select Window > Extensions from the menu bar.
Look through the installed extensions, and click the Remove button on any that seem suspicious.
Step 1. Open the Task ManagerStep 2. Check Task Manager for suspicious extensionsStep 3. Go to Chrome's extensionsStep 4. Click Remove to uninstall an extension
MacKeeper’s Smart Uninstaller doesn’t just remove apps—it’ll also delete extensions, including those installed by malware.
8. Get rid of pop-up ads on Mac
Another symptom of malware infection is an increase in unwanted pop-ups, which can affect browser performance. Thankfully, you can do something to get rid of these annoyances.
To prevent pop-ups in Safari:
In Safari, select Safari > Settings in the menu bar, and go to the Websites tab. In the sidebar, click Pop-up Windows.
Use the drop-down menus to block pop-ups.
Step 1. Find pop-up in Safari's settingsStep 2. Choose which pop-up to block
Follow these steps to block pop-ups in Chrome:
In the menu bar, go to Chrome > Settings, and then Privacy and security > Site settings.
Scroll down and select Pop-ups and redirects.
Look through the list under Allowed to send pop-ups and use redirects. Click the three dots next to an entry, and select Block.
Step 1. Go to Site settings in ChromeStep 2. Choose Pop-ups and redirectsStep 3. Select a site and block pop-ups
MacKeeper’s Adware Cleaner makes it even easier to remove the malware that causes unwanted pop-ups. In just a few minutes, this adware remover can get your Mac free of unwanted apps.
9. Check for profiles
Based on our experience, a common method malware uses to infiltrate Mac computers is by disguising itself as a legitimate profile. We strongly advise regularly reviewing the list of profiles in your Mac settings to ensure there are no suspicious entries.
Here’s how to check for unwanted profiles on your Mac:
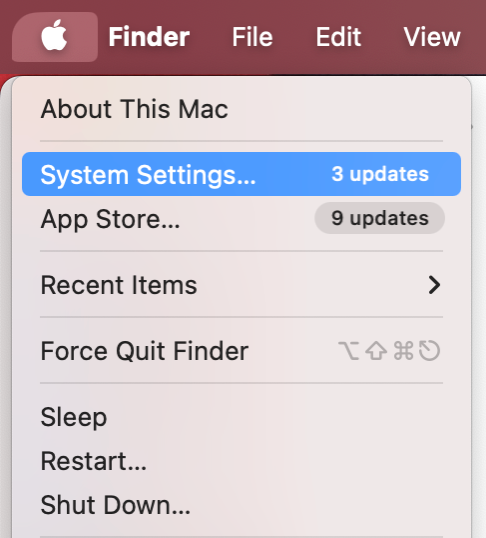
Click the Apple logo in the menu bar.
Select System Settings from the dropdown menu.
Scroll down the sidebar and choose Users & Groups.
Look for any suspicious profiles.
Click the i icon next to an unwanted profile.
Click Delete User.
Select Deletethe home folder, then click Delete User.
Step 1. Apple logo > System SettingsStep 2. Users & Groups > i icon next to suspicious profileStep 3. Click Delete UserStep 4. Delete the home folder > Delete User
10. Update macOS and apps
We believe that one of the most effective ways to safeguard your Mac against all forms of malware is to keep both your operating system and apps consistently updated. Only then will you benefit from Apple’s newest security and privacy features while minimizing potential vulnerabilities that malware could exploit.
Follow these steps to update macOS and any app purchased through the Mac App Store:
Click on the Apple logo in the menu bar, then select System Settings.
Choose General from the left sidebar.
Click Software Update.
If there are any updates available, click Update Now.
Follow the steps on your screen to upgrade to the latest macOS version.
Step 1. Apple logo > System SettingsStep 2. General > Software UpdateStep 3. Hit Update Now
Important: For applications not available in the Mac App Store, we recommend performing manual updates. You can typically do this from within each app’s settings, or by uninstalling and reinstalling the most recent version from the developer’s website.
11. Resettle the system and restore from a backup
When you’re trying to remove a virus from a Mac, you may want to restore from a backup. Using the Time Machine function built into macOS, you can return your machine to a previously saved snapshot, taken before you picked up the malware.
Assuming you already have Time Machine activated, here’s how to restore from a backup:
Go to System Settings > General > Transfer or Reset.
Click Erase All Content and Settings, then follow the on-screen instructions to erase all your user data.
When your macOS has been reset and restarted, open Applications > Utilities > Migration Assistant. Click Continue, and enter your system password.
Select From a Mac, Time Machine backup or Startup disk, and click continue.
Select your Time Machine backup and click Continue.
Choose a backup to restore from, and click Continue. Follow the on-screen instructions to finish the restore.
Step 1. Select Transfer or ResetStep 2. Click Erase All Content and SettingsStep 3. Open Migration AssistantStep 4. Choose where you want to transfer information fromStep 5. Choose the drive to restore fromStep 6. Select a backup to restore
12. Wipe your Mac and reinstall macOS
If all else fails, you can wipe your Mac and reinstall macOS. Certainly if you’re unable to boot into macOS at all, this may be the only solution left to you to get a virus off your Mac. To reinstall the OS, you’ll need to get into macOS Recovery.
Enter Recovery on an Apple silicon Mac like this:
Shut down your Mac.
Press and hold the power button until you see Loading startup options.
Choose Options > Continue, and follow the instructions.
Use these steps to get into Recovery on an Intel Mac:
As soon as you turn your machine on, press Cmd + R.
In the Recovery app, select Reinstall for your macOS release, then Continue.
Yes, a factory reset will remove all traces of malware from your Mac, but it should be your last resort. Why? Because it also means you’ll also lose everything that’s stored on your Mac. Your apps, your documents, your photos—everything. Make sure to back up what you can before you take this route.
How to remove malware from Mac automatically?
While manual removal of malware with XProtect, Apple’s built-in antivirus software, can be beneficial for some users, it carries the risk of missing hidden threats. We highly recommend trusted third-party apps like MacKeeper’s Antivirus. Developed by Clario Tech and trusted by millions of users, MacKeeper stands out as a comprehensive cybersecurity solution, offering continuous malware protection, Mac optimization tools, and an integrated VPN.
Choose Antivirus from the sidebar, under Security.
Click Launch Antivirus and enter your Mac password.
To perform a manual scan, click the Start Scan button.
Wait until the scanning process is complete.
Select all threats by clicking the Check All box.
Click Move to Quarantine.
Click Restart and wait until the app relaunches.
Select all threats again.
Finally, click Delete to confirm.
Step 1. Antivirus > Launch AntivirusStep 2. Antivirus > Start ScanStep 3. Waiting until the scan is done.Step 4. Check All > Move to QuarantineStep 5. Click RestartStep 6. Check All > Delete
What if malware removal didn’t help?
If nothing else works, a factory reset will remove all malware from your Mac. However, if the malware somehow prevents you from resetting your Mac or a factory reset isn’t an option because you need to keep some data on your Mac, we strongly recommend getting expert help.
So who can you turn to? There are a few options we suggest:
Apple support: The official route makes sense if your Mac is still under warranty or you pay for AppleCare.
A third-party repair shop: Local technicians may be able to help.
MacKeeper’s Premium Services: Our experts know Macs and malware like the back of their hand—and they’re available 24/7.
How to protect Mac from malware
Prevention is, of course, better than cure. If you take the right precautions, you might never have to get rid of viruses on your Mac.
Here are a few ways to protect your Mac from viruses and other malicious software:
Don’t open email attachments from people you don’t know
Don’t visit websites you don’t trust
Avoid piracy websites and services
Use unique, strong passwords
Buy apps from the App Store where possible
Use antivirus with real-time malware protection for Mac
Use an ad blocker to stop your web browser downloading dangerous files
Just in case, back up your important files regularly.
Best way to remove malware from Mac
Without a doubt, the best way to remove malware is with an automated checker like MacKeeper’s Antivirus. Removing viruses manually is slow, and you need to know what to look for.
With MacKeeper, you can scan your entire Mac quickly and safely delete malware, while keeping the rest of your data untouched. Thanks to its real-time protection, our tool can also help you prevent malware from ever getting on your Mac in the first place.
We respect your privacy and
use cookies
for the best site experience.
Privacy Preferences Center
We use cookies along with other tools to give you the best possible experience while using the
MacKeeper website. Cookies are small text files that help the website load faster. The cookies we
use don’t contain any type of personal data meaning they never store information such as your
location, email address, or IP address.
Help us improve how you interact with our website by accepting the use of cookies. You can change
your privacy settings whenever you like.
Manage consent
All cookies
These cookies are strictly necessary for enabling basic website functionality (including page
navigation, form submission, language detection, post commenting), downloading and purchasing
software. The website might malfunction without these cookies.