In this article you will find the following:
There are lots of reasons behind Apple Mail not working on Mac. How do you know it’s not working correctly? The Mac Mail app might be unresponsive and not receive new emails. The Mail app might not be opening at all. Fortunately, whatever the problem is, you just need to follow a simple set of troubleshooting steps to fix it.
Before we start
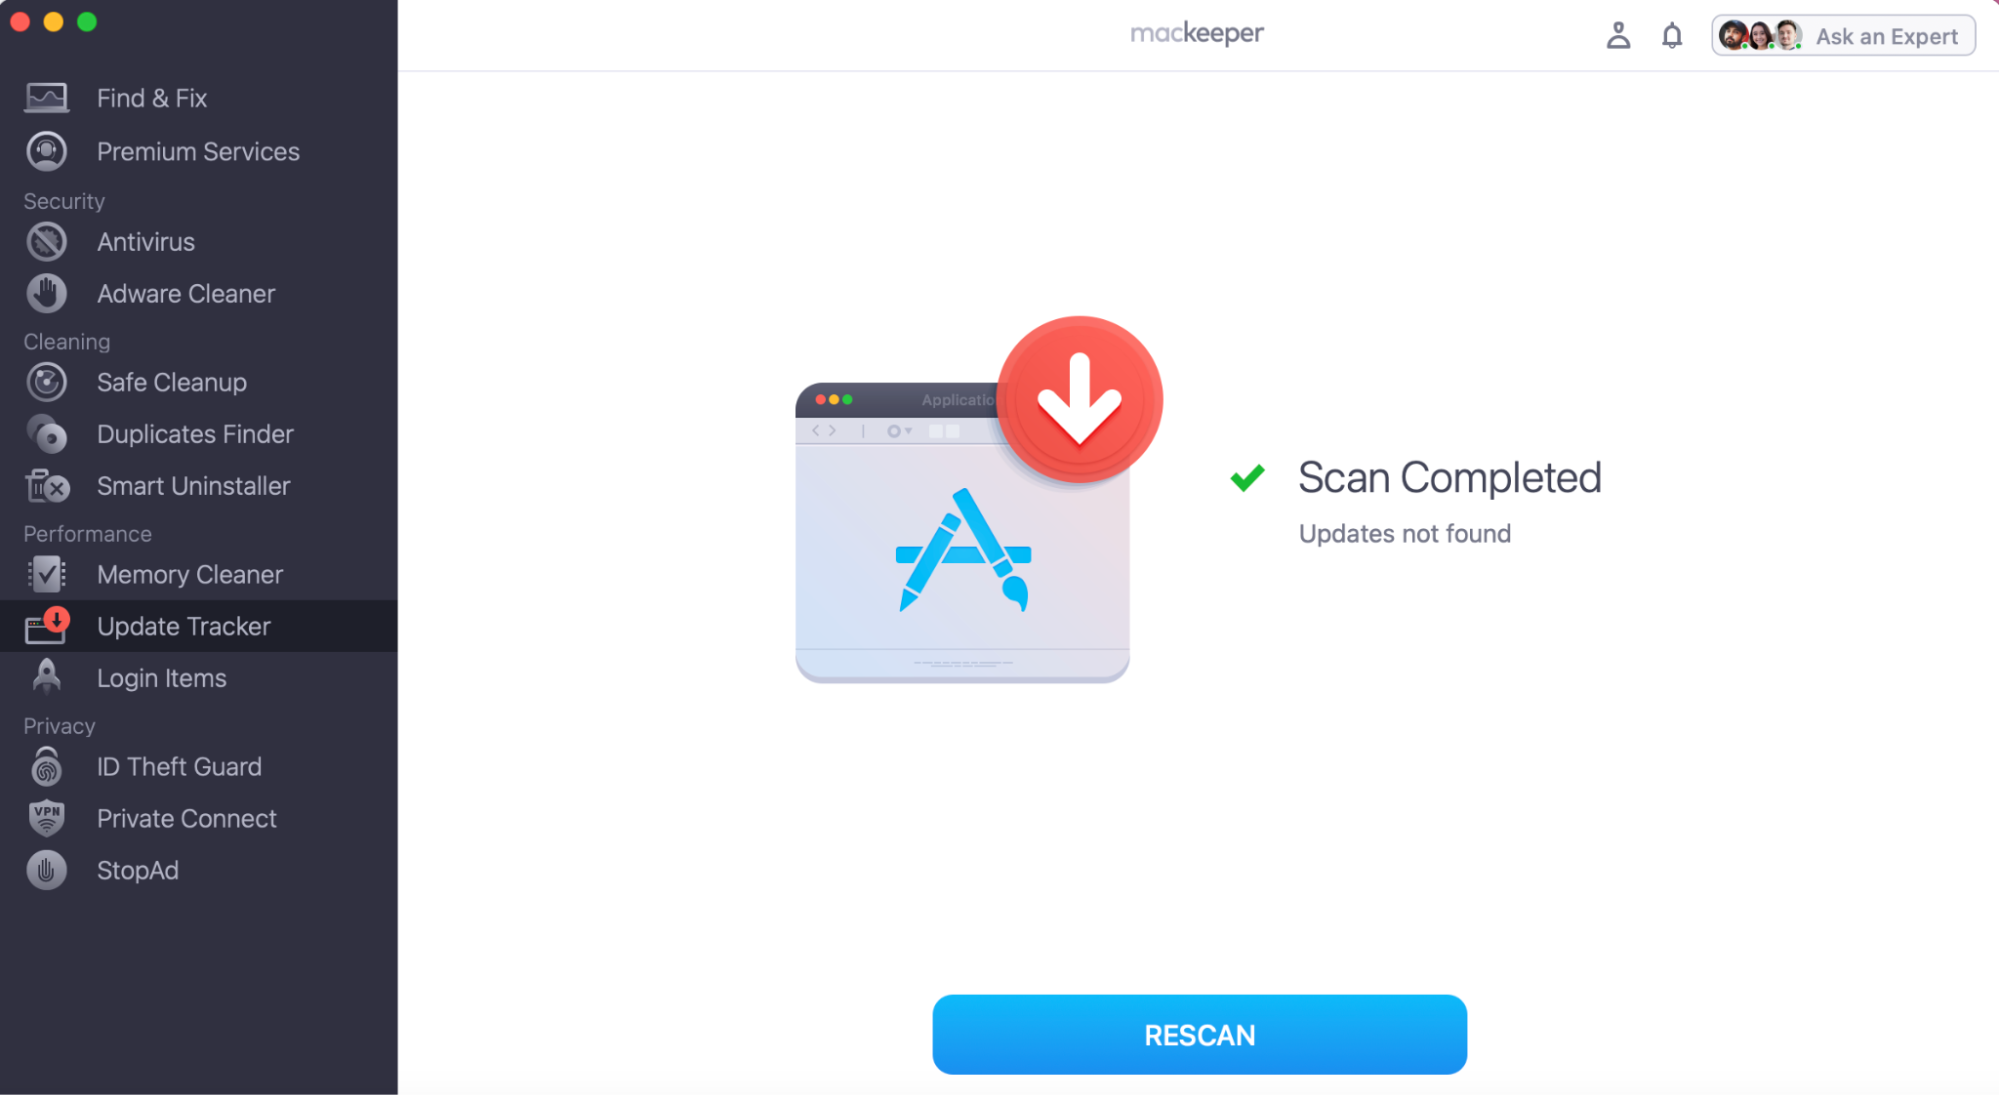
It’s frustrating when any app unexpectedly stops opening or loading correctly on your Mac, let alone when it’s an app that is used as often as Apple Mail. One of the best ways to keep your MacBook running smoothly is to regularly ensure all of your apps are up-to-date. To fix Mail on Mac, we recommend using MacKeeper’s Update Tracker to scan and automatically initiate any pending updates, reducing the likelihood of program or system crashes.
Here’s how you to use MacKeeper’s Update Tracker to update all your important apps:
- Download MacKeeper and launch the app on your Mac.
- Navigate the side menu to the Update Tracker feature.
- Click Scan for Updates to allow MacKeeper to check your software is up-to-date.
- On the left, choose the apps found by ticking the boxes and confirming to Update.
Why is Mail not working on Mac
If you’re encountering issues with Mail on your Mac, these could point to various problems, each presenting its unique challenges and disruptions. Specifically, when Mail not working on Mac, it can manifest into numerous scenarios, such as:
- Mail app won’t open.
- Mail is frozen and unresponsive.
- You can’t receive new emails.
- You can’t send emails because they get stuck in the outbox.
- Mail won’t load your email accounts or inbox.
- The Mail search bar isn’t working.
- Apple keeps asking for your email passwords.
- Mail is slow or keeps crashing and quitting.
- Mail isn’t showing your email messages.
These common problems explain your and other users’ challenges with Apple Mail on their MacBook or iMac devices. But worry not, we’ll delve into several effective troubleshooting methods to address these issues, allowing you to regain productivity and smart control over the Mail app.
How to fix Apple Mail on your Mac
Luckily, there are various effective methods to resolve the Mail app issues that might hinder its performance. We’ll guide you through everything from connection checks to changing settings and re-linking your email accounts.
Here are several solutions to help with Mac Mail troubleshooting:
- Open Mail from the Applications folder
- Check Mail activity
- Use Connection Doctor to check your connections
- Quit or force quit the Mail app
- Quit every app and restart your Mac
- Update macOS and Mail
- Merge and close windows
- Rebuild your mailboxes
- Reset your Mail preferences
- Remove your email accounts
- Re-link your email accounts
- Clean up Mail attachments
- Remove and reindex envelope files
- Check Apple servers
- Test Mail in safe mode
If your Mac is running slow before you begin any Mac Mail troubleshooting, then that’s the first issue you’ll need to address with the help of our supporting guide. Though it might be tricky to load or continually re-open the Mail app if your Mac is slow, we know how to help you oppose long loading times and crashes.
1. Open Mail from the Applications folder
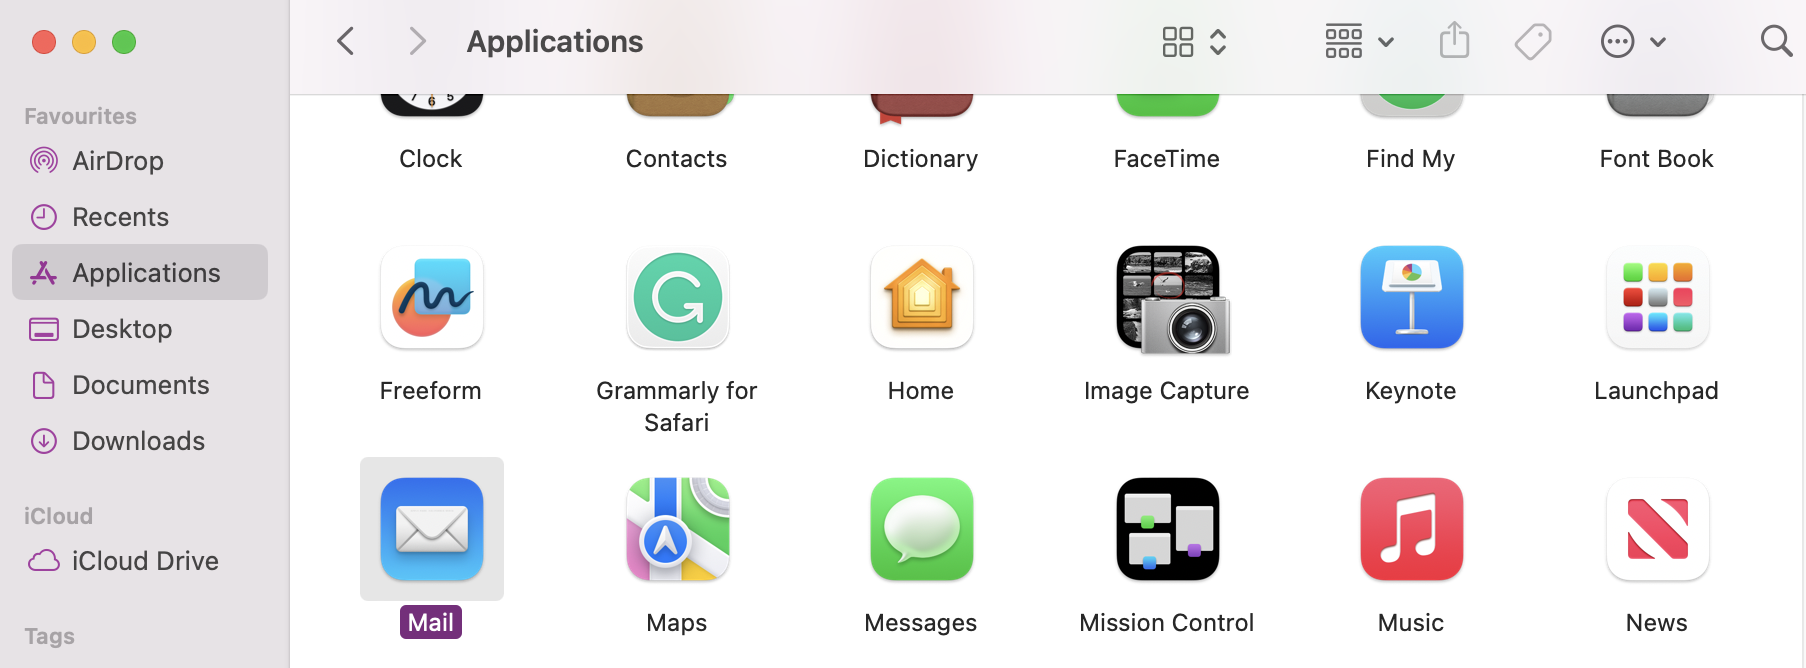
If you’ve recently updated macOS, the Mail icon in your Dock app may still be an older version, as it mightn’t have updated automatically. To fix Mail on Mac, all you need to do is open the Mail app from the Applications folder:
- Launch Finder.
- Select Applications from the sidebar (or press Cmd + Shift + A).
- Find and double-click Mail to open it.
- If this works, drag Mail from the Finder to the Dock to update the icon.

2. Check Mail Activity
Monitoring Mail activity on your MacBook lets you gain insights into how the app interacts with servers and handles incoming and outgoing messages. This method aids in helping you identify any connectivity problems or issues surrounding Apple Mac not loading emails correctly.
Here’s how to check Mail activity:
- Open the Mail application on your Macbook.
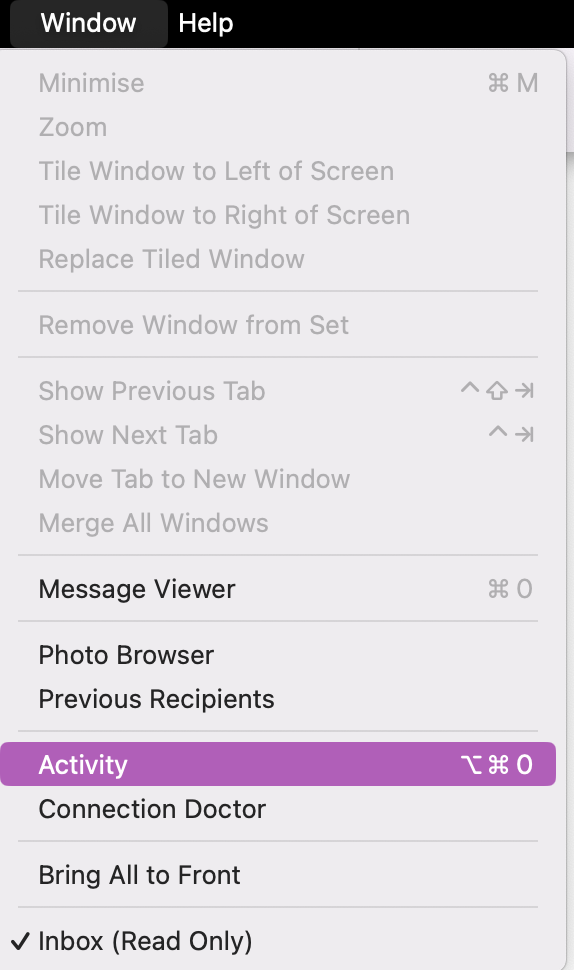
- Click on the Window menu at the top of the screen within the Mail app.
- Choose the Activity option from the dropdown menu. This opens a pop-up Activity Viewer window, displaying a real-time overview of Mail's ongoing operations.
- Monitor the Activity Viewer for insights into Mail's operations, including message sending/receiving, connection statuses, or potential errors.

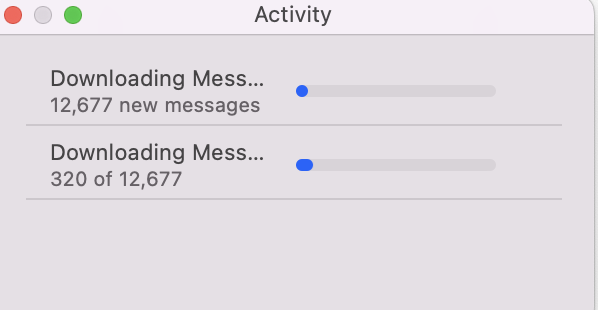
Pay attention to network activity indicators or error logs displayed within the Activity Viewer. It’ll also display Wi-Fi connectivity issues as well as server-related problems.
3. Use Connection Doctor to check your connections
You probably already know that you need an internet connection to send and receive emails, but if your device is offline, you might still encounter issues using the app, like Mail not opening on Mac. If you haven’t already, open a web browser and load a new page to test your Wi-Fi connection. If you encounter problems like loading, unexpectedly long lags, or if it's offline, you can follow these tips to fix your Mac internet connection.
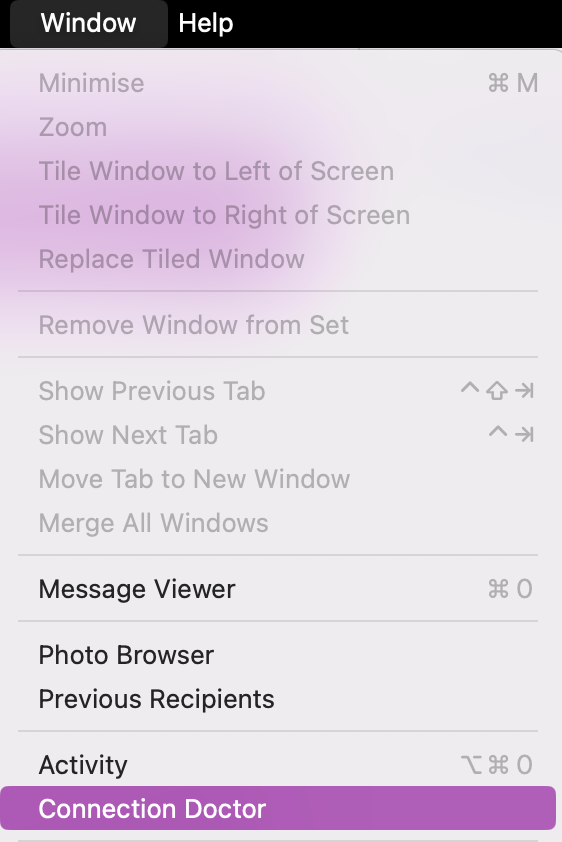
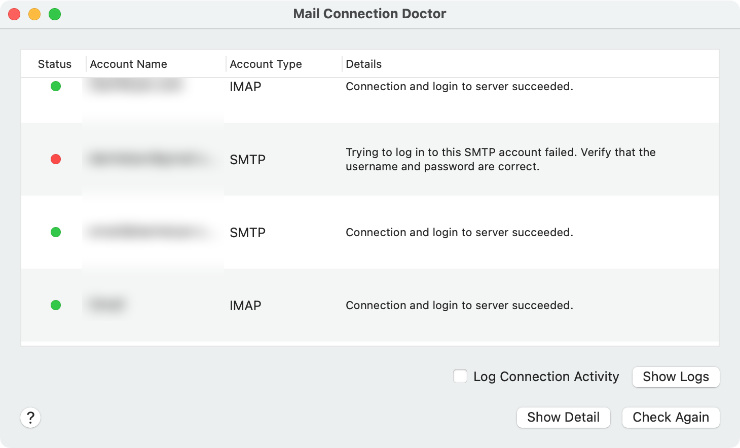
Even if your Mac appears to be online, you should use the Connection Doctor in the Mail app to test the connection to all your email accounts. Here’s how:
- Launch the Mail app.
- From the menu bar, go to Window > Connection Doctor.
- The Connection Doctor will open, showing green or red lights next to each of your accounts.
- If there’s a red light next to your account, double-click it to make sure the username and password are correct.

4. Quit or force quit the Mail app
One of the best steps you can take when any app stops working on your MacBook or iMac—including the Mail app—is to quit and restart it. Of course, that’s easier said than done if the reason Mail has stopped working is that it’s unexpectedly frozen and you’re unable to get the app to respond. In such cases, performing a force quit might be necessary to fix Mail on Mac.
Luckily, you can easily force quit the Mail app even if it’s unresponsive.
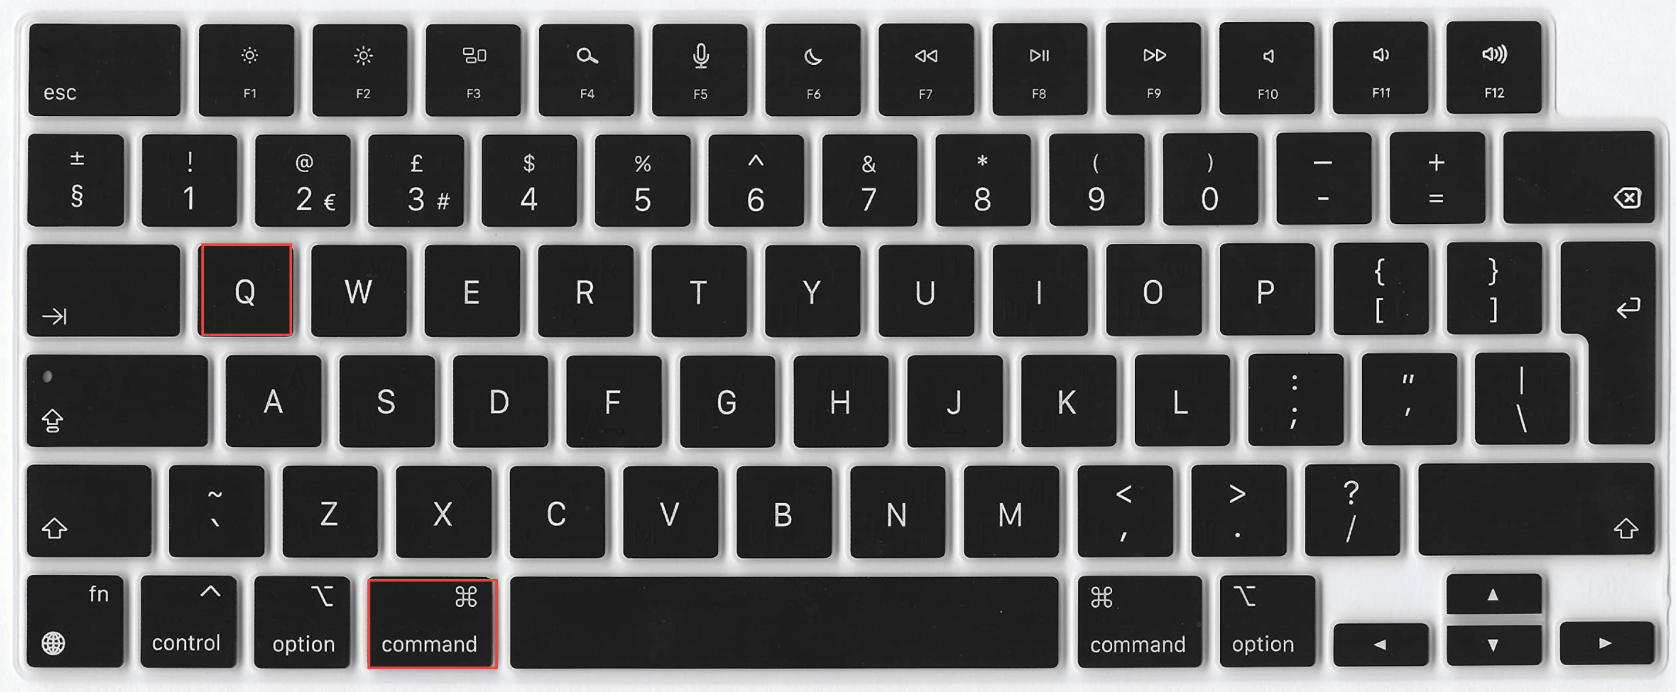
- To quit the Mail app normally: Click the Mail app icon in the Dock to make it your active app, then press Command + Q to quit it.
- To force quit the Mail app: Press Option + Command + Escape to open the Force Quit window, then select the Mail app, and click Force Quit.
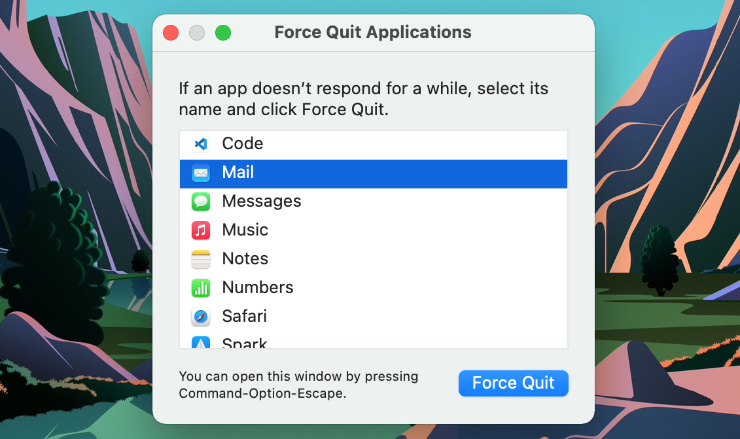
When you properly quit an app using one of those methods, it'll completely terminate the app and stop any background processes or active tasks associated with it. This will give the Mail app a chance to restart properly the next time you open the Mail app.
5. Quit every app and restart your Mac
If Mail isn’t responding on Mac properly, or it takes a long time to load or reopen the app, then it’s likely due to having too many apps open all at once. Running multiple apps at once can eat into your processing power or RAM. All you need to do to fix Mail not working on your Mac is to quit every app and restart your Mac.
Here’s how to restart your Mac after quitting all open apps:
- Ensure you’ve quit all the active apps on your Mac.
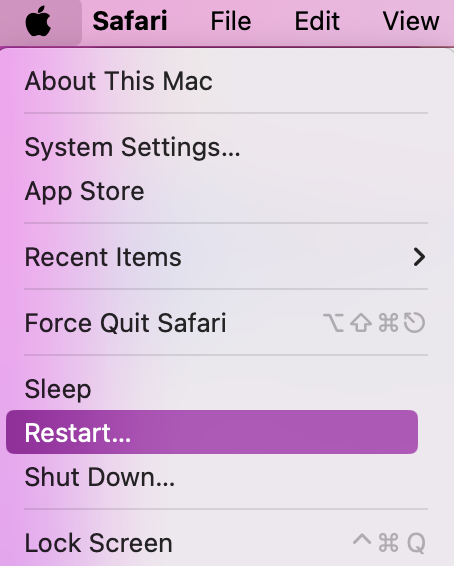
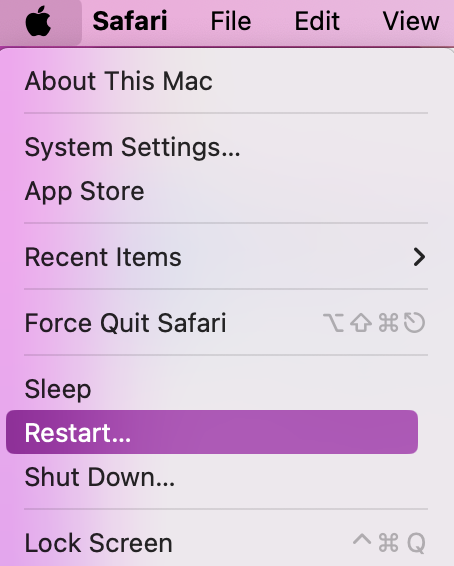
- Click on the Apple logo in the top-left corner of the screen.
- Choose Restart from the dropdown menu.
6. Update macOS and Mail
Similar to the previous point, issues with Mail not working on Mac might stem from outdated macOS. Updating macOS is crucial as it encompasses Mail updates. So, if you're encountering problems due to an outdated Mail program, check and update macOS from the System Settings.
Here’s how to check for any macOS updates:
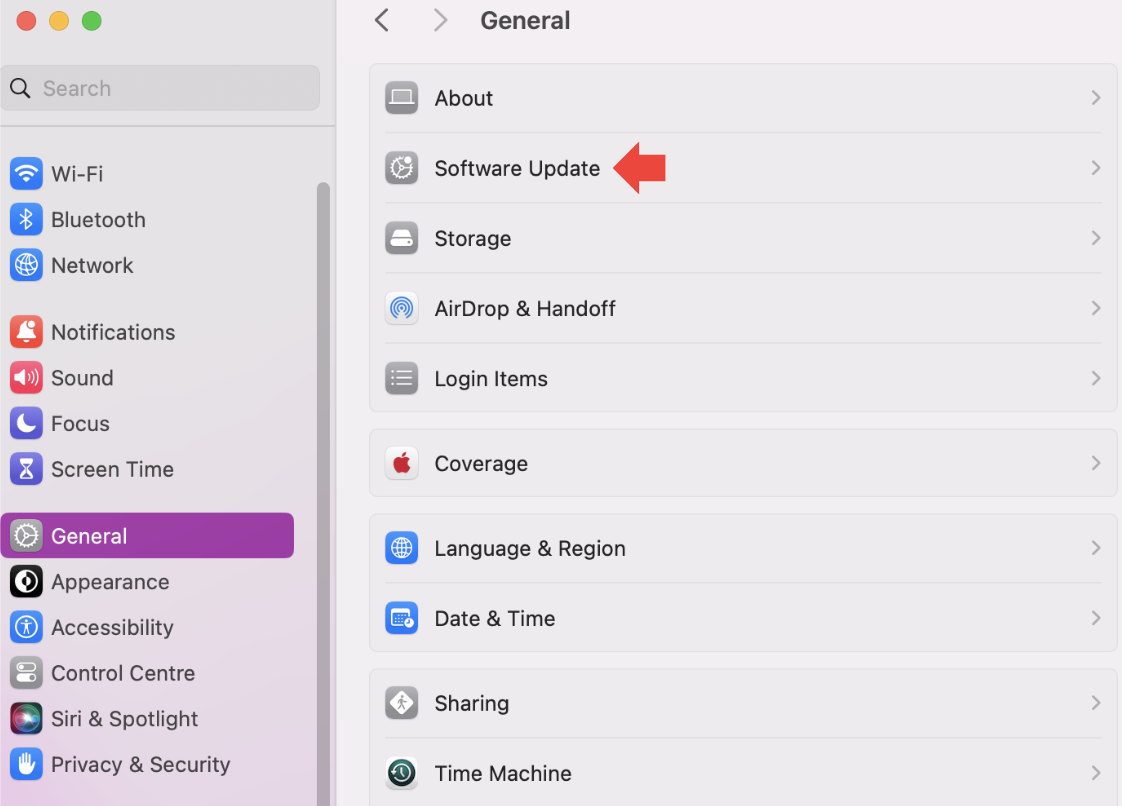
- Begin by opening System Settings on your Mac.
- Click on General > Software Updates.
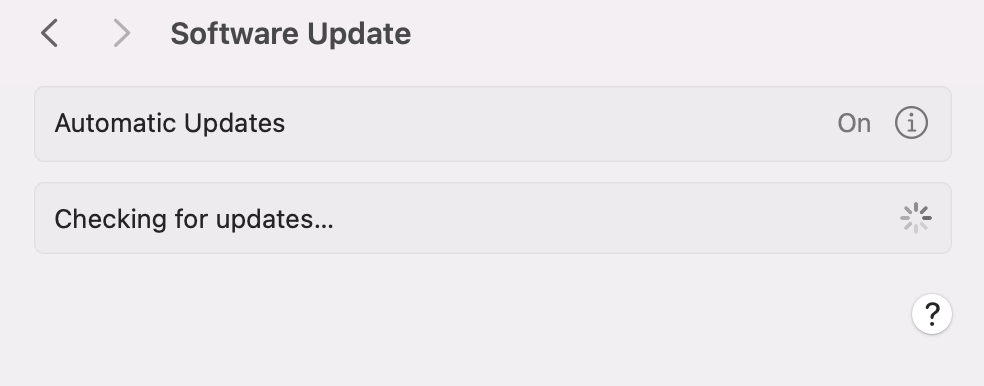
- Allow your Mac to check for any macOS updates. If a macOS update is found, you’ll be able to click Update Now.
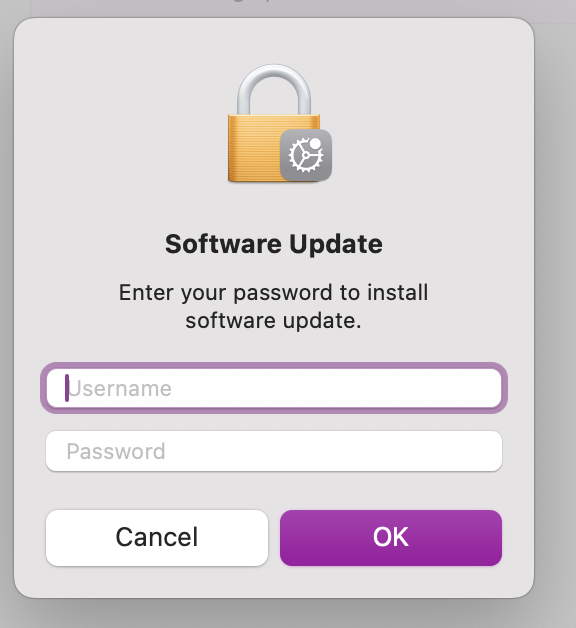
- You may need to enter your Admin login and password to action the download. Then all you need to do is allow your macOS system and apps, including Mail, to update.
Note from our experts: MacKeeper’s Update Tracker provides an efficient alternative solution to updating not just Mail but all your apps. With its help, you can streamline Mail updates alongside macOS updates by simplifying the update process.
Here’s how to use MacKeeper’s Update Tracker to update Mail and other apps:
- Download MacKeeper and launch the app on your Mac.
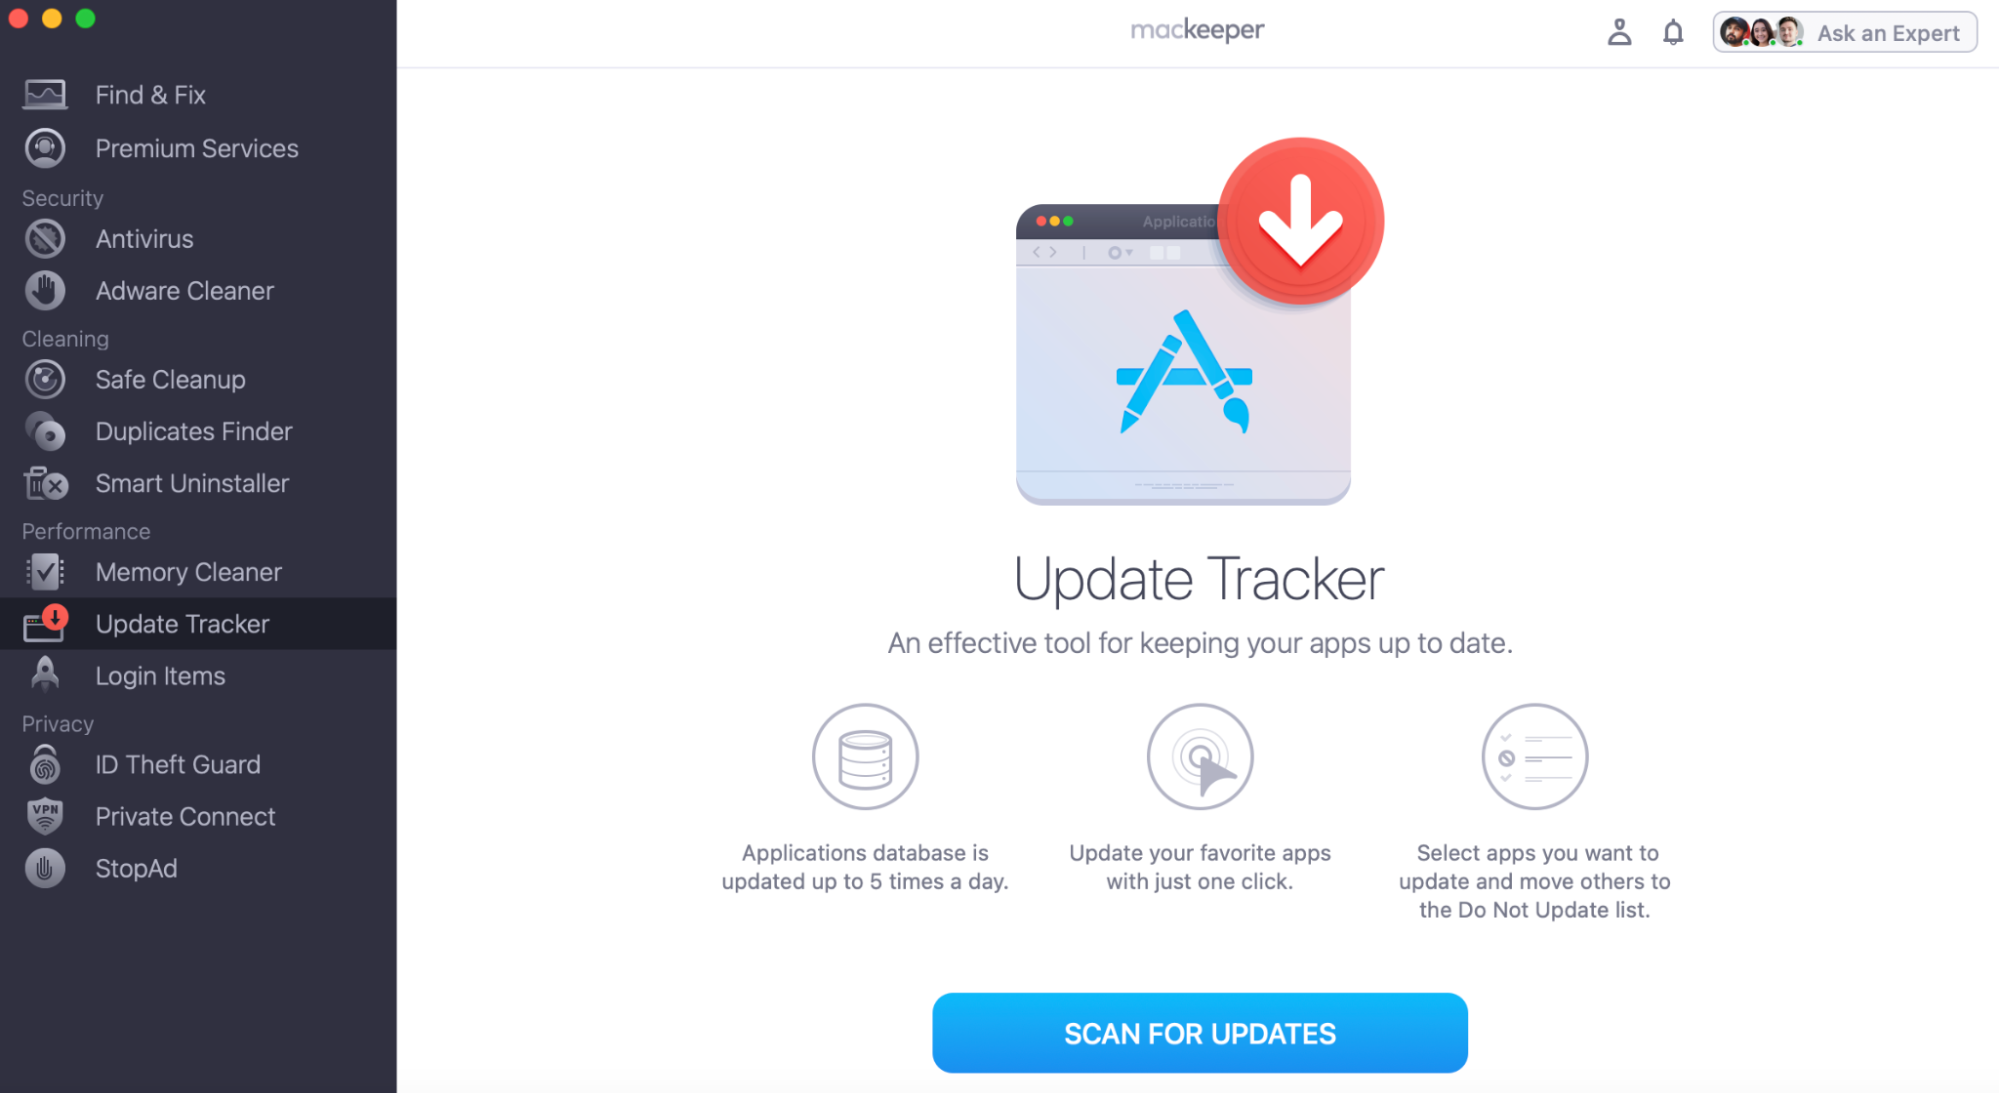
- Navigate the side menu to the Update Tracker feature.
- Click Scan for Updates to allow MacKeeper to check your software is up-to-date.
- On the left, choose the apps found by ticking the boxes and confirming to Update.

7. Merge and close windows
If Mail isn’t responding on Mac, or it’s taking a long time when opening or loading in and out of your messages, it might be trying to do too much at once. This can happen if there are too many Mail windows open in the background. In this case, the solution here is to see how many Mail windows you have opened to help you merge and close any that are unnecessary.
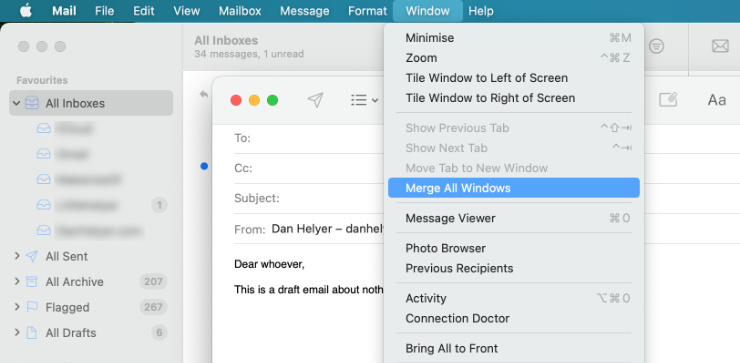
Here’s how you can merge and close windows from the menu bar:
- Open the Mail app on your MacBook.
- Go to Window, locate and select Merge All Windows.
- Once you’ve successfully merged all windows, you can batch-close them.
8. Rebuild your mailboxes
If Apple Mail isn’t loading emails, or it takes a long time to load and reopen them, we recommend rebuilding your mailbox. It’s a handy solution to fix issues with missing messages or if your Mail inbox seems disorganized. This feature essentially re-syncs all messages, ensuring a seamless loading and reopening of content in your accounts, thereby enhancing overall productivity.
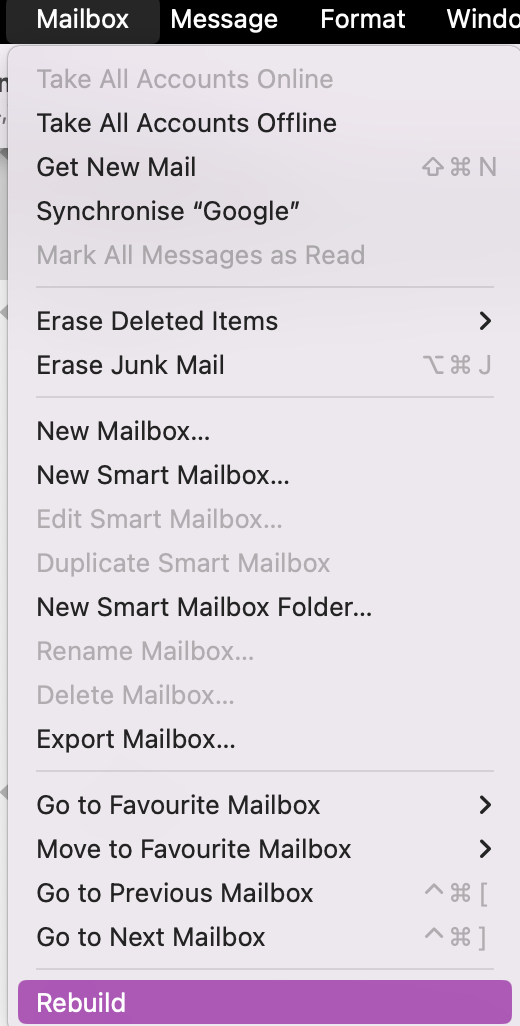
Here’s how you can rebuild your mailboxes:
- Open the Mail app on your Mac via Dock or a Spotlight Search.
- Click on the Mailbox tab at the top of your screen.
- Select Rebuilt and allow your device to refresh all your messages.

9. Reset your Mail preferences
The reason behind Mail not working on Mac may be due to an unexpected bug in the file that saves all your app preferences. This isn’t entirely uncommon for Mac apps, but fortunately, it’s fairly easy to fix. All you need to do is delete the plist file that holds your Mac preferences. This makes the Mail app create a new plist file that will set all the preferences back to their default setting. You may need to edit some options to get it how you want again.
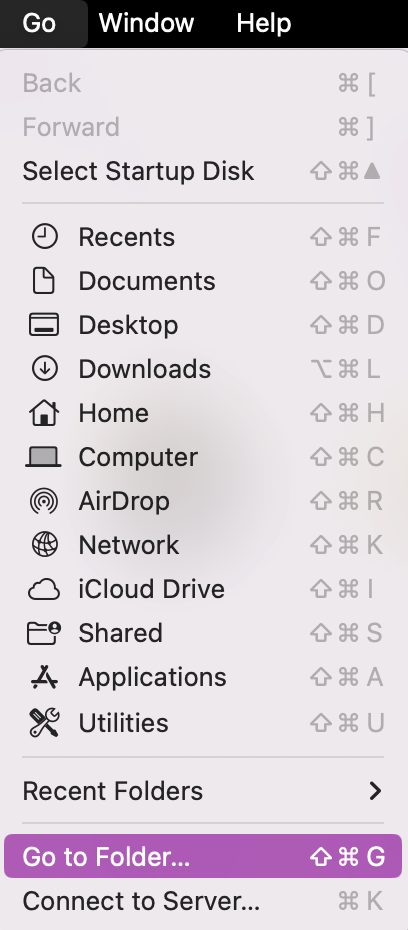
To reset your Mail preferences:
- Launch Finder.
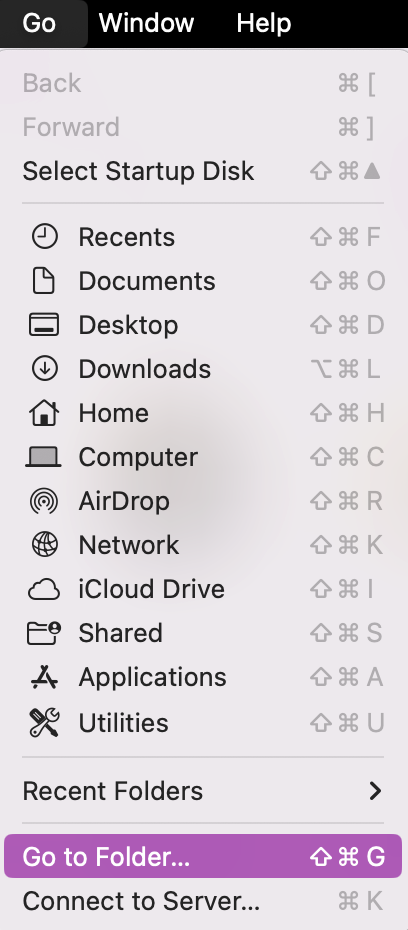
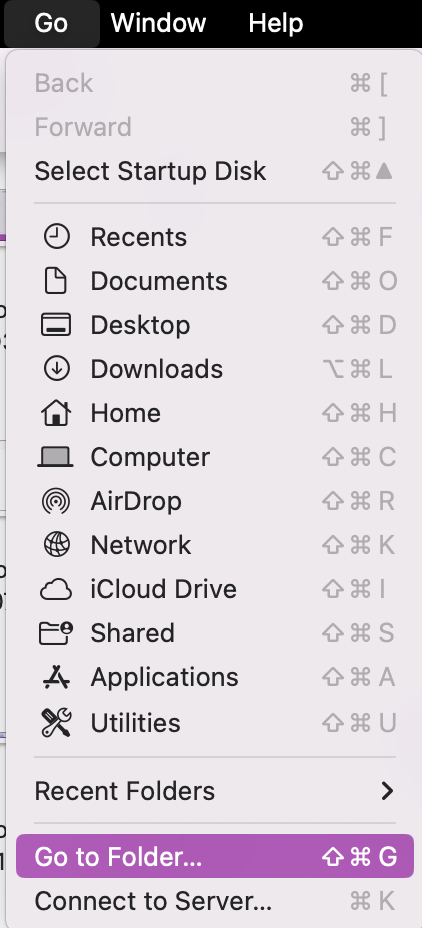
- From the menu bar, click on Go > Go to Folder.
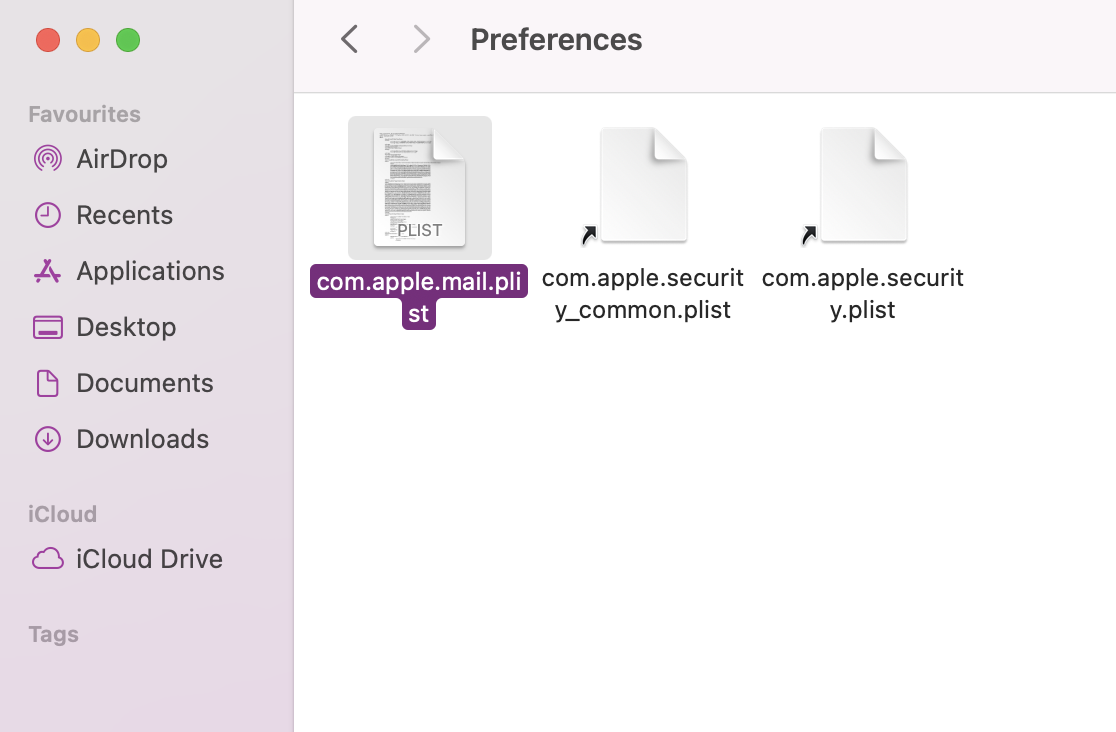
- Enter the following file path and hit Enter to go there: ~/Library/Containers/com.apple.mail/Data/Library/Preferences.
- Drag the com.apple.mail.plist file to your Desktop to reset your preferences.
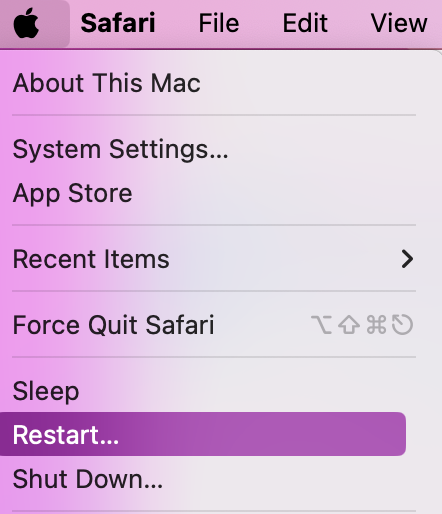
- Now, restart your Mac and try using Mail again.
- If Mail still isn’t working, move the plist file from your Desktop back into the Preferences folder to restore your preferences.

If that didn’t work, here are some other Mail system files you can try removing:
- Launch Finder.
- From the menu bar, click on Go > Go to Folder.
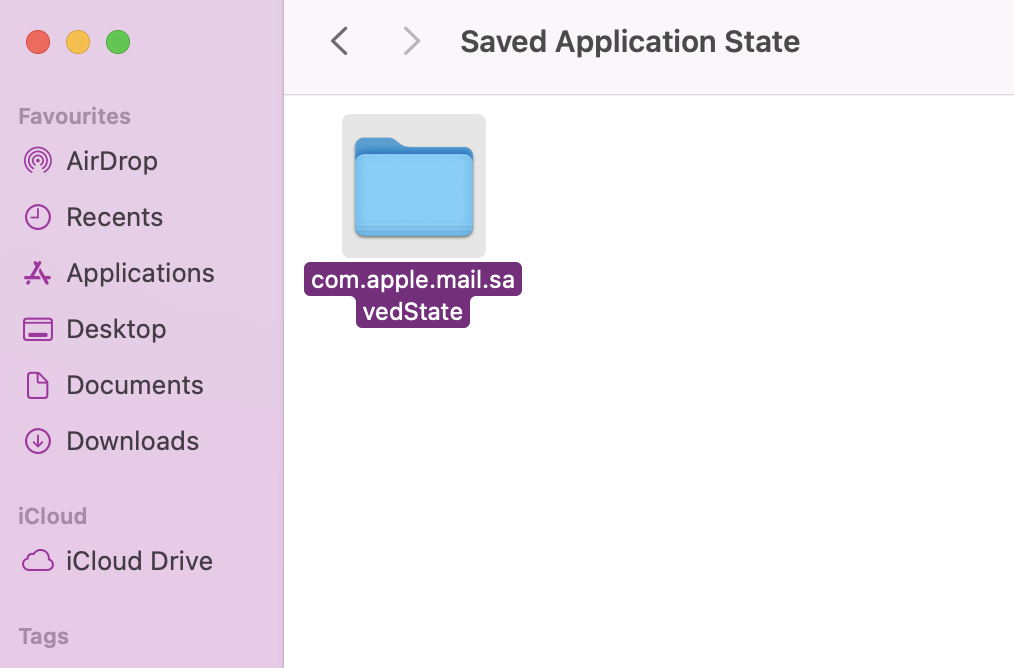
- Enter the following file path and hit Enter to go there: ~/Library/Containers/com.apple.mail/Data/Library/Saved Application State.
- Move any folders or files from here to your Desktop.
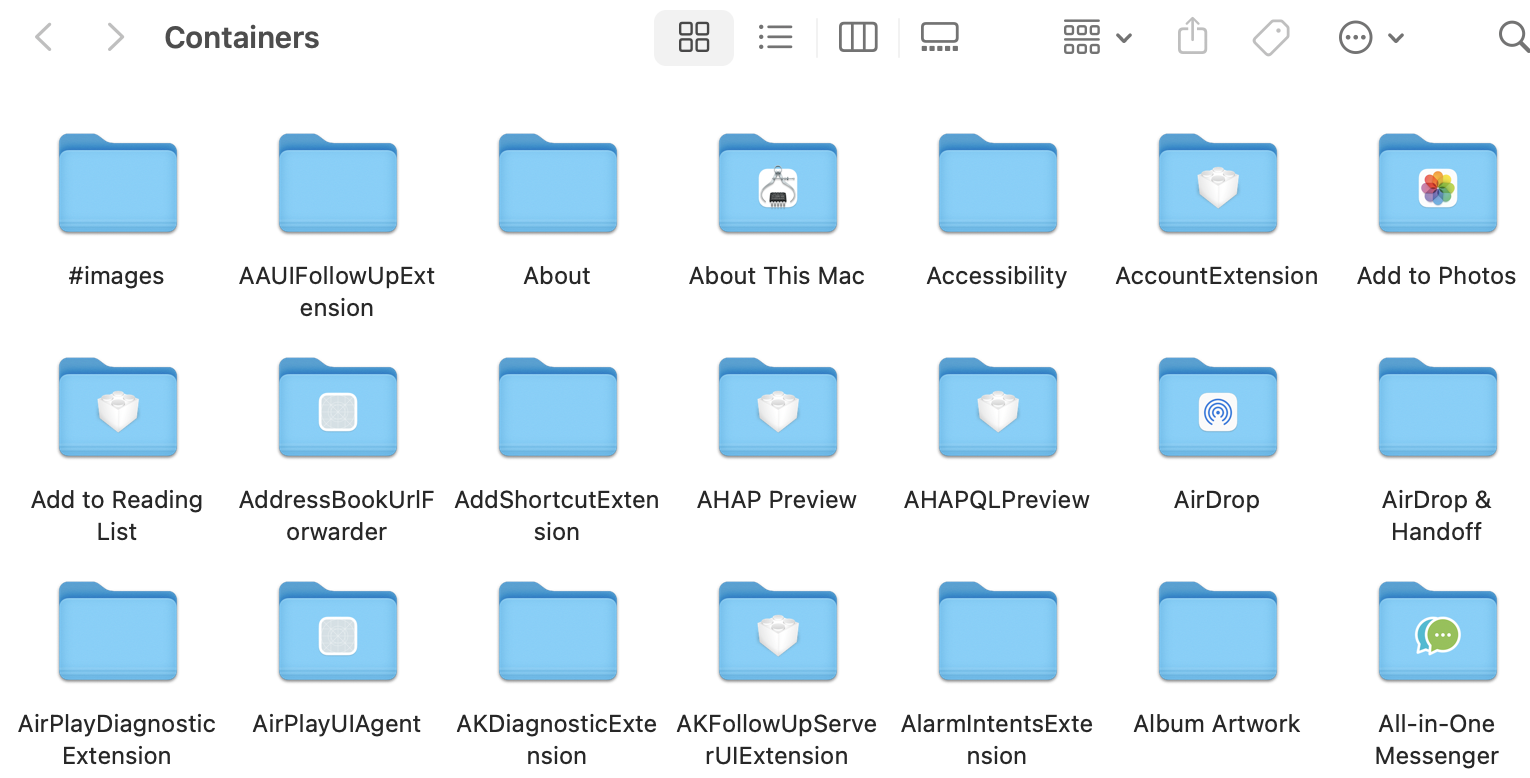
- Now, go back five levels to the Containers folder.
- Move the following folder to your Desktop: com.apple.mail and com. apple.MailServiceAgent.
- Now, restart your Mac and try using Mail again.
- If Mail still isn’t working, move the folders and files from your Desktop back into the folders they came from.

10. Remove your email accounts
If you’re still having issues with Mail not working on Mac, you could try removing your email accounts. Be aware, that doing this will remove emails that are waiting to be sent in your Outbox, so make a note of them first.
Follow our instructions below to remove an email account:
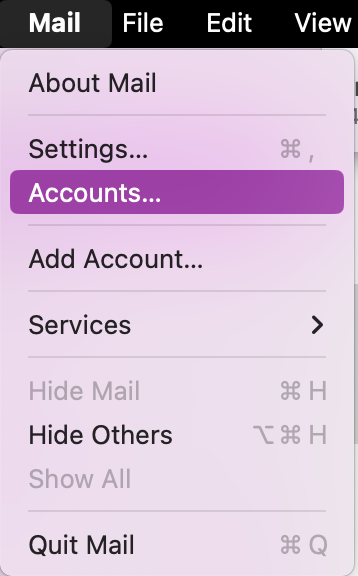
- Launch the Mail app and go to Mail > Accounts from the menu bar.
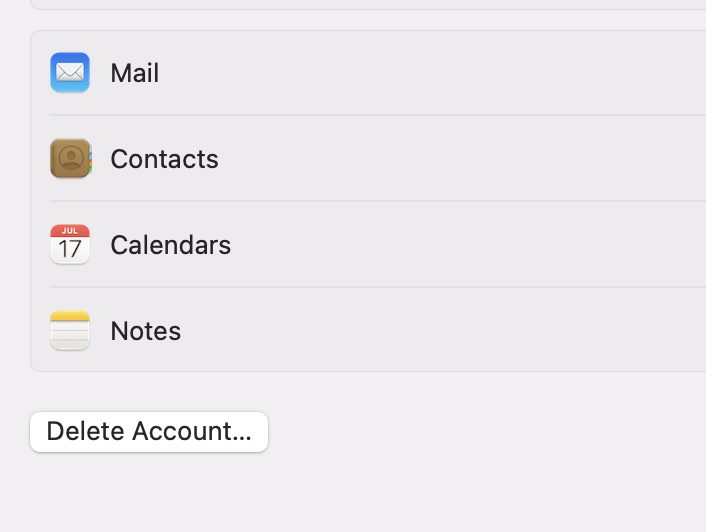
- This will take you to your Account settings with System Settings. From here, you can manage your email accounts.
- Locate the email you want to delete from your Mac and confirm the action.
11. Re-link your email accounts
Re-establishing connections with your email accounts can play a pivotal role in addressing Mail-related issues on your Mac. Challenges like loading disruptions or unresponsiveness within the app can often be resolved by reconnecting your email accounts to the Mail application.
To re-link your email account, follow these steps:
- Launch the Mail application on your Mac.
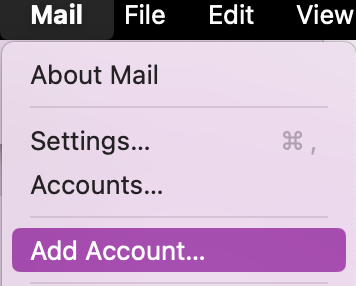
- Click on Mail in the menu bar and select Accounts.
- This will take you to your Account settings with System Settings. From here, you can manage your email accounts.
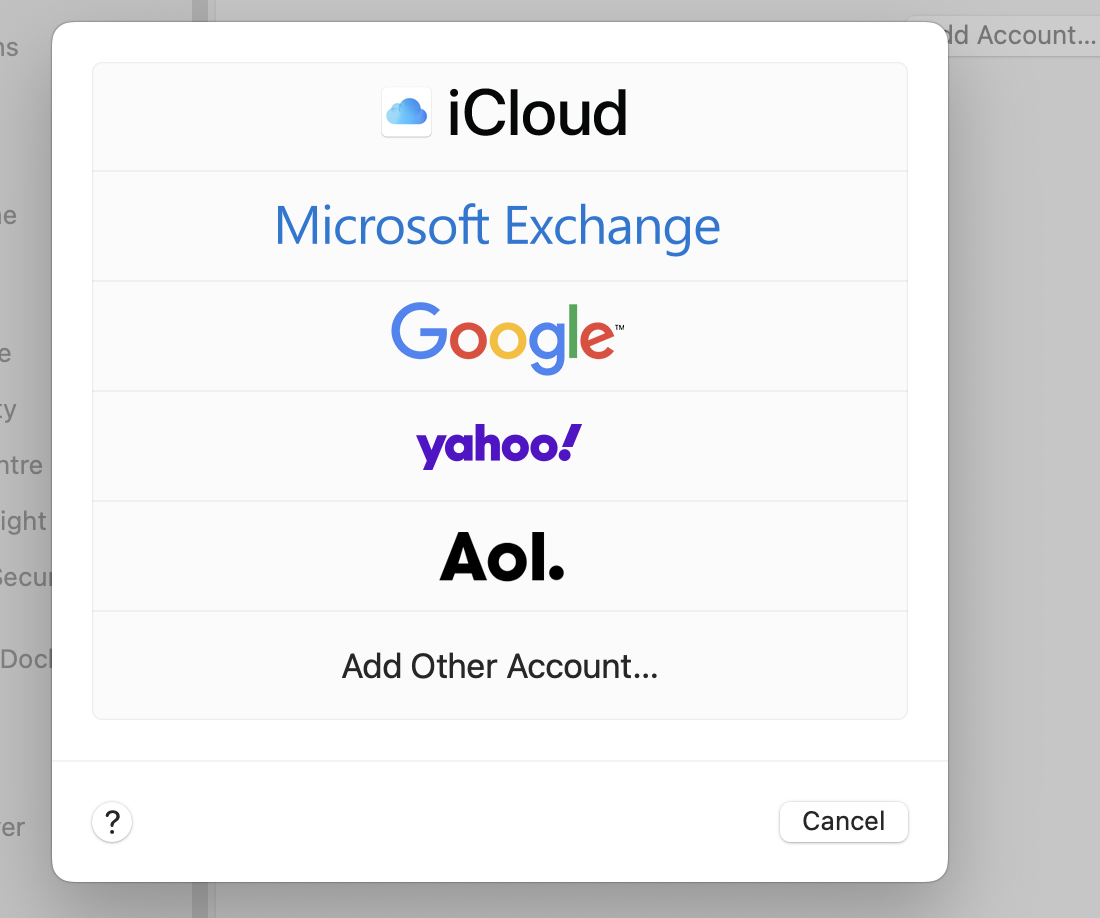
- Now, click the Add Accounts button to re-link the email account to your Mac again.
12. Clean up Mail attachments
Clearing unnecessary Mail attachments is a smart solution to significantly improve the performance of the app, as it can free up essential storage space on your MacBook. Over time, accumulated attachments can burden the Mail app, leading to slower operation and potential disruptions. That’s why regularly cleaning up these attachments is an effective way to enhance responsiveness.
Here’s how to clean up Mail attachments to boost performance and overall productivity on your Mac:
- Open the Mail app on your Mac.
- Choose the mailbox containing attachments you wish to clean.
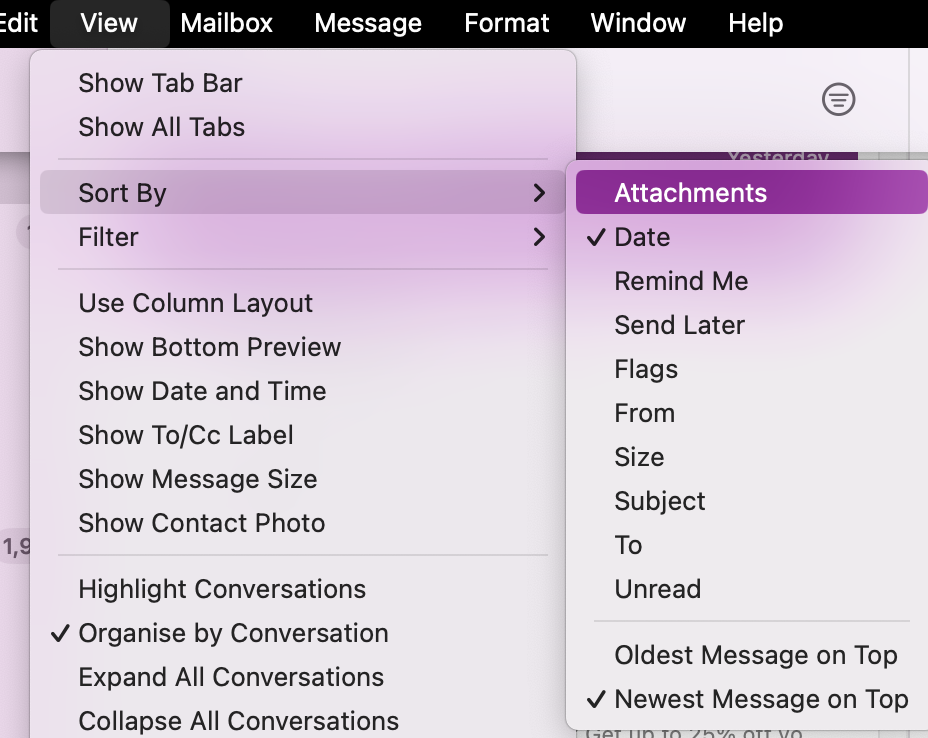
- Click on View and use the sorting feature to arrange emails by attachment size.
- Review and identify emails with large attachments.
- Select emails with unnecessary attachments and delete them.
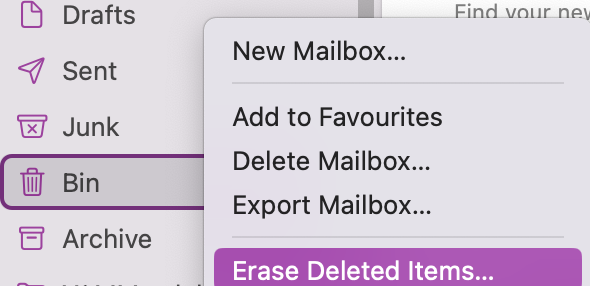
- Click Erase Deleted Items to remove attachments permanently.
13. Remove and reindex envelope files
Refreshing the envelope files within the Mail app is a strategic method for Mac Mail troubleshooting as it relates to message visibility and organization. Sometimes, due to indexing errors or glitches, messages might not display correctly or are seemingly missing. This can also cause the loading of messages to take a long time and even glitch when you try to reopen them. By removing and reindexing these envelope files, you can rectify these issues.
Here’s how to remove and reindex envelope files:
- Close the Mail application if it's currently open.
- Go to Finder, click on Go in the menu bar > Go To Folder.
- Enter the path ~/Library/Mail/.
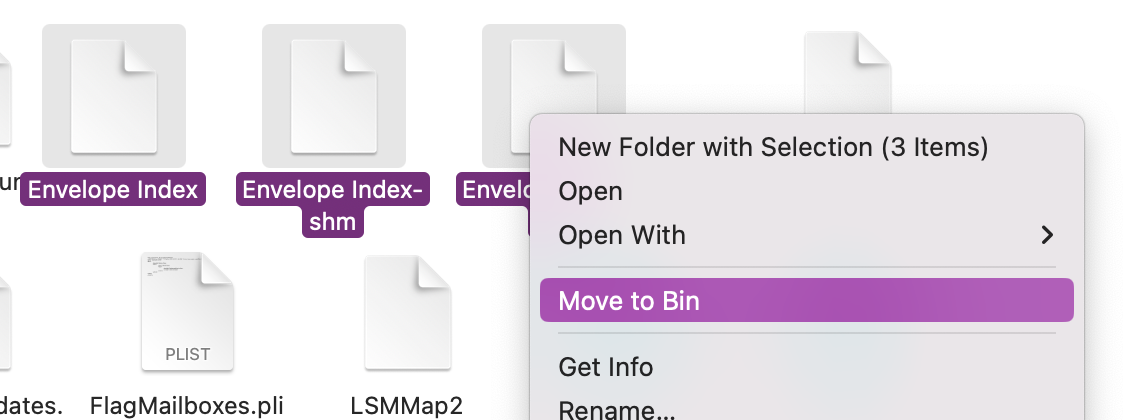
- Locate and select any files that say Envelope Index.
- Drag these files to the Trash folder.
- Reopen the Mail app - this will trigger a re-indexing process.
- Allow the app some time to reindex all your emails before reopening the app.

14. Check Apple Servers
Verifying your Apple program can shed light on whether Mail issues are originating from server-related problems. Sometimes, disruptions in email features might occur due to offline server maintenance or remote issues at Apple's end. This step involves checking the status of Apple's servers to rule out any widespread service outages or disturbances affecting Mail services.
Here’s how to check Apple Servers:
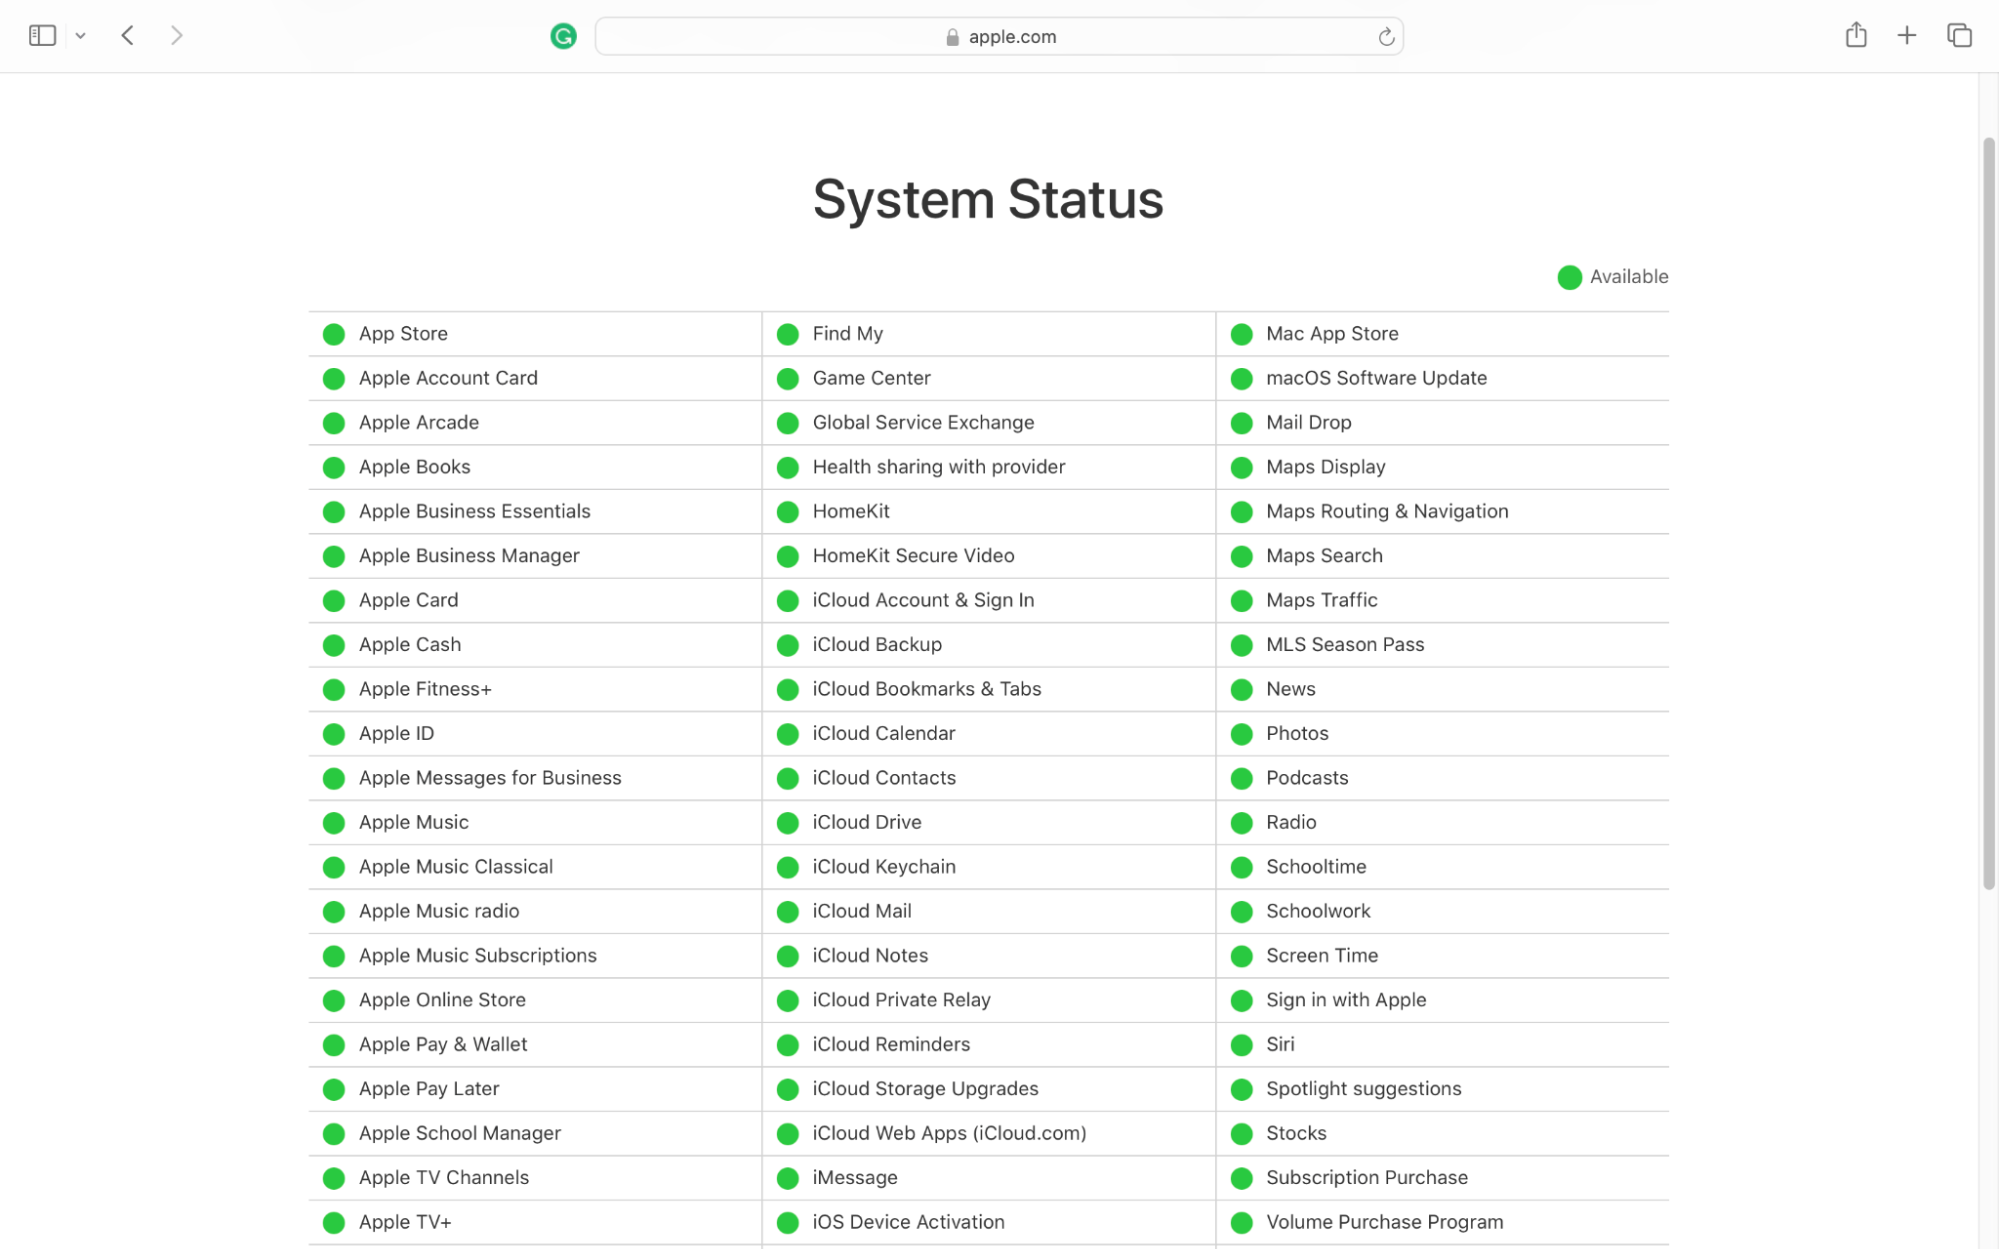
- Open Safari and search for Apple's System Status page.
- Look for the Mail service status among the listed services.
- Verify if there are any ongoing issues or interruptions indicated for Mail.
- Keep an eye on any updates provided regarding the Mail service.
If you face unexpected issues with Safari so slow on Mac, you may need to restart your device first before continuing to fix Mail on Mac. Also, your Mail issues might be linked to the same issues as a slow browser—poor correction or too many apps running in the background. Check these two points as well.
15. Test Mail in safe mode
Finally, if all those solutions have been unsuccessful at fixing Mail on Mac, you may want to try running the Mail app in safe mode. Running Mail in Safe Mode is an effective diagnostic method to identify whether third-party applications or plugins are causing disruptions and hindering user productivity.
Here’s how you can test the Mail app whilst in Mac’s safe mode:
- Quit the Mail application if it's currently open on your Mac.
- Hold down the Shift key and simultaneously relaunch the Mail app.
- Check if Mail operates without disruptions or issues in this mode.
- Note any improvements or persistent problems while using Mail in Safe Mode.

Resolving Mac Mail issues: concluding remarks
After trying out our Mac Mail troubleshoot suggestions, we hope your Mail app headaches are now a thing of the past. We aimed to make this guide a lifesaver, tackling unexpected Mail issues head-on to smoothen your user experience and not hinder your productivity.
What’s more, don't forget about MacKeeper's Update Tracker tool, as your very own trusty MacBook sidekick that keeps all of your apps and your system running like a charm. This nifty tool is super easy to use and ensures your Mail app, as well as other software, stays on top of its game with all the latest updates.
Read more:


