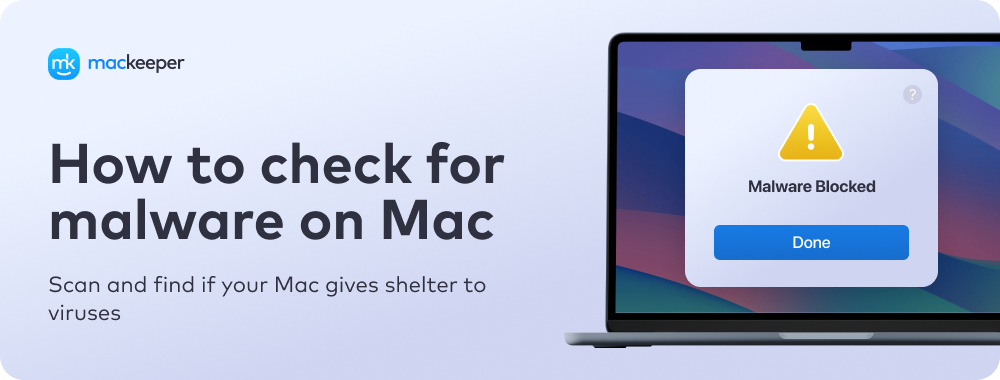
Sometimes we blame our devices for slow performance and unexpected errors completely unfairly. This is because the main reason for their poor operation is malware. Detecting it manually on a Mac is a hard task, so it’s better to let MacKeeper's Antivirus check malware and remove any in just a couple of clicks.
To check for malware on Mac, identify unusual processes in Activity Monitor, look for unknown login items and configuration profiles, review suspicious apps in the Application folder, and check browser settings and installed extensions.
To detect malware, you can use a built-in tool on Mac, such as Activity Monitor, or a dedicated malware removal tool like MacKeeper.
The signs of virus infection include reduced Mac speed, browser hijacking, fake virus pop-ups, sudden freezes, unknown apps, and browser extensions.
If you suspect malware on Mac, disconnect from the internet and boot in safe mode to prevent further damage or unauthorized access. Once you’ve removed the harmful files, restart your Mac normally.
A note from our experts:
It may be a very difficult task to detect malware or a virus on your Mac. In such a case, the best decision is to use a third-party app. MacKeeper’s Antivirus is such an app.
Here’s how to use MacKeeper’s Antivirus:
Open MacKeeper, and go to Antivirus on the left bar.
Click Start Scan.
MacKeeper’s Antivirus finishes scanning and shows you the list of detected malware. Delete it from your Mac or move it to Quarantine.
Step 1. Go to Antivirus tab in MacKeeperStep 2. Click Start ScanStep 3. Manage detected malware (delete or move to quarantine)
Signs of malware infection on Mac
Can Macs get viruses? Yes, and it doesn’t matter if you have a MacBook Air, Mac mini, or an iMac. It’s also vital to detect malware as soon as possible. The sooner you know you have an infection, the sooner you can check your Mac for viruses and delete them, protecting your computer and data.
There are a few ways to detect viruses on Mac:
Look out for warning signs of an attack.
Check system folders for suspicious files.
Locate apps that you didn’t install.
Run an antivirus scanner app.
Signs of malware on Mac
Be aware of the fact that while some malware infections are obvious, others aren’t. Many attackers go to great lengths to conceal their malicious software so that you’re less likely to spot it, but there are some clear signs of malware that you can look out for:
Extremely slow performance: Many malware infections eat up a lot of processing power and memory, which makes your Mac feel sluggish and more unstable.
A browser homepage change: Some malware infections hijack your browser and then set a malicious website as your homepage, or redirect you to different sites.
Pop-ups and other intrusive ads: Displaying ads can be a profitable endeavor, so some adware infections place these wherever they can on your system.
Freeze-up and restarts: Malware infections can often make your Mac unstable, which can lead to frequent freezes and restarts.
Bogus security alerts: If you see a security alert that doesn’t look genuine, it could be malware that’s trying to steal payment information or direct you to other malicious downloads.
Your friends receive spam from you: Do you have a friend who says they received spam or strange messages from one of your accounts? This is a common sign that malware has infected your Mac and gained access to your messages and emails.
And if your Mac gets infected with ransomware, it’ll be pretty obvious. You’ll get a demand to pay a ransom, and you’ll find your files or drives have been encrypted and can’t be opened.
The difference between malware and a virus
Malware is short for malicious software, an umbrella term for all kinds of nasty programs that can be harmful to your computer and your data. Technically, viruses are a type of malware, but there’s a difference between these and other infections.
The key aspect of a virus is that it’s usually a small program that infects other files and applications on your Mac, and then spreads throughout your system. This is unlike other malware infections that are built as standalone pieces of software, which try to look legitimate or disguise themselves as something else.
List of Mac viruses
There are many, many viruses built for Mac, and every year, thousands of new infections surface. As the macOS operating system has become more popular, this problem has only gotten worse. Some of the most recent and most common infections include XMRig, MacStealer, and RustBucket. Read our Mac viruses list for details on how each one works.
How to check for viruses on Mac
There are a few different ways to check for viruses on Mac, some of which are built right into macOS:
1. Identify malware with Activity Monitor
A great way to find out if your Mac is infected with malware is to look for suspicious processes in Activity Monitor. Here’s how:
In Finder, go to Applications > Utilities, then launch Activity Monitor.
Check the list of running processes for anything that seems suspicious with unusually high CPU or RAM usage. Click the % CPU or Memory column headers to sort them.
To force quit a suspicious process, select it, then click the X button.
Click Force Quit to confirm.
In Finder, search for the name of the process and delete any corresponding files.
Empty the Trash to remove them.
We recommend that you don’t quit anything before confirming what it does, as you may inadvertently close important system processes. If you find anything that could be malware, search its name in Google to see what it is before closing it.
Step 1. Launch Activity Monitor from UtilitiesStep 2. Look for any suspicious processesStep 3. Select a suspicious process then click X to quit itStep 3. Click Force Quit to confirmStep 4. Find and delete corresponding filesStep 5. Empty the Trash can
2. Run a Mac virus scan using built-in tools
Every Mac comes with antivirus detection built in. macOS includes a technology called XProtect, which scans your Mac for malware using a database of virus signatures maintained by Apple. This checker is free and enabled by default, so you don’t need to do anything to use it. If you download malware and try to run it, XProtect can detect it and stop it from running.
Here’s how to check if XProtect is getting updates:
In System Settings, select General > Software Update.
Click the i icon next to Automatic Updates.
Make sure Install Security Responses and system files is activated.
Step 1. Go to General > Software Update in System SettingsStep 2. Click the i button next to Automatic updatesStep 3. Make sure security updates are on
A friendly reminder: XProtect, although better than nothing, is limited in a few key ways. Apple isn’t a security company, for a start, so XProtect doesn’t detect as many viruses as a dedicated security app, and you don’t get full control over the cleanup. XProtect is a passive solution–you can’t run a scan to check your Mac for malware, so it’s not the best way to clean viruses from your Mac.
3. Check for unwanted applications
The Applications folder might not seem like the best place to check for Mac viruses. After all, most malware wants to remain hidden within unwanted apps, and, that’s why, is difficult to access. Still, it’s worth starting to detect a trojan virus on Mac from this folder as it can contain seemingly legitimate apps, which are actually loaded with viruses.
How to check for suspicious apps:
Go to the Applications folder.
Look for any apps you don’t recognize or don’t remember installing. Check Google to see if they’re legitimate or not. If they’re not, or if you’re suspicious, delete them and empty your trash.
Step 1. Open the Applications folderStep 2. Move suspicious applications to Trash
Alternatively, it’s even easier to delete unwanted apps with MacKeeper’s Smart Uninstaller:
In MacKeeper, select Smart Uninstaller in the sidebar.
Click the Applications option.
Select the apps you want to uninstall, then click Remove Selected.
Step 1. In MacKeeper, select Smart Uninstaller > ApplicationsStep 2. Select apps to uninstall, then click Remove Selected
4. Check the Downloads folder
Whenever you search for malware on Mac, you should check your Downloads folder. If you’ve been tricked into downloading something malicious, there’s a good chance you’ll see it there.
Simply follow these steps to check your Mac’s downloads for malware:
Open a new Finder window, and select Downloads from the sidebar.
Look through your downloads for anything that you don’t recognize or don’t recall downloading. Right-click it, and select Move to Trash.
Right-click your trash/bin, and select Empty Trash.
Step 1. Open your Download folderStep 2. Send anything suspicious to your trash
5. Check suspicious login items
Malware will often load automatically when you start your Mac, and you might check your macOS login items list. Bear in mind, though, many login items like Launch Daemons, and Launchagents won’t actually appear in this list, so you may need to go further to find them and protect your Mac from malware.
Here’s how to check suspicious login items:
In System Settings, select General > Login Items.
Look through the list and select anything you think is suspicious.
Click the minus button to remove the login item.
Step 1. Open General > Login Items from System PreferencesStep 2. Select apps you think are suspiciousStep 3. Remove the login item
Additionally, you can also manage login items using the MacKeeper app like so:
Select the items you don’t want to run at startup, then click Remove Select Items.
Step 1. In Login Items, select apps you don’t want to run at startupStep 2. Click Remove Selected Items
6. Check browser homepage and extensions
Malicious browser extensions that monitor your online activities and steal your data have become increasingly common. Check your browser for suspicious extensions and delete any you don’t recognize or no longer need to prevent them from causing any harm.
To check your homepage and extensions in Safari:
Select Safari > Settings in your menu bar.
In the General section, check that your homepage is set properly.
Next, click Extensions. Select an extension and click Uninstall.
Click Show in Finder, then send the extension to your trash.
Step 1. Open Safari's settingsStep 2: Check your Safari homepageStep 3. Select an extension and click UninstallStep 4. Click Show in Finder, then delete the extension
Manage homepage and extensions in Chrome:
Select Chrome > Settings from your bar.
Click Appearance in the sidebar, under the Show Home button, check your homepage.
Next, select Extensions from the side. Click the Remove button on an extension you want to delete.
Click Remove to confirm.
Step 1. Open Chrome settingsStep 2. Check your Chrome homepageStep 3. Click an extension's 'Remove' buttonStep 4. Click Remove to confirm the extension removal
7. Clear your browser cache
If your web browser has been infected by Mac malware, you need to ensure you clear its cache once the malware has been dealt with. The cache is where your browser stores files that it may need to use again in the future, and these can often become infected as well.
To clear your cache in Safari, follow these steps:
Open Safari, then click Safari > Settings in your Mac’s menu bar.
Click the Privacy tab, then select Manage Website Data.
Click the Remove All button, then select Remove Now to confirm.
Step 1. In Safari Settings, click Privacy > Manage Website DataStep 2. Click Remove All, then select Remove Now to confirm
Here’s how to clear your cache in Google Chrome:
Open Google Chrome.
Click History > Show Full History in your Mac’s menu bar.
Select Clear browsing data.
Ensure Cached images and files are selected, then click the Clear data button.
Step 1. In Chrome, select History > Show Full HistoryStep 2. Click Clear browsing dataStep 3. Select cached files, then click Clear data
Hint from our team:
If you prefer using browsers other than Chrome or Safari, there’s no need to panic. Instead, check our full guide on clearing cache on Mac and find the required instructions.
8. Boot your Mac in Safe Mode
When dealing with potential malware, Safe Mode can be very useful. It boots your Mac without any third-party drivers, helping diagnose and eliminate infections.
On an Apple Silicon Mac, simply do as follows:
Shut down your Mac.
Press and hold the power button until you see Loading startup options.
Select a volume.
Press and hold the Shift key, then select Continue in Safe Mode.
To start your Intel Mac in Safe Mode:
Power on or restart your Mac, and immediately press and hold Shift.
When you see the login window, release the Shift key.
Log in again if you’re asked. You’ll now be Safe Mode.
In both cases, you should see “Safe Mode” in your menu bar.
9. Check if your email has been compromised
Some malware infections gain access to your email to steal personal data, which attackers can then use to clone your identity and take out phone contracts, credit cards, and other things in your name. Therefore, it’s important to check if your email account is safe when you scan for malware on Mac.
Use MacKeeper’s ID Theft Guard to see if your email has been compromised:
In MacKeeper, select ID Theft Guard in the sidebar.
Check your personal data leaks, then click Review.
Click Send Code to receive a verification code for safety.
Find the code in your email inbox, then paste it into MacKeeper and click Enter.
Check all accounts that have been compromised and follow the steps to fix them.
Step 1. Select ID Theft Guard then click Send CodeStep 2. Copy the code sent to your emailStep 3. Paste the code into MacKeeper > click EnterStep 4. Check each account and follow steps to fix them
10. Check for viruses using Terminal
The macOS command-line tool can help you see if your Mac is infected with malware. Here are a few commands we think you’ll find useful:
Show all apps that are currently connected to the internet: Enter lsof -i and look for anything that could be malware connecting to a remote server.
Show all hidden files in a particular location: Some malware will conceal itself by creating hidden files and folders. Reveal them with ls -la (followed by the file path you want to check).
Display current running processes, sorted by CPU usage: Enter top -o cpu. Look for anything that’s using a lot of CPU cycles. This is particularly common with viruses that use your computer to mine for cryptocurrency or send spam emails to other people.
Check kernel extensions: Use kextstat. Look for unusual or unsigned extensions, because they might be a sign you have a rootkit on your Mac.
Display currently running login items: Enter launchctl list to bring up a list of all the processes and apps that launch automatically with macOS.
Check for scheduled tasks: Malware may use scheduled task to automatically carry out malicious tasks. Check for them with crontab -l.
Make sure that System Integrity Protection is on: Type crsutil status to check that this crucial security measure is running as it’s supposed to.
List all user-level processes: Run the ps aux command, then look through the list of processes for anything that could be linked to malware.
You can use Terminal to check all kinds of information about your Mac
11. Scan a Mac for viruses automatically
Ultimately, trying to find malware on your Mac manually is a losing game. Well-designed viruses don’t make themselves easy to find. Built-in features like XProtect do help, but do Macs need antivirus too? Without a doubt. When it comes down to it, the best way to scan a Mac for viruses is to use a tool like MacKeeper, which is capable of protecting and cleaning your device.
There are two main types of protection you need to use—antivirus scans and real-time protection. Scans can be carried out on demand, searching your entire system or chosen folders for malware, so you can clear a virus from your Mac when you need to. Real-time protection is always on, and if you download or try to run a virus, it kicks in and lets you know.
Here’s how to run a virus scan in MacKeeper:
Open MacKeeper, and select Antivirus from the sidebar.
If you want to scan certain folders only, click Custom Scan. Otherwise, click Start Scan.
When the scan is finished, select any detected malware, and you can either delete it from your Mac or move it to Quarantine.
What to do if your Mac has a virus
If you’ve carried out the appropriate checks and discovered that your Mac has a virus, you’ll need to deal with it as quickly as possible. In addition to following the above steps, there are other precautions you can take to minimize the damage the virus can do, including:
Stay offline: Disable the Wi-Fi on your Mac from the Control Panel, or disconnect the Ethernet cable if you use a wired connection. If possible, turn off your router temporarily. This will stop any viruses from communicating with the attackers’ servers and prevent any more of your data from being transmitted to them.
Avoid logging into any accounts: Avoid logging into any of your accounts, or entering any passwords until you can be sure the virus is removed. If the virus is using a keylogger to record all of your keyboard inputs, this will ensure that it cannot steal any. Also, avoid opening any password managers you use to prevent the virus from taking screenshots of them.
Change your Mac’s login password: In System Settings > Users & Groups, change all the login passwords for your Mac to ensure the virus cannot access your machine remotely using details it has already stolen.
Change your iCloud password: If the virus has stolen your iCloud password, it’ll be able to access your saved passwords, photos and videos, messages, and all other data that is uploaded to the cloud. In System Settings > Apple ID > Sign-In & Security, change your iCloud password to prevent others from logging in.
Cancel debit and credit cards: Call your bank and credit card providers to cancel all the cards you have saved on your Mac. This will prevent attackers from using any payment details they may have stolen.
How to get rid of malware on Mac?
Before you remove malware from your Mac, disconnect it from the internet to stop malware from phoning home. You should uninstall any suspicious apps from your Applications folder, check your app and system settings, and run a virus scan with a dedicated security tool. In extreme cases, you have to resort to resetting your Mac or restoring from a backup.
1. Boot in Safe Mode
Booting into Safe Mode can help you tell if your Mac has a virus and can make malware easier to remove. Here’s how to do it on an Apple Silicon Mac:
Shut down your Mac.
Press and hold the power button until you see Loading startup options.
Select your startup disk.
Hold down Shift, and click Continue in Safe Mode.
You should now see Safe Mode in your menu bar.
Hold down your Mac's power button to get to the startup options
2. Remove unwanted applications
Sometimes malware can be hidden in apps. You can delete them like this:
Open your Applications folder.
Look for any apps that you don’t recognize or don’t remember installing.
Drag these suspicious apps to your Trash, and empty it.
To delete apps, send them to your Trash and empty it
A hint from us:
It’s important to note that uninstalled apps can leave behind data in hidden files on your Mac. To completely remove apps and these “leftover’ files, try MacKeeper’s Smart Uninstaller.
3. Remove suspicious browser extensions and check settings
A lot of malware targets web browsers, so it’s a good idea to check for suspicious extensions. For example, if you’re using Safari:
While in Safari, select Safari > Settings from your menu bar.
In the Extensions tab, select the extension you want to remove, and click the Uninstall button.
Click Show in Finder.
Send the extension to your Trash, and empty it.
Click the Uninstall button, and then delete the extension
4. Remove unknown Login Items
These items automatically load every time you start macOS, so you want to remove anything that could be infected. Here’s what you need to do:
Open your System Settings, and go to General > Login Items & Extensions.
To remove a Login Item, select it from the list, then click the minus button.
Select the Login Item, then click the minus button
5. Run a malware scanner
This is the fastest and most foolproof way to see if a Mac has malware. There are many options, but this is how to run a security check on your Mac with MacKeeper:
When the scan is done, check the results and let MacKeeper remove the malware.
How to avoid malware and protect your Mac
Just as important as knowing how to check for malware on Mac is knowing how to avoid it so that you don’t pick up more infections in the future. Fortunately, it’s not difficult to maintain a healthy Mac with a few simple steps:
Avoid suspicious software: macOS will prevent you from opening potentially unsafe software from unregistered developers. Keep these protections enabled to prevent malware from being installed, and only download software from trusted sources.
Be wary of fake files: Viruses are often hidden inside files that are disguised as innocent downloads, such as PDF documents, Word files, and app packages. Don’t trust files if you can’t be sure of where they came from, and be extra cautious before opening files that have been sent to you through emails. Don’t open files that suddenly appear without warning.
Look out for fake updates and tools: Some viruses disguise themselves as software updates, system tools, or trusted applications. Only download these things from trusted sources, such as the App Store or an official developer webpage.
Don’t trust unsolicited support: If you receive a call or message offering Mac support that you didn’t ask for, ignore it. Genuine support companies don’t cold call customers to provide help for no reason, so it’s likely a scammer trying to convince you to download a virus.
Follow good cyber practices: Take the usual precautions to protect your Mac and your data whenever you use your machine. Avoid untrusted websites, use antivirus software, use strong passwords that you don’t share with others, and be wary of sharing personal data.
FAQ
How do I run a malware scanner on my Mac?
To find hidden malware on your Mac, use the Antivirus utility built into MacKeeper. It trawls through your entire system to weed out malicious applications and then removes them. Also, our tool uses a real-time monitoring feature to ensure that you’re alerted to new threats as soon as they appear.
Does Mac have a built-in malware scan?
Yes, macOS has a built-in tool called XProtect that scans your system for viruses and malware. However, it doesn’t have the ability to perform on-demand scans or scan specific files and folders like a dedicated antivirus tool.
How can I clean my Mac from malware?
You can manually remove malware from your Mac by uninstalling unrecognized apps and deleting suspicious processes. However, it can be difficult to locate hidden malware programs, which is why dedicated tools like MacKeeper’s Antivirus are essential to many users.
Is it possible for a Mac to have malware?
Yes, there are tens of thousands of malware infections built for Mac, and that number only increases as the operating system becomes more popular. Although macOS is regarded as being less susceptible to malware than Windows, it’s certainly not immune, as some Mac users believe.
We respect your privacy and
use cookies
for the best site experience.
Privacy Preferences Center
We use cookies along with other tools to give you the best possible experience while using the
MacKeeper website. Cookies are small text files that help the website load faster. The cookies we
use don’t contain any type of personal data meaning they never store information such as your
location, email address, or IP address.
Help us improve how you interact with our website by accepting the use of cookies. You can change
your privacy settings whenever you like.
Manage consent
All cookies
These cookies are strictly necessary for enabling basic website functionality (including page
navigation, form submission, language detection, post commenting), downloading and purchasing
software. The website might malfunction without these cookies.